
DIY Gold Splatter Paint Glass Plates: A Stunning, Affordable Home Décor Project
Elevate your home décor with a touch of metallic glamour by creating your own DIY gold splatter paint glass plates. This project offers a sophisticated yet accessible way to personalize your tableware, add a festive flair to seasonal gatherings, or craft unique gifts. The beauty of this DIY lies in its simplicity and the striking visual impact of the gold splatter. You don’t need to be an artist to achieve professional-looking results. These plates are not only visually appealing but also surprisingly durable if the correct materials and techniques are employed. Beyond their function as serving dishes, these decorated plates can also serve as decorative art pieces, displayed on shelves or as part of a gallery wall. The versatility of this project allows for endless customization, from the intensity of the splatter to the specific shade of gold used. We will delve into the necessary materials, the step-by-step process, crucial tips for success, and explore various creative applications for your bespoke gold-splattered glassware.
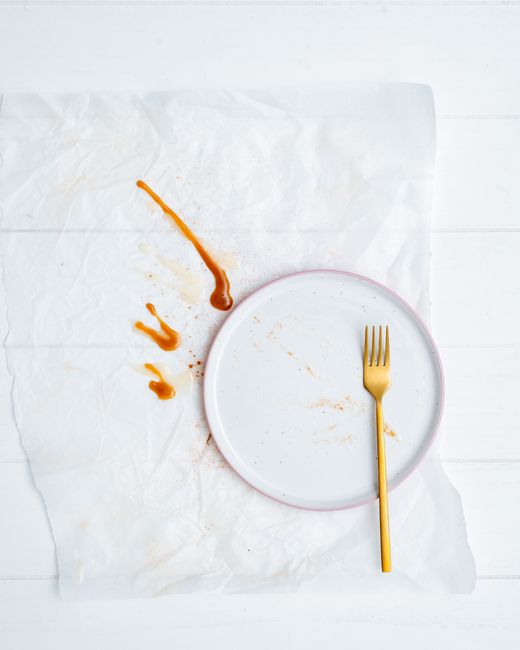
To embark on this exciting DIY adventure, gathering the right supplies is paramount. The foundation of your project will be plain glass plates. Opt for clear glass for the most prominent splatter effect, but frosted or colored glass can also yield interesting results. Ensure the plates are clean and free of any grease or residue. A thorough wash with soap and water, followed by a good rinse and complete drying, is essential. For the gold splatter, you have a few excellent options. Gold glass paint is specifically formulated for this purpose and offers excellent adhesion and a durable finish. Look for acrylic-based glass paints in metallic gold shades. Alternatively, you can achieve a similar effect using metallic gold spray paint designed for glass or multi-surface use. If you opt for spray paint, ensure you work in a well-ventilated area and use a fine-mist nozzle for better control. For a more subtle, brushed gold look, metallic gold craft paint combined with a sealant can also be a viable option, though the splatter effect might be less pronounced. Beyond the paint, you’ll need tools to create the splatter. The most effective method involves using a stiff-bristled brush, such as a toothbrush or a stiff paint brush. You can also use a palette knife or even your fingers (wearing gloves) to flick paint. To protect your workspace and prevent unwanted splatters, you’ll need newspaper, a drop cloth, or a large cardboard box. Painter’s tape is useful for masking off any areas you wish to keep paint-free, although for a freeform splatter, this is usually unnecessary. Finally, for longevity and a professional finish, a clear sealant, preferably a food-safe one if the plates are intended for direct food contact, is highly recommended. This sealant will protect the paint from chipping, scratching, and washing.
The process of creating your DIY gold splatter paint glass plates is straightforward and highly rewarding. Begin by preparing your workspace. Lay down newspaper or a drop cloth to catch any stray paint. Ensure the glass plates are immaculately clean and dry. If you are using spray paint, set up your work area in a well-ventilated space, preferably outdoors or in a garage with the door open. For glass paints applied with a brush, a slightly less stringent ventilation requirement is needed, but still, good airflow is beneficial.
If you are using glass paint and a brush for the splatter effect, pour a small amount of your chosen gold glass paint onto a disposable palette or a small dish. Dip the bristles of your stiff brush into the paint, but avoid overloading it. You want enough paint to create distinct splatters, but not so much that it drips excessively. Hold the brush a short distance above the glass plate and flick the bristles firmly, directing the paint onto the plate. Experiment with different flicking motions and distances to achieve varied splatter patterns. Some areas might have denser splatters, while others will be more sparse. Rotate the plate as you work to ensure an even distribution of gold. For a more intense splatter, you can use the back of a spoon or a palette knife to flick larger droplets of paint.
If you opt for metallic gold spray paint, hold the can about 8-12 inches away from the glass plate. Use short, quick bursts of spray, moving the can in a sweeping motion across the plate. Again, experiment with the distance and the intensity of the spray to achieve your desired effect. A lighter, more diffused splatter can be achieved with a further distance and shorter bursts, while a denser, bolder splatter requires a closer distance and slightly longer, controlled bursts. You can also layer the spray paint for added depth and dimension.
For those using metallic gold craft paint without specific glass formulation, apply a thin layer of clear sealant to the glass plate first. Once the sealant is dry, apply the gold craft paint in a splatter pattern as described above. Once the paint is completely dry, apply another coat of clear, food-safe sealant over the entire painted area, ensuring all gold paint is covered. This step is crucial for durability and food safety.
Regardless of the paint type, allow the first layer of splatter to dry completely according to the manufacturer’s instructions. This is vital to prevent smudging and ensure good adhesion of subsequent layers. Once dry, you can add additional layers of splatter if you desire a more intense or layered effect. Apply these subsequent layers with the same techniques, allowing each layer to dry thoroughly before proceeding.
After you have achieved your desired gold splatter effect and all layers of paint are completely dry, it’s time for the finishing touch: the sealant. If you used glass paint specifically designed for glassware, it might be oven-cureable. Follow the manufacturer’s instructions for baking the plates. This curing process significantly enhances the paint’s durability and resistance to washing. If your paint is not oven-cureable, or if you used spray paint or craft paint, apply a clear, food-safe sealant. This can be a spray-on sealant or a brush-on variety. Ensure you cover all painted areas thoroughly. Allow the sealant to dry completely, again following the manufacturer’s recommendations. For spray sealants, multiple thin coats are generally better than one thick coat. Ensure adequate ventilation during this process.
A crucial consideration for your DIY gold splatter paint glass plates is durability and food safety. If the plates are intended for everyday use and will come into direct contact with food, using food-safe glass paints and food-safe sealants is non-negotiable. Many glass paints are non-toxic once cured, but always check the product label. Similarly, sealants must be explicitly labeled as food-safe. If you are unsure about the food safety of your chosen materials, it’s best to designate these plates for decorative purposes only, such as serving dry appetizers or as display pieces. Handwashing is always recommended for decorated glassware, even with food-safe finishes, as harsh detergents and high dishwasher temperatures can degrade the paint over time.
To ensure the best results and a professional-looking finish for your DIY gold splatter paint glass plates, a few key tips will make a significant difference. Firstly, cleanliness is paramount. Any grease, dust, or fingerprints on the glass will prevent the paint from adhering properly and can lead to peeling or uneven coverage. Wash and dry your plates thoroughly. Secondly, practice makes perfect. Before committing to your final plates, practice your splatter technique on a piece of scrap glass or cardboard. This will help you get a feel for the amount of paint to use, the distance to hold your brush or spray can, and the flicking motion that achieves the desired effect. Experiment with different pressure levels for flicking to create varying splatter sizes. Thirdly, layering for depth. Don’t be afraid to apply multiple thin layers of splatter. This builds dimension and creates a richer, more dynamic look. Allow each layer to dry completely before adding the next. Fourthly, control the splatter. While the beauty of splatter paint is its organic nature, you can still exert some control. For example, by tilting the plate slightly, you can encourage some splatters to run in specific directions. For a more controlled splatter, use a fine-tipped brush and dab paint onto the bristles for larger dots. Fifthly, consider the background. The color of your glass plate will significantly influence how the gold splatter appears. Clear glass will show the most contrast, while colored or frosted glass will offer a more muted or unique effect. Test your paint on a similar surface if possible. Sixthly, proper drying and curing are essential. Rushing this process is a common mistake that leads to ruined projects. Always adhere to the manufacturer’s recommended drying and curing times. Oven-curing, where applicable, is a significant step in enhancing the paint’s resilience. Seventhly, sealant is your friend. Even if you’ve used a high-quality glass paint, a good sealant will protect your artwork from scratches, chips, and the rigors of washing. Always use a food-safe sealant if the plates are intended for food contact. Eighthly, experiment with gold shades. Gold isn’t just one color; there are various shades from pale champagne to deep antique gold. Consider what complements your existing décor or the intended use of the plates. A brighter gold will pop more, while a more subdued metallic finish will offer a subtler elegance. Ninthly, consider the plate’s intended use. If the plates are purely decorative, your material choices and sealing needs might be less stringent. If they are for serving food, prioritize food-safe materials and robust sealing. Finally, think beyond the plate’s surface. You can splatter the edges of the plate, the underside, or even create a gradient effect where the splatter is more concentrated in the center and fades towards the rim.
The creative applications for your DIY gold splatter paint glass plates extend far beyond simple dinnerware. Imagine using them as elegant platters for serving appetizers during holiday gatherings. The gold splatter adds a festive and sophisticated touch that complements any celebratory theme. For a wedding or engagement party, these plates can serve as unique charger plates, placed beneath the dinnerware to add a layer of visual interest and metallic sheen. They can also be repurposed as decorative accents. Display them on a shelf in your dining room or kitchen, showcasing them as a piece of art. Grouping several splatter-painted plates together can create a striking gallery wall effect, adding a touch of modern glamour to your space. Consider them for housewarming gifts, personalized with a unique splatter pattern that reflects the recipient’s style. For a bridal shower or baby shower, these plates can be a thoughtful and handmade gift for the guest of honor. They are also ideal for creating themed party décor. For a Hollywood glamour theme, the gold splatter embodies the glitz and sophistication. For a more rustic or bohemian look, a lighter, more scattered splatter can be achieved. Don’t limit yourself to just plates; this technique can be applied to glass bowls, vases, and even candle holders, allowing you to create a cohesive and customized collection of metallic-accented décor for your home. The possibilities are truly as vast as your imagination. For those who enjoy crafting, these plates can also be a base for further embellishment, such as adding small crystals or decorative charms to the painted areas, though this would necessitate them being purely decorative items. The subtle shimmer and visual texture provided by the gold splatter can transform ordinary glass items into extraordinary decorative pieces.
By following these comprehensive guidelines, you can confidently create stunning DIY gold splatter paint glass plates that will impress your guests and elevate your home décor. The process is enjoyable, the materials are relatively inexpensive, and the end result is a personalized touch of elegance that transforms ordinary glassware into bespoke works of art. The satisfaction of creating something beautiful and functional with your own hands is immense, and these gold-splattered plates are a perfect example of how simple DIY projects can yield spectacular results.
