
Craft Your Dream Workspace: The Ultimate Guide to Easy DIY Bulletin Boards in Any Shape or Size
Creating a functional and visually appealing workspace, home office, or even a creative corner in a child’s room often hinges on effective organization. Central to this organization is the humble bulletin board. While pre-made options abound, they can be expensive, limited in size and shape, and may not perfectly match your aesthetic. Fortunately, crafting your own DIY bulletin board is an incredibly accessible, cost-effective, and customizable project. This comprehensive guide will walk you through the process of creating virtually any shape or size of bulletin board you can imagine, offering endless possibilities for personalization and functionality. We’ll cover material selection, construction techniques, finishing touches, and even ideas for unique applications. Whether you’re a seasoned crafter or a complete beginner, this guide provides the knowledge and inspiration to build a bulletin board that perfectly suits your needs and style.
The foundation of any successful DIY bulletin board lies in choosing the right core material. This is the structural element that provides the necessary rigidity for pinning items. For smaller to medium-sized boards, lightweight yet sturdy options are ideal. Foam core board, readily available at craft stores and office supply shops, is an excellent choice. It’s lightweight, easy to cut with a craft knife, and provides a good surface for adhering your chosen covering. For larger or more demanding applications, such as a high-traffic community notice board, MDF (Medium-Density Fiberboard) or plywood are superior choices. These materials offer greater durability and a more robust structure, though they require more effort to cut and may be heavier. When selecting MDF or plywood, opt for thicknesses of 1/4 inch or 1/2 inch for a good balance of strength and manageable weight. Consider the environment where the bulletin board will be installed. If it’s in a damp area, moisture-resistant MDF or sealed plywood would be a wise investment.
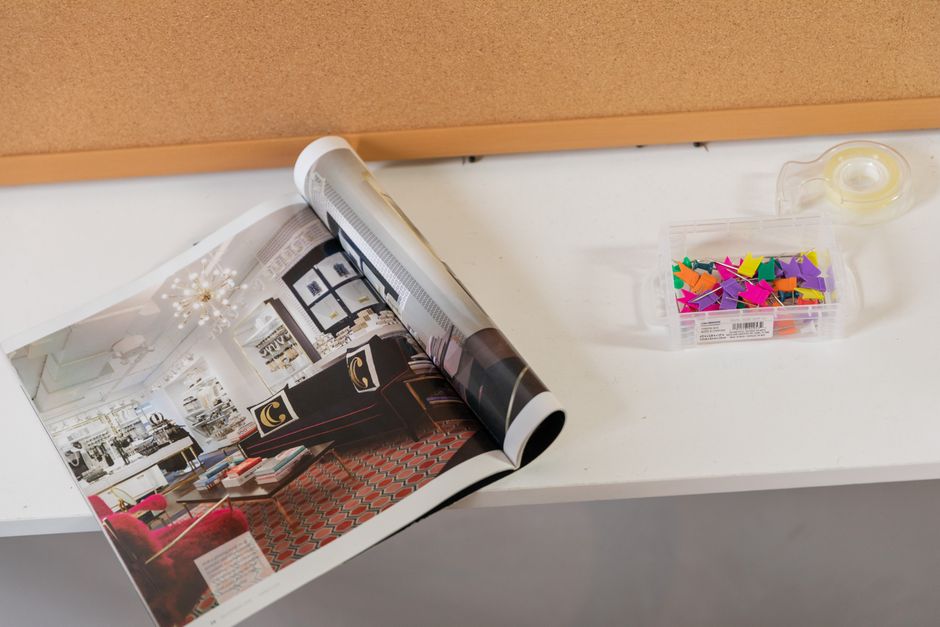
The surface material is what gives your bulletin board its characteristic pin-friendly texture and its visual appeal. This is where the real creativity comes into play. Cork sheeting is the classic and most functional choice for a traditional bulletin board. It’s durable, self-healing to some extent, and provides excellent pin-holding power. Cork sheeting comes in various thicknesses, with 1/8 inch to 1/4 inch being ideal for most DIY projects. It’s often available in rolls or sheets, making it adaptable to different board sizes. For a more economical and readily available option, felt can also function as a bulletin board surface, especially for lighter items. Look for dense, high-quality felt that won’t easily fray. While not as robust as cork, felt offers a softer aesthetic and a wider range of color options. Fabric, such as burlap, canvas, or even a sturdy upholstery fabric, can also be used. Underneath the fabric, you’ll still need a firm backing material like foam core or MDF, and potentially a layer of thin batting or foam to provide a slight cushion for pins. For a more modern or industrial look, consider thin metal sheeting (like aluminum or galvanized steel) if you plan to use magnets instead of pins. This requires a different approach to mounting and a magnetic surface.
The adhesive you use is critical for ensuring your surface material adheres securely and smoothly to the core. For foam core and lightweight cork or felt, spray adhesive is often the most effective. It provides even coverage and creates a strong bond without warping the foam core. Apply it in a well-ventilated area and follow the manufacturer’s instructions carefully for best results. For heavier materials like thicker cork, MDF, or fabric with batting, PVA glue (white craft glue) or a heavy-duty adhesive like construction adhesive can be used. Ensure the glue is spread thinly and evenly to avoid lumps that will telegraph through the surface. If using fabric, consider using a fabric glue specifically designed for strong, flexible bonds. For attaching cork or fabric to MDF or plywood, you might also consider using a contact cement, which creates an instant, very strong bond. This requires precise application as there’s no repositioning once the surfaces touch.
Cutting your core material to the desired shape and size is a straightforward process with the right tools. For foam core, a sharp craft knife or utility knife is essential. Use a metal ruler or a straight edge to guide your cuts for clean, straight lines. For more intricate or curved shapes, a rotary cutter can be useful, or you can carefully score and then snap the foam core. When cutting MDF or plywood, a hand saw, jigsaw, or circular saw will be necessary. For precise curves or intricate designs, a jigsaw is the most versatile tool. Always wear safety glasses when operating power saws. Measure twice, cut once, and ensure your cutting surface is protected. If you’re aiming for a specific shape – a circle, a hexagon, a freeform organic shape – it’s helpful to draw your design onto the core material first. Templates can be created by printing them out and tracing them or by freehand drawing.
Attaching the surface material to the core requires patience and attention to detail to achieve a professional finish. If using cork sheeting, unroll it and let it flatten out for a few hours before applying. Apply your chosen adhesive to the core material, working in sections if necessary, especially with spray adhesive or PVA glue. Carefully lay the cork sheeting onto the adhesive, starting from one edge and slowly smoothing it out to avoid air bubbles and wrinkles. Use a rolling pin or a smooth, flat object to press the cork firmly into the adhesive. For fabric, you’ll typically adhere a layer of batting or foam first, then the fabric. Stretch the fabric taut as you adhere it, ensuring there are no slack areas. Fold the edges neatly and secure them on the back of the core material. If using a fabric with a pattern, pay close attention to alignment and pattern matching. For felt, the process is similar to cork, though it might require slightly less aggressive smoothing.
Framing your DIY bulletin board adds a polished look and protects the edges. This is an optional step, but highly recommended for a professional finish. Wood trim is a popular choice. You can use simple pine molding, or more decorative trim to match your decor. Measure and cut your trim pieces to fit the edges of your bulletin board. For mitered corners (45-degree angles), use a miter box and saw for clean, precise joints. Alternatively, you can create butt joints for a simpler finish. Attach the trim using wood glue and small nails or brad nails. If your bulletin board is thick, you might need to use longer nails. For a contemporary look, consider using metal angle trim or aluminum L-channel. This can be attached with strong adhesive or small rivets. If you’re not using a frame, ensure the edges of your surface material are neatly finished and secured. For fabric, this means folding and gluing the edges to the back of the core.
Mounting your DIY bulletin board is as important as its construction. The method will depend on the size, weight, and the wall material. For lightweight foam core boards, Command strips or heavy-duty double-sided tape are excellent options that won’t damage your walls. Ensure the wall surface is clean and dry for optimal adhesion. For larger and heavier boards made from MDF or plywood, you’ll need more robust mounting hardware. D-rings attached to the back of the board and picture hanging wire or heavy-duty hooks are a common and secure solution. If mounting directly to drywall, use wall anchors to distribute the weight and prevent the board from pulling away from the wall. For a truly seamless look, consider cleat hangers, which create a secure, flush mount. If your bulletin board has a wooden frame, you can also screw directly through the frame into wall studs for maximum stability. Always consider the weight capacity of your chosen mounting hardware.
The beauty of DIY is the ability to personalize beyond just shape and size. Painting the core material before applying the surface can create a subtle color peeking through or a completely different background. Consider stenciling designs onto the surface material itself, especially if you’re using fabric or felt. For cork, you can use paint pens to draw directly onto it, though this might slightly affect its pin-holding ability over time. Adding grommets to fabric bulletin boards can provide reinforced points for hanging heavier items or for decorative purposes. Incorporating other functional elements is also a fantastic way to customize. Attach small pockets made from fabric or felt to hold pens, scissors, or other small items. Small magnetic strips can be adhered to the back for a hybrid pin/magnet board. Consider adding a chalkboard paint section to one part of the board for jotting quick notes.
The possibilities for custom shapes and sizes are virtually limitless. Imagine a giant hexagonal bulletin board for a living room wall, or a series of smaller hexagonal boards arranged in a honeycomb pattern. A circular bulletin board is perfect for a child’s room, perhaps painted to resemble a planet or a sun. Consider creating a freeform organic shape inspired by nature, like a leaf or a cloud. For a home office, a long, horizontal bulletin board spanning a desk area can maximize vertical space. Even a simple rectangular board can be made unique by its dimensions – think extra-wide or extra-tall. If you’re a student, a large bulletin board to display assignments, inspiration, and schedules is invaluable. For crafters, a dedicated bulletin board for fabric swatches, pattern pieces, or inspiration images can be a game-changer. Don’t be afraid to experiment with asymmetry and unconventional forms.
Beyond the standard cork and felt, explore alternative surface materials for unique effects. Carpet tiles can offer a surprisingly durable and textured bulletin board surface, especially for high-traffic areas. Ensure they are densely woven and not prone to snagging. Wallpaper scraps can be adhered to a sturdy core and then covered with a clear protective laminate or even a thin layer of Mod Podge to create a pin-friendly surface, though this might sacrifice some pin-holding power. For a truly tactile experience, consider quilted fabric as your surface material. This adds depth and visual interest, and the batting provides excellent pin support. If you have access to a large format printer, you could even print custom designs or images onto fabric that can then be adhered to your bulletin board core for a truly personalized statement piece.
The durability of your DIY bulletin board depends on the quality of your materials and construction. Using thicker core materials and high-quality adhesives will contribute to longevity. For frequently used boards, especially in commercial or educational settings, opting for MDF or plywood over foam core is advisable. Regularly checking the adhesion of the surface material and reinforcing any loose areas with additional glue can prevent premature wear. If using fabric, choose durable, washable fabrics if the board might need cleaning. For cork boards, small punctures from pins will eventually become visible. However, good quality cork is remarkably resilient, and for very heavy use, consider replacing the cork surface over time rather than the entire board.
Safety considerations are paramount throughout the DIY process. Always wear safety glasses when cutting materials, especially with power tools. Use a sharp blade for your craft knife to ensure clean cuts and reduce the risk of slipping. When working with adhesives, ensure good ventilation to avoid inhaling fumes. If using power tools like jigsaws or circular saws, familiarize yourself with their operation and follow all safety guidelines. When mounting heavy bulletin boards, ensure you are using appropriate hardware for the wall type and weight, and consider having a second person assist with lifting and securing larger pieces.
In conclusion, the DIY bulletin board is an incredibly versatile project that allows for complete creative control. By carefully selecting your core material, surface material, adhesives, and finishing touches, you can craft a functional and aesthetically pleasing organizational tool in any shape or size imaginable. From a small decorative accent to a large-scale organizational hub, the possibilities are limited only by your imagination. This guide provides the fundamental knowledge and inspiration to embark on your own DIY bulletin board journey, transforming your space and enhancing your productivity.
