Acrylic message board DIY is a fun and versatile project that allows you to create a personalized and functional piece for your home, office, or classroom. With a few simple materials and tools, you can transform a plain acrylic sheet into a stylish and practical message center.
Whether you’re looking to organize your daily tasks, display inspiring quotes, or showcase your creativity, an acrylic message board offers endless possibilities.
The beauty of this project lies in its adaptability. You can customize the size, shape, and design to perfectly suit your needs and aesthetic preferences. Whether you prefer a minimalist design or a bold statement piece, the possibilities are truly boundless.
Acrylic Message Boards: A DIY Guide to Versatility
Acrylic message boards are a modern and versatile way to display information, messages, and even artwork. These transparent boards offer a sleek and contemporary aesthetic, making them a popular choice for homes, offices, and businesses. The beauty of acrylic message boards lies in their DIY-friendly nature.
Acrylic message boards are so versatile! You can use them to display your favorite quotes, create a fun to-do list, or even organize your jewelry. And if you’re looking for some inspiration for crafting with acrylic, check out this amazing list of 25 clothing accessory DIYs that’s full of great ideas for making your own accessories.
Once you’ve made a few pieces, you can display them on your acrylic message board for everyone to admire!
You can easily customize them to fit your specific needs and preferences.
Creative Uses for Acrylic Message Boards
Acrylic message boards offer a wide range of creative applications, making them perfect for both functional and decorative purposes.
Creating an acrylic message board is a fun and versatile DIY project. You can personalize it with your favorite colors and patterns, and it’s perfect for displaying reminders, inspirational quotes, or even just a fun message for the day.
If you’re looking for some inspiration for a unique design, check out diy chic summer tie dye from katie , which features a vibrant and playful tie-dye pattern that would look amazing on an acrylic message board. After you’ve got your design, you can use acrylic paint, stencils, or even markers to create a truly one-of-a-kind message board that reflects your personal style.
- Home Decor:Acrylic message boards can be used to display family photos, inspirational quotes, or even create a personalized gallery wall.
- Office Organization:They can be used as a to-do list, a reminder board, or a visual aid for team projects.
- Business Signage:Acrylic message boards are ideal for displaying store hours, menus, or special promotions.
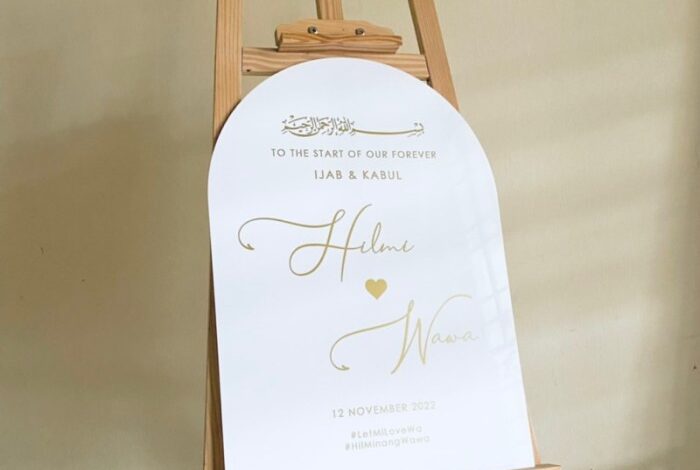
- Event Planning:They can be used as seating charts, welcome signs, or even to display the menu for a special occasion.
- Art Projects:Acrylic message boards can be used to create unique and eye-catching art installations, especially when paired with other materials like paint, fabric, or even found objects.
Materials and Tools
Before embarking on your acrylic message board DIY journey, you’ll need to gather the essential materials and tools. The list may seem extensive, but having everything ready beforehand will make the process smoother and more enjoyable.
Acrylic Sheets
Acrylic sheets are the foundation of your message board. They provide a smooth, clear surface for writing and displaying messages.
- Thickness:Choose a thickness that provides stability and durability. A 1/4-inch (6mm) sheet is a good starting point for most projects.
- Size:Determine the desired size of your message board. Consider the space you have available and the size of messages you want to display.
- Color:Acrylic sheets come in a wide range of colors. Transparent sheets allow for a clean, modern look, while colored sheets can add a pop of personality.
Cutting Tools
Cutting acrylic sheets requires specialized tools to ensure clean, precise edges.
- Acrylic Cutter:An acrylic cutter is a handheld tool with a sharp blade designed for scoring acrylic. It’s essential for making straight cuts.
- Ruler:A straight edge ruler is crucial for guiding the acrylic cutter and ensuring accurate cuts.
- Cutting Mat:A cutting mat provides a protective surface for your work and prevents damage to your workspace.
Assembly Supplies
Assembling your acrylic message board requires materials that secure the pieces together and provide a sturdy base.
- Acrylic Adhesive:Use a strong acrylic adhesive designed for bonding acrylic to acrylic. Avoid using super glue, as it can cloud the acrylic.
- Clamps:Clamps are essential for holding the acrylic pieces together while the adhesive dries.
- Backer Board:A backing board, such as a piece of plywood or MDF, provides structural support and a flat surface for mounting your message board.
- Mounting Hardware:Select mounting hardware appropriate for your backing board and desired hanging method. This could include screws, nails, or picture hanging hooks.
Additional Supplies
These optional supplies enhance the functionality and appearance of your message board.
- Dry-Erase Markers:Choose dry-erase markers in various colors to create vibrant messages.
- Magnetic Strips:Attach magnetic strips to the back of the acrylic sheets to create a magnetic message board.
- Decorative Elements:Consider adding decorative elements, such as decorative tape, paint, or stencils, to personalize your message board.
Sourcing Materials and Tools
Materials and tools for acrylic message boards are readily available online and at craft stores.
- Online Retailers:Amazon, Etsy, and specialty acrylic suppliers offer a wide selection of acrylic sheets, cutting tools, and assembly supplies.
- Craft Stores:Local craft stores like Michaels, Joann Fabrics, and Hobby Lobby often carry acrylic sheets, adhesives, and other essential supplies.
Design Considerations

The design of your acrylic message board is crucial for its functionality and aesthetics. It determines how it will be used, where it will be displayed, and how it will blend with your existing décor. When choosing a design, you need to consider various factors, such as size, shape, and style.
I love the versatility of an acrylic message board – it’s perfect for jotting down notes, displaying inspiring quotes, or even showcasing your latest DIY project. Speaking of DIY, I recently stumbled upon this amazing tutorial for a hand-stamped DIY pony print dress that I just had to share.
It’s the perfect way to add a touch of whimsy to your wardrobe, and I can imagine it looking amazing on an acrylic message board, surrounded by other fun and creative projects!
Size and Shape
The size and shape of your acrylic message board depend on its intended use. A large board is ideal for displaying a lot of information, while a small one is perfect for a quick message.
- For example, a large rectangular board can be used to display a menu in a restaurant or a schedule in an office.
- A small square board can be used to display a message on a desk or a table.
The shape of your acrylic message board can also influence its functionality and aesthetics.
- A rectangular board is a classic choice that is versatile and can be used for various purposes.
- A circular board can be a unique and eye-catching option.
- A custom shape can be designed to fit a specific need or aesthetic.
Style
The style of your acrylic message board should complement your existing décor. You can choose from various styles, including modern, traditional, and rustic.
- A modern acrylic message board can be sleek and minimalist, with clean lines and a simple design.
- A traditional acrylic message board can have a more ornate design, with decorative elements such as carvings or embellishments.
- A rustic acrylic message board can have a more natural look, with elements such as wood or metal accents.
Unique Acrylic Message Board Designs
Here are some examples of unique acrylic message board designs:
- A message board with a built-in LED backlight for a modern and eye-catching effect.
- A message board with a magnetic surface that allows you to attach notes and photos.
- A message board with a custom design, such as a logo or a quote.
- A message board with a built-in stand for easy display.
- A message board with a frame made from different materials, such as wood, metal, or fabric.
Cutting and Shaping: Acrylic Message Board Diy
Now that you have your acrylic sheet, it’s time to get it into the shape you want for your message board. Cutting and shaping acrylic can be a bit tricky, but with the right tools and techniques, you can achieve professional-looking results.
This section will guide you through the process of cutting and shaping acrylic safely and effectively.
Cutting Acrylic Sheets
Cutting acrylic sheets requires precision and care. You can use a variety of tools, but the most common are a jigsaw, a scoring tool, and a circular saw. Here’s how to cut acrylic sheets safely and accurately:
- Use a jigsaw:For intricate cuts, a jigsaw is a versatile tool. Make sure to use a fine-tooth blade designed for acrylic to prevent chipping. Use a slow, steady speed and apply light pressure. Guide the jigsaw along a straight edge or template for precise cuts.
- Score and snap:For straight cuts, you can use a scoring tool and snap the acrylic along the scored line. Use a ruler and a scoring tool to make a deep, consistent score on the acrylic sheet. Then, gently snap the acrylic along the score line.
- Use a circular saw:For large, straight cuts, a circular saw with a fine-tooth blade can be used. Make sure to use a slow, steady speed and apply light pressure. Guide the saw along a straight edge or template for precise cuts.
Remember to wear safety goggles and gloves when cutting acrylic. Avoid excessive pressure to prevent cracking or chipping.
Shaping Acrylic Boards
Shaping acrylic boards requires a bit more finesse. Here’s how to shape acrylic boards using a jigsaw or router:
- Using a jigsaw:For curved cuts, a jigsaw can be used. Use a fine-tooth blade designed for acrylic to prevent chipping. Use a slow, steady speed and apply light pressure. Guide the jigsaw along a template or pattern for accurate cuts.
- Using a router:For more complex shapes, a router can be used. Use a router bit designed for acrylic to prevent chipping. Use a slow, steady speed and apply light pressure. Guide the router along a template or pattern for accurate cuts.
For both methods, ensure the template is securely attached to the acrylic board to prevent movement during the cutting process. Be mindful of the direction of the blade or router bit, and always cut with the grain of the acrylic to avoid chipping.
Creating Smooth Edges
After cutting or shaping your acrylic, you’ll need to smooth out the edges to prevent chipping and ensure a professional finish. Here’s how to create smooth edges:
- Sanding:Use a sanding block or sandpaper with progressively finer grits to smooth out the edges. Start with a coarse grit sandpaper and gradually move to a finer grit to achieve a smooth finish.
- Polishing:For a high-gloss finish, you can use a polishing compound and a buffing wheel. Apply the polishing compound to the edges and buff them with the wheel to achieve a smooth, shiny surface.
Remember to wear a dust mask and eye protection when sanding or polishing acrylic. Be sure to clean the acrylic surface thoroughly after sanding or polishing to remove any dust or debris.
Assembly and Finishing
With the acrylic pieces cut and shaped, it’s time to bring your message board to life. This stage involves assembling the board and adding a finishing touch that reflects your personal style.
Attaching the Backing Board
The backing board serves as the foundation for your message board, providing stability and a surface to attach the acrylic panels. The choice of material for the backing board depends on your preference and the overall design.
Plywood
This versatile option is readily available and provides a sturdy base.
MDF
Medium-density fiberboard is another common choice, known for its smooth surface.
Foam board
For a lightweight option, foam board can be used, especially for smaller boards.The backing board should be slightly larger than the acrylic panels to ensure a secure fit.
- Use wood glue to attach the acrylic panels to the backing board. Apply a thin layer of glue to the back of each panel and press it firmly against the backing board.
- For added stability, consider using clamps to hold the panels in place while the glue dries.
- Once the glue is dry, you can further secure the panels with screws or nails.
Creating a Secure Frame, Acrylic message board diy
A frame adds visual appeal and enhances the overall aesthetic of your message board. The framing material can be chosen based on your desired style.
- Wood:Classic and versatile, wood frames come in various styles and finishes.
- Metal:Metal frames, such as aluminum or steel, offer a modern and sleek look.
- Plastic:Plastic frames provide a lightweight and affordable option.
- To attach the frame, use wood glue or construction adhesive. Apply a thin layer to the edges of the backing board and press the frame firmly in place.
- For a more secure fit, consider using screws or nails to attach the frame.
- If using wood, you can pre-stain or paint the frame before attaching it to the board.
Finishing Touches
Once the assembly is complete, it’s time to personalize your message board with finishing touches.
- Painting:Paint the acrylic panels or the backing board with your favorite colors or patterns.
- Staining:For a natural wood look, stain the backing board or frame with your preferred color.
- Decorative Elements:Add decorative elements such as ribbons, buttons, or fabric scraps to enhance the visual appeal of your message board.
- Embellishments:Use stencils, glitter, or other embellishments to create unique designs.