
DIY Colorblocked Envelope Clutch: A Step-by-Step Guide for Fashion-Forward Accessories
Creating your own colorblocked envelope clutch is a rewarding and stylish endeavor, allowing for personalized color palettes and unique design expressions. This tutorial provides a comprehensive, SEO-friendly guide to constructing a chic and functional clutch, perfect for elevating any outfit. The process involves selecting materials, pattern creation, fabric cutting, construction, and finishing touches, all explained with clarity and detail to ensure successful results for DIY enthusiasts of all skill levels. Understanding the fundamental principles of sewing and fabric manipulation is beneficial, but this guide is designed to be accessible even for beginners eager to embark on their first clutch-making project. The beauty of a DIY clutch lies in its adaptability; you can experiment with different fabric textures, color combinations, and closure styles to create a truly one-of-a-kind accessory. Whether you’re looking to update your own wardrobe or create thoughtful handmade gifts, this colorblocked envelope clutch project offers a perfect blend of creativity and practicality.
Materials and Tools for Your Colorblocked Envelope Clutch
To embark on this creative journey, gather the following essential materials and tools. The choice of fabric will significantly impact the final aesthetic of your clutch. For a structured and elegant finish, consider using medium-weight cottons, linen blends, or even faux leather. For a softer, more bohemian feel, silk or satin could be excellent choices. When selecting colors, think about complementary hues, analogous shades, or even contrasting tones for a bold statement. The interlining adds crucial structure and body, preventing the clutch from becoming limp. Pellon 809 interfacing is a popular and effective choice for its stability.
- Fabric:
- Outer Fabric: Two coordinating or contrasting fabrics for the colorblocking. You’ll need enough for the main body pieces and the flap.
- Lining Fabric: A complementary fabric for the interior.
- Interfacing: Medium-weight fusible interfacing (e.g., Pellon 809). This is crucial for structure.
- Closure:
- Magnetic snap closure (two parts).
- Alternatively, a button and loop closure, or a zipper can be used.
- Thread: Matching or contrasting thread for your chosen fabrics.
- Pattern Paper or Cardstock: For drafting your clutch pattern.
- Fabric Scissors: Sharp scissors specifically for cutting fabric.
- Rotary Cutter and Cutting Mat (Optional but recommended): For precise and straight cuts.
- Ruler or Measuring Tape: For accurate measurements.
- Fabric Marker or Chalk: For marking your pattern pieces.
- Sewing Machine: With a standard needle suitable for your fabric type.
- Iron and Ironing Board: Essential for pressing seams and fusing interfacing.
- Pins: For holding fabric pieces together.
- Seam Ripper: For correcting any mistakes.
- Awl or Hole Punch (if using button/loop closure): For creating holes.
Designing and Pattern Drafting Your Colorblocked Envelope Clutch
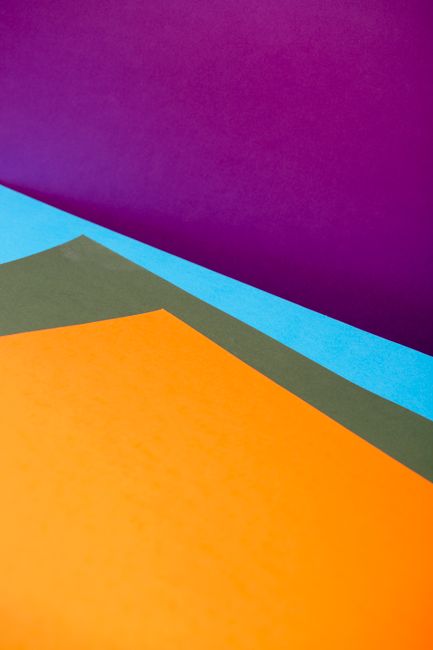
The envelope design of this clutch offers a sleek and modern silhouette. The colorblocking adds visual interest and allows for dynamic interplay of colors. The key to this design is the angled flap that tucks into the main body. We will draft a pattern for a clutch with approximate finished dimensions of 10 inches wide by 6 inches tall (when closed). These dimensions can be adjusted to suit personal preferences for size.
- Main Body Piece:
- On your pattern paper, draw a rectangle measuring 21 inches wide by 6.5 inches tall. This accounts for seam allowances. This piece will be folded in half to form the two sides of the clutch.
- Flap Piece:
- This is where the colorblocking comes into play. We need two pieces for the flap, each with an angled top edge.
- For Flap Piece A (Bottom Flap): Draw a rectangle measuring 10.5 inches wide by 7 inches tall. From the center of the top edge (5.25 inches in), draw a diagonal line down to each bottom corner. This creates an inverted trapezoid.
- For Flap Piece B (Top Flap): Draw a rectangle measuring 10.5 inches wide by 7 inches tall. From the center of the top edge, draw a diagonal line down to each bottom corner. This will be the same shape as Flap Piece A.
- Colorblocking Consideration: Decide how you want to divide your flap into two colors. You can have one color for the entire bottom flap and another for the entire top flap. Alternatively, you can cut each flap piece in half horizontally and colorblock each piece. For this tutorial, we will assume one color for the entire bottom flap and another for the entire top flap.
Cutting Your Fabric Pieces
Precision in cutting is paramount for a professional-looking finish. Use sharp fabric scissors or a rotary cutter for clean edges. Always double-check your measurements before cutting. Remember to add seam allowances to all pattern pieces. We will be using a standard 1/4-inch (0.6 cm) seam allowance throughout.
- Main Body Fabric (Color 1):
- Cut one rectangle measuring 21 inches x 6.5 inches.
- Lining Fabric:
- Cut one rectangle measuring 21 inches x 6.5 inches.
- Interfacing:
- Cut one rectangle measuring 20.5 inches x 6 inches. (Slightly smaller than the main body to avoid bulk in seams).
- Outer Flap Fabric (Color 2) – For the bottom flap:
- Cut one piece using Flap Piece A pattern.
- Outer Flap Fabric (Color 3) – For the top flap:
- Cut one piece using Flap Piece B pattern.
- Lining Fabric for Flaps:
- Cut two pieces using the Flap Piece A pattern (or Flap Piece B, as they are identical in shape). This will be the lining for your two-part flap.
Applying Interfacing
Interfacing provides structure and stability to the clutch, ensuring it holds its shape beautifully. Follow the manufacturer’s instructions for your chosen fusible interfacing.
- Prepare the Main Body: Place the main body fabric rectangle (21" x 6.5") right side down on your ironing board.
- Fuse Interfacing: Position the cut interfacing rectangle (20.5" x 6") onto the wrong side of the main body fabric, centered and leaving a small border around the edges to avoid interfacing extending into the seam allowance.
- Press: Using your iron on the appropriate setting for your fabric and interfacing, press the interfacing onto the fabric. Avoid sliding the iron; lift and press to prevent stretching. Ensure the interfacing is completely adhered.
Constructing the Colorblocked Flap
This is where the visual appeal of your clutch truly comes to life. We’ll construct the two-part flap separately before attaching it to the main body.
- Prepare Flap Pieces:
- Take the Outer Flap Fabric (Color 2) piece for the bottom flap and its corresponding Lining Fabric piece. Place them right sides together.
- Take the Outer Flap Fabric (Color 3) piece for the top flap and its corresponding Lining Fabric piece. Place them right sides together.
- Sew the Flap Sides:
- For each pair of flap pieces (bottom flap pair and top flap pair), sew along the two side edges and the straight bottom edge with a 1/4-inch (0.6 cm) seam allowance. Leave the angled top edge open.
- Trim and Clip:
- Trim the seam allowances to about 1/8 inch (0.3 cm) along the sewn edges.
- Clip the seam allowances at the corners of the straight bottom edge to reduce bulk.
- Turn Right Side Out:
- Turn each flap right side out through the open angled top edge.
- Use a point turner or a chopstick to gently push out the corners and seams so they are crisp and defined.
- Press:
- Press each flap thoroughly, ensuring the seams are flat and the angled edges are sharp. This is crucial for a neat finish.
- Topstitching the Flap:
- For a polished look and to secure the layers, topstitch around the three sewn edges of each flap, about 1/8 inch (0.3 cm) from the edge. This step also helps prevent the lining from rolling out.
Attaching the Magnetic Snap to the Flap
The magnetic snap is an essential functional element of the envelope clutch. Placing it correctly ensures a secure closure.
- Locate Snap Placement: On the wrong side of the top flap (the piece that will be visible on the outside when closed), mark the center of the flap, approximately 1.5 inches up from the point where the angled edge meets the straight edge. This is where one half of the magnetic snap will be attached.
- Mark and Cut Holes:
- Using your fabric marker or chalk, mark the placement for the prongs of the magnetic snap.
- Carefully cut small slits or holes at these marks, just large enough to thread the prongs through. A seam ripper or a small craft knife works well.
- Attach Snap Half:
- Insert the prongs of one half of the magnetic snap through the slits on the wrong side of the top flap.
- Fold the prongs outwards to secure the snap in place. You can also use the small washers that often come with magnetic snaps for added security.
- Repeat for Other Flap Half:
- Now, place the bottom flap onto the main body piece to determine the correct placement for the other half of the magnetic snap. Align the main body and the bottom flap as they will be when the clutch is closed.
- Mark the spot on the right side of the main body piece where the top flap’s snap half will meet. This should be directly in line with the snap you just attached to the top flap.
- On the wrong side of the main body piece at this marked spot, create slits and attach the remaining half of the magnetic snap, just as you did with the top flap.
Assembling the Clutch Body
With the flap prepared and the magnetic snap attached, we can now focus on constructing the main body of the clutch.
- Fold the Main Body: Take the interfaced main body fabric rectangle (21" x 6.5"). Fold it in half widthwise, bringing the two short edges together. The interfaced side should be on the inside of this fold.
- Sew the Side Seams: Sew along the two side edges with a 1/4-inch (0.6 cm) seam allowance. You will be sewing through one layer of fabric on each side. This creates the main body of the clutch, open at the top.
- Press Seams: Press the side seams open.
Attaching the Flap to the Main Body
This is a crucial step for the envelope design. We need to carefully align and attach the flap to ensure it drapes correctly.
- Position the Flap:
- Open up the main body so it is lying flat.
- Take the bottom flap (Color 2) and align its straight bottom edge with the raw edge at one of the open ends of the main body. The right side of the bottom flap should be facing the right side of the main body fabric. Ensure the flap is centered.
- Baste the Flap:
- Pin the bottom flap securely in place along the raw edge.
- Baste stitch (long stitches) the flap to the main body, about 1/8 inch from the raw edge. This temporarily secures the flap and allows for easier handling.
- Repeat for Top Flap:
- Now, take the top flap (Color 3) and align its straight bottom edge with the raw edge at the other open end of the main body. The right side of the top flap should be facing the right side of the main body fabric.
- Pin the top flap securely in place.
- Baste stitch the top flap to the main body, about 1/8 inch from the raw edge.
Constructing and Attaching the Lining
The lining will enclose all the raw edges and provide a clean interior finish.
- Prepare the Lining: Take the lining fabric rectangle (21" x 6.5").
- Fold and Sew Lining: Fold the lining fabric in half widthwise, just like the main body. However, leave a 3-4 inch opening in the middle of one of the side seams. This opening will be used to turn the entire clutch right side out. Sew the side seams with a 1/4-inch (0.6 cm) seam allowance, remembering to leave the opening.
- Attach Lining to Main Body:
- With the main body (with flaps basted) and the lining right sides together, slide the lining over the main body so that the right sides are facing each other. The raw edges of the main body (where the flaps are attached) should align with the raw edges of the lining.
- Pin the lining to the main body all around the top edge, ensuring that the basted flaps are sandwiched between the main body and the lining. The flaps will be on the outside of this construction.
- Sew the Top Edge:
- Sew around the entire top edge of the clutch with a 1/4-inch (0.6 cm) seam allowance. Be careful to catch both the main body and the lining, as well as the basted flaps. This will create a continuous loop.
Turning and Finishing Your Clutch
This is the final stage of construction, where your clutch takes its final form.
- Turn Right Side Out:
- Carefully reach through the opening you left in the lining seam and pull the entire clutch right side out.
- Gently push out all the corners and seams.
- Press the Clutch:
- Press the entire clutch thoroughly. Pay special attention to the top edge where the lining meets the main body and flaps. This pressing will help the lining sit neatly inside and the flaps to lie flat.
- Close the Lining Opening:
- Fold the raw edges of the lining opening inwards and press.
- Hand-stitch the opening closed using a ladder stitch (also known as an invisible stitch) for a seamless finish. Alternatively, you can machine stitch very close to the edge, but hand stitching is often preferred for a cleaner look.
- Final Pressing:
- Give your clutch one final press to ensure everything is crisp and well-defined.
Optional Embellishments and Variations
Your DIY colorblocked envelope clutch is now complete! However, you can further personalize it with embellishments or explore variations:
- Contrast Topstitching: Add decorative topstitching in a contrasting color along the edges of the flaps or the main body for added visual interest.
- Hardware: Consider adding decorative studs, rivets, or a D-ring to attach a wrist strap.
- Piping: Incorporate fabric piping along the edges for a more defined and professional finish.
- Embellished Flaps: Appliqué, embroidery, or fabric paint can be used to decorate the flap.
- Zipper Closure: For added security, consider sewing a zipper into the top edge instead of using a magnetic snap. This will require a slightly different construction method.
- Interior Pocket: Add a simple slip pocket to the lining for storing cards or small items.
SEO Considerations and Keywords
To ensure this article ranks well in search engine results, we’ve incorporated relevant keywords and phrases throughout. These include:
- DIY clutch
- Envelope clutch tutorial
- Colorblocked clutch
- Handmade clutch
- Sewing clutch
- Fabric clutch
- Clutch pattern
- Easy clutch DIY
- Fashion accessories DIY
- Custom clutch
- Colorblocking sewing
- Clutch making
- Crafting clutch
- Beginner sewing projects
By following these detailed steps and incorporating these keywords naturally into the content, this article will be a valuable resource for anyone looking to create their own stylish and personalized colorblocked envelope clutch. The emphasis on clear instructions, material choices, and finishing techniques makes this a comprehensive guide for crafters of all levels.
