DIY cake beverage stencils set the stage for a whole new level of creativity in your baking adventures. Whether you’re a seasoned baker or just starting out, stencils offer a simple yet powerful way to add professional-looking designs to your cakes and beverages.
Imagine crafting intricate patterns on a birthday cake, adding whimsical designs to your coffee, or even creating custom designs for special occasions. The possibilities are endless with a little bit of creativity and the right tools.
This guide will walk you through the process of creating your own stencils, exploring different design techniques, and mastering the art of applying them to your culinary creations. We’ll cover everything from selecting the right materials and tools to troubleshooting common challenges and achieving professional-looking results.
Get ready to unleash your inner artist and elevate your baking game to new heights with the help of DIY cake beverage stencils.
Introduction to DIY Cake Beverage Stencils

Cake and beverage decorating is an art form that allows for endless creativity and personalization. One popular technique that simplifies the process and achieves stunning results is using stencils. DIY cake beverage stencils are reusable templates that provide a guide for applying designs, patterns, and lettering to cakes, cupcakes, and even beverages.
These stencils are a game-changer for both amateur and professional bakers and beverage artists. They eliminate the need for intricate hand-drawing, making it easier to create professional-looking designs.
Types of DIY Cake Beverage Stencils
Stencils offer a diverse range of designs and applications. Here are some popular types:
- Letter stencils:These stencils are perfect for adding personalized messages, names, or quotes to cakes and beverages. They are available in various fonts and sizes, allowing for customization.
- Pattern stencils:These stencils offer a wide array of patterns, from simple geometric shapes to intricate floral designs. They can be used to create borders, backgrounds, or accent pieces on cakes and beverages.
- Themed stencils:For special occasions like birthdays, holidays, or events, themed stencils are available. They feature designs related to the theme, such as birthday cakes, Christmas trees, or Halloween pumpkins.
Benefits of Using DIY Cake Beverage Stencils
Using stencils offers numerous advantages for cake and beverage decorating:
- Ease of use:Stencils are simple to use, even for beginners. They provide a guide for applying designs, eliminating the need for precise hand-drawing.
- Consistent results:Stencils ensure consistent and uniform designs, regardless of your artistic skills. They help achieve professional-looking results.
- Versatility:Stencils can be used for various decorating techniques, including dusting with powdered sugar, cocoa powder, or edible glitter, as well as painting with food coloring.
- Cost-effectiveness:DIY cake beverage stencils are often inexpensive and reusable, making them a cost-effective option for decorating multiple cakes and beverages.
Examples of DIY Cake Beverage Stencils
Here are some examples of how DIY cake beverage stencils can be used:
- Birthday cake:Use a letter stencil to create a personalized message on a birthday cake, such as “Happy Birthday” or the recipient’s name. You can also use a pattern stencil to create a border around the cake or add decorative elements like stars or hearts.
- Wedding cake:Stencils can be used to create intricate floral patterns, delicate lace designs, or elegant lettering on a wedding cake. The stencils can be used to create a cohesive theme throughout the cake tiers.
- Coffee latte art:Stencils can be used to create latte art designs on coffee drinks. By placing a stencil over the milk foam, you can create intricate patterns and designs.
Materials and Tools
Creating your own cake beverage stencils requires a few essential materials and tools. The quality of these materials can significantly impact the longevity and sharpness of your stencils, ultimately affecting the quality of your cake decorations.
Materials
The materials you choose will determine the durability and aesthetic of your stencils.
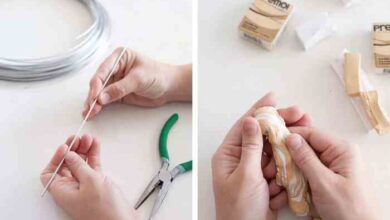
- Clear Plastic Sheets:These are the foundation of your stencils. Look for sheets that are thick and durable, ideally made from polyethylene terephthalate (PET) or polypropylene (PP). These materials are resistant to tearing and can withstand repeated use.
- Adhesive Vinyl:This is the material you’ll use to create the design of your stencil. Choose adhesive vinyl with a good adhesive strength that will stick securely to your plastic sheet.
- Transfer Tape:This is used to transfer the design from the adhesive vinyl to the plastic sheet. Opt for a transfer tape that is strong and doesn’t leave behind any residue.
- Cutting Mat:A self-healing cutting mat is essential for protecting your work surface and providing a stable base for cutting.
- X-ACTO Knife:This sharp blade is perfect for precise cutting of intricate details in your stencil designs.
- Scissors:Scissors are useful for cutting larger sections of the adhesive vinyl and for trimming excess material.
- Scraping Tool:This is used to remove excess adhesive vinyl from the plastic sheet after transferring the design.
Tools
The right tools will make the process of creating your stencils easier and more efficient.
- Craft Knife:This is the most common tool for cutting adhesive vinyl. Choose a craft knife with replaceable blades for sharp, clean cuts.
- Cutting Machine:A cutting machine like a Cricut or Silhouette can automate the cutting process, making it faster and more precise, especially for complex designs.
- Ruler:A ruler is essential for accurate measurements when creating your stencils.
- Pencil:A pencil is useful for marking and sketching your design on the adhesive vinyl before cutting.
- Weeding Tools:These tools help you remove the unwanted sections of adhesive vinyl from your design, leaving behind the stencil.
- Transfer Tape:This is used to transfer the design from the adhesive vinyl to the plastic sheet.
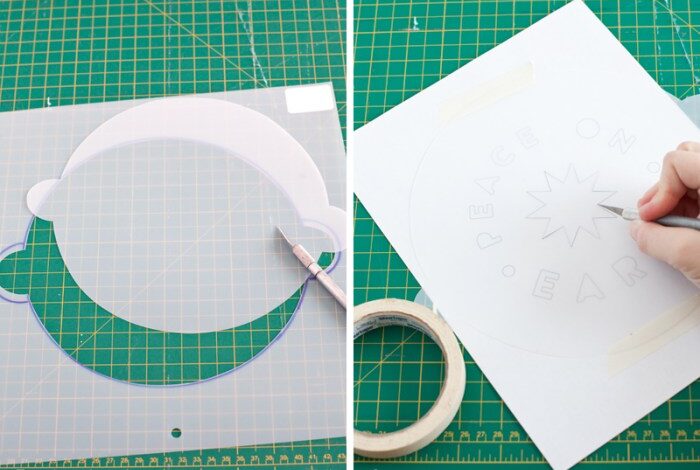
Design and Creation
The design process for creating custom stencils is an exciting part of this DIY project. It allows you to express your creativity and personalize your cake decorations. You can choose from a variety of design techniques, each with its own advantages and limitations.
Creating a DIY cake beverage stencil is a fun and creative way to personalize your treats. But before you head to the store for supplies, take a minute to learn about how to shop cleaner at Target. By making conscious choices about the products you buy, you can minimize your environmental impact and support sustainable practices.
This will help you feel good about your DIY project and the overall impact it has on the planet.
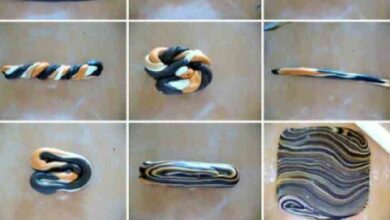
Freehand Drawing
Freehand drawing is a great way to create unique and personalized stencil designs. It gives you complete control over the shape and details of your design. You can use a pencil, pen, or marker to draw your design directly onto a sheet of stencil material.
For example, you could draw a simple flower design with intricate details, or a more complex geometric pattern.
I’m always on the lookout for creative DIY projects, and recently I’ve been obsessed with making my own cake beverage stencils. It’s such a fun way to personalize drinks for parties and gatherings. Speaking of DIY, I recently stumbled upon a fantastic tutorial for the Sadie bed, a modern pet bed , that I’m definitely going to try out for my furry friend.
It’s amazing how much creativity can be applied to everyday objects, whether it’s a cake stencil or a pet bed. I’m so excited to keep exploring these fun DIY projects and sharing my creations with you all!
Using Templates
Using templates is a convenient and efficient way to create stencils, especially for designs that require precise shapes or intricate details. You can find a wide variety of templates online or at craft stores. Simply trace the template onto your stencil material using a pencil or pen.
For instance, you could use a template to create a stencil of a heart, star, or animal silhouette.
Digital Design Software
Digital design software offers a powerful and versatile way to create stencils. You can use programs like Adobe Illustrator or Inkscape to create intricate designs with precise details. You can then print your designs onto stencil material or use a cutting machine to cut out the design.
This technique allows you to create complex patterns, logos, or even custom portraits for your cake decorations.
Stenciling Techniques
Now that you have your stencil, it’s time to put it to use! Stenciling is a versatile technique that can be applied to both cakes and beverages, allowing you to create intricate designs with ease. Let’s dive into the step-by-step process of using stencils for decorating.
Preparing Your Surface
Before applying your stencil, it’s essential to prepare your cake or beverage surface. For cakes, ensure the frosting is smooth and level. For beverages, ensure the surface is clean and dry. This will help your stencil adhere properly and prevent smudging.
Applying the Stencil
1. Secure the stencil
Gently place your stencil onto the prepared surface, ensuring it is centered and aligned correctly.
2. Hold the stencil firmly
Use your fingers or a light weight to hold the stencil in place, preventing it from moving while applying the design.
Stenciling Techniques
There are various techniques you can use for applying your stencil, each offering different results.
Airbrushing
Airbrushing is a popular technique for achieving smooth, even coverage with a fine mist of color.
1. Prepare your airbrush
Choose the appropriate nozzle size for your design and fill the airbrush cup with the desired color.
2. Test the airbrush
Test the airbrush on a scrap piece of paper to ensure the spray pattern is even and the color is consistent.
3. Apply the color
Hold the airbrush a few inches above the stencil and gently spray the color, working in light, overlapping passes.
Creating a DIY cake beverage stencil is a fun way to add a touch of elegance to your next party. Just like a delicate pearl necklace, a well-designed stencil can elevate a simple drink to something truly special. If you’re looking for inspiration for your next project, take a look at Butler Wilson’s enchanting pearl jewelry collection for luxurious beauty and style.
The intricate details and timeless beauty of their designs will surely spark your creativity. After all, a little bit of sparkle can go a long way, whether it’s on a piece of jewelry or a perfectly crafted beverage stencil.
4. Remove the stencil
Carefully lift the stencil after applying the color, ensuring it is completely dry to avoid smudging.
Using Brushes
Brushes offer a more controlled application, allowing you to achieve different effects, from fine lines to bold strokes.
1. Choose the right brush
Select a brush with a soft, synthetic bristle that is appropriate for the size and detail of your design.
2. Load the brush
Dip the brush into your chosen color, removing excess paint by wiping it against the edge of the container.
3. Apply the color
Gently dab the brush onto the stencil, working from the inside out to avoid bleeding.
4. Clean the brush
Immediately wash the brush with soap and water after each use to prevent paint from drying and hardening.
Sponges
Sponges provide a textured application, creating a soft, diffused effect.
1. Prepare the sponge
Choose a sponge with a smooth, even surface and cut it to the desired size.
2. Load the sponge
Dab the sponge into your chosen color, ensuring it is evenly coated.
3. Apply the color
Gently dab the sponge onto the stencil, working in light, overlapping motions.
4. Clean the sponge
Rinse the sponge with water and dry it completely after each use.
Tips for Achieving Clean and Precise Stenciling Results
Use high-quality stencils
Invest in durable stencils made from food-grade materials, ensuring they are flexible and easy to clean.
Secure the stencil properly
Ensure the stencil is firmly secured to the surface to prevent movement and bleeding.
Apply light pressure
Avoid pressing too hard, as this can cause the stencil to warp or tear.
Clean the stencil regularly
Wipe the stencil clean after each use to remove any excess paint or debris.
Practice makes perfect
Experiment with different techniques and colors to find what works best for you.
Inspiration and Ideas: Diy Cake Beverage Stencil
The possibilities for cake and beverage stencils are truly endless. From elegant designs to playful patterns, stencils can transform your creations into edible masterpieces.
Creative Designs
Stencils offer a fantastic way to add intricate details and unique patterns to cakes and beverages. They can be used to create a variety of designs, from classic to contemporary.
| Design Name | Description | Image Description | Stencil Design |
|---|---|---|---|
| Floral Fancies | Delicate floral patterns adorn the cake, creating a romantic and elegant touch. | A white cake with intricate floral designs in shades of pink and purple, creating a delicate and feminine aesthetic. | A stencil with various floral motifs, including roses, lilies, and daisies, in different sizes and arrangements. |
| Geometric Glamour | Modern geometric patterns add a touch of sophistication to the cake. | A black and white cake with bold geometric patterns, such as squares, triangles, and circles, creating a contemporary and stylish look. | A stencil with geometric shapes, such as squares, triangles, and circles, in various sizes and configurations. |
| Whimsical Wonderland | Playful and whimsical designs, such as stars, hearts, and animals, add a touch of fun to the cake. | A colorful cake with playful designs, including stars, hearts, and cartoon animals, creating a cheerful and whimsical aesthetic. | A stencil with various whimsical designs, such as stars, hearts, animals, and cartoon characters, in different sizes and arrangements. |
| Personalized Portraits | Create unique and personalized designs by using stencils to create portraits of loved ones or special characters. | A cake with a stencil-created portrait of a beloved pet, showcasing a realistic and heartwarming design. | A stencil with a detailed Artikel of a portrait, allowing for precise and intricate designs. |
Personalized Decorations
Beyond simply adding visual appeal, stencils can be used to personalize your creations. They can be used to create:* Monograms or Initials:Add a personal touch to cakes and beverages with elegant monograms or initials.
Special Messages
Express your sentiments with customized messages, such as “Happy Birthday” or “Congratulations.”
Themed Designs
Create designs that match the occasion, such as snowflakes for a winter celebration or hearts for a romantic dinner.
Themed Events
Stencils can be a valuable tool for creating themed decorations for events and parties. They can be used to create designs that match the theme of the event, such as:* Holiday Celebrations:Use stencils to create festive designs for holidays like Christmas, Halloween, or Thanksgiving.
Birthday Parties
Personalize cakes and beverages with stencils featuring the birthday person’s favorite characters, hobbies, or interests.
Special Occasions
Create elegant and unique designs for weddings, anniversaries, or graduations.
Troubleshooting and Tips

While DIY cake beverage stencils offer a fun and creative way to personalize your cakes, you might encounter some challenges along the way. This section will equip you with troubleshooting tips and advice to ensure professional-looking results.
Troubleshooting Common Stenciling Issues
Troubleshooting common stenciling issues is crucial to achieve a smooth and satisfying outcome. Here are some common challenges and solutions:
- Uneven Application:Stencil slippage can result in uneven application. To prevent this, use a light hand and apply the stencil firmly to the cake surface. A light mist of water or edible glue can help keep the stencil in place.
Avoid using too much pressure as it can distort the stencil.
- Smudging:When applying frosting or chocolate, it’s essential to avoid smudging. Use a clean, dry brush or spatula to apply the design, and work in small sections. Wait for each section to dry slightly before moving to the next.
- Stencil Sticking:Stencils can sometimes stick to the cake surface, particularly if using a sticky frosting. To prevent this, dust the stencil lightly with cornstarch or powdered sugar before applying it to the cake. This will help to create a barrier between the stencil and the frosting.
Tips for Achieving Professional Results, Diy cake beverage stencil
Achieving professional-looking results with stencils is about precision and technique. Here are some tips to enhance your stenciling skills:
- Practice Makes Perfect:Practice applying your stencil on a piece of parchment paper or a cake dummy before decorating your actual cake. This allows you to refine your technique and get comfortable with the stencil’s design.
- Clean Stencils:Clean your stencils thoroughly after each use to prevent frosting or chocolate from drying and sticking. Use warm, soapy water and a soft brush to remove any residue. Allow the stencils to air dry completely before storing them.
- Use a Light Touch:Apply the frosting or chocolate gently and evenly. Avoid pressing too hard, as this can distort the stencil or cause the frosting to bleed under the stencil.
Maintaining and Storing Stencils
Proper maintenance and storage are essential for preserving your stencils and ensuring their longevity.
- Cleaning:After each use, gently clean the stencils with warm, soapy water and a soft brush. Avoid using abrasive cleaners or scrubbing aggressively, as this can damage the stencil. Thoroughly rinse and air dry the stencils before storing them.
- Storage:Store your stencils in a cool, dry place away from direct sunlight. Avoid storing them in a humid environment, as this can lead to mold growth. You can store them flat in a plastic container or hang them on a hook to prevent warping.