Diy stiched chevron necklace – DIY Stitched Chevron Necklace: Ever wanted to create a statement piece of jewelry that’s both stylish and unique? Look no further! This guide will walk you through the process of crafting your own chevron necklace using simple materials and easy-to-follow instructions.
From designing your pattern to mastering stitching techniques, we’ll cover every step of the way.
The chevron pattern, known for its bold and geometric appeal, has been a popular design element in jewelry for centuries. Its versatility allows for countless variations, making it perfect for expressing your personal style. With this project, you can create a necklace that reflects your individual taste and adds a touch of handmade charm to your wardrobe.
Chevron Necklaces: A Timeless Trend
Chevron patterns, with their distinctive V-shaped motifs, have captivated designers and fashion enthusiasts for centuries. From ancient civilizations to contemporary runways, chevron designs have graced everything from textiles to architecture, and of course, jewelry.
History and Origins of Chevron Patterns in Jewelry
The chevron pattern’s history is deeply rooted in various cultures. In ancient Egypt, chevron motifs adorned tombs and jewelry, symbolizing protection and good fortune. The Aztecs also incorporated chevron patterns into their art and textiles, associating them with strength and power.
Crafting a DIY stitched chevron necklace is a fun way to express your personal style, and it’s surprisingly easy! The process reminds me of creating a personalized home welcome mat , where each stitch adds a unique touch. You can experiment with different colors and patterns, just like you would with a welcome mat, to create a truly one-of-a-kind piece.
So grab your needle and thread, and let your creativity flow!
Popularity of Chevron Necklaces in Contemporary Fashion
In contemporary fashion, chevron necklaces have enjoyed a resurgence in popularity. Their geometric appeal and versatility make them a favorite among designers and fashionistas alike. The chevron’s bold and modern aesthetic complements a wide range of styles, from casual to formal.
Different Chevron Necklace Designs, Diy stiched chevron necklace
Chevron necklaces come in an array of styles, each with its own unique charm.
- Simple Chevron Necklaces:These necklaces feature a single, repeating chevron pattern, often crafted from metal or beads. Their minimalist design makes them a versatile accessory that can be worn with various outfits.
- Layered Chevron Necklaces:These necklaces feature multiple chevron patterns layered on top of each other, creating a visually striking and textured look. Layered chevron necklaces often incorporate different materials, such as metal, gemstones, and beads, adding depth and dimension to the design.
- Statement Chevron Necklaces:Statement chevron necklaces are bold and eye-catching, often featuring large, intricate chevron patterns. They are designed to make a statement and can be the focal point of any outfit.
- Chevron Necklaces with Pendants:These necklaces combine the classic chevron pattern with a pendant, adding a touch of personalization and style. Pendants can range from simple geometric shapes to intricate designs, depending on the wearer’s taste.
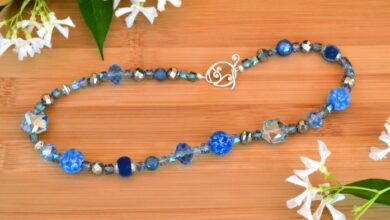
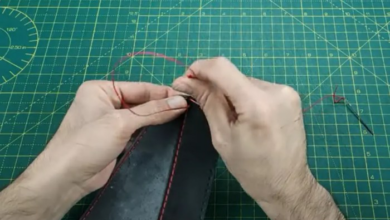
Materials and Tools for DIY Stitched Chevron Necklaces
![]()
Crafting a stitched chevron necklace is a rewarding and creative project. With the right materials and tools, you can personalize your necklace with unique fabrics, colors, and embellishments. Let’s delve into the essential components for this DIY project.
Fabric Selection
Choosing the right fabric is crucial for creating a visually appealing and durable stitched chevron necklace. You’ll need a fabric that holds its shape well, has a good drape, and is easy to stitch. Here are some fabric options that are well-suited for this project:
- Cotton Fabric:Cotton is a popular choice for stitched chevron necklaces due to its durability, breathability, and ease of stitching. It’s readily available in a wide variety of colors, patterns, and weights.
- Linen Fabric:Linen is a natural fiber known for its strength, durability, and crisp texture. It’s a good option for adding a touch of elegance and sophistication to your necklace.
- Felt Fabric:Felt is a non-woven fabric that is soft, flexible, and easy to cut. It’s an excellent choice for creating textured and unique chevron patterns.
- Leather Fabric:Leather adds a touch of ruggedness and sophistication to stitched chevron necklaces. It’s durable and can be cut into intricate shapes.
Thread and Needles
The thread and needles you choose will significantly impact the quality and appearance of your stitched chevron necklace. Opt for threads and needles that are compatible with your chosen fabric and stitching technique.
- Embroidery Thread:Embroidery thread is a popular choice for stitching chevron necklaces. It’s available in a wide range of colors and finishes, and it adds a touch of elegance and detail to the design.
- Sewing Thread:Sewing thread is a durable and versatile option for stitching chevron necklaces. It’s available in various weights and colors, making it suitable for a range of fabric types.
- Embroidery Needles:Embroidery needles have a sharp point and a large eye, making them ideal for stitching through multiple layers of fabric. Choose a needle size that is appropriate for your chosen thread and fabric.
- Sewing Needles:Sewing needles come in various sizes and types, depending on the fabric and stitching technique. Select a needle that is sharp enough to penetrate the fabric but not too sharp to damage it.
Embellishments
Embellishments can add a personal touch and enhance the visual appeal of your stitched chevron necklace. Choose embellishments that complement your fabric and design.
- Beads:Beads come in a wide variety of shapes, sizes, colors, and materials. They can be used to create accents, borders, or focal points in your necklace.
- Sequins:Sequins are small, shiny discs that add sparkle and glamour to your necklace. They can be sewn or glued onto the fabric.
- Rhinestones:Rhinestones are sparkling crystals that can be used to add a touch of elegance and sophistication to your necklace.
- Buttons:Buttons can be used as decorative elements or functional closures for your necklace.
Tools for Stitching
Having the right tools will make your stitching process easier and more efficient. Here are some essential tools for creating a stitched chevron necklace:
- Scissors:Sharp scissors are essential for cutting fabric, thread, and embellishments accurately.
- Measuring Tape:A measuring tape is necessary for accurately measuring fabric and creating even chevron patterns.
- Fabric Marker:A fabric marker is useful for marking fabric before cutting and stitching. Choose a marker that is washable and will not bleed through the fabric.
- Sewing Machine:A sewing machine can be used to stitch the chevron pattern quickly and efficiently. However, you can also stitch the necklace by hand.
Alternative Materials and Tools
If you don’t have access to all of the materials and tools listed above, there are some alternatives that you can use:
| Material | Description | Purpose | Alternatives |
|---|---|---|---|
| Fabric | Cotton, linen, felt, leather | Creating the chevron pattern | Denim, silk, wool, velvet |
| Thread | Embroidery thread, sewing thread | Stitching the chevron pattern | Yarn, ribbon, cord |
| Needles | Embroidery needles, sewing needles | Stitching through the fabric | Hand needles, tapestry needles |
| Scissors | Sharp scissors | Cutting fabric, thread, and embellishments | Fabric shears, rotary cutter |
| Measuring Tape | Measuring tape | Measuring fabric and creating even chevron patterns | Ruler, yardstick |
| Fabric Marker | Fabric marker | Marking fabric before cutting and stitching | Pencil, chalk, tailor’s chalk |
| Sewing Machine | Sewing machine | Stitching the chevron pattern | Hand stitching |
Design and Pattern Creation
Creating a chevron pattern for your necklace is a fun and creative step. You can choose from pre-made patterns or design your own, and you can personalize your design by adjusting the size and shape of the chevrons. Designing your own pattern allows you to create a truly unique piece.
Designing Chevron Patterns
You can create a chevron pattern using graph paper or a digital design tool. Here are some step-by-step instructions:* Using graph paper:
1. Choose your scale
Decide how large you want your chevrons to be. Each square on the graph paper will represent a certain unit of measurement.
2. Draw the basic chevron
Start by drawing a simple chevron shape on your graph paper. You can make it as wide or narrow as you like.
3. Repeat the chevron
Once you have your basic chevron shape, repeat it across the graph paper to create a continuous pattern. You can use different colors to distinguish between the rows of chevrons.
4. Add details
Once you have your basic pattern, you can add details like different stitch types or embellishments to make it more unique.* Using a digital design tool:
1. Choose a tool
There are many digital design tools available, such as Adobe Illustrator or Canva.
2. Create a new document
My DIY stitched chevron necklace is a great way to add a pop of color to any outfit, and it’s surprisingly easy to make. It reminds me of another fun DIY project I tackled recently – a colorblocked scratching post DIY for my cat! The vibrant colors and geometric patterns in both projects are so satisfying to create.
I’m always on the lookout for new DIY projects, and I’m sure my next one will be just as much fun.
Set the size of your document to match the size of your necklace.
3. Draw the basic chevron
Use the drawing tools in your chosen program to create a simple chevron shape.
4. Repeat and modify
Use the copy and paste function to repeat the chevron shape and create your pattern. You can then use the editing tools to change the size, color, and shape of the chevrons to create a unique design.
Chevron Pattern Variations
There are many different variations of chevron patterns that you can use for your necklace. Here are a few examples:* Classic Chevron:This is the most basic chevron pattern, with a simple V-shape. It is a timeless and elegant design that works well with any style.
I’ve been wanting to try my hand at making a DIY stitched chevron necklace for a while now. I’m really inspired by all the beautiful handmade jewelry I see online, and I think a chevron pattern would be a fun and modern look.
I’m also inspired by the amazing transformation Laura did on her hallway, check out her before and after photos here , and I think the bold chevron pattern in her new rug would look great on a necklace. I’m excited to get started and see how my own version turns out!
Zigzag Chevron
This pattern is created by alternating the direction of the chevrons. It creates a more dynamic and eye-catching design.
Reverse Chevron
This pattern is created by reversing the direction of the chevrons. It creates a more modern and edgy look.
Curved Chevron
This pattern is created by using curved lines to create the chevron shape. It creates a more whimsical and playful design.
Layered Chevron
This pattern is created by layering different chevron shapes on top of each other. It creates a more complex and interesting design.You can also combine different chevron patterns to create unique and personalized designs. For example, you could use a classic chevron pattern for the center of your necklace and then add a zigzag chevron pattern to the edges.
Stitching Techniques
Now that you have your chevron pattern ready, it’s time to bring it to life with stitching! There are several techniques you can use, each offering a unique look and feel to your necklace. Let’s explore some popular options.
Back Stitch
The back stitch is a strong and versatile stitch that creates a clean, defined line. It’s perfect for outlining your chevron shapes and adding a touch of elegance to your necklace. Here’s how to execute a back stitch:
1. Start
Bring your needle up from the back of the fabric, then insert it back down a few stitches away.
2. Continue
Bring the needle up again right next to where you just brought it down.
3. Repeat
Insert the needle down again a few stitches away from where you just brought it up, and repeat steps 2 and 3 until you reach the end of your chevron shape.
Tip:Use a contrasting thread color for a bold statement, or match your thread to your fabric for a subtle, understated look.
Blanket Stitch
The blanket stitch is a decorative stitch that creates a raised, textured edge. It’s ideal for adding a touch of whimsy and visual interest to your chevron necklace.Here’s how to execute a blanket stitch:
1. Start
Bring your needle up from the back of the fabric.
2. Continue
Bring the needle down a few stitches away from where you just brought it up.
3. Repeat
Bring the needle up again, but this time, insert the needle under the loop created by the previous stitch. Pull the thread through, and repeat steps 2 and 3 until you reach the end of your chevron shape.
Tip:Use a thick thread for a chunky, bold effect, or a thin thread for a delicate, airy look.
Cross Stitch
The cross stitch is a classic stitch that creates a bold, geometric pattern. It’s perfect for adding a touch of traditional charm to your chevron necklace.Here’s how to execute a cross stitch:
1. Start
Bring your needle up from the back of the fabric.
2. Continue
Bring the needle down a few stitches away from where you just brought it up.
3. Repeat
Bring the needle up again, creating a diagonal stitch.
4. Complete the cross
Bring the needle down a few stitches away from where you just brought it up, creating another diagonal stitch that intersects with the first stitch.
Tip:Use a variety of thread colors to create a vibrant, multi-colored chevron pattern.
Assembly and Finishing: Diy Stiched Chevron Necklace
The final step in crafting your stitched chevron necklace is bringing all the pieces together. This involves attaching your meticulously stitched chevron pattern to a chosen necklace base, ensuring a secure and aesthetically pleasing finish.This section will guide you through the process of assembling your stitched chevron pattern, exploring different necklace base options, and demonstrating various methods to secure the pattern to the base.
Necklace Base Options
The choice of necklace base plays a crucial role in the overall look and feel of your chevron necklace. It provides the framework for showcasing your stitched pattern and determines the necklace’s length and style.
- Chains:Chains offer a classic and versatile option for necklace bases. They come in various materials, such as gold, silver, brass, or stainless steel, and a wide range of styles, from delicate chains to chunky chains. Choose a chain that complements the overall design and color scheme of your stitched pattern.
- Cords:Cords provide a more casual and bohemian vibe. They are available in a wide array of materials, including leather, suede, cotton, and silk, and come in various colors and textures. Cords can be braided, twisted, or left plain, allowing for a personalized touch.
- Ribbons:Ribbons offer a feminine and elegant touch. They come in a wide array of colors, patterns, and widths, allowing for a variety of styles. Consider using satin, velvet, or grosgrain ribbons to create a luxurious and sophisticated look.
Securing the Stitched Pattern
Once you have chosen your necklace base, it’s time to attach the stitched chevron pattern. This step requires careful consideration to ensure a secure and visually appealing connection.
- Glue:Using a strong fabric glue is a quick and easy method for attaching the stitched pattern to the necklace base. Apply a thin layer of glue to the back of the pattern and carefully press it onto the base, ensuring even adhesion.
Allow the glue to dry completely before wearing the necklace.
- Stitching:Stitching the pattern to the base provides a more durable and permanent attachment. Use a needle and thread that matches the color of the pattern and base. Carefully stitch through both the pattern and the base, securing the pattern in place.
Ensure the stitches are small and even for a neat finish.
- Other Techniques:Other techniques can be used to secure the stitched pattern, depending on the chosen base and desired aesthetic. For example, you can use jump rings to attach the pattern to a chain or a beading wire to create a more intricate design.
Alternatively, you can use fabric tape or a fusible adhesive to bond the pattern to the base.