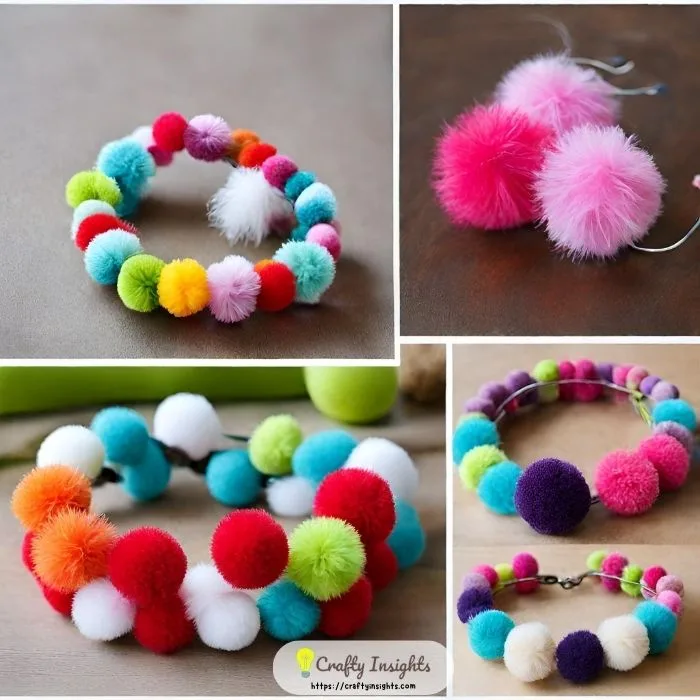

DIY Pom Pom Bracelets: A Comprehensive Guide to Crafting Adorable Accessories
The DIY pom pom bracelet is a versatile and charming accessory that allows for endless customization and creativity. These soft, fluffy creations are not only fun to make but also incredibly trendy, appealing to a wide range of ages and styles. Whether you’re looking for a fun craft project for kids, a way to add a pop of color to your own wardrobe, or even a potential small business venture, this comprehensive guide will equip you with all the knowledge you need to create beautiful pom pom bracelets. We’ll delve into the various methods of making pom poms, explore different bracelet construction techniques, discuss material choices, and offer tips for achieving a professional and stylish finish.
Mastering the Art of Pom Pom Creation: Multiple Methods Explained
The heart of any pom pom bracelet lies in the pom pom itself. Fortunately, there are several accessible methods for creating these delightful spheres, each with its own advantages.
1. The Cardboard Ring Method: This is arguably the most traditional and widely accessible method, requiring only cardboard, scissors, and yarn. Begin by cutting out two identical cardboard rings. The size of the inner and outer circles will determine the size of your pom pom. Larger outer circles and smaller inner circles yield fuller, fluffier pom poms. Place the rings together, and begin wrapping yarn around them, passing the yarn through the center hole and around the outer edge. Continue wrapping until the center hole is nearly filled, ensuring even coverage. Once satisfied with the density, carefully insert scissors between the two cardboard rings and cut the yarn all the way around. Then, tie a piece of yarn securely around the center of the wrapped yarn, pulling it as tightly as possible. Remove the cardboard rings, and trim any uneven strands to create a perfectly spherical pom pom. This method is excellent for beginners and for creating a consistent pom pom size.
2. The Fork Method: For smaller, more delicate pom poms, the fork method is ideal. Take a standard fork and wrap yarn around the tines. The more yarn you wrap, the denser your pom pom will be. Once you’ve wrapped a sufficient amount, carefully slide a separate piece of yarn underneath the wrapped yarn, between the two middle tines, and tie it very tightly. Then, carefully slide the pom pom off the fork and use scissors to cut through the looped yarn on both sides. Trim any stray ends to achieve a uniform sphere. This method is particularly useful for creating miniature pom poms that are perfect for delicate bracelets or for adding multiple small pom poms to a single strand.
3. The Pom Pom Maker Method: For those who plan to create a significant number of pom poms or desire a more effortless and consistent result, investing in a commercial pom pom maker is highly recommended. These tools come in various sizes and are designed to simplify the wrapping and cutting process. Typically, they involve two hinged arms that you wrap yarn around. Once filled, you close the arms, and the built-in blade cuts the yarn. A separate tie secures the pom pom, and then you open the arms to release your perfectly formed pom pom. This method is efficient, produces uniform pom poms, and is especially beneficial for bulk crafting.
Choosing the Right Yarn for Your Pom Pom Bracelets
The type of yarn you select will significantly impact the look, feel, and durability of your pom pom bracelets.
- Acrylic Yarn: This is a popular choice due to its affordability, wide color selection, and durability. It’s easy to work with, holds its shape well, and is generally hypoallergenic. Acrylic is a great all-around option for beginners and for creating vibrant, long-lasting bracelets.
- Wool Yarn: For a softer, more luxurious feel, wool is an excellent choice. It has a natural elasticity that creates beautifully shaped pom poms and can be incredibly warm. However, wool can be more expensive and may require handwashing to maintain its integrity.
- Cotton Yarn: Cotton yarn offers a matte finish and is breathable, making it suitable for warmer climates or for individuals with sensitive skin. It tends to be less elastic than acrylic or wool, so you might need to wrap a bit more yarn to achieve a dense pom pom.
- Blended Yarns: Many yarns are blends of acrylic, wool, cotton, or other fibers. These can offer a balance of desirable qualities, such as the softness of wool with the durability of acrylic. Experiment with different blends to find your preferred texture and finish.
- Specialty Yarns: For a unique look, consider specialty yarns like boucle, chenille, or metallic yarns. These can add interesting textures and visual appeal to your pom pom bracelets. Be mindful that some specialty yarns can be more challenging to work with and may require a lighter touch during the cutting and trimming stages.
Building Your Pom Pom Bracelet: Construction Techniques
Once your pom poms are ready, it’s time to transform them into bracelets. Here are several popular construction methods:
1. Simple Yarn Stringing: This is the most straightforward method. After creating your pom poms, thread a long piece of sturdy yarn or cord through the center of each pom pom. You can either thread it through the tie-off yarn you used to secure the pom pom or create a small hole with a needle and thread it through the pom pom itself. Leave enough extra string on either end to tie the bracelet onto the wrist. You can space the pom poms evenly or group them together for a clustered effect. This method is quick and easy, perfect for making multiple bracelets in a short time.
2. Elastic Cord Bracelet: For a bracelet that easily slips on and off, using elastic cord is an excellent choice. Similar to the yarn stringing method, thread your pom poms onto the elastic cord. Ensure the elastic is strong enough to hold the pom poms without stretching too much when worn. Once all pom poms are in place, tie the ends of the elastic cord together securely with a double or triple knot, and trim any excess cord. This creates a flexible and comfortable bracelet.
3. Chain Link Method: This technique offers a more structured and potentially more durable bracelet. You can use a sturdy embroidery floss, thin cord, or even a very fine jewelry wire. After creating your pom poms, use a needle and thread to create a small loop on the underside of each pom pom. Then, connect these loops together using jump rings or by directly knotting the thread between them. This method allows for precise spacing and creates a more refined look, akin to a charm bracelet.
4. Macrame Integration: For a bohemian or more intricate design, you can incorporate pom poms into macrame bracelets. Macrame knots, such as square knots and lark’s head knots, can be used to create a band, and then pom poms can be attached at intervals. This method requires some knowledge of macrame techniques but results in truly unique and visually appealing accessories.
5. Charm Bracelet Style: Combine your pom poms with other charms, beads, or findings to create a personalized charm bracelet. This allows for even greater customization and the opportunity to tell a story with your accessories.
Customization and Embellishment: Elevating Your Designs
The beauty of DIY pom pom bracelets lies in their infinite customization potential.
- Color Combinations: Experiment with single-color bracelets for a bold statement or create ombre effects by blending different shades. Contrasting colors can make your pom poms pop.
- Size Variation: Mix and match pom pom sizes on a single bracelet for visual interest. Tiny pom poms paired with larger ones can create a dynamic look.
- Bead Accents: Incorporate beads between your pom poms. Seed beads, pony beads, or even semi-precious stones can add sparkle, texture, and color.
- Tassel and Charm Additions: Attach complementary tassels or small charms to your bracelet for added flair. Think feathers, small metal charms, or even tiny bells.
- Embroidery Details: Once your pom pom is made, you can use a needle and thread to add small embroidered details to the surface, like dots, stars, or even tiny initials.
- Layering: Create multiple bracelets and layer them for a trendy, stacked look. This allows for a more complex and personalized aesthetic.
- Closure Styles: Beyond simple knots, consider using lobster clasps, toggle clasps, or adjustable sliding knots for a more finished and functional closure.
Tips for Perfect Pom Poms and Professional Bracelets
- Yarn Density: For the fullest and most spherical pom poms, ensure you wrap a generous amount of yarn. A dense wrap will prevent the core from showing through and create a plush texture.
- Sharp Scissors are Key: A good, sharp pair of scissors is crucial for cleanly cutting the yarn and achieving a uniform shape. Dull scissors will result in ragged edges.
- Even Trimming: Take your time when trimming your pom poms. Rotate the pom pom and trim any stray fibers to create a perfectly round sphere. You can even use a ruler to check for evenness.
- Secure Knotting: When tying off your pom poms, ensure the knot is very tight. This will prevent the pom pom from unraveling.
- Reinforce Connections: When stringing pom poms onto cords or threads, consider reinforcing the knots where the pom pom meets the bracelet string. This adds durability and prevents the pom pom from sliding off.
- Knot Concealment: For a cleaner look, try to hide knots at the back of the bracelet or within the pom pom itself.
- Consistency is Key (When Desired): If you’re aiming for a very uniform bracelet, use the same pom pom-making method and yarn for all pom poms.
- Test Your Materials: Before committing to a large project, test your yarn and construction methods to ensure they work well together.
SEO Considerations for Your DIY Pom Pom Bracelet Content:
To ensure your DIY pom pom bracelet content is discoverable online, integrate relevant keywords naturally throughout the article. Consider using terms such as:
- "DIY pom pom bracelet"
- "how to make pom poms"
- "yarn crafts"
- "bracelet making tutorial"
- "easy craft ideas"
- "handmade jewelry"
- "customizable accessories"
- "pom pom maker"
- "best yarn for pom poms"
- "kids craft projects"
- "crafting for beginners"
- "festival fashion"
- "boho jewelry"
Utilize these keywords in headings, subheadings, image alt text (if applicable), and within the body of the text. Structure your article with clear headings and subheadings to improve readability and aid search engine crawlers. Providing a comprehensive and informative guide like this will not only attract readers but also establish your content as a valuable resource for anyone interested in creating their own charming pom pom bracelets. The combination of clear instructions, detailed material explanations, and creative embellishment ideas ensures that this article will be a go-to reference for crafters of all levels.
