
Mastering the At-Home Gel Manicure: Your Comprehensive Guide to Salon-Quality Nails
Achieving a professional-looking gel manicure at home is entirely attainable with the right knowledge, tools, and a step-by-step approach. This guide demystifies the process, empowering you to create durable, high-gloss nails that resist chipping and fading for weeks, all without the salon price tag. From essential preparation to expert application techniques and crucial removal methods, this article provides everything you need to know for a successful DIY gel manicure.
I. The Foundation: Essential Tools and Products for Your At-Home Gel Manicure
Before embarking on your gel manicure journey, gather a comprehensive collection of tools and products. The quality of your supplies directly impacts the longevity and finish of your manicure.
- LED or UV Gel Lamp: This is non-negotiable for curing gel polish. LED lamps cure faster and are more energy-efficient than older UV lamps. Ensure the lamp’s wattage is sufficient for proper curing (typically 36W or higher).
- Gel Polish Starter Kit: Many brands offer starter kits that include a base coat, top coat, a few color shades, and often a cleansing solution. This can be a cost-effective way to begin.
- Gel Base Coat: This crucial layer adheres the gel polish to the natural nail, providing a smooth canvas and preventing staining.
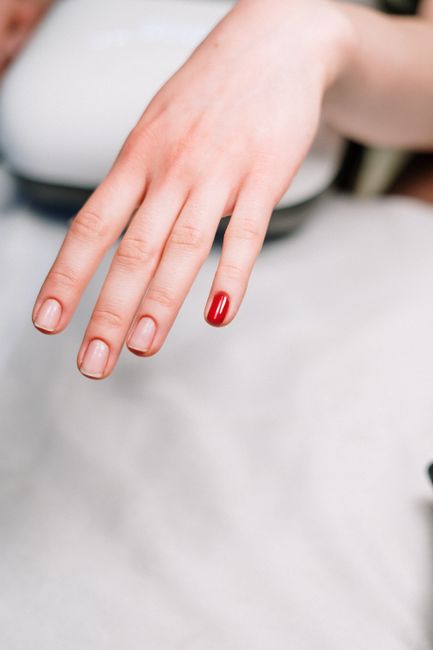
- Gel Color Coats: Select your desired shades. Gel polish offers a vast spectrum of colors and finishes.
- Gel Top Coat: This seals the color, provides a high-shine finish, and protects against chipping and wear. Some top coats are "no-wipe," meaning they don’t leave a sticky residue after curing.
- Nail Prep Solution/Dehydrator: This removes natural oils and moisture from the nail plate, ensuring optimal adhesion of the base coat.
- Nail Cleanser/Rubbing Alcohol: Used to remove the sticky "inhibition layer" left after curing the top coat (if not using a no-wipe top coat) and to clean brushes.
- Cuticle Pusher/Orange Stick: Gently pushes back the cuticle to create a clean nail surface for application.
- Nail File (180-240 grit): For shaping the natural nail. Avoid coarse files that can damage the nail.
- Buffer (fine grit, e.g., 240 grit): To gently buff the nail surface for better adhesion.
- Lint-Free Wipes: Essential for applying cleanser and removing sticky residue without leaving fibers.
- Cuticle Oil: To rehydrate and nourish the cuticles after the manicure.
- Optional: Gel Polish Remover: Specialized solutions designed to break down gel polish for easier removal.
- Optional: Aluminum Foil and Cotton Pads: For an alternative gel removal method.
- Optional: Nail Art Tools: Brushes, dotting tools, glitter, etc., if you plan on decorative elements.
II. The Art of Preparation: Setting the Stage for a Flawless Gel Manicure
Proper nail preparation is paramount for the longevity and professional appearance of your at-home gel manicure. Rushing this stage can lead to lifting, peeling, and a less-than-ideal finish.
- Sanitize Your Hands and Tools: Begin by washing your hands thoroughly with soap and water. Disinfect all your tools with rubbing alcohol or a sanitizing solution.
- Remove Old Polish: If you have any existing nail polish (gel or regular), remove it completely using a non-acetone remover, as acetone can sometimes be too harsh on the nail bed.
- Trim and Shape Your Nails:
- Trimming: If your nails are too long, trim them to your desired length using clean nail clippers.
- Shaping: Use a fine-grit nail file (180-240 grit) to shape your nails. File in one direction only, from the side of the nail towards the center, to prevent splitting and weakening. Aim for a smooth, uniform edge.
- Push Back Cuticles: Gently use a cuticle pusher or an orange stick to push back your cuticles. This exposes the entire nail plate, allowing for a cleaner application of polish and preventing polish from flooding the cuticle area. Be firm but gentle; do not cut your cuticles unless you are experienced and have sterilized cuticle nippers, as this can lead to infection.
- Buff the Nail Surface: Using a fine-grit buffer (around 240 grit), gently buff the surface of each nail. This removes any natural shine and creates a slightly porous surface, which allows the base coat to adhere more effectively. Do not over-buff, as this can thin the natural nail. The goal is to remove the shine, not to create deep scratches.
- Cleanse and Dehydrate: Apply a nail prep solution or dehydrator to each nail using a lint-free wipe. This removes any remaining dust, oils, and moisture from the nail plate. Allow it to air dry completely for about 30 seconds. This step is critical for preventing lifting.
III. The Gel Polish Application Process: Layer by Layer to Perfection
Applying gel polish requires precision and adherence to specific curing times. Each layer needs to be thin and evenly applied.
-
Apply the Gel Base Coat:
- Shake the base coat bottle gently to mix the product (avoid vigorous shaking, which can create air bubbles).
- Apply a thin, even layer of the base coat to the entire nail plate, ensuring you cap the free edge (paint the very tip of the nail). This helps prevent chipping and lifting.
- Crucially: Avoid getting the base coat on your cuticles or skin. If you do, wipe it away immediately with a lint-free wipe dipped in cleanser or rubbing alcohol.
- Cure under the Lamp: Place your hand in the LED or UV lamp and cure for the time recommended by the manufacturer (typically 30-60 seconds for LED, 2 minutes for UV). Ensure all nails on that hand are cured simultaneously.
-
Apply the First Layer of Gel Color:
- Shake the gel color bottle gently.
- Apply a thin, even layer of your chosen gel color to the nail. Start with a thin layer; you can always add more.
- Again, cap the free edge and avoid contact with cuticles and skin.
- Cure under the Lamp: Cure the first layer of color for the manufacturer’s recommended time (e.g., 30-60 seconds for LED, 2 minutes for UV).
-
Apply the Second Layer of Gel Color:
- Most gel polishes require two thin coats for opaque coverage.
- Apply a second thin, even layer of the gel color, ensuring complete coverage.
- Cure under the Lamp: Cure the second layer of color for the recommended time.
-
Apply the Gel Top Coat:
- Shake the top coat bottle gently.
- Apply a thin, even layer of the top coat over the entire nail. This layer is essential for shine and protection.
- Cap the free edge.
- Cure under the Lamp: Cure the top coat for the manufacturer’s recommended time (e.g., 60 seconds for LED, 2 minutes for UV).
-
Cleanse the Sticky Inhibition Layer (if applicable):
- If your top coat is not a "no-wipe" formula, it will leave a sticky residue on the nail surface after curing.
- Using a lint-free wipe generously saturated with nail cleanser or rubbing alcohol, gently wipe away the sticky layer from each nail until it is smooth and shiny. Do not scrub; a gentle swipe is sufficient.
-
Apply Cuticle Oil:
- Once the sticky layer is removed, apply a drop of cuticle oil to the skin around each nail.
- Gently massage the oil into the cuticles and surrounding skin. This rehydrates the area, which can become dry from the nail preparation and curing process.
IV. Troubleshooting Common At-Home Gel Manicure Issues
Even with careful application, some common issues can arise. Understanding how to prevent and fix them is key to successful DIY gel manicures.
- Gel Polish Lifting or Peeling: This is usually due to inadequate nail preparation (oils or moisture left on the nail), applying too thick coats, or the gel touching the cuticle.
- Solution: Ensure thorough cleansing and dehydrating. Apply thin coats and cap the free edge. Avoid cuticle contact. If it lifts early, you may need to remove and reapply.
- Gel Polish Not Curing Properly (Bubbling or Streaky): This can happen if coats are too thick, the lamp is too weak or old, or the curing time is insufficient.
- Solution: Apply thin coats. Ensure your lamp is functioning correctly and is powerful enough. Follow recommended curing times precisely.
- Chipping or Wearing Away Quickly: This is often caused by not capping the free edge, a weak top coat, or aggressive use of hands without gloves.
- Solution: Always cap the free edge with every layer. Use a high-quality top coat. Protect your hands by wearing gloves for household chores involving water or harsh chemicals.
- Gel Polish Staining Natural Nails: This is more common with darker or highly pigmented shades.
- Solution: Always use a base coat. If using very dark colors, consider applying two thin base coats.
- Uneven or Streaky Color Application: This usually stems from uneven application of the color coats.
- Solution: Apply thin, even coats. Ensure the brush is not overloaded with polish. If streaks persist, you might need a third thin coat.
V. The Essential Art of Gel Polish Removal: Protecting Your Natural Nails
Proper gel polish removal is just as crucial as application. Improper removal can lead to nail damage, thinning, and breakage.
-
Soak Off Method (Recommended):
- File the Top Coat: Gently file away the shine of the top coat from each nail using a nail file. This allows the remover to penetrate the gel polish.
- Prepare Remover Wraps:
- Option A (Store-bought): Use pre-made gel polish remover wraps, which consist of a foil outer layer with a cotton pad attached.
- Option B (DIY): Cut small squares of aluminum foil and cotton pads. Soak a cotton pad with gel polish remover (specifically designed for gel, containing acetone is usually necessary here) and place it on the nail.
- Wrap the Nails: Securely wrap each finger with the foil, ensuring the cotton pad is firmly against the nail.
- Soak: Allow the nails to soak for 10-15 minutes (or as per the remover’s instructions). The acetone will break down the gel polish.
- Gently Remove: After soaking, gently push off the softened gel polish with a cuticle pusher or an orange stick. Work from the cuticle towards the free edge. Avoid aggressive scraping, as this can damage the natural nail.
- Cleanse and Buff: Once the majority of the gel is removed, cleanse your nails with rubbing alcohol and gently buff any remaining residue.
- Hydrate: Apply cuticle oil and hand lotion to rehydrate your nails and surrounding skin.
-
Alternative: Gel Polish Remover Clips: These reusable clips hold cotton pads soaked in remover against the nails, providing a convenient alternative to foil.
-
Avoid Peeling or Scraping Dry Gel: Never attempt to peel or aggressively scrape off gel polish that has not been softened by a remover. This will almost certainly damage your natural nails.
VI. Maintaining Your At-Home Gel Manicure
Once your at-home gel manicure is complete, a few simple practices can help extend its lifespan:
- Wear Gloves: Always wear gloves when washing dishes, cleaning with chemicals, or engaging in activities that might expose your nails to prolonged moisture or harsh substances.
- Avoid Using Nails as Tools: Refrain from using your nails to open cans, scrape surfaces, or perform any task that puts excessive stress on them.
- Regularly Moisturize: Keep your hands and cuticles moisturized with cuticle oil and hand lotion. Healthy cuticles contribute to healthier nails and better polish adherence.
- Touch-Ups (Minor Chips): For very minor chips on the very tip, you can sometimes carefully reapply a tiny amount of top coat to seal it, curing under the lamp. This is a temporary fix.
Conclusion:
Mastering the at-home gel manicure is a rewarding skill that offers significant benefits in terms of time, cost, and convenience. By meticulously following the preparation, application, and removal steps outlined in this comprehensive guide, you can consistently achieve durable, salon-quality nails from the comfort of your home. Patience, precision, and the use of appropriate tools and products are your keys to success in creating beautiful, long-lasting gel manicures.
