How I Recolored My Kitchen Appliances: My kitchen was feeling a bit blah, and I wanted to give it a refresh without the expense of new appliances. So, I decided to take matters into my own hands and give my old appliances a makeover with a fresh coat of paint.
It was a fun, DIY project that completely transformed my kitchen.
I started by researching the best paints and techniques for recoloring appliances. Then, I carefully prepared my appliances by cleaning, sanding, and masking them. The painting process was a little messy, but the results were well worth it.
Now, my kitchen has a completely new vibe, and I’m so proud of how it turned out.
Why Recolor Kitchen Appliances?
Recoloring your kitchen appliances can be a great way to refresh your space and give it a whole new look. Whether you’re tired of the old color or want to match your appliances to a new color scheme, recoloring can be a fun and affordable way to achieve your desired kitchen aesthetic.
Reasons for Recoloring Kitchen Appliances
There are several reasons why someone might choose to recolor their kitchen appliances. Here are some of the most common motivations:
- Updating the Look of the Kitchen: Appliances are a major part of a kitchen’s overall aesthetic. If your appliances are outdated or simply don’t match your current style, recoloring them can instantly refresh the look of the entire room. For instance, a kitchen with dated stainless steel appliances can be transformed with a fresh coat of white or black paint.
- Matching Appliances to a New Color Scheme: If you’re redecorating your kitchen and want to create a cohesive look, recoloring your appliances can help you achieve this. For example, if you’re going for a modern farmhouse look, you might choose to paint your appliances a soft white or cream to complement the other elements in the room.
- Personalizing the Space: Recoloring your appliances allows you to personalize your kitchen and make it truly your own. You can choose colors that reflect your unique style and personality, creating a space that feels both stylish and comfortable. Imagine a kitchen with vibrant turquoise appliances that add a pop of color and personality to the room.
Choosing the Right Color and Finish: How I Recolored My Kitchen Appliances
Now that you’ve decided to recolor your kitchen appliances, the next big decision is choosing the perfect color and finish. This step is crucial, as it will significantly impact the overall look and feel of your kitchen. To make the right choice, consider your existing décor, personal preferences, and the style you want to achieve.
I finally finished recoloring my kitchen appliances! It was a lot of work, but I’m so happy with how they turned out. The new colors really make the space feel more modern and inviting. Now, I’m looking for some fall-inspired decor to complete the look.
I saw this amazing post about sister style autumn vibes already that gave me some great ideas. I’m thinking of adding some warm-toned throw pillows and maybe even a pumpkin-shaped vase. I can’t wait to cozy up in my newly-recolored kitchen this fall!
Color Selection
The color of your appliances should complement your kitchen’s existing décor, including your cabinets, countertops, backsplash, and flooring. A harmonious color palette creates a cohesive and visually appealing space. If your kitchen features neutral tones like white, gray, or beige, you have a wide range of color options.
Bold colors, such as black, navy blue, or emerald green, can add a dramatic touch to a neutral kitchen. However, if your kitchen has vibrant colors, choosing a more muted appliance color can help balance the overall aesthetic.
Finishes
The finish you choose for your appliances can dramatically alter their appearance and how they blend into your kitchen’s overall design. Common finishes include:
- Matte:This finish provides a subtle, understated look and helps minimize fingerprints and smudges.
- Gloss:Glossy finishes create a sleek, modern look and reflect light, making your kitchen appear brighter. However, they can be more prone to fingerprints.
- Metallic:Metallic finishes, such as stainless steel, bronze, or copper, add a touch of luxury and sophistication to your kitchen. They can be a good choice for modern or industrial-style kitchens.
- Textured:Textured finishes, such as hammered or brushed, offer a unique look and feel, adding depth and visual interest to your appliances. They can be particularly effective in creating a rustic or farmhouse-style kitchen.
Popular Appliance Colors and Finishes
Here’s a table showcasing some popular appliance colors and finishes, along with their pros and cons:
| Color | Finish | Pros | Cons |
|---|---|---|---|
| White | Matte | Classic, timeless, brightens the kitchen, hides fingerprints | Can appear outdated in some styles |
| Black | Gloss | Modern, sleek, creates a dramatic effect | Shows fingerprints easily, can make the kitchen feel smaller |
| Stainless Steel | Brushed | Modern, sleek, durable, resists fingerprints | Can be expensive, requires regular cleaning |
| Gray | Matte | Neutral, versatile, complements many styles | Can appear bland if not paired with other colors |
| Navy Blue | Gloss | Bold, sophisticated, adds a pop of color | Can be overwhelming in a small kitchen |
Preparation and Materials
Preparing your kitchen appliances for a fresh coat of paint is crucial for achieving a smooth, durable, and long-lasting finish. This involves a thorough cleaning, proper sanding, and careful masking to ensure the paint adheres properly and provides a professional look.
Cleaning the Appliances
Before you begin the recoloring process, it’s essential to thoroughly clean your appliances. This removes any grease, grime, or residue that might interfere with the paint’s adhesion.
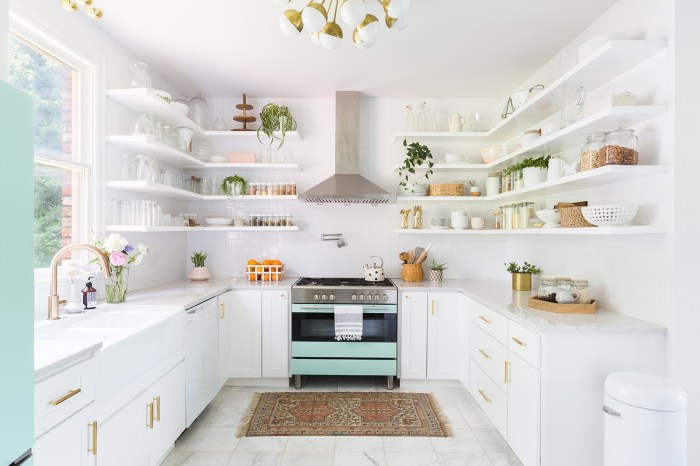
Recoloring my kitchen appliances was a fun DIY project that really transformed the space. I was inspired by the cozy and stylish kitchen featured in at home with rachel denbow , which showcased a similar color palette. The result?
A bright and inviting kitchen that I absolutely love!
- Use a degreaser:Start by using a strong degreaser to remove any stubborn grease or oil buildup. Apply the degreaser according to the manufacturer’s instructions and ensure it’s safe for your appliance’s material.
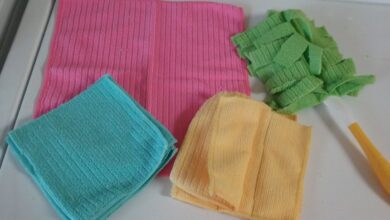
- Scrub with a non-abrasive sponge:Use a non-abrasive sponge to scrub the appliance’s surface thoroughly. Avoid using abrasive cleaners or scouring pads, as they can damage the surface and create imperfections.
- Rinse and dry:Rinse the appliance thoroughly with clean water and dry it completely with a clean cloth. This ensures that no residue remains on the surface before you proceed to the next step.
Sanding the Appliances
Sanding the appliances is crucial for creating a smooth surface that promotes better paint adhesion. It also helps to remove any imperfections or unevenness.
Recoloring my kitchen appliances was a fun DIY project that took a bit of trial and error. I wanted to create a cohesive look that felt fresh and modern, and I was inspired by the “sister style” concept – sister style i did my best – to embrace imperfections and make it my own.
The final result was a little quirky, but it perfectly reflects my personality and the unique character of my kitchen.
- Use fine-grit sandpaper:Start with a fine-grit sandpaper (220-grit or higher) to smooth out any minor imperfections. Sand in a circular motion, applying light pressure to avoid damaging the surface.
- Focus on rough areas:Pay special attention to any areas with scratches, dents, or rough spots. Sand these areas until they are smooth and level with the rest of the surface.
- Clean after sanding:After sanding, use a damp cloth to wipe away any dust or debris. Ensure the surface is completely dry before proceeding to the next step.
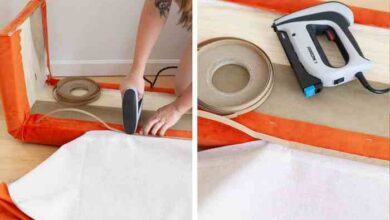
Masking the Appliances
Masking is essential for protecting areas you don’t want to paint. This ensures a clean and professional look.
- Use painter’s tape:Apply painter’s tape to the areas you want to protect, such as handles, knobs, or surrounding surfaces. Ensure the tape is pressed firmly to prevent paint from seeping underneath.
- Cover delicate areas:Use plastic sheeting or drop cloths to cover any delicate surfaces, such as countertops or floors, to prevent paint splatters.
- Use masking paper:If you’re painting a large area, use masking paper to protect the surrounding areas. This helps to ensure a clean and professional finish.
Essential Materials for Recoloring
- Paint:Choose a paint specifically designed for appliances. Look for a durable, high-quality enamel paint that provides a smooth and long-lasting finish.
- Primer:Use a primer specifically designed for appliances to enhance paint adhesion and provide a smooth, even surface.
- Brushes:Select high-quality brushes suitable for the type of paint you’re using. Ensure the bristles are soft and durable for a smooth application.
- Sandpaper:Use fine-grit sandpaper (220-grit or higher) for smoothing the appliance surface and preparing it for painting.
- Painter’s tape:Use painter’s tape to mask off areas you don’t want to paint, ensuring a clean and professional finish.
- Protective gear:Wear gloves, a mask, and eye protection to protect yourself from paint fumes and splatters.
Visual Guide
Imagine a step-by-step illustration depicting the preparation process.
- Step 1: Cleaning– A picture of a person cleaning an appliance with a degreaser and a non-abrasive sponge.
- Step 2: Sanding– A picture of a person sanding an appliance with fine-grit sandpaper.
- Step 3: Masking– A picture of a person applying painter’s tape to an appliance and covering the surrounding areas with plastic sheeting.
Recoloring Techniques

Recoloring your kitchen appliances can be a fun and rewarding project, but choosing the right technique is crucial for achieving a durable and professional-looking finish. There are several options available, each with its own advantages and disadvantages.
Spray Painting
Spray painting is a popular technique for recoloring appliances due to its speed and ease of application. It’s ideal for large surfaces, allowing for a smooth and even finish. However, it requires a well-ventilated space and proper safety precautions, including wearing a respirator mask and protective gear.
- Advantages:
- Fast and efficient application
- Creates a smooth and even finish
- Wide range of colors and finishes available
- Disadvantages:
- Requires a well-ventilated space
- Can be messy if not done carefully
- Requires proper safety precautions
Brush Painting
Brush painting is a more traditional technique that offers greater control over the application process. It’s ideal for smaller appliances or areas with intricate details, as it allows for precise application and avoids overspray. However, it requires more time and effort to achieve a smooth and even finish.
- Advantages:
- Provides greater control over application
- Suitable for smaller appliances or intricate details
- Can be used in confined spaces
- Disadvantages:
- Requires more time and effort
- Can be challenging to achieve a smooth and even finish
- May require multiple coats for full coverage
Specialized Appliance Paint
Specialized appliance paint is specifically formulated for use on appliances, offering superior durability and resistance to heat, moisture, and scratches. It’s often available in a variety of colors and finishes, including enamel, epoxy, and high-gloss options. However, it can be more expensive than standard paint and may require specialized application techniques.
- Advantages:
- Provides superior durability and resistance
- Available in a variety of colors and finishes
- Specifically designed for appliances
- Disadvantages:
- Can be more expensive than standard paint
- May require specialized application techniques
- Limited availability in some regions
Tips for a Professional Finish
Regardless of the technique chosen, there are several tips to ensure a professional-looking finish:
- Prepare the surface thoroughly:Clean the appliance surface with a degreaser and sand it lightly to create a smooth and even surface for paint adhesion.
- Apply multiple thin coats:Applying multiple thin coats is better than one thick coat, as it allows for better coverage and avoids drips and runs.
- Allow for proper drying time:Ensure each coat dries completely before applying the next. This prevents the paint from becoming tacky or uneven.
- Use a sealant:Applying a sealant after the final coat protects the paint from scratches, chips, and fading. It also adds a layer of protection and enhances the overall finish.
Maintaining the Recolored Appliances
You’ve successfully transformed your outdated kitchen appliances with a fresh coat of color, and now it’s time to ensure your hard work lasts. Proper maintenance is key to preserving the beauty and longevity of your recoloring project. Here’s a guide to help you keep your appliances looking their best.
Cleaning Methods
Cleaning your recoloured appliances is crucial to maintain their appearance and protect the finish. While a simple wipe-down with a damp cloth is often sufficient for everyday cleaning, certain techniques are recommended for deeper cleaning and stain removal.
- Mild Detergent and Water:For regular cleaning, a solution of mild dish soap and warm water is usually sufficient. Avoid harsh chemicals that can damage the finish.
- Baking Soda Paste:For tougher stains or grease, a paste of baking soda and water can be effective. Apply the paste gently with a soft cloth, then rinse thoroughly with water.
- White Vinegar:White vinegar can help remove mineral deposits and hard water stains. Dilute it with water (1:1 ratio) and apply it to the affected area with a soft cloth. Rinse thoroughly after cleaning.
Avoiding Harsh Chemicals
Certain chemicals can damage the finish of your recoloured appliances, leading to discoloration, fading, or even peeling. It’s crucial to avoid using the following on your appliances:
- Abrasive Cleaners:Avoid using abrasive cleaners, such as scouring powders, as they can scratch the surface. These cleaners are often used for tough stains on pots and pans but should not be used on your appliances.
- Bleach:Bleach can cause discoloration and damage to the paint finish. It is best to use alternative cleaning solutions for stain removal.
- Ammonia-Based Cleaners:Ammonia-based cleaners can also damage the paint finish and should be avoided.
Protecting the Finish from Scratches
Scratches can mar the appearance of your recoloured appliances, so taking precautions to protect the finish is important.
- Use Soft Cleaning Tools:Always use soft cloths or sponges when cleaning your appliances. Avoid using abrasive materials like steel wool or scouring pads, as these can scratch the paint.
- Handle with Care:When moving or handling your appliances, be careful not to bump them against sharp edges or hard surfaces. Handle them with care to avoid scratches or dents.
- Protective Covers:Consider using protective covers or appliance wraps to shield the finish from scratches and dust when not in use. This is particularly useful for appliances that are frequently used or exposed to harsh conditions.
Expected Lifespan of the Recoloring Job
The lifespan of a recoloring job can vary depending on several factors, including the quality of the paint used, the preparation of the appliance surface, and the level of care and maintenance provided.
- High-Quality Paint:Using high-quality, durable paint specifically designed for appliances can significantly extend the lifespan of the recoloring job. Choose paint with a durable finish that can withstand heat and moisture. Look for paints labeled as “appliance enamel” or “high-gloss enamel” for optimal durability.
- Proper Preparation:Thoroughly preparing the appliance surface before applying paint is crucial. This includes cleaning, sanding, and priming to ensure a smooth and even surface for the paint to adhere to. Proper preparation helps prevent peeling or chipping of the paint over time.
- Maintenance:Regular cleaning and care can significantly impact the lifespan of the recoloring job. Following the cleaning and protection tips Artikeld above will help maintain the finish and prevent premature wear and tear.
Touching Up the Recoloring, How i recolored my kitchen appliances
Even with careful maintenance, minor scratches or chips may appear on the recoloured surface over time. Touch-up paint is available to help you restore the appearance of your appliances.
- Use the Original Paint:If possible, use the same paint that was used for the initial recoloring job. This ensures a perfect color match and a consistent finish.
- Prepare the Surface:Clean the area to be touched up with a mild detergent and water. If necessary, lightly sand the area to create a smooth surface for the paint to adhere to.
- Apply Thin Coats:Apply thin coats of touch-up paint, allowing each coat to dry completely before applying the next. Multiple thin coats are better than one thick coat, as they will provide a smoother and more durable finish.