
How to Bleach Pinecones: A Comprehensive Guide for Crafts and Decor
Bleaching pinecones offers a versatile and aesthetically pleasing way to prepare them for a multitude of craft projects and decorative arrangements. The process, while seemingly simple, involves understanding the right materials, techniques, and safety precautions to achieve desired results without damaging the pinecones or creating hazardous conditions. This guide delves into the intricate details of bleaching pinecones, covering everything from selecting the ideal specimens to various bleaching agents, application methods, and post-bleaching care. The objective is to provide a thorough understanding that empowers crafters and DIY enthusiasts to successfully transform natural pinecones into a light, airy, and uniform decorative element.
The initial step in the pinecone bleaching process is the selection of suitable pinecones. Not all pinecones are created equal, and choosing the right ones will significantly impact the final outcome. Opt for mature, dry pinecones that are fully open or have begun to open. Closed or green pinecones are less likely to bleach effectively and may retain moisture, leading to mold or decay during the process. Inspect pinecones for any signs of damage, insect infestation, or mold. These should be discarded as they will not only compromise the bleaching but could also introduce unwanted issues into your craft space. Cones from pine trees are generally a good choice, but varieties like Ponderosa, Douglas Fir, and Lodgepole pine often yield attractive shapes and sizes. It’s also beneficial to collect a few more than you think you’ll need, as some may not bleach as well as others or might break during handling.
Before embarking on the bleaching itself, thorough cleaning and preparation of the pinecones are paramount. This initial cleaning removes dirt, debris, sap, and any lingering organic matter that could interfere with the bleaching process or cause discoloration. A gentle brushing with a stiff-bristled brush or a scrub brush can dislodge loose dirt. For more stubborn grime or sap, submerging the pinecones in warm, soapy water for a period of 15-30 minutes can be effective. A mild dish soap is sufficient; avoid harsh detergents. After soaking, rinse the pinecones thoroughly under running water to remove all soap residue. Following the cleaning, it is crucial to ensure the pinecones are completely dry before proceeding to the bleaching stage. Spreading them out on a baking sheet or on towels in a well-ventilated area and allowing them to air dry for at least 24-48 hours is recommended. Alternatively, a low-temperature setting in a conventional oven (around 170-200°F or 75-95°C) can expedite the drying process, but requires constant monitoring to prevent scorching. This drying phase is critical for ensuring even bleaching and preventing potential issues like mold growth in the subsequent steps.
The most common and effective bleaching agent for pinecones is bleach, specifically household bleach containing sodium hypochlorite. However, other alternatives exist, each with its own set of advantages and disadvantages. Hydrogen peroxide, particularly in higher concentrations (3% or more), can also be used for bleaching, offering a slightly gentler approach but often requiring longer soaking times for comparable results. Another option, though less common for pinecones due to its corrosive nature and potential for damage, is chlorine dioxide. For a more natural approach, sun bleaching is possible, where pinecones are left exposed to direct sunlight for extended periods, especially in hot, arid climates. This method is slow and results can be inconsistent, but it avoids the use of chemicals. For the purpose of this comprehensive guide, we will focus on the most prevalent and effective methods: household bleach and hydrogen peroxide. When using any bleaching agent, it is imperative to work in a well-ventilated area, wear protective gloves and eyewear, and avoid prolonged skin contact.
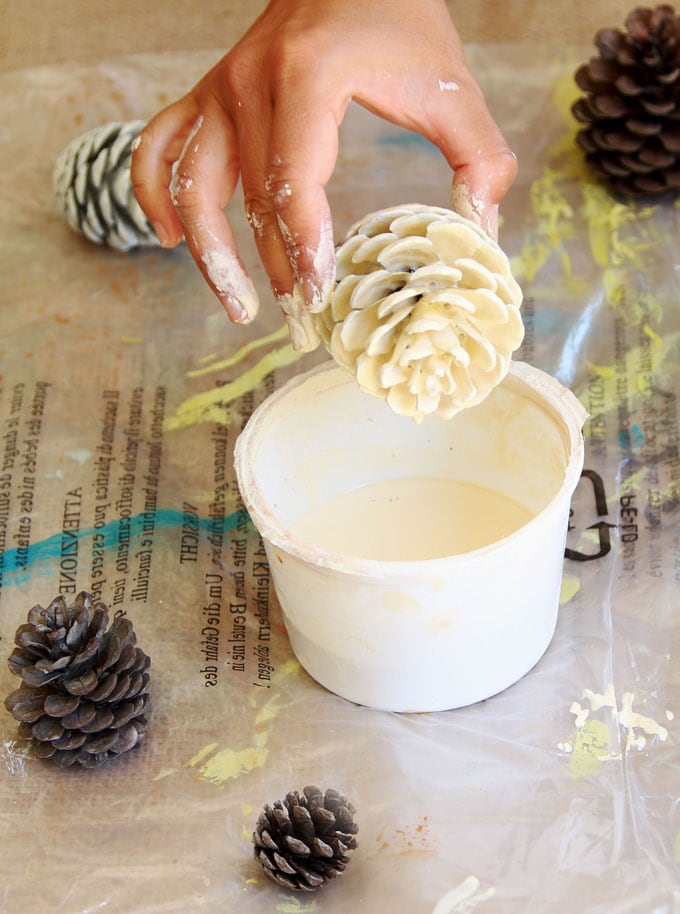
Utilizing household bleach for bleaching pinecones is a widely adopted method due to its accessibility and efficacy. The standard concentration of household bleach (typically 5.25% sodium hypochlorite) is generally sufficient for achieving a pale, uniform color. The ratio of bleach to water is a key factor in determining the speed and intensity of the bleaching process. A common starting point is a 1:1 ratio of bleach to water. This means for every cup of bleach, an equal amount of water is added. For a stronger bleaching effect, a higher concentration of bleach can be used, but this also increases the risk of damaging the pinecones. Conversely, a more diluted solution will require longer soaking times. Ensure the container used for the bleach solution is made of a material resistant to bleach, such as plastic or glass. Avoid metal containers, as bleach can corrode them. The pinecones should be fully submerged in the bleach solution to ensure even bleaching.
The immersion time for pinecones in bleach solution varies significantly based on several factors: the concentration of the bleach solution, the type and size of the pinecones, and the desired level of paleness. Generally, pinecones bleached in a 1:1 bleach-to-water solution can take anywhere from a few hours to overnight. It is advisable to check the pinecones periodically, perhaps every hour or two, to monitor their progress. As they lighten, remove them from the solution and rinse them thoroughly. For a more intense bleaching effect, you can leave them submerged for up to 24 hours, but again, constant monitoring is recommended. If the pinecones start to appear brittle or fragile, it’s a sign they have been bleached for too long. Always err on the side of caution and remove them as soon as they reach your desired shade of white or cream.
After the bleaching process, thorough rinsing is a critical step to remove all residual bleach. Inadequate rinsing can lead to continued bleaching, discoloration, or a lingering bleach odor that might be undesirable for certain craft applications. Place the bleached pinecones in a sink or large bucket and rinse them under cool running water for several minutes. Gently agitate them to ensure the water reaches all nooks and crannies. You might need to rinse them multiple times to be absolutely sure all traces of bleach have been eliminated. Following the rinsing, it is essential to dry the pinecones completely. Similar to the pre-bleaching drying process, spreading them out on a clean surface, such as towels or a baking sheet, in a well-ventilated area is the most effective method. Sunlight can aid in the drying process and also contribute to further lightening, if desired. Patience is key here; ensuring complete dryness will prevent mold and preserve the integrity of the bleached pinecones for your crafting endeavors.
Using hydrogen peroxide as an alternative bleaching agent offers a slightly different approach. Hydrogen peroxide, particularly the 3% concentration commonly found in drugstores, is a less harsh chemical than household bleach. However, it generally requires longer soaking times to achieve similar results. For bleaching pinecones with hydrogen peroxide, it is best to use it undiluted or with a very minimal amount of water. Submerge the cleaned and dried pinecones in a container filled with 3% hydrogen peroxide. The time required can range from 24 hours to several days. It’s important to check the pinecones regularly to gauge their progress. The advantage of hydrogen peroxide is that it breaks down into water and oxygen, making it a more environmentally friendly option and potentially less damaging to the pinecones than bleach. As with bleach, ensure the pinecones are fully submerged.
Similar to the household bleach method, thorough rinsing after bleaching with hydrogen peroxide is crucial. Even though hydrogen peroxide breaks down into water and oxygen, it’s still good practice to remove any excess liquid and potential residue. Rinse the pinecones under cool running water until you are confident that all the peroxide has been washed away. Then, proceed with the drying process as described previously, ensuring they are completely dry before use.
Whether you use household bleach or hydrogen peroxide, post-bleaching treatments can enhance the final appearance and durability of your pinecones. Sealing the pinecones can help to preserve their bleached color and prevent them from becoming brittle or deteriorating over time. A clear acrylic sealant, Mod Podge, or even a spray varnish can be applied. Apply the sealant in thin, even coats, allowing each coat to dry completely before applying the next. This step also adds a slight sheen to the pinecones, which can be desirable for certain decorative purposes. Additionally, if you wish to add a touch of color or shimmer to your bleached pinecones, this is the stage to do so. Glitter, spray paint, or chalk paint can be applied after the sealant has dried, creating unique and personalized craft embellishments.
Safety is paramount throughout the entire pinecone bleaching process. Always work in a well-ventilated area, such as outdoors or near an open window, to minimize inhalation of fumes from the bleaching agents. Wear chemical-resistant gloves to protect your skin from irritation and burns. Safety glasses or goggles are essential to prevent accidental splashes from reaching your eyes. If you are using a stronger concentration of bleach or hydrogen peroxide, or if you have sensitive skin or respiratory issues, consider wearing a mask. Store bleaching agents safely, out of reach of children and pets, and dispose of used bleach solutions responsibly according to local regulations. Never mix bleach with other cleaning products, as this can create toxic fumes.
Beyond the basic bleaching techniques, there are several advanced tips and tricks that can elevate your pinecone crafting. For a more rustic or antique look, consider a partial bleach. This involves submerging only a portion of the pinecone or applying the bleach solution with a brush, creating a gradient effect. Experimenting with different soaking times in diluted bleach solutions can also yield a range of pale hues, from off-white to a creamy beige. For a completely uniform color, especially on pinecones with varied natural pigmentation, you might need to repeat the bleaching process or use a stronger solution, always with caution. If your pinecones have very stubborn sap or dark spots, pre-treating these areas with a concentrated bleach solution applied with a cotton swab can be effective. Ensure to rinse these specific areas thoroughly after treatment.
The applications for bleached pinecones are vast and varied. They serve as beautiful natural accents in floral arrangements, wreaths, and centerpieces. Their light color makes them ideal for holiday decorations, particularly for winter and Christmas themes, where they can be combined with evergreen branches, ornaments, and fairy lights. In crafting, bleached pinecones can be incorporated into garlands, painted and hung as ornaments, or used as filler in decorative bowls. Their neutral tone also makes them an excellent base for adding other embellishments, such as ribbons, beads, or small figurines. They can even be used in DIY potpourri or incorporated into handmade soaps and candles for a natural, textural element. The key is to consider the overall aesthetic and the desired mood when integrating them into your projects.
The process of bleaching pinecones, while chemical in nature, can also be seen as a way of revealing a hidden beauty within these natural objects. By stripping away their natural pigments, a blank canvas is created, allowing for a multitude of creative transformations. Understanding the nuances of selection, preparation, bleaching agents, application, and post-treatment care is crucial for achieving successful and aesthetically pleasing results. Safety should always be the top priority, ensuring a safe and enjoyable crafting experience. With this comprehensive guide, crafters and decorators can confidently embark on the journey of transforming ordinary pinecones into extraordinary decorative elements.
