
Sew Your Own Sleeping Bag: A Comprehensive DIY Guide
Creating a custom sleeping bag offers unparalleled advantages, from tailoring it precisely to your body and anticipated conditions to saving significant costs compared to high-end retail options. This detailed guide walks you through the entire process, from material selection and design considerations to the step-by-step sewing instructions, empowering you to craft a functional and durable sleeping bag for your next outdoor adventure.
Understanding Sleeping Bag Components and Design
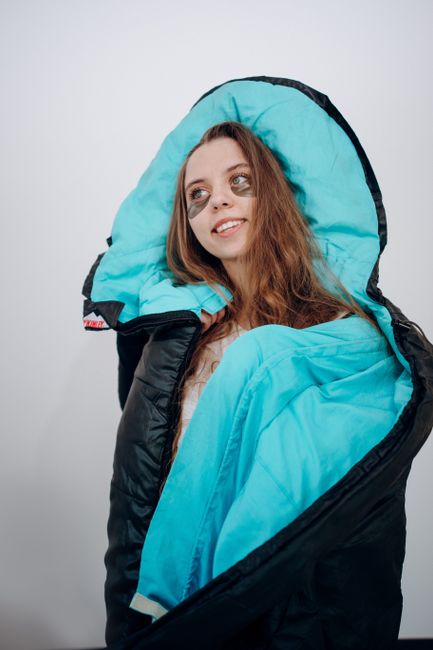
A sleeping bag primarily consists of three key components: the shell, the insulation, and the lining. The shell is the outer fabric, designed for durability and water resistance. The insulation is the core element responsible for trapping body heat and providing warmth. The lining is the inner fabric, which should be comfortable against the skin. Beyond these components, several design aspects influence a sleeping bag’s performance: shape, temperature rating, and features like hoods and draft tubes.
Choosing the Right Materials
Material selection is paramount for a successful DIY sleeping bag. The shell fabric should strike a balance between durability, weight, and water repellency. Ripstop nylon or polyester are excellent choices. Ripstop weaves incorporate reinforced threads that prevent small tears from spreading. Look for fabrics with a denier rating (e.g., 40D, 70D) that indicates thread thickness and thus durability; higher denier means stronger but heavier. A Durable Water Repellent (DWR) finish on the shell fabric is highly beneficial for shedding light moisture. For milder conditions or as a budget-friendly option, tightly woven cotton canvas can also be used, though it’s heavier and less water-resistant.
The insulation is the most critical factor for warmth. The two primary types are down and synthetic. Down insulation (duck or goose) offers superior warmth-to-weight ratio, compressibility, and loft. Its effectiveness is measured by fill power (e.g., 600, 800). Higher fill power indicates better loft and insulation. Down is expensive and loses its insulating properties when wet. If choosing down, consider treated hydrophobic down, which resists moisture better. Synthetic insulation (e.g., polyester fill, PrimaLoft) is more affordable, retains its loft when wet, and dries faster. However, it’s generally heavier and less compressible than down for equivalent warmth. Common synthetic insulations are available in various weights (grams per square meter) and can be layered or used in sheets. For beginner sewers, synthetic insulation in sheet form is often easier to handle.
The lining fabric should be soft, breathable, and comfortable against the skin. Nylon taffeta, polyester silk, or a light cotton blend are suitable. Ensure the lining fabric doesn’t trap moisture and allows for good breathability.
Determining Sleeping Bag Shape and Size
The most common sleeping bag shapes are:
- Mummy: Tapered from shoulders to feet, with a fitted hood. Offers maximum warmth by minimizing dead air space and preventing drafts. Ideal for cold weather and backpacking.
- Rectangular: Straight sides, offering more room and versatility. Can often be unzipped to form a blanket. Less thermally efficient for cold weather due to larger air volume.
- Semi-rectangular (or barrel): A compromise between mummy and rectangular, offering a bit more room than a mummy while still being relatively efficient.
For your DIY project, a mummy shape is recommended for optimal warmth. You’ll need to determine your dimensions:
- Length: Your height plus a few inches for comfort.
- Shoulder width: Your natural shoulder width plus 6-10 inches for ease of movement.
- Foot box width: Approximately 18-20 inches for adequate foot room.
Consider the temperature rating you need. This is influenced by the type and amount of insulation. Research common fill powers or insulation weights for your desired temperature range (e.g., 0°C, -10°C, -20°C). For a general-purpose bag, a rating of around -5°C to 0°C (20-30°F) is a good starting point.
Essential Tools and Notions
Beyond fabric and insulation, you’ll need:
- Sewing Machine: A robust machine capable of handling multiple layers of fabric and insulation.
- Heavy-Duty Needles: Size 14 or 16 denim or upholstery needles are recommended for tougher fabrics.
- Strong Thread: Polyester or nylon thread is ideal for durability. Gutermann Mara 30 or similar is a good choice.
- Sharp Scissors or Rotary Cutter and Mat: For precise fabric cutting.
- Measuring Tape and Ruler: For accurate measurements.
- Fabric Marker or Chalk: For marking cutting lines.
- Pins or Wonder Clips: To hold fabric layers together. Wonder clips are excellent for thick layers.
- Zipper: A robust, separating zipper of sufficient length to go down the side and across the foot. A #8 coil zipper is a good choice. Consider a two-way zipper for ventilation.
- Webbing: For zipper stops and potentially for a draft tube.
- Drawcord and Cord Locks: For the hood cinch.
- Optional: A walking foot for your sewing machine can significantly improve feeding multiple layers of fabric and insulation evenly.
Pattern Making and Cutting
You can adapt an existing sleeping bag pattern or create your own. To create your own mummy bag pattern:
- Measure and Mark: Lay out your desired outer shell fabric and lining fabric flat.
- Draft the Main Body: For the mummy shape, you’ll essentially be creating two tapered panels: one for the top and one for the bottom.
- Top Panel (Shell and Lining): Mark your desired length and shoulder width. Then, taper down to the foot box width at the bottom. Add seam allowances (typically 1/2 inch or 1.5 cm) to all edges.
- Bottom Panel (Shell and Lining): This is a mirror image of the top panel.
- Draft the Foot Box: This can be a simple rectangular section to attach to the bottom of the main panels or a more integrated trapezoidal shape that tapers from the main body to the foot. For a mummy bag, a slightly more structured foot box is beneficial. Consider creating a separate, roughly cubical foot box piece and then attaching it.
- Draft the Hood: This is typically a semi-circular or U-shaped piece that attaches to the top opening of the sleeping bag. Again, add seam allowances.
- Consider Baffles (Optional but Recommended for Down): If using down, baffles are crucial to keep the down evenly distributed and prevent cold spots. Baffles are internal fabric walls that create chambers for the down. They can be sewn as vertical or horizontal channels. For synthetic insulation, baffles are less critical, and the insulation can often be quilted directly to the shell and lining. For a simpler DIY, you might opt for quilting the synthetic insulation to the shell and lining instead of creating separate baffles.
- Cut the Fabric: Carefully cut out all pattern pieces, paying close attention to the grainline if applicable. Cut two of each main body panel (one for shell, one for lining) and the corresponding hood pieces.
Step-by-Step Sewing Instructions
This process assumes a mummy-shaped bag with synthetic insulation sandwiched between the shell and lining, and a zipper along one side.
-
Prepare Insulation (If using sheets): If using a sheet of synthetic insulation, you’ll typically want to attach it to the lining fabric first. Lay your lining fabric flat, right side up. Place the insulation on top, ensuring it covers the entire piece. You can then lightly baste or quilt the insulation to the lining to keep it from shifting. Quilt in channels or a grid pattern, roughly every 6-12 inches, to create baffles and prevent the insulation from clumping. Use a walking foot if you have one.
-
Sew the Main Body Panels:
- Shell: Place the two shell main body panels right sides together. Sew along the side seams and the foot seam, leaving the top opening and the zipper edge open. If you created a separate foot box, attach it now, sewing it to the bottom edges of the main panels.
- Lining (with Insulation attached): Repeat the process for the lining panels. Sew side seams and foot seam. Attach the foot box if applicable.
-
Attach the Zipper:
- Prepare the Zipper Edge: Decide which side will have the zipper. Open up the shell and lining along this edge. You may need to trim any excess insulation that interferes with the zipper.
- Install the Zipper: This is a critical step. Lay the shell fabric right side up. Place the zipper face down along the edge, aligning its teeth with the edge of the fabric. Pin or clip securely. Then, place the lining fabric right side down on top of the zipper, aligning its edge with the other side of the zipper tape. Baste or carefully sew the zipper in place, using a zipper foot on your sewing machine. Ensure the zipper tape is caught evenly in the seam. You’ll be sewing a seam along both sides of the zipper tape, attaching it to both the shell and the lining. This can be tricky with multiple layers. Work slowly and ensure the zipper is not puckered. If using a separating zipper, ensure it’s fully closed before sewing.
-
Sew the Hood:
- Attach Hood to Shell: Lay the shell right side up. Align the raw edge of the hood piece(s) with the top opening of the shell. Pin or clip. Sew the hood to the shell.
- Attach Hood to Lining: Repeat the process for the lining and its hood piece.
- Join Hood and Shell/Lining: Now, you need to join the hood to the main body panels. Align the edges of the shell/hood unit with the lining/hood unit, right sides together. Sew around the entire perimeter of the hood, joining it to the main bag body on both the shell and lining sides.
-
Sew the Top Opening:
- With the bag right side out, you’ll have an open top where the hood is attached. Fold the raw edges of the shell and lining inward, and sew them together to create a clean finish around the neck opening. This might involve folding the shell edge over the lining edge and stitching, or a double-fold hem.
-
Finishing Touches:
- Drawcord and Cord Locks (for Hood): If you want a cinchable hood, create a casing around the hood opening by folding the fabric over twice and stitching, leaving a small opening to insert a drawcord. Thread your drawcord through the casing using a safety pin and secure it with cord locks.
- Draft Tube (Optional but Recommended for Cold Weather): A draft tube runs along the zipper to prevent heat loss. This is a long, narrow tube sewn to one or both sides of the zipper. It can be filled with a small amount of insulation or just be a pocket for down to settle into. For simpler synthetic bags, a wide sewn channel along the zipper can act as a draft tube.
- Reinforce Stress Points: Add extra stitching at stress points like the top and bottom of the zipper and where the hood attaches to the main body.
-
Turn Right Side Out and Inspect: Turn your sleeping bag right side out. Inspect all seams for strength and any missed stitches. Trim any excess threads.
Tips for Success and Advanced Considerations
- Practice on Scraps: Before cutting into your main fabrics, practice sewing techniques like installing the zipper and handling multiple layers on scrap pieces.
- Basting is Your Friend: For tricky areas, especially with insulation, basting stitches can help hold layers in place before permanent sewing.
- Quilting for Synthetic Insulation: Quilting the synthetic insulation directly to the shell and lining is a common and effective method for DIY bags. This creates channels for the insulation.
- Down vs. Synthetic for DIY: While down offers superior performance, it’s more challenging to work with for DIY projects due to its loft and tendency to shift. Synthetic insulation in sheet form is generally more beginner-friendly.
- Waterproofing: For shell fabrics, a DWR treatment is good for light rain. For truly waterproof capabilities, you’d need a more technical fabric and potentially seam sealing, which adds complexity.
- Bag Compression: Consider sewing a stuff sack or compression sack for your finished sleeping bag.
By following these comprehensive steps, you can successfully sew your own custom sleeping bag, achieving a personalized fit, appropriate warmth for your needs, and the satisfaction of a handmade piece of gear. This DIY project not only equips you for the outdoors but also represents a significant accomplishment in your sewing journey.
