Craft Your Signature Style: A Comprehensive Guide to DIY Fabric Belts
Creating your own fabric belts offers unparalleled creative freedom, allowing you to perfectly match any outfit, express your unique aesthetic, and even upcycle existing textiles. This comprehensive guide delves into the essential techniques, material considerations, and design possibilities for making your own fabric belts, empowering you to craft accessories that are both functional and fashion-forward. From simple no-sew options to more intricate, fully constructed belts, you’ll discover the steps to transform fabric scraps into statement pieces. The process begins with understanding the core components of a fabric belt: the fabric itself, the interfacing for structure, and the hardware for closure. Mastering these elements will unlock a world of personalized accessory design.
The foundational step in any DIY fabric belt project is material selection. The type of fabric you choose will significantly influence the belt’s drape, durability, and overall aesthetic. For a structured, professional-looking belt, consider using medium to heavy-weight cottons, canvas, denim, or even upholstery fabrics. These materials offer excellent stability and hold their shape well, especially when reinforced with interfacing. For a softer, more relaxed look, lighter fabrics like linen blends, silk, or even certain types of rayon can be employed, though they will likely require a sturdier interfacing to prevent excessive slouching. Upholstery remnants, quilting cottons, and even old jeans are excellent sources for durable and interesting fabric choices. Think about the texture and pattern of the fabric; a bold print can turn a simple belt into a focal point, while a subtle texture can add understated sophistication. If you’re aiming for a reversible belt, ensure the two chosen fabrics complement each other in terms of weight and drape. Consider the fraying tendencies of your chosen material. Some fabrics, like linen, fray more readily than others and may require specific finishing techniques to prevent excessive unraveling over time. For beginners, pre-washed quilting cottons are a reliable starting point due to their ease of handling and predictable behavior.
Interfacing is the unsung hero of fabric belt construction, providing crucial structure and preventing the belt from becoming flimsy or losing its shape. The weight and type of interfacing you select should correspond to the weight of your main fabric and the desired stiffness of the finished belt. For lighter fabrics, a lightweight fusible or sew-in interfacing might suffice. For heavier materials like canvas or denim, a medium to heavy-weight fusible interfacing will offer the necessary body. Fusible interfacing is applied by ironing it onto the wrong side of your fabric, creating a permanent bond. Sew-in interfacing, on the other hand, is stitched in place. The choice between fusible and sew-in often comes down to personal preference and the specific construction method. Fusible is generally quicker and easier for beginners, but sew-in can offer a more flexible drape in some cases. Always follow the manufacturer’s instructions for applying fusible interfacing, paying attention to temperature and pressing times. Test your chosen interfacing on a scrap piece of fabric to ensure it adheres properly and doesn’t alter the fabric’s color or texture negatively. For belts that need to withstand significant stress, consider using a double layer of interfacing or a specialized interfacing designed for straps and belts.
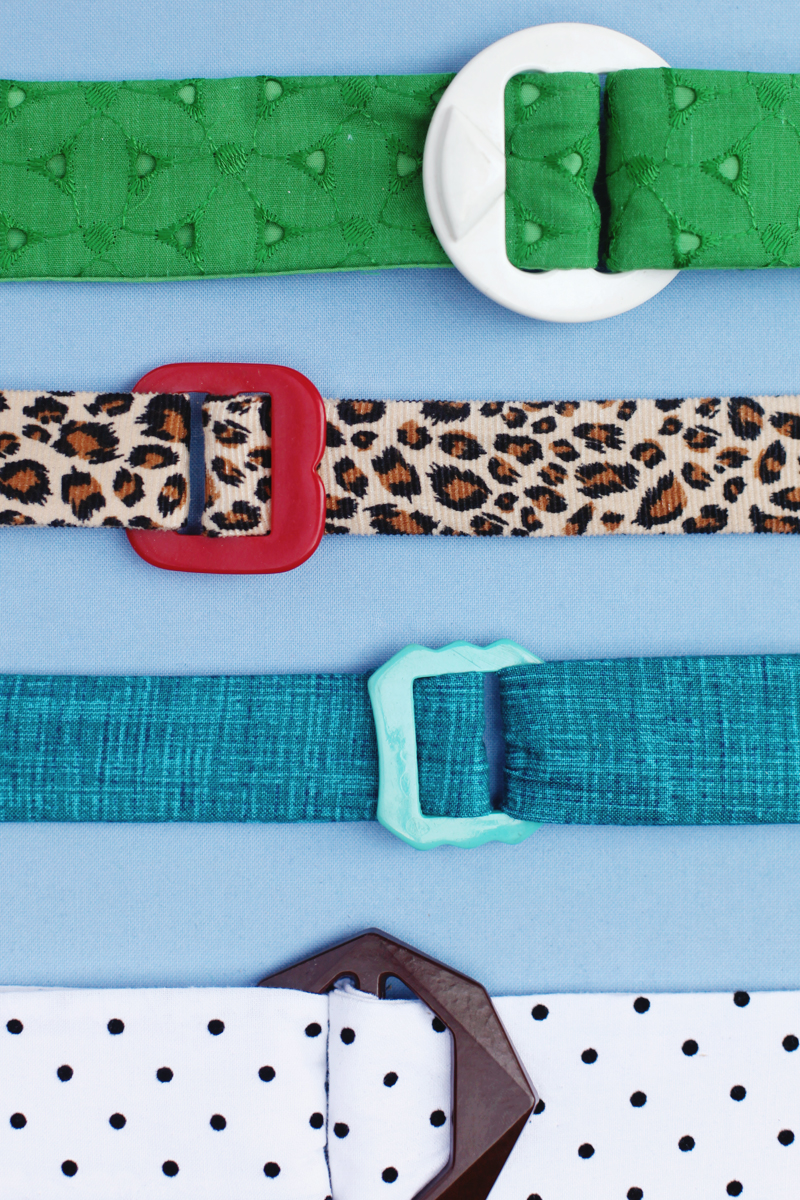
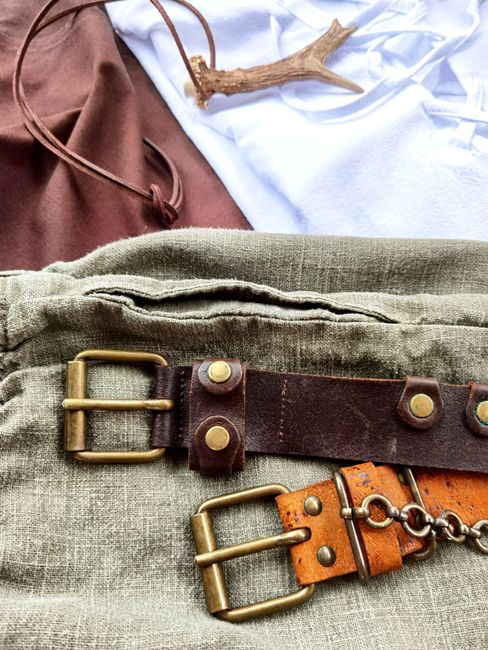
Hardware is another critical element that dictates both the functionality and the style of your fabric belt. The most common types of belt hardware include buckles, D-rings, and grommets. Buckles come in a vast array of styles, from simple utilitarian designs to ornate decorative pieces. Consider the size and proportion of the buckle in relation to the width of your belt. A very wide belt might overwhelm a tiny buckle, and vice versa. D-rings are often used in conjunction with a strap or slider to create an adjustable belt, offering a more casual and customizable fit. Grommets add a decorative and functional element, allowing for a pin-and-hole closure system, similar to traditional leather belts. When choosing hardware, pay attention to the finish. Common finishes include antique brass, silver, gold, and nickel. Select a finish that complements your fabric choices and overall wardrobe. Ensure the hardware is sturdy and well-made to withstand regular use. Purchasing hardware from specialized sewing or craft stores will guarantee better quality and a wider selection. Some hardware sets come with instructions on how to attach them, which can be very helpful.
Let’s delve into the construction techniques, starting with the simplest method: the no-sew fabric belt. This approach is ideal for those with limited sewing experience or for quick accessory upgrades. One popular no-sew method involves using fabric glue or strong double-sided fabric tape. You’ll need a strip of fabric cut to your desired length and width, plus seam allowances. Fold the raw edges inward twice to create a clean, finished edge, securing them with fabric glue or tape. For a more polished look, consider using a pinking shears to cut the fabric edges; this helps to minimize fraying. Another effective no-sew technique utilizes fusible web. Cut your fabric strip, apply fusible web to the wrong side, fold the edges inward, and press with an iron to fuse the layers together. For closure, you can attach a pre-made D-ring slider or use a fabric tab with a button. Alternatively, for a simpler knot closure, you can simply hem the ends of your fabric strip. This method is particularly suited for softer fabrics and creates a more bohemian or casual aesthetic. The key to a successful no-sew belt is precision in your folds and a high-quality adhesive or fusible web.
Moving to sewn fabric belt construction, this method offers greater durability and a more professional finish. We’ll explore the basic straight-stitch belt. Begin by cutting two identical fabric strips, each long enough to wrap around your waist with ample overlap for the buckle and closure, plus seam allowances. Cut your interfacing to the same dimensions as one of the fabric strips. Fuse or sew the interfacing to the wrong side of one fabric strip. Place the two fabric strips right sides together, aligning all edges. Stitch around the perimeter, leaving a small opening on one of the long sides for turning. Trim the corners to reduce bulk and turn the belt right side out through the opening. Carefully press the belt flat, ensuring the edges are crisp. Hand-stitch or machine-stitch the opening closed. For a sturdy belt, you can topstitch around the entire perimeter, about 1/8 to 1/4 inch from the edge. This topstitching not only adds a decorative element but also reinforces the belt’s structure.
To attach hardware to your sewn belt, the process will vary depending on the type of hardware. For a buckle with a prong, you’ll typically create a finished end on one side of the belt. Fold the raw edge of this end under twice to create a clean hem and stitch it in place. Then, thread the other end of the belt through the buckle, fold it back onto itself, and stitch securely to create the adjustable loop. For D-rings, you’ll create a loop at one end of the belt, stitch it securely, and then thread the other end of the belt through the D-rings. Grommets can be installed using a grommet setting tool, following the manufacturer’s instructions. This usually involves punching a hole in the fabric, inserting the grommet halves, and then crimping them together.
Beyond the basic straight-stitch belt, consider variations that enhance both style and functionality. A reversible fabric belt is a popular choice, offering two distinct looks in one accessory. To create a reversible belt, cut two identical fabric strips, each with interfacing applied to the wrong side of one of the strips. Place the two strips right sides together and stitch around, leaving an opening for turning. Press and topstitch as described previously. The beauty of a reversible belt lies in the ability to choose a different pattern or color for each side, maximizing its versatility. Another interesting option is a belt with a braided or woven element. This can be achieved by cutting multiple narrow strips of fabric and braiding or weaving them together before attaching them to a backing strip for stability. This technique results in a visually rich and textured belt.
Belt loops are an essential element for belts that will be worn with trousers or skirts that have built-in belt loops. To create belt loops, cut narrow strips of fabric, fold and press them to create clean edges, and then stitch them closed. You can then attach these loops to the belt at desired intervals using strong stitching. The size of the belt loop should be slightly larger than the width of the belt to allow for easy insertion. For a more decorative touch, consider using contrasting fabric for your belt loops.
Exploring different closure mechanisms can further personalize your fabric belts. Beyond buckles and D-rings, consider button and loop closures for a softer, more whimsical look. This involves sewing a fabric loop onto one end of the belt and attaching a button to the other. For a more substantial closure, you can explore snap fasteners or even magnetic clasps, though these might require additional reinforcement. Grommet and pin closures offer a classic, adjustable style, mimicking the look of traditional leather belts. The choice of closure will significantly impact the overall aesthetic and practicality of your DIY belt.
To elevate your fabric belt designs, consider incorporating embellishments. Appliqué, where fabric shapes are cut and stitched onto the belt, can add intricate details and visual interest. Embroidery, either by hand or machine, offers another avenue for personalization, allowing for custom monograms or decorative patterns. Beading and sequins can add a touch of glamour, transforming a simple belt into a statement piece. Fabric paints or dyes can also be used to create unique patterns or to alter the color of your fabric. When embellishing, ensure that the added elements do not compromise the belt’s comfort or durability. For example, overly bulky embellishments might create an uncomfortable bulge when the belt is worn.
For those seeking a quick and accessible project, the no-sew fabric belt using a fabric sash or scarf is an excellent starting point. Simply take a long, narrow scarf or sash, tie it around your waist, and let the ends hang or knot them creatively. This method requires no cutting, sewing, or hardware and is ideal for adding a pop of color or pattern to an outfit with minimal effort. The key here is the fabric choice of the sash; a silk scarf will offer a more elegant drape, while a woven cotton sash will provide a more casual feel.
When designing and constructing your fabric belts, pay attention to the finished width. A belt that is too narrow might not provide sufficient support or visual impact, while a belt that is excessively wide can be cumbersome. Standard belt widths typically range from 1 to 2 inches, but you can experiment with narrower or wider options depending on your desired look and the fabric you are using. For instance, a wider belt might be ideal for cinching an oversized dress, while a narrower belt could be perfect for adding a subtle detail to trousers.
The longevity of your DIY fabric belts will depend on the quality of materials used and the care they receive. When washing fabric belts, it’s best to hand wash them in cool water with a mild detergent, especially if they feature embellishments or hardware that could be damaged by machine washing. Allow them to air dry completely. For belts with fusible interfacing, avoid excessively high heat during ironing, as it can weaken the bond over time. Proper storage, such as hanging them or rolling them gently, will also help to maintain their shape and prevent creasing.
In conclusion, creating your own fabric belts is a rewarding and versatile DIY endeavor. By understanding the interplay of fabric, interfacing, and hardware, and by mastering various construction techniques, you can craft accessories that are not only stylish but also uniquely yours. Whether you opt for a quick no-sew project or a more involved sewn creation, the ability to personalize your style, upcycle materials, and express your creativity through fabric belts is an invaluable skill for any fashion-conscious individual. The possibilities for design are as boundless as your imagination, allowing you to tailor each belt to specific outfits, occasions, and personal preferences, ensuring you always have the perfect finishing touch.
