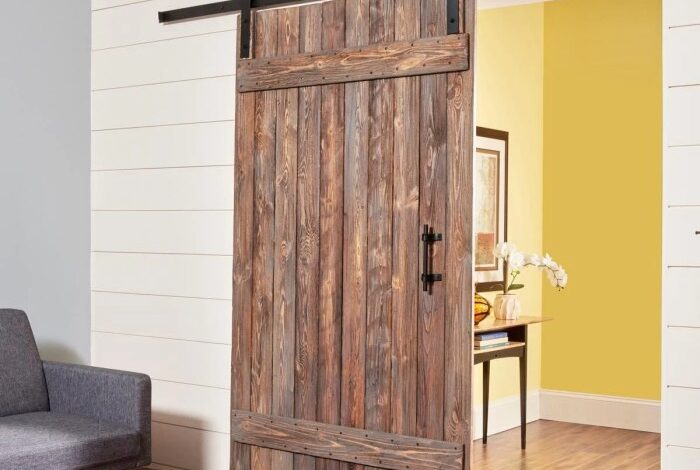
Modern barn door DIY is more than just a trend; it’s a statement. These doors, with their sleek lines and minimalist design, instantly elevate any space, adding a touch of industrial chic and functionality. They’re not just for rustic farmhouse kitchens anymore.
From contemporary living rooms to sleek bedrooms, modern barn doors offer a unique blend of style and practicality, seamlessly blending with a variety of interior design aesthetics.
Whether you’re looking to create a dramatic entryway, separate a workspace from a living area, or simply add a touch of personality to your home, a DIY barn door project can be an incredibly rewarding experience. This guide will take you through the entire process, from choosing the right materials and planning the design to the final installation and finishing touches.
Introduction to Modern Barn Doors
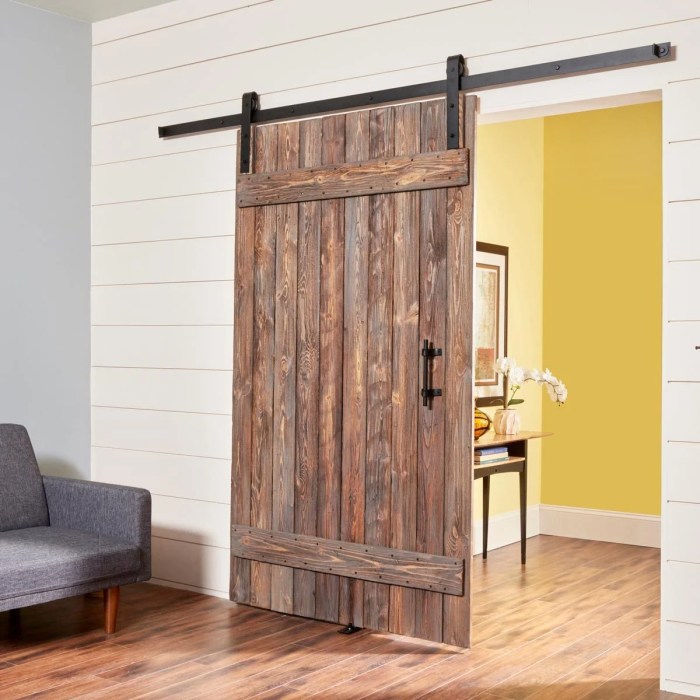
Modern barn doors have become a popular design element in contemporary homes, adding a touch of rustic charm and functionality to various spaces. They offer a unique blend of style and practicality, making them a versatile choice for homeowners seeking to enhance their interior design.
Benefits of Modern Barn Doors
Barn doors offer a range of benefits that make them a desirable choice for various rooms in the home.
- Space-Saving Solution:Barn doors slide along a track, eliminating the need for swinging doors that require additional space to open. This is particularly beneficial in smaller rooms or areas with limited floor space.
- Enhanced Aesthetics:Modern barn doors come in a variety of materials, finishes, and styles, allowing homeowners to seamlessly integrate them into their existing décor. They can add a touch of rustic charm to a modern space or create a contemporary feel in a traditional setting.
- Improved Functionality:Barn doors can be used to divide rooms, create a sense of privacy, or simply add a unique design element. They can also be used as closet doors, pantry doors, or even room dividers.
- Easy Installation:Barn doors are relatively easy to install, making them a DIY-friendly option for homeowners who want to add a touch of personality to their homes.
DIY Barn Door Essentials
A successful DIY barn door project relies on the right materials and tools. Choosing high-quality components ensures durability, aesthetics, and a smooth operation. Let’s delve into the essential elements for your barn door project.
Material Selection
The choice of materials significantly impacts the longevity and appearance of your barn door. Here’s a breakdown of crucial components and considerations:
Door Slab
- Wood:Pine, cedar, and oak are popular choices due to their affordability and durability. Pine is lightweight and budget-friendly, while cedar and oak offer greater strength and resistance to moisture.
- Reclaimed Wood:Adds a rustic charm and unique character to your barn door. However, ensure the wood is properly treated and stabilized to prevent warping or cracking.
- Metal:Steel and aluminum offer modern aesthetics and are robust, but they can be more expensive and require specific tools and techniques for fabrication.
Hardware
- Track System:The track guides the door’s movement and should be strong enough to support the weight of the door. Consider options like steel, aluminum, or even wooden tracks depending on the door’s weight and style.
- Rollers:These are essential for smooth operation. Choose rollers made of high-quality materials like nylon or steel with bearings for effortless movement.
- Handles and Pulls:Select handles and pulls that complement the door’s style and are comfortable to grip. Options range from rustic to modern, and materials include metal, wood, or leather.
- Hinges:If you are using a traditional barn door design with hinges, ensure they are heavy-duty and capable of supporting the door’s weight. Look for options made of steel or iron.
Tools
- Measuring Tape:Accurate measurements are crucial for ensuring proper fit and function.
- Level:Essential for installing the track and door straight.
- Circular Saw:For cutting the door slab to size.
- Drill:For drilling pilot holes and securing hardware.
- Screwdriver:For assembling the door and attaching hardware.
- Safety Glasses and Gloves:Always wear safety gear when working with power tools and sharp objects.
Sourcing Affordable Components
- Online Retailers:Offer a wide selection of barn door hardware and materials at competitive prices. Look for reputable retailers with good customer reviews.
- Local Lumber Yards:Can provide guidance on wood types and quality, and often offer competitive prices for materials.
- Second-hand Stores and Antique Shops:Great sources for finding unique and affordable reclaimed wood for your door.
Planning and Design Considerations

Before you dive into the exciting world of DIY barn doors, it’s essential to plan and consider several factors to ensure a successful and aesthetically pleasing outcome. These considerations will guide you in creating a barn door that perfectly complements your space and style.
Determining the Appropriate Size and Dimensions
The size and dimensions of your barn door are crucial for its functionality and visual appeal. You need to determine the door’s width, height, and weight, considering the opening it will cover and the weight-bearing capacity of the hardware.
Modern barn doors are a great way to add a touch of rustic charm to any room, but sometimes you need to get creative with the space around them. If you have a recessed wall niche near your door, you might want to consider filling it in for a more cohesive look.
Check out this helpful guide on how to fill in a recessed wall niche for some great tips and techniques. Once you’ve filled in the niche, you can paint it to match the rest of the wall, or even add a decorative accent to highlight the area around your stylish barn door.
- Measure the opening:Carefully measure the width and height of the opening where you plan to install the barn door. Add a few inches to the width for clearance and allow for any potential irregularities in the wall.
- Consider the door’s weight:The weight of the door will affect the type of hardware you need. A heavier door will require more robust rollers and a stronger track system.
- Think about the door’s functionality:If you want the door to slide fully open, ensure you have enough wall space on both sides of the opening.
Step-by-Step DIY Barn Door Construction
Now that you have your materials and design finalized, it’s time to get your hands dirty and start building your modern barn door. This section provides a detailed guide to constructing the door frame, attaching the panel, and installing the hardware.
Let’s dive into the process!
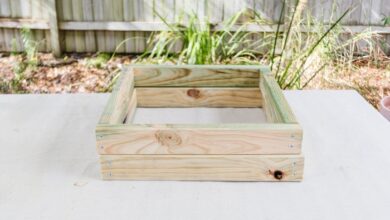
Constructing the Door Frame
The door frame forms the foundation of your barn door. It provides structural support and houses the panel. Building a sturdy frame ensures the door hangs straight and operates smoothly.
- Cut the frame pieces:Using your pre-measured dimensions, cut the four frame pieces from your lumber using a saw. Ensure accurate cuts for a perfect frame.
- Assemble the frame:Lay the frame pieces on a flat surface, forming a rectangle. Use wood glue and screws to join the pieces at the corners.
Modern barn door DIY projects are all the rage these days, offering a stylish and functional way to upgrade your home. While I was researching hardware options for my own barn door, I stumbled upon an interesting news article about Hydreight announcing a normal course issuer bid.
While not directly related to my barn door project, it reminded me of the importance of keeping up with financial news, especially when it comes to companies that could potentially impact the cost of materials or the availability of products.
Use a drill with a countersinking bit to create pilot holes for the screws to prevent wood splitting.
- Reinforce the frame:For added strength and stability, consider adding corner braces or wood cleats to the inside of the frame. These reinforcements will prevent the frame from warping or twisting over time.
- Sand and finish the frame:After assembly, sand the frame to remove any rough edges or imperfections. Apply a wood stain or paint to achieve your desired finish.
Attaching the Door Panel to the Frame
Once the frame is constructed, you need to attach the door panel to it. This step involves securing the panel to the frame while ensuring a flush fit.
- Position the panel:Place the door panel inside the frame, ensuring it’s centered and aligned with the edges.
- Pre-drill holes:Pre-drill pilot holes through the frame and into the panel to prevent splitting. These holes should be slightly smaller than the screws you’ll be using.
- Secure the panel:Use wood screws to attach the panel to the frame. Drive the screws through the pre-drilled holes, ensuring they are countersunk and flush with the surface.
- Check for flushness:After attaching the panel, ensure it sits flush with the frame. Make any necessary adjustments to ensure a smooth, even surface.
Installing the Hardware
The hardware includes the track, rollers, and handle, which are crucial for the functionality of your barn door. Proper installation ensures smooth operation and a secure hold.
- Install the track:Mount the track to the wall above the door opening, ensuring it’s level and securely fastened. Use a stud finder to locate wall studs for maximum support.
- Attach the rollers:Install the rollers to the top of the door frame. The rollers should slide smoothly along the track.
Modern barn door DIY projects are so versatile! I recently used one to create a fun, functional divider in my kiddo guest playroom update. It’s a great way to add a touch of farmhouse charm while creating a defined space for the kids to play.
- Install the handle:Attach the handle to the door panel, ensuring it’s positioned comfortably for use.
Finishing Touches and Customization: Modern Barn Door Diy
Now that your barn door is built, it’s time to add the finishing touches that will truly make it your own. This is where your creativity can shine, and you can personalize your barn door to perfectly complement your home’s style.
Finishing Options
The final finish of your barn door can significantly impact its overall appearance and durability. Here are some popular options:
- Painting: A simple and versatile option, painting allows you to match your barn door to your existing décor or create a bold statement. Choose a durable paint designed for interior or exterior use, depending on where your door will be installed.
Consider using a primer for better adhesion and coverage.
- Staining: Staining highlights the natural beauty of the wood grain, adding warmth and depth to your barn door. Choose a stain color that complements your home’s style. Remember to apply a sealant to protect the stain from fading and moisture.
- Protective Finishes: A clear finish, such as polyurethane or varnish, can protect your barn door from scratches, moisture, and UV damage. It can also enhance the natural beauty of the wood or create a glossy or matte effect.
Decorative Hardware and Accents
Hardware and accents play a crucial role in defining the style of your barn door.
- Handles and Pulls: Choose handles and pulls that complement the modern aesthetic of your barn door. Sleek, minimalist designs in metal finishes like brushed nickel, black, or brass are popular choices. You can even explore unique options like leather straps or rope handles.
- Hinges: While standard hinges can work, consider using decorative hinges that add visual interest. Black or brass hinges can add a touch of elegance. You can also find hinges with unique patterns or finishes.
- Accents: Consider adding accents like metal strips, decorative hardware, or even geometric shapes to enhance the modern feel of your barn door. These accents can be strategically placed to create visual interest and emphasize the door’s design.
Unique and Personalized Barn Doors
To create a truly unique barn door, consider these ideas:
- Incorporate Reclaimed Materials: Give your barn door a rustic charm by using reclaimed wood or salvaged materials. This can add character and a unique story to your door.
- Add a Statement Piece: Integrate a statement piece like a large mirror, a piece of art, or a decorative panel into the design of your barn door. This will create a focal point and make your door a conversation starter.
- Use Different Wood Species: Explore different wood species for a unique look. For example, you can create a contrasting effect by using a dark wood for the frame and a lighter wood for the panels.
Installation and Hanging the Barn Door
With your barn door constructed, the excitement builds as you prepare to install it and see it in action. This section will guide you through the process of installing the track and hanging the door, ensuring smooth operation and a stunning addition to your space.
Installing the Barn Door Track
Installing the track is the foundation of your barn door system. It determines the door’s movement and aesthetic. Here’s a step-by-step guide:
- Determine Track Placement:Decide on the track’s location, considering the door’s swing direction and clearance. Measure and mark the wall for track installation, ensuring levelness and proper alignment.
- Secure the Track Brackets:Use the provided brackets to secure the track to the wall. Pre-drill holes for easier installation and to prevent wood splitting. Use appropriate screws for your wall type, ensuring secure fastening.
- Install the Track:Slide the track onto the brackets, ensuring it’s level and aligned. Double-check the track’s alignment before permanently securing it to the brackets.
- Test and Adjust:Before hanging the door, test the track’s movement. Ensure it glides smoothly and without any binding or resistance. Make adjustments as needed to ensure proper operation.
Hanging the Barn Door, Modern barn door diy
With the track securely installed, you’re ready to hang the door. Here’s how to do it:
- Attach the Door Hangers:Install the door hangers to the top of the door. These hangers are typically adjustable, allowing you to fine-tune the door’s height and alignment.
- Attach the Door to the Track:Carefully lift the door and slide the hangers onto the track. Ensure the door is centered and hangs evenly.
- Test and Adjust:Once the door is hanging, test its movement. Ensure it glides smoothly and without any binding or resistance. Adjust the door hangers as needed to fine-tune its operation and alignment.
Troubleshooting Installation Issues
While installing the track and hanging the door, you might encounter some common issues. Here are some troubleshooting tips:
- Door Binding:If the door binds, check the track for any debris or obstructions. Ensure the track is level and aligned. Adjust the door hangers to ensure proper clearance and alignment.
- Uneven Hanging:If the door hangs unevenly, check the track for levelness and alignment. Ensure the door hangers are properly secured and adjusted.
- Noisy Operation:If the door makes noise during operation, check the track for any loose screws or brackets. Ensure the door hangers are properly lubricated.
Safety and Maintenance
Building a barn door is a rewarding DIY project, but it’s crucial to prioritize safety throughout the process. Proper maintenance ensures your door functions smoothly and remains aesthetically pleasing for years to come.
Safety Considerations
Safety is paramount when working with tools and materials. Always wear appropriate safety gear, including eye protection, gloves, and a dust mask. Here’s a list of safety precautions:
- Ensure the work area is well-lit and free of clutter.
- Use sturdy sawhorses or a workbench to support your materials while cutting.
- Always double-check measurements before cutting to avoid errors.
- Use clamps to secure materials during cutting and assembly.
- Use caution when handling power tools and always follow the manufacturer’s instructions.
- Never operate power tools while under the influence of alcohol or drugs.
- If you’re unsure about a step, consult a professional or refer to the manufacturer’s instructions.
Regular Maintenance
Regular maintenance keeps your barn door running smoothly and extends its lifespan.
- Inspect the hardware:Regularly check the rollers, track, and handles for signs of wear or damage. Replace worn-out parts promptly to prevent issues.
- Clean the track:Dust and debris can accumulate in the track, causing the door to bind. Clean the track regularly with a vacuum cleaner or a soft brush.
- Lubricate the rollers:Apply a light lubricant, like dry Teflon spray, to the rollers to ensure smooth operation.
- Tighten loose screws:Periodically check and tighten any loose screws on the door, hardware, and frame.
Preventing Common Problems
Following these tips can help prevent common problems:
- Proper installation:Ensure the track is level and securely attached to the wall or ceiling. This prevents misalignment and binding.
- Correct door weight:The rollers and track should be rated for the weight of the door. Overloading can cause premature wear and tear.
- Avoid harsh chemicals:Use mild cleaning solutions and avoid harsh chemicals that can damage the door’s finish.
- Protect from moisture:If your barn door is exposed to moisture, consider applying a sealant or water-resistant finish to protect it from damage.