Creating Colorful Wall Art with Foam: A Comprehensive Guide to Foam Art Techniques
Foam art offers a surprisingly versatile and accessible medium for crafting vibrant, dimensional, and eye-catching wall art. From humble craft foam sheets to thicker insulation foam boards, the possibilities are as broad as your imagination. This guide delves into various techniques for creating colorful foam wall art, focusing on methods that are both beginner-friendly and offer room for advanced exploration. We’ll cover material selection, cutting and shaping, adhesion, coloring techniques, and finishing touches, all geared towards producing stunning, SEO-friendly results that will elevate any living space.
Choosing the Right Foam for Your Art Project
The foundation of any successful foam art project lies in selecting the appropriate foam material. Craft foam sheets, commonly found in craft stores, are thin, flexible, and available in a vast array of colors. They are ideal for layering, intricate cutouts, and simple mosaic-style designs. For more dimensional pieces, consider thicker craft foam, often referred to as "craft foam planks" or "foam board." These thicker sheets allow for carving and sculpting. Expanding foam, typically used for insulation and gap-filling, can also be a dynamic medium for abstract, organic shapes when carefully managed and cut. Insulation foam boards, such as polystyrene or extruded polystyrene foam (XPS), offer a robust and rigid base for larger, more structural art pieces. These are often denser and can be carved, sanded, and glued with greater ease than softer foams. When selecting foam, consider the desired texture, thickness, flexibility, and whether you intend to carve, layer, or simply cut. The accessibility of these materials makes foam art a budget-friendly option for creating impactful décor.
Essential Tools and Techniques for Cutting and Shaping Foam
Precise cutting and shaping are fundamental to creating clean and professional-looking foam art. For thin craft foam sheets, sharp craft knives (like X-Acto blades), rotary cutters, and specialized craft punchers are excellent choices. For thicker craft foam or foam boards, a utility knife or a craft knife with a sturdy blade is necessary. For larger projects or intricate curves, a hot wire foam cutter is an invaluable tool. This device uses a heated wire to melt through foam, creating smooth, clean cuts. Always use a metal ruler as a guide for straight lines and to protect your fingers. For more organic or freehand shapes, freehand cutting with a sharp blade is perfectly acceptable.
When shaping foam, consider employing different techniques. Layering is a cornerstone of foam art, allowing you to build depth and dimension. Cut out multiple shapes of varying sizes and colors from craft foam sheets and adhere them on top of each other. Embossing tools or the back of a blunt knife can be used to create subtle indentations or raised patterns on the foam surface, adding texture. For thicker foams, carving is a key technique. Utilize craft knives, chisels, or even small wood carving tools to remove material and sculpt desired forms. Experiment with scraping and scoring to create different surface textures. Sanding, particularly with finer grit sandpaper, can smooth out rough edges from carving or cutting, and also prepare the surface for painting. For more advanced sculpting, consider using a Dremel tool with various bits to carve, engrave, and polish foam.
Adhesive Solutions for Strong and Durable Foam Art
The choice of adhesive is critical for ensuring the longevity and structural integrity of your foam wall art. For adhering thin craft foam sheets together, craft glue, tacky glue, or spray adhesive are effective. These glues dry clear and are flexible, preventing the foam from cracking. When working with thicker craft foam or foam boards, stronger adhesives are required. Hot glue guns are incredibly versatile for quick and strong bonds. However, be mindful that excessive heat from a hot glue gun can melt some types of foam, so test on a scrap piece first. Super glue (cyanoacrylate) can also be used for strong, rapid adhesion, but it’s less forgiving for repositioning. For larger, more substantial pieces, consider specialized foam adhesives or construction adhesives. These provide a more robust bond and are suitable for heavier foam boards. When applying adhesive, ensure both surfaces are clean and dry. A thin, even layer is generally more effective than a thick, gloppy application. For layered projects, applying adhesive to the smaller or more detailed pieces first often yields better results, allowing you to precisely place them onto the larger base.
Mastering the Art of Coloring Foam: Techniques for Vibrant Hues
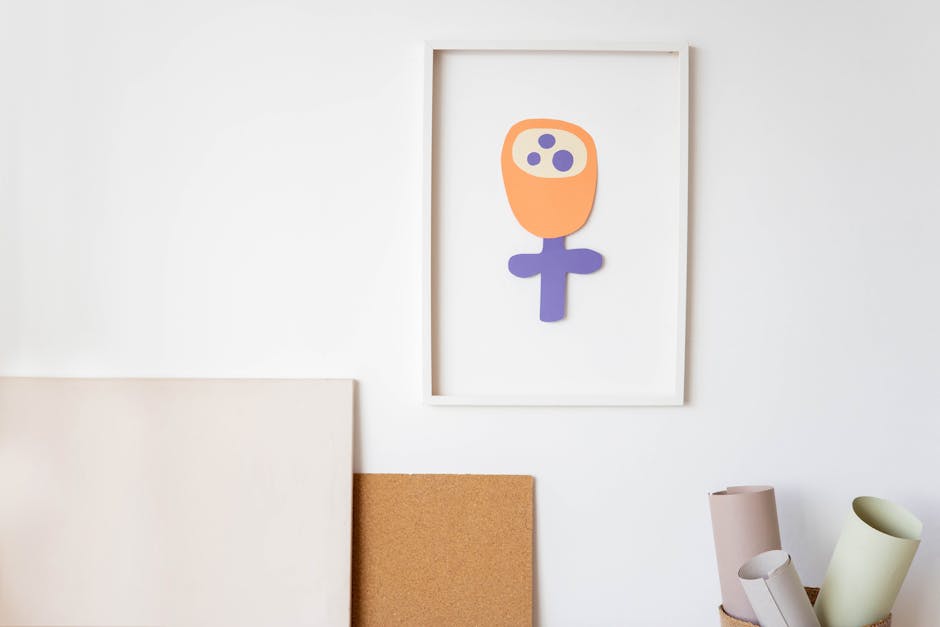
The ability to imbue foam with vibrant color is what truly elevates it into captivating wall art. For thin craft foam sheets, the color is often inherent to the material. However, you can further enhance or alter these colors with various mediums. Acrylic paints are the go-to for coloring foam. They are water-based, dry quickly, and offer excellent coverage. Apply acrylics with brushes for smooth, even coats or use sponges for a more textured, stippled effect. For bolder color blocking and clean lines, masking tape can be used to create sharp edges.
For thicker foams that have been carved or shaped, acrylic paints are also ideal. You may need multiple coats to achieve full opacity, especially if the foam has a porous surface. Sealants can be applied before painting to reduce paint absorption and create a smoother surface. Metallic acrylic paints add a touch of shimmer and sophistication. For a more watercolor-like effect on denser foams, dilute acrylics with water.
Other coloring options include permanent markers, especially for intricate details and fine lines on craft foam. Gel pens can add subtle highlights and patterns. For a truly unique finish, consider using spray paint. Apply in light, even coats to avoid drips and excessive melting of the foam. Always use spray paint in a well-ventilated area and wear a mask. Glitter can be applied over wet paint or with a dedicated glitter glue for added sparkle. Alcohol inks can create beautiful, translucent, and marbled effects on certain types of foam, particularly smooth, non-porous surfaces. Experiment with layering different colors of alcohol ink for depth and complexity.
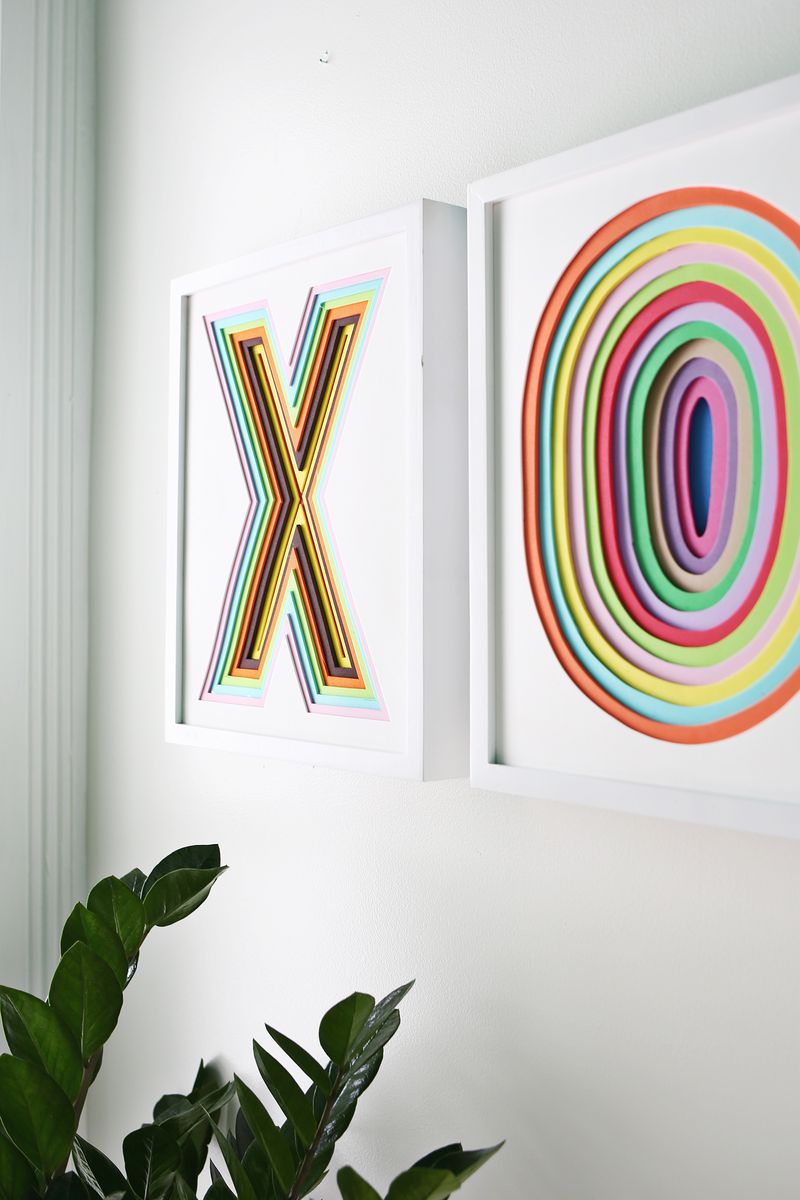
Creating Texture and Dimension Through Foam Art Techniques
Beyond simple coloring, manipulating the foam’s surface and structure is key to creating visually engaging art. Layering, as mentioned, is a primary method for building dimension. Cut out shapes of varying sizes and subtly overlap them to create a sense of depth. Consider offsetting layers slightly to cast shadows, further enhancing the 3D effect.
Embossing involves pressing into the foam to create raised or indented patterns. This can be done with specialized tools, the back of a dull pencil, or even everyday objects like the edge of a ruler. Experiment with different patterns – geometric lines, wavy textures, or even freehand designs.
Carving, particularly with thicker foams, allows for true sculptural elements. Use sharp knives to carefully remove material, creating contours, valleys, and intricate details. Sanding can then be used to smooth these carved areas or to create a rougher, more textured surface depending on the grit of the sandpaper.
Adding 3D elements is another powerful technique. Cut out smaller foam shapes and attach them to the main artwork using foam-safe adhesives or hot glue. These could be geometric shapes, organic forms, or even small figures. Consider bending or curving thin craft foam pieces before adhering them to create a more dynamic visual.
Utilizing heat can also alter the foam’s texture and shape. A heat gun, used with caution and at a low setting, can subtly warp or curl craft foam, creating organic, flowing shapes. This technique requires practice and careful temperature control to avoid melting or burning the foam.
The art of shadow play is crucial for highlighting the dimensionality of your foam creations. By strategically placing light sources, the sculpted and layered elements will cast shadows, adding depth and visual interest to the artwork. Consider how the light will interact with the different textures and protrusions of your foam art.
Finishing and Protecting Your Colorful Foam Wall Art
Once your colorful foam wall art is complete, a few finishing touches can significantly enhance its appearance and longevity. Sealing the foam can protect the colors and provide a more uniform surface. A clear acrylic sealer or a matte varnish are good options. Apply in thin, even coats. This will also make the artwork easier to clean.
For added protection and a professional sheen, consider a clear acrylic spray sealant. This can provide a durable, protective layer. Depending on the desired finish, opt for matte, satin, or gloss sealants.
If your foam art is particularly delicate or has intricate, protruding elements, consider framing it. A shadow box frame can beautifully showcase the three-dimensional nature of the artwork. Even a simple frame can provide a sense of completion and polish.
For larger pieces, consider attaching hanging hardware. D-rings and picture wire are suitable for lighter foam art, while heavier pieces might require more robust mounting solutions. Ensure the hanging hardware is securely attached to the foam or a sturdy backing board.
To further enhance visual appeal, you can add elements like beads, sequins, or small found objects to your foam art. These can be adhered with strong craft glue or a hot glue gun. The contrast in materials can add an extra layer of visual interest.
Consider the environment where the artwork will be displayed. If it will be exposed to direct sunlight, the colors may fade over time. Applying a UV-resistant sealant can help mitigate this. Similarly, if the artwork is in a high-traffic area, a more durable sealant will offer better protection against scuffs and scratches.
SEO-Optimized Keywords and Content Strategy for Foam Art
To ensure your foam art content ranks well in search engine results, a strategic approach to keywords and content is essential. Integrate relevant keywords naturally throughout the article. Target keywords include: "foam wall art," "DIY foam art," "colorful foam crafts," "craft foam art ideas," "foam board art," "cutting foam art," "coloring foam," "foam sculpting," "dimensional foam art," "DIY home decor," "budget-friendly art," "easy craft projects," and "unique wall art."
Utilize long-tail keywords for more specific searches, such as "how to create colorful wall art with craft foam sheets" or "best adhesive for foam board art projects."
Structure your article with clear headings and subheadings (H2, H3 tags) using these keywords to improve readability and SEO. For instance, "Choosing the Right Foam for Your Art Project" or "Mastering the Art of Coloring Foam."
Incorporate high-quality images and videos showcasing your foam art projects. Alt text for images should include relevant keywords. Descriptive captions can further boost SEO.
Consider creating variations of your content, such as video tutorials on specific foam art techniques, or blog posts focusing on specific themes or styles of foam wall art.
Promote your foam art content on social media platforms using relevant hashtags like #foamart, #DIYdecor, #craftideas, #wallart, #colorfulart, and #handmade. Engaging with online communities and forums dedicated to crafting and DIY can also drive traffic and increase visibility.
The persistent integration of these SEO strategies will ensure that your comprehensive guide to creating colorful wall art with foam reaches a wider audience, inspiring more people to explore this accessible and rewarding art form. The focus on practical techniques, material insights, and creative application, combined with a robust SEO strategy, will position this article as a valuable resource for anyone looking to add a splash of color and dimension to their living spaces with foam.
