
DIY Rope Wrapped Planters: Rustic Charm and Creative Container Gardening
Rope-wrapped planters offer a fantastic blend of rustic aesthetics, natural textures, and practical functionality, transforming ordinary containers into eye-catching statement pieces for any home or garden. This DIY project is surprisingly accessible, requiring minimal specialized tools and materials, making it an ideal undertaking for crafters of all skill levels. The inherent beauty of natural fibers, such as jute, sisal, or even cotton rope, adds warmth and character to plant displays, providing a more organic and inviting feel than mass-produced plastic or terracotta. Beyond their visual appeal, rope-wrapped planters offer a unique way to personalize your gardening space and elevate your plant styling. This guide will delve into the comprehensive process of creating these charming planters, covering material selection, preparation, wrapping techniques, and finishing touches, all while optimizing for search engines to ensure accessibility for those seeking inspiration and instruction.
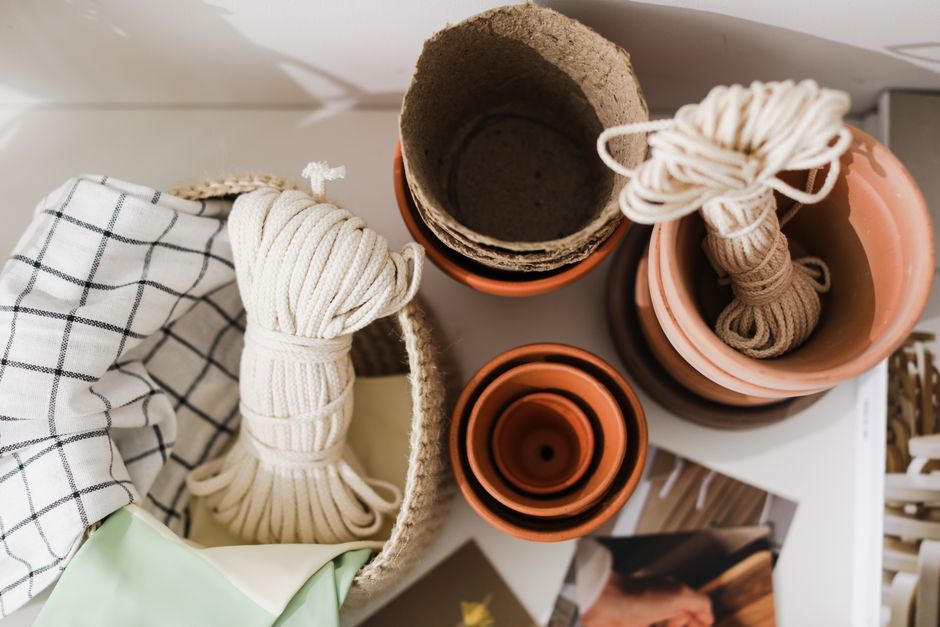
The foundation of any successful rope-wrapped planter is the container itself. A wide variety of vessels can be repurposed for this project, offering a spectrum of shapes, sizes, and materials. Terracotta pots, with their porous surface, provide excellent grip for the adhesive and rope, creating a robust bond. However, virtually any rigid container will suffice, including old tin cans, plastic buckets, ceramic pots, glass jars, or even discarded wooden crates. When selecting your base container, consider its intended use. For outdoor gardening, ensure the container has adequate drainage holes. If drainage is a concern for an indoor planter, you can opt for a liner or a cachepot system, where the rope-wrapped planter acts as an outer decorative shell. The size and shape of the container will dictate the amount of rope needed and the complexity of the wrapping pattern. Simple cylindrical or square pots are generally the easiest to start with, offering a straightforward wrapping experience. More complex shapes might require patience and strategic rope placement. Cleaning the container thoroughly before beginning is paramount. Any dust, dirt, or grease will compromise the adhesion of the glue and the durability of the rope wrap. A good scrub with soap and water, followed by thorough drying, is essential. For metal or plastic containers that might be slick, a light sanding with fine-grit sandpaper can create a slightly textured surface, further enhancing adhesive grip.
The choice of rope is a critical element that significantly influences the final look and feel of your planter. Natural fiber ropes like jute, sisal, and hemp are popular for their earthy tones, natural texture, and biodegradability. Jute offers a slightly rougher texture and a warm, golden-brown hue, lending itself well to a rustic, farmhouse aesthetic. Sisal, typically a lighter tan color, has a finer weave and a smoother finish, suitable for a more refined look. Hemp, while less common, provides a similar natural appeal and durability. For a softer, more contemporary feel, consider cotton rope. Cotton offers a wider range of colors and a smoother, more pliable texture, making it easier to work with for intricate designs. The thickness of the rope is another consideration. Thicker ropes will cover the container more quickly and create a bolder visual impact, while thinner ropes allow for more intricate patterns and a more delicate aesthetic. It’s also worth exploring braided versus twisted ropes. Twisted ropes can sometimes unravel if not secured properly, whereas braided ropes tend to be more stable and less prone to fraying. When purchasing rope, buy more than you think you’ll need. It’s always better to have a little extra than to run out mid-project, especially if you plan on creating multiple planters or experimenting with different patterns. Consider purchasing rope in bulk if you anticipate making several projects, as it can often be more cost-effective.
Adhesives play a crucial role in securing the rope to the container. Several types of glue are suitable for this project, each with its own advantages. Hot glue is a popular choice for its fast drying time and strong bond, making it ideal for quick projects and beginners. A high-temperature hot glue gun is recommended for a more robust hold, especially on less porous surfaces. However, be mindful of the heat, as it can melt certain plastics. Craft glue, such as Aleene’s Tacky Glue or Mod Podge, is another excellent option. These glues are water-based, non-toxic, and provide a strong, flexible bond once dry. They also offer a longer working time than hot glue, allowing for more precise placement of the rope. For a more industrial-strength bond, particularly on challenging surfaces like metal or glass, consider using E6000 adhesive. This strong, flexible, and waterproof glue is ideal for projects that will be exposed to the elements. When applying adhesive, work in small sections to prevent the glue from drying before you can secure the rope. A continuous bead of glue is generally more effective than applying it sporadically.
The process of wrapping the rope can be approached in several ways, depending on the desired outcome and the complexity of the container. The most basic technique involves starting at the base of the container and working your way upwards, applying adhesive as you go and wrapping the rope tightly and evenly. For a clean finish, start by securing the end of the rope to the bottom of the container with a generous amount of adhesive. Then, begin wrapping the rope around the base, ensuring each coil is pressed firmly against the previous one and the container surface. As you work your way up, apply a continuous bead of adhesive to the container or the rope itself. Maintain consistent tension on the rope throughout the process to avoid gaps and ensure a smooth, uniform appearance. For cylindrical containers, a simple spiral wrap is effective. For square or rectangular containers, you’ll need to adjust your wrapping technique at the corners. You can either miter the rope at the corners, creating a clean diagonal line, or wrap the rope around each side independently, creating a slightly more pronounced corner. Experimentation is key here, and different approaches will yield distinct visual results.
For a more decorative finish, consider incorporating patterns or textures into your rope wrap. Stripes can be achieved by alternating colors of rope or by using different thicknesses of rope. A classic chevron pattern can be created by strategically angling the rope as you wrap. This requires careful planning and a bit more patience. To achieve a chevron, you’ll essentially be wrapping in a V-shape, with each layer of rope building upon the previous one. For more intricate designs, such as diamonds or zigzags, you might need to use thinner rope and employ a more precise application of adhesive. Another technique to add visual interest is the use of different rope materials within the same planter. For example, you could use a base layer of thick jute rope for texture and then wrap thinner sections of cotton rope in a contrasting color over the top for decorative accents. Fraying the ends of the rope can also add a touch of bohemian charm, but ensure these frayed ends are securely glued down to prevent further unraveling.
Finishing touches can elevate your DIY rope-wrapped planter from a craft project to a polished decorative item. Once the rope is fully wrapped and the adhesive is dry, inspect the planter for any loose ends or uneven sections. Trim any stray fibers with sharp scissors or a craft knife. For a more durable and weather-resistant finish, especially for outdoor planters, consider applying a sealant. Mod Podge Outdoor or a clear acrylic spray sealant can protect the rope from moisture, UV rays, and general wear and tear. Ensure the sealant is applied in a well-ventilated area and allow ample drying time according to the product instructions. If you’ve used a container without drainage, consider lining the inside with plastic sheeting or a plastic pot insert to prevent water from damaging the rope and adhesive over time. For a truly unique planter, consider adding decorative elements such as beads, shells, or small wooden charms woven into the rope as you wrap, or glued on after completion. These embellishments can further personalize your creation and tie it into your existing decor.
The versatility of rope-wrapped planters extends to their use as both functional plant holders and stylish decorative accents. They are perfect for housing a variety of plants, from small succulents and air plants to larger houseplants and herbs. The natural texture of the rope can complement the greenery of plants, creating a harmonious and inviting display. For a cohesive look, consider creating a collection of rope-wrapped planters in varying sizes and styles. Group them together on a shelf, windowsill, or patio to create a focal point. They also make excellent gifts for plant lovers, offering a handmade touch that is both thoughtful and practical. When considering placement, think about the lighting needs of your plants and the overall aesthetic of your space. A rope-wrapped planter in a natural fiber material will complement bohemian, coastal, and rustic interiors, while a cleaner, more tightly wrapped planter in a neutral color can fit seamlessly into a modern or minimalist design.
When it comes to optimizing for search engines, incorporating relevant keywords naturally throughout the article is crucial. Terms such as "DIY rope planter," "rope wrapped pot," "jute planter tutorial," "sisal pot decor," "how to wrap a planter with rope," "natural fiber planters," "rustic plant pots," "creative container gardening," and "upcycled planters" should be strategically placed. The title itself is a primary SEO element. Using descriptive and keyword-rich language within headings and subheadings further improves search visibility. For example, using a subheading like "Choosing the Right Rope for Your DIY Planter" helps both readers and search engines understand the content. Engaging content that provides detailed, actionable instructions, along with potential variations and problem-solving tips, encourages longer dwell times on the page, a positive signal for SEO. The use of bullet points or numbered lists can break up text and make it more scannable, improving user experience, which indirectly benefits SEO. Ultimately, a comprehensive and well-structured guide that answers the user’s query thoroughly and offers valuable insights is the most effective way to achieve strong search engine rankings for DIY rope-wrapped planters. The focus should always be on providing high-quality, informative content that users are actively searching for.
