Quickly sew a flat or shank button: a phrase that might strike fear into the heart of even the most seasoned sewer. But fear not! Mastering this simple skill is easier than you think. Whether you’re tackling a ripped button on your favorite shirt or adding a touch of elegance to a new project, understanding the differences between flat and shank buttons, gathering the right tools, and following a few simple steps will have you confidently sewing buttons in no time.
This guide will walk you through the process step-by-step, starting with a breakdown of the different button types and the essential sewing supplies you’ll need. We’ll then delve into the techniques for sewing both flat and shank buttons, offering tips for achieving a professional finish.
Finally, we’ll address common issues and provide solutions to ensure your button-sewing experience is a smooth one.
Understanding Button Types

When sewing, choosing the right button type is crucial for both functionality and aesthetics. Understanding the differences between flat and shank buttons will help you select the perfect button for your project.
Flat Buttons
Flat buttons are characterized by their smooth, flat underside, which sits flush against the fabric. This design makes them ideal for lightweight fabrics and garments where a slim profile is desired. Here are some common uses for flat buttons:
- Shirts: Flat buttons are a classic choice for dress shirts, casual shirts, and blouses, offering a clean and polished look.
- Dresses: They work well on lightweight dresses, especially those made from delicate fabrics like silk or chiffon.
- Skirts: Flat buttons can be used on skirts for a minimalist and modern aesthetic.
Flat buttons come in a variety of sizes, materials, and finishes, allowing for endless possibilities in your sewing projects.
Shank Buttons
Shank buttons have a raised post, or shank, on the underside, which allows for a more secure fastening. The shank prevents the button from pulling through the fabric, making them suitable for heavier fabrics and garments that experience a lot of stress.Shank buttons are commonly used in:
- Coats and jackets: Their sturdy construction makes them ideal for outerwear, ensuring a secure closure even in windy conditions.
- Jeans: The shank provides a strong hold, preventing the buttons from coming undone during movement and wear.
- Trousers: Shank buttons are often used on formal trousers, adding a touch of elegance and durability.
The shank also allows for a more secure buttonhole, as it provides a space for the buttonhole to sit without being compressed.
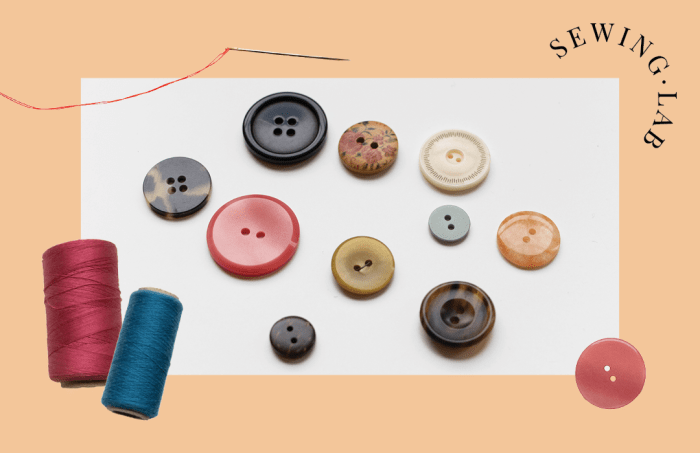
Essential Sewing Supplies
Sewing buttons quickly and securely requires a few essential tools. Having the right tools at hand makes the process much smoother and ensures a professional finish.
Sewing a flat or shank button quickly can be a lifesaver when you’re in a rush to get dressed. I’ve always loved the simplicity of a button, and it reminds me of the amazing talks I heard at Paradoxcon last year.
If you’re looking for some inspiration, check out this article on ranking the best of paradoxcon , it’s a great way to find out what people loved most about the event. Once you’re all inspired, grab your needle and thread and get sewing those buttons!
Let’s explore the key tools and how to choose the right ones for your button sewing needs.
Tools for Button Sewing, Quickly sew a flat or shank button
The following tools are essential for button sewing:
- Sewing Needle:This is the most important tool for sewing buttons. The needle should be strong enough to pierce through fabric and button holes, but not so thick that it damages the fabric. The needle size should be chosen based on the thickness of the fabric and the size of the button.
- Thread:Choose a thread that matches the color of the fabric and the button. The thread should be strong enough to hold the button securely, but not so thick that it creates a bulky seam.
- Scissors:You’ll need a pair of sharp scissors for cutting thread and fabric. Small, sharp scissors are ideal for button sewing.
- Thimble:A thimble protects your finger from being pricked by the needle. It also helps you push the needle through the fabric more easily.
- Measuring Tape:A measuring tape is useful for accurately measuring the distance between buttonholes and buttons.
- Buttonhole Cutter:This tool is used to create buttonholes in fabric. A buttonhole cutter can be used to create a variety of buttonhole sizes.
- Buttonhole Foot:This foot attachment for your sewing machine is designed to create buttonholes with precision. It is a great option for creating consistent buttonholes for a professional look.
Choosing the Right Thread and Needle
The type of thread and needle you choose will depend on the type of button you are sewing. For example, you will need a different thread and needle for sewing a shank button than for sewing a flat button.
| Button Type | Thread Type | Needle Type |
|---|---|---|
| Flat Button | All-purpose thread | Sharp needle (size 8-10) |
| Shank Button | Heavy-duty thread | Sharp needle (size 9-11) |
Tips for Selecting the Right Thread and Needle:
Sewing on a button might seem simple, but sometimes it’s a pain! Whether it’s a flat or shank button, I find myself fumbling with the thread. Speaking of fumbling, I just read an interesting article about CMC Metals Ltd.
announcing a proposed amendment of warrants , which definitely made me think twice about my own financial planning. But back to the buttons, maybe I should invest in a button sewing foot for my machine – that might make the whole process a little less frustrating!
- Thread:Use a thread that is strong enough to hold the button securely. For flat buttons, all-purpose thread is generally sufficient. For shank buttons, heavy-duty thread is recommended. Choose a thread color that matches the fabric or the button.
- Needle:The needle should be sharp enough to pierce through the fabric and buttonhole easily. For flat buttons, a sharp needle (size 8-10) is usually suitable. For shank buttons, a slightly larger needle (size 9-11) may be needed.
Sewing a Flat Button
Sewing a flat button is a simple task that can be mastered with a few basic steps. Whether you’re fixing a loose button on your favorite shirt or adding a decorative touch to a new project, this guide will walk you through the process.
Sewing on a button might seem like a simple task, but knowing the right techniques can save you time and frustration. Whether you’re attaching a flat or shank button, a strong stitch is essential. And speaking of essential, have you checked out the top ten tax write offs for small biz owners ?
It’s important to maximize your deductions, just like you want to maximize the durability of your button sewing. So, grab your needle and thread, and let’s get stitching!
Sewing a Flat Button
To sew a flat button, you will need a needle, thread, and a flat button. The button should have four holes for sewing. The process of sewing a flat button involves a few steps. The steps are as follows:
- Thread your needle with a length of thread. The length of thread should be about 18 inches long. Tie a knot at the end of the thread.
- Place the button on the fabric where you want to sew it. Make sure the button is centered and flat against the fabric.
- Insert the needle through one of the buttonholes from the back of the fabric to the front. Pull the thread through until the knot is against the fabric.
- Insert the needle through the next buttonhole, from the front of the fabric to the back. Pull the thread through until the knot is against the fabric.
- Continue sewing through the buttonholes, alternating between the front and back of the fabric. Make sure to pull the thread tight with each stitch.
- After you have sewn through all of the buttonholes, tie off the thread by making a few knots. Trim the excess thread.
Sewing a Shank Button
Sewing a shank button, with its raised stem, presents a unique challenge compared to sewing a flat button. While both require basic sewing skills, the shank button’s design necessitates a different approach to ensure a secure and aesthetically pleasing finish.
Sewing a Shank Button: A Step-by-Step Guide
Sewing a shank button involves creating a secure loop for the button to sit on, allowing for easy buttoning and unbuttoning. This process involves threading a needle with strong thread and creating a series of stitches that form a sturdy loop.
- Thread the Needle:Start by threading a needle with strong thread, such as buttonhole thread or a thread that matches the fabric. The thread should be long enough to allow for multiple passes through the fabric.
- Mark the Button Position:Carefully mark the desired position for the button on the fabric using a fabric marker or chalk. This will ensure the button is placed correctly and evenly.
- Create the First Stitch:Insert the needle through the fabric at the marked position. Then, pass the needle through the shank hole of the button from the bottom to the top. This creates the first stitch, anchoring the button to the fabric.
- Form the Loop:Continue to stitch through the fabric and the shank hole, creating a loop. The loop should be large enough to accommodate the buttonhole on the opposite side of the garment.
- Secure the Loop:After creating the desired loop size, secure the loop by stitching back through the fabric and shank hole several times. This reinforces the loop and prevents it from loosening.
- Finish the Stitch:Tie off the thread by creating a secure knot on the underside of the fabric. Trim any excess thread for a clean finish.
Comparing Techniques for Flat and Shank Buttons
The techniques for sewing flat and shank buttons differ mainly in the way the button is secured to the fabric.
- Flat Buttons:Flat buttons are sewn directly to the fabric, typically with a series of small stitches that pass through the button holes. These stitches create a secure hold for the button, ensuring it stays in place.
- Shank Buttons:Shank buttons, on the other hand, are not sewn directly to the fabric. Instead, they are secured by creating a loop of thread around the button’s shank. This loop allows the button to sit above the fabric, preventing it from being pulled through the fabric when buttoned.
Tips for a Secure and Aesthetically Pleasing Finish
Here are some tips for ensuring a secure and aesthetically pleasing finish when sewing shank buttons:
- Use Strong Thread:Opt for strong thread, such as buttonhole thread, to prevent the loop from breaking or loosening over time. This thread is specifically designed for buttonholes and other areas that require durability.
- Create a Secure Loop:Make sure the loop is large enough to accommodate the buttonhole, but not so large that it looks sloppy. It’s also crucial to secure the loop by stitching back and forth several times.
- Keep Stitches Even:Maintain even stitches throughout the loop creation process. This contributes to a more aesthetically pleasing finish and ensures a secure hold for the button.
- Trim Excess Thread:After tying off the thread, trim any excess thread for a clean and polished look.
Troubleshooting Common Issues: Quickly Sew A Flat Or Shank Button

Even the most experienced sewists can encounter challenges when sewing buttons. This section will guide you through common problems you might face and provide solutions to help you achieve a professional finish.
Button Placement
Incorrect button placement can lead to a misaligned buttonhole or a lopsided garment. Here’s how to avoid this:
- Mark the button position carefully: Use a fabric marker or tailor’s chalk to mark the precise spot for the button.
- Use a buttonhole foot for accurate placement: If you’re sewing buttonholes, use a buttonhole foot on your sewing machine to ensure the buttonhole aligns perfectly with the button.
- Double-check your markings: Before sewing, make sure your markings are in the right place and that the button fits comfortably within the buttonhole.
Button Sewing
Button sewing issues can range from loose buttons to broken threads. Here’s how to address these problems:
- Secure the button firmly: Use enough thread to secure the button firmly to the fabric, ensuring it doesn’t come loose easily.
- Avoid knotting the thread too tightly: A tight knot can create a bulky bump under the button.
- Choose the right needle size: A needle that is too small might break, while a needle that is too large can damage the fabric.
- Use the correct sewing technique: Follow the recommended techniques for sewing flat and shank buttons, as described earlier.
Buttonhole Issues
Buttonholes can be tricky to sew perfectly. Here’s how to deal with common buttonhole problems:
- Uneven buttonhole edges: This can be caused by inconsistent tension on the sewing machine or improper use of the buttonhole foot.
- Buttonhole too small: If the buttonhole is too small, the button won’t fit through.
- Buttonhole too large: If the buttonhole is too large, the button will be loose and may fall off.
| Problem | Solution |
|---|---|
| Uneven buttonhole edges | Adjust the tension on your sewing machine. Make sure the buttonhole foot is properly positioned and the fabric is evenly fed through the machine. |
| Buttonhole too small | Use a larger buttonhole foot or adjust the buttonhole settings on your sewing machine. |
| Buttonhole too large | Use a smaller buttonhole foot or adjust the buttonhole settings on your sewing machine. |
Buttonhole Size
- Buttonhole too small: The button won’t fit through.
- Buttonhole too large: The button will be loose and may fall off.
| Problem | Solution |
|---|---|
| Buttonhole too small | Use a larger buttonhole foot or adjust the buttonhole settings on your sewing machine. |
| Buttonhole too large | Use a smaller buttonhole foot or adjust the buttonhole settings on your sewing machine. |
Additional Tips and Techniques
Mastering the art of button sewing involves more than just the basic steps. With a few extra tips and techniques, you can elevate your sewing game, achieving a professional finish that adds a touch of elegance to your projects.
Creative Techniques for Efficient Button Sewing
These techniques can help you sew buttons quickly and efficiently while maintaining high quality:
- Pre-Thread Your Needle:Threading your needle before you begin saves valuable time, especially if you’re working on multiple buttons. Thread a few needles at once to streamline your process.
- Use a Buttonhole Foot:A buttonhole foot, a specialized sewing machine attachment, offers a more precise and consistent button attachment. It guides the fabric and ensures uniform stitching, resulting in a professional look.
- Utilize a Buttonhole Stitch:The buttonhole stitch, a decorative stitch commonly used for buttonholes, provides a strong and secure attachment. It adds a touch of elegance and reinforces the button’s hold.
- Employ a Button Sewing Tool:Button sewing tools, such as a buttonhole stitch tool or a button-sewing awl, offer convenience and precision. They help to guide the needle and thread, making the process easier and faster.
Alternative Button Attachment Methods
Beyond traditional sewing, explore alternative methods for attaching buttons, offering a diverse range of options:
- Glue:Fabric glue provides a quick and easy way to attach buttons, especially for delicate fabrics or when sewing isn’t feasible. Choose a fabric-safe glue for reliable adhesion.
- Snap Buttons:Snap buttons offer a secure and easy-to-use closure. They are readily available in various sizes and colors, adding a modern touch to your projects.
- Velcro:Velcro offers a convenient and adjustable closure. It’s particularly useful for children’s clothing, where buttons can be challenging.
- Magnetic Buttons:Magnetic buttons provide a secure and invisible closure, perfect for garments where you want a sleek and modern look.
Achieving a Professional Finish
Attention to detail and a few simple techniques can elevate your button sewing to a professional level:
- Consistent Stitching:Maintain even and consistent stitches throughout the button attachment. This ensures a neat and polished appearance.
- Secure Knots:Tie secure knots at the beginning and end of your stitching to prevent the thread from unraveling.
- Trim Excess Thread:Trim any excess thread close to the button to maintain a clean and professional finish.
- Ironing:Ironing the area around the button after sewing helps to flatten the fabric and create a smooth, professional look.