
The Ultimate Studio Bathroom Tour: Maximizing Style and Function in a Compact Space
The studio bathroom, often perceived as a utilitarian necessity, holds immense potential for both aesthetic appeal and practical efficiency. This comprehensive guide, a final home tour of my own meticulously designed studio bathroom, delves into strategies for transforming this compact area into a stylish and functional sanctuary. We will explore layout optimization, material selection, smart storage solutions, lighting techniques, and design choices that maximize visual space and personal comfort, offering actionable insights for anyone looking to elevate their own studio bathroom.
Strategic Layout for Maximum Flow and Functionality:
The cornerstone of any successful studio bathroom design, especially in a confined space, is an intelligent layout. The primary goal is to create a sense of spaciousness while ensuring every fixture and element serves a purpose without impeding movement. In my studio bathroom, the layout was approached with a “less is more” philosophy, prioritizing the most crucial functions: showering, toileting, and handwashing. The shower enclosure was strategically placed in the most readily accessible corner, minimizing wasted floor space. A curbless shower design was implemented, seamlessly blending the shower area with the rest of the bathroom floor. This not only enhances the feeling of openness but also improves accessibility and safety, eliminating tripping hazards. The toilet was positioned adjacent to the shower, allowing for a shared plumbing wall which can sometimes simplify installation and reduce costs, and critically, positioned so that it is not the first thing one sees upon entering the room. This maintains a sense of privacy and visual tidiness. The vanity was placed on the opposite wall, creating a clear visual line and a defined functional zone. This deliberate placement ensures that each area has ample space for use and prevents a feeling of being cramped or overcrowded. The door swing was also a critical consideration. Opting for a pocket door or a door that swings outwards, if space allows, can significantly enhance the usability of the interior. In my case, a standard door was chosen, but careful attention was paid to its opening arc to ensure it didn’t obstruct access to any key areas when open. The overall principle here is to treat the studio bathroom as a puzzle, where each piece (fixture, vanity, storage) must fit perfectly to create a cohesive and highly functional whole.
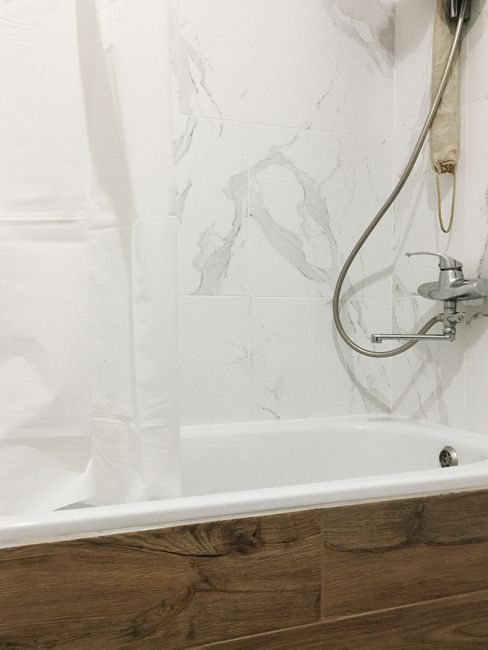
Material Selection: Balancing Durability, Aesthetics, and Perceived Space:
The choice of materials plays a pivotal role in both the durability and the perceived size of a studio bathroom. For a compact space, lighter colors and reflective surfaces are paramount to bouncing light and creating an illusion of greater square footage. In my studio bathroom, large-format porcelain tiles were selected for the floor and the shower walls. The large format minimizes grout lines, which can visually break up the space and make it appear smaller. The chosen tiles have a subtle, light grey hue with a slight sheen, reflecting ambient light and contributing to a bright and airy feel. For the shower walls, the same large-format tiles were used, extending seamlessly from floor to ceiling. This continuous visual plane further enhances the sense of height and expansiveness. The vanity countertop was chosen from a durable and visually light material. A solid surface in a crisp white, with a subtle veining pattern, was selected. This choice provides a clean, modern look that doesn’t overpower the space. The backsplash, a simple yet elegant subway tile in a slightly lighter shade than the vanity, adds a touch of texture without creating visual clutter. To avoid a sense of overwhelming darkness, darker accents were used sparingly, primarily in fixtures like the brushed nickel faucet and showerhead, and a black framed mirror. This strategic use of contrast adds depth and sophistication without compromising the overall brightness of the space. Durability is also a key consideration. High-traffic areas like bathroom floors and shower walls require materials that can withstand moisture, regular cleaning, and potential wear and tear. Porcelain tiles and solid surface countertops are excellent choices for their longevity and low maintenance.
Intelligent Storage Solutions: Maximizing Every Inch:
Storage is arguably the biggest challenge in a studio bathroom. Effective solutions are crucial to maintaining a clutter-free and organized environment. My studio bathroom employs a multi-pronged approach to storage. The vanity, while compact, features deep drawers with internal organizers. These drawers are designed to house toiletries, cleaning supplies, and personal care items, keeping them neatly tucked away and out of sight. The "above-the-toilet" space, often underutilized, has been transformed into valuable storage with a sleek, wall-mounted shelving unit. This unit provides open shelving for frequently used items like hand soap, a decorative plant, and rolled towels, as well as concealed cabinets for less sightly essentials. The shower enclosure incorporates recessed niches, providing convenient storage for shampoo, conditioner, and body wash without encroaching on showering space. These niches are lined with the same tile as the shower walls, creating a seamless and integrated look. Over-the-door organizers were considered, but ultimately avoided to maintain a cleaner aesthetic. Instead, a wall-mounted towel rack, strategically placed near the shower, serves its purpose efficiently. For larger items or seasonal storage, a slim, tall linen cabinet was incorporated into a less conspicuous corner of the bathroom. This cabinet is intentionally designed with a shallow depth to avoid protruding too far into the room, yet offers ample vertical storage. The key to effective storage in a studio bathroom is to think vertically and utilize every available nook and cranny without sacrificing visual appeal. Concealed storage is prioritized for items that can contribute to visual clutter, while open shelving is reserved for functional and aesthetically pleasing items.
Lighting Design: Illuminating and Expanding the Space:
Lighting is a transformative element in any bathroom, and in a studio bathroom, it’s a critical tool for creating an illusion of space and enhancing ambiance. My studio bathroom utilizes a layered lighting approach. The primary light source is a recessed LED ceiling fixture, providing bright, even illumination across the entire space. This fixture is dimmable, allowing for adjustable light levels to suit different moods and activities. Above the vanity, a strategically placed vanity light fixture provides task lighting for grooming and makeup application. The choice of fixture was important; a minimalist sconce with an upward-facing shade was selected to direct light upwards, further enhancing the sense of height and preventing harsh shadows. Natural light, if available, should be maximized. In my studio, a well-placed window, frosted for privacy, allows ample natural light to enter during the day, further brightening the space. For an added touch of ambient lighting and a touch of luxury, LED strip lighting was installed under the floating vanity. This creates a soft, diffused glow that adds depth and sophistication to the space in the evening, making the vanity appear to float and contributing to the illusion of a larger footprint. The color temperature of the bulbs is also crucial. Warm white (around 2700K-3000K) is generally preferred for a more inviting and spa-like atmosphere, while cooler white (around 4000K) can be beneficial for task lighting where clarity is paramount. The aim is to create a well-lit, inviting, and functional space where every corner is effectively illuminated.
Design Choices and Finishes: Crafting a Cohesive and Stylish Aesthetic:
The overall aesthetic of a studio bathroom is dictated by the cumulative effect of all design choices, from fixture styles to color palettes and decorative elements. In my studio bathroom, the design philosophy is one of modern minimalism with a touch of warmth. The color palette is predominantly neutral, with shades of white, light grey, and subtle wood tones. This creates a calming and sophisticated backdrop. The fixtures, including the faucet, showerhead, and towel bars, are in a brushed nickel finish. This finish is durable, resistant to water spots, and adds a touch of understated elegance without being overly flashy. The mirror above the vanity is large and frameless, maximizing its reflective surface and contributing to the illusion of space. Its clean lines complement the minimalist aesthetic. The shower curtain, if a glass enclosure is not feasible, should be a light-colored, water-resistant fabric that allows light to pass through. In my case, a frameless glass shower enclosure was opted for, further enhancing the sense of openness. Decorative elements are kept to a minimum. A small, live plant adds a touch of natural color and life. A set of high-quality, fluffy white towels adds a sense of luxury and comfort. The overall goal is to create a cohesive and inviting space that feels both functional and aesthetically pleasing, proving that even the smallest bathrooms can exude style and sophistication. The absence of visual clutter and the careful selection of finishes contribute significantly to the perception of a larger and more luxurious bathroom. This final home tour of my studio bathroom aims to demonstrate that with thoughtful planning and execution, a compact space can be transformed into a highly desirable and functional area.
