Easy crop top restyle is more than just a fashion trend; it’s a gateway to endless style possibilities. Crop tops have become a staple in contemporary wardrobes, offering a versatile piece that can be dressed up or down, making them perfect for any occasion.
From casual outings to formal events, crop tops can be transformed with a few simple tricks, allowing you to express your unique style with ease.
This guide will explore various restyling techniques, from layering and accessorizing to DIY customizations, providing you with all the tools you need to unleash your creativity and elevate your crop top game.
The Allure of Easy Crop Tops
Crop tops have taken the fashion world by storm, becoming a staple in contemporary wardrobes. Their popularity stems from their versatility, comfort, and ability to flatter a range of body types. From casual to chic, crop tops offer endless styling possibilities, making them a must-have for fashion enthusiasts.
Versatility of Crop Tops
Crop tops are incredibly versatile, offering a wide range of styling options for different occasions and personal styles. They can be dressed up or down, making them suitable for everything from a casual brunch to a night out. Their versatility lies in their ability to be paired with various bottoms, from high-waisted jeans and skirts to flowy pants and shorts.
- Casual Chic:Pair a simple cotton crop top with high-waisted denim jeans and sneakers for a relaxed and effortless look. Add a statement necklace or earrings for a touch of personality.
- Bohemian Vibes:A flowy, lace crop top paired with a maxi skirt and sandals creates a bohemian aesthetic. Accessorize with a straw hat and layered jewelry for a complete look.
- Dressy Occasion:A fitted crop top in a luxurious fabric, like silk or satin, can be paired with a high-waisted skirt or trousers for a sophisticated and chic evening ensemble. Complete the look with heels and statement jewelry.
Different Crop Top Styles, Easy crop top restyle
The beauty of crop tops lies in their diverse styles, catering to different preferences and body types. From sporty to feminine, there’s a crop top for every taste.
Revamping an old crop top into a fresh, trendy piece is a great way to add some personality to your wardrobe. It’s a simple project that can be tackled even by beginners, and it’s a fantastic way to explore your creativity.
It’s like learning new skills, like I did when I started my adventures in upholstery, learning new skills adventures in upholstery. The satisfaction of transforming something old into something new is truly rewarding. Just like with upholstery, a little bit of fabric, thread, and a dash of imagination can go a long way when it comes to giving your crop top a whole new lease on life.
- Sports Bra Crop Tops:These are perfect for a sporty and casual look. They are often made from breathable and moisture-wicking fabrics, making them ideal for workouts or running errands.
- Ribbed Crop Tops:Ribbed crop tops offer a classic and versatile option. They can be dressed up or down and are available in a range of colors and fabrics.
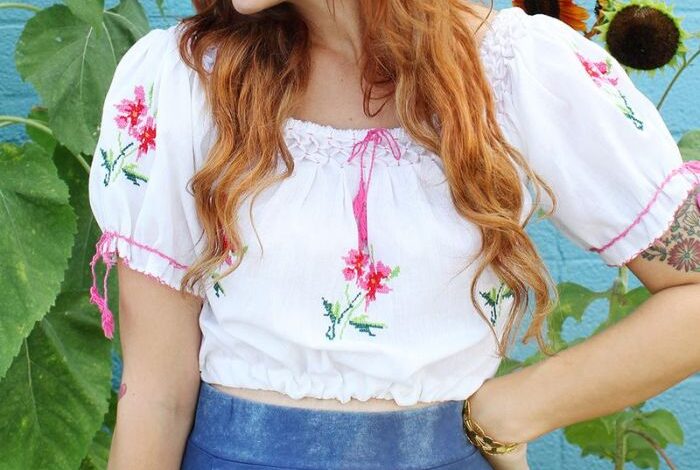
- Off-the-Shoulder Crop Tops:These are perfect for a feminine and romantic look. They can be paired with high-waisted jeans, skirts, or trousers for a chic and stylish ensemble.
- Lace Crop Tops:Lace crop tops add a touch of elegance and sophistication to any outfit. They are perfect for special occasions or evening events.
Restyling Crop Tops
The beauty of crop tops lies in their ability to be restyled in countless ways. With a few simple tricks, you can transform a basic crop top into a unique and stylish piece.
- Layering:Layer a crop top over a button-down shirt or a long-sleeved tee for a trendy and layered look. This is a great way to add warmth and style to your outfit.
- Knotting:Knot a simple crop top at the front or side to create a unique and flattering silhouette. This is a great way to add personality and style to a basic top.
- Belting:Add a belt to a crop top to cinch in the waist and create a more defined shape. This is a great way to accentuate your curves and add a touch of sophistication.
- Accessorizing:Accessorize your crop top with statement jewelry, scarves, or hats to elevate your look. This is a great way to add personality and style to your outfit.
Basic Restyling Techniques

A basic crop top can be transformed into a variety of stylish looks with some simple restyling techniques. By experimenting with layering, accessories, and styling tricks, you can elevate your crop top from casual to chic in an instant.
I’m all about easy DIY projects, like turning an old t-shirt into a cute crop top. It’s amazing how a few snips and stitches can give new life to old clothes! Speaking of unexpected changes, I was surprised to read about the Equifax Canada report on the rise in automotive fraud.
It’s a reminder that even when we’re focused on our own creative projects, it’s important to be aware of the bigger picture and stay vigilant about protecting ourselves from scams. Now, back to my crop top – I think I’ll add some lace trim to the edges!
Layering Crop Tops
Layering is a versatile way to create different looks with a crop top. By adding layers, you can add dimension, warmth, and style to your outfit.
I’m all about finding new ways to give old clothes a fresh look, and turning a basic tee into a cute crop top is always a winner. It’s like giving your wardrobe a mini-makeover! But while I’m busy getting creative with my clothes, I also love crafting fun things for my cat.
Recently, I’ve been obsessed with making these adorable junk food cat toy DIYs , and they’re a huge hit! Maybe I should try making a crop top for my cat, too… It’s all about that DIY spirit, right?
- Over a Button-Down Shirt:Layering a crop top over a button-down shirt creates a stylish and effortless look. You can leave the shirt unbuttoned or button it up for a more polished look.
- Under a Blazer:A blazer adds a touch of sophistication to a crop top. You can choose a blazer in a contrasting color or a similar hue for a monochromatic look.
- With a Cardigan:A cardigan provides warmth and style. Opt for a cardigan in a contrasting color or pattern to add visual interest.
- Over a T-shirt:Layering a crop top over a t-shirt creates a casual and comfortable look. This is a great option for cooler weather.
Using Accessories
Accessories can elevate a crop top from basic to chic. Consider these options:
- Belts:A belt can cinch in your waist and add a touch of definition. Choose a belt in a contrasting color or pattern to add visual interest.
- Jewelry:Statement necklaces, earrings, or bracelets can add a touch of glamour to your crop top.
- Hats:A hat can add a touch of personality to your outfit. Consider a baseball cap, fedora, or beret.
- Bags:A stylish bag can complete your look. Choose a bag that complements the style of your crop top.
Restyling for Different Occasions: Easy Crop Top Restyle

The versatility of crop tops extends beyond their casual appeal. By applying simple restyling techniques, you can effortlessly transform a crop top into an outfit suitable for various occasions, from casual outings to formal events.
Casual Event Outfit Ideas
Crop tops are a staple for casual events, offering a comfortable and stylish option.
- Pair a basic crop top with high-waisted jeans or a flowy skirt for a relaxed yet put-together look.
- Layer a crop top over a tank top or a t-shirt for a more casual vibe.
- Consider adding a denim jacket or a cardigan for warmth and extra style.
Styling Tips for Different Body Types
Crop tops are a versatile piece of clothing that can be styled in many ways. However, choosing the right crop top style for your body type can make all the difference in achieving a flattering and confident look. Here are some styling tips to help you find the perfect crop top for your unique shape.
Styling for Hourglass Figure
The hourglass figure is characterized by a defined waist and balanced bust and hips. To accentuate this balanced shape, consider crop tops that cinch in at the waist and highlight your curves. * Recommended styles:
Fitted crop tops
These styles hug your curves and create a flattering silhouette.
Peplum crop tops
The peplum detail adds volume to the hips, balancing out the bust.
High-waisted crop tops
These tops create a more elongated look and accentuate the waist.* Tips:
Avoid oversized or baggy crop tops
These styles can hide your curves and make you appear wider.
Choose fabrics that drape well
Fabrics like silk, satin, and jersey will flow over your curves and enhance your natural shape.
Styling for Rectangle Figure
The rectangle figure has a straight line from shoulders to hips, with a less defined waist. The goal is to create the illusion of curves and define the waist.* Recommended styles:
Cropped sweaters
These styles can add volume to the bust and hips, creating the illusion of curves.
Crop tops with ruffles or embellishments
These details can add visual interest and create a more balanced look.
High-waisted crop tops with a belt
This combination helps define the waist and create a more hourglass shape.* Tips:
Avoid crop tops that are too tight or too loose
Both extremes can emphasize the straight line of the body.
Choose fabrics with texture or pattern
This can add visual interest and break up the straight lines of the body.
Styling for Pear Figure
The pear figure has a wider bottom than the top. The goal is to balance out the proportions and create a more streamlined look.* Recommended styles:
Empire waist crop tops
These styles emphasize the bust and create a more balanced look.
Crop tops with a V-neckline
This neckline elongates the torso and draws attention to the upper body.
Crop tops with a loose fit
This style can help to camouflage the wider hips and create a more balanced look.* Tips:
Avoid crop tops that are too tight in the hips
These styles can emphasize the wider bottom.
Choose crop tops with darker colors on the bottom
Darker colors can make the hips appear smaller.
Styling for Inverted Triangle Figure
The inverted triangle figure has broader shoulders than hips. The goal is to balance out the proportions and create a more balanced look.* Recommended styles:
Crop tops with a scoop neckline
This neckline balances out the broad shoulders and draws attention to the décolletage.
Crop tops with a loose fit in the shoulders
This style can help to minimize the appearance of broad shoulders.
Crop tops with ruffles or embellishments on the bottom
These details can add volume to the hips and create a more balanced look.* Tips:
Avoid crop tops with shoulder pads
These styles can accentuate the broad shoulders.
Choose crop tops with lighter colors on the bottom
Lighter colors can make the hips appear wider.
Styling for Apple Figure
The apple figure has a fuller midsection. The goal is to minimize the appearance of the stomach and create a more defined waist.* Recommended styles:
Crop tops with a high neckline
This style draws attention to the décolletage and minimizes the appearance of the stomach.
Crop tops with a loose fit in the midsection
This style can help to camouflage the fuller midsection.
Crop tops with a V-neckline
This neckline elongates the torso and draws attention to the upper body.* Tips:
Avoid crop tops that are too tight in the midsection
These styles can accentuate the fuller midsection.
Choose crop tops with a darker color in the midsection
Darker colors can make the midsection appear smaller.
DIY Restyling Ideas
Let’s dive into the fun parttransforming your crop tops into unique pieces that reflect your personal style! We’ll explore creative DIY techniques that are easy to follow and can breathe new life into your wardrobe. From adding embellishments to changing the neckline, there’s a world of possibilities waiting to be unlocked.
Adding Embellishments
Adding embellishments is a simple yet effective way to personalize your crop tops. These additions can elevate a basic piece into a statement-making outfit. Here are some ideas:
- Beaded Trim:Sew or glue beaded trim along the neckline, hemline, or sleeves of your crop top. Choose beads that complement the color and style of your top. Imagine a delicate beaded trim along the neckline of a plain white crop top, instantly adding a touch of elegance.
- Lace Appliqués:Cut out lace motifs and attach them to your crop top using fabric glue or sewing. Experiment with different lace patterns and colors to create unique designs. Think of delicate lace flowers adorning the front of a simple black crop top, adding a touch of romanticism.
- Rhinestones:Use fabric glue or sewing to attach rhinestones to your crop top. Arrange them in patterns or create a scattered design. A row of shimmering rhinestones along the hemline of a plain crop top can add a touch of glamour.
- Fabric Patches:Cut out fabric patches in different shapes and sizes and attach them to your crop top using fabric glue or sewing. Use contrasting colors or patterns for a bold look. Imagine patches of denim or floral prints adorning a plain crop top, adding a touch of vintage charm.
Changing the Neckline
Altering the neckline of your crop top can significantly change its look and feel. Here are some techniques to explore:
- Adding a Tie-Front:Cut two strips of fabric and attach them to the front neckline of your crop top. Tie the strips into a bow or knot for a chic and feminine touch. Imagine a simple crop top transformed with a silk tie-front, adding a touch of sophistication.
- Creating a V-Neck:Cut a V-shaped opening in the front neckline of your crop top. You can create a deep or shallow V-neck, depending on your preference. A V-neck can elongate your torso and create a flattering silhouette.
- Adding a Halter Strap:Cut two strips of fabric and attach them to the back neckline of your crop top. Tie the straps around your neck to create a halter style. A halter strap can add a touch of drama and make your crop top stand out.
Altering the Length
Adjusting the length of your crop top can create entirely new styles. Here are some ideas:
- Adding a Peplum:Cut a piece of fabric in a peplum shape and attach it to the bottom of your crop top. This adds volume and creates a flattering silhouette. Imagine a simple crop top transformed with a flowing peplum, adding a touch of femininity.
- Extending the Hemline:Cut a strip of fabric and sew it to the bottom of your crop top to extend the hemline. You can create a straight hemline or add a ruffle for a more feminine look. Imagine a crop top transformed into a stylish top with a longer hemline, adding versatility to your wardrobe.