DIY hanging clothes rail sets the stage for this enthralling narrative, offering readers a glimpse into a story that is rich in detail with personal blog style and brimming with originality from the outset. A DIY hanging clothes rail is a fantastic way to add extra storage space to your home and personalize your wardrobe.
Whether you’re looking for a simple solution to organize your clothes or want to create a unique statement piece, building your own clothes rail can be a fun and rewarding project.
This guide will walk you through the entire process, from planning and design to construction and finishing touches. We’ll cover the different types of clothes rails available, the materials and tools you’ll need, and the steps involved in building your own.
We’ll also provide tips on safety, troubleshooting, and maintenance to ensure your DIY clothes rail lasts for years to come.
DIY Hanging Clothes Rails: A Guide to Creating Your Own Storage Solution
A DIY hanging clothes rail is a fantastic way to add extra storage space to your home, whether you’re looking to organize your wardrobe, create a dedicated craft room, or simply need a more efficient way to store clothes. These rails offer a practical and aesthetically pleasing solution, allowing you to display and access your belongings easily.
The best part? You can customize them to fit your specific needs and style, making them a great project for any DIY enthusiast.
Types of DIY Hanging Clothes Rails
There are several types of DIY hanging clothes rails you can choose from, each with its own advantages and disadvantages.
- Industrial Pipe Rails:These rails are made using industrial pipes and fittings, giving them a modern and minimalist look. They are typically strong and durable, making them suitable for heavier items. You can find various pipe sizes and finishes to suit your style.
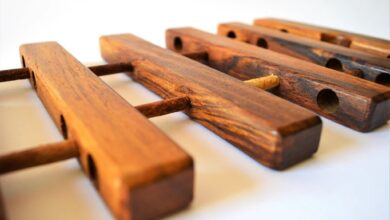
- Wooden Rails:Wooden rails offer a classic and warm look, blending seamlessly with most decor styles. They can be made from various types of wood, such as pine, oak, or cedar, and can be stained or painted to match your existing furniture.
Building a DIY hanging clothes rail is a great way to add storage and style to your home. It’s a simple project that can be completed in an afternoon, and you can customize it to fit your needs and décor.
While I’m working on my rail, I’m going to indulge in a sweet treat: a delicious chocolate coconut cookie dip dairy free that I found online. Once the dip is gone, I can get back to my rail and enjoy the satisfaction of a job well done.
- Metal Rod Rails:Metal rod rails are a simple and affordable option, often found at hardware stores. They are available in various finishes, including chrome, black, and brass, and can be easily attached to walls or ceilings.
Choosing the Right Materials and Tools
The materials and tools you choose will depend on the type of hanging clothes rail you decide to build. However, some essential tools and materials are common to most projects.
- Measuring Tape:Essential for determining the size and dimensions of your rail.
- Level:Ensures your rail is installed straight and securely.
- Drill:Used for drilling holes for mounting brackets or attaching pipes.
- Screwdriver:Necessary for securing brackets and other hardware.
- Saw:Used to cut wood or metal to size, depending on your chosen materials.
- Safety Glasses and Gloves:Always wear safety gear when working with tools and materials.
Planning and Design
The first step in any DIY project is planning and design. This is crucial for a successful hanging clothes rail, as it ensures the final product meets your needs and fits your space.
Design Considerations
When designing your clothes rail, several factors influence the final outcome.
- Size:Determine the dimensions of your rail, considering the available space and the amount of clothing you need to store. A longer rail is suitable for larger wardrobes, while a shorter one might be better for smaller spaces.
- Style:Consider the overall style of your room and choose a design that complements it. You can opt for a simple, minimalist design or a more elaborate, decorative one.
- Functionality:Think about the specific needs of your wardrobe. Do you need a rail for hanging clothes, a shelf for folded items, or a combination of both?
Examples of DIY Hanging Clothes Rail Designs
There are numerous design options for DIY hanging clothes rails. Here are some examples:
- Industrial-style rail:This design often uses exposed pipes and metal brackets for a modern and functional look. It can be constructed using readily available materials like plumbing pipes and fittings.
- Rustic wooden rail:This option offers a warm and natural aesthetic. You can use reclaimed wood or salvaged beams to create a unique and sustainable rail.
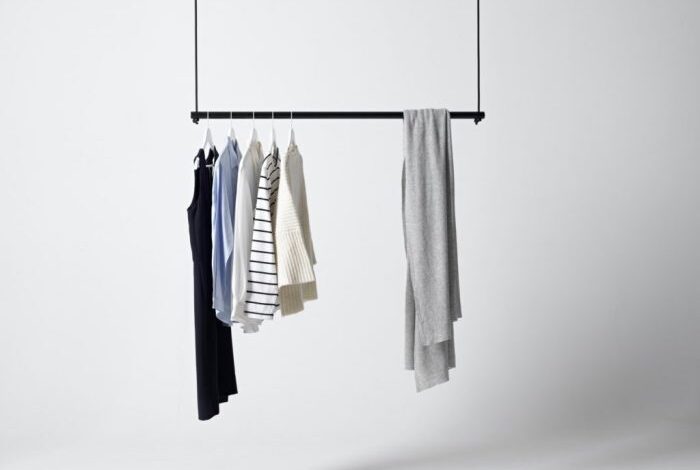
- Minimalist rail:This design emphasizes simplicity and clean lines. It can be created using thin metal rods or wooden dowels mounted on simple brackets.
Materials and Tools: Diy Hanging Clothes Rail
Before you start building your DIY hanging clothes rail, it’s essential to gather all the necessary materials and tools. Having everything ready will make the process smoother and prevent any delays. The specific materials and tools you’ll need will depend on the design and size of your clothes rail.
However, there are some common essentials that you’ll likely need for most projects.
Materials
The type of material you choose for your clothes rail will influence its durability, style, and cost. Here’s a breakdown of the most common materials and their pros and cons:
- Wood:
- Pros:Natural, versatile, easy to work with, aesthetically pleasing, can be stained or painted.
- Cons:Can be susceptible to moisture damage, requires regular maintenance, may be more expensive than other options.
- Metal:
- Pros:Durable, strong, rust-resistant (with proper treatment), can be easily customized, readily available in various finishes.
- Cons:Can be more expensive than wood, may require more specialized tools, can be heavy.
- PVC Pipes:
- Pros:Lightweight, affordable, easy to cut and assemble, waterproof, comes in various sizes and colors.
- Cons:Not as strong as wood or metal, can be prone to scratches and dents, may not be suitable for heavy loads.
Tools
Having the right tools for the job will make the construction process much easier and more efficient. Here are some essential tools you’ll likely need:
- Measuring tape:To accurately measure the dimensions of your clothes rail and the space where it will be installed.
- Level:To ensure that your clothes rail is installed straight and level.
- Saw:To cut the materials to the desired length, depending on the material you choose, you might need a handsaw, circular saw, or jigsaw.
- Drill:To create holes for mounting hardware and to attach the clothes rail to the wall or ceiling.
- Screwdriver:To secure the screws and other hardware.
- Clamps:To hold the pieces of the clothes rail together while you secure them.
- Sandpaper:To smooth out any rough edges and prepare the surfaces for painting or staining.
- Safety glasses:To protect your eyes from flying debris during cutting and drilling.
- Work gloves:To protect your hands from splinters and other potential hazards.
Construction Steps
Now that you have your materials and tools ready, it’s time to build your DIY hanging clothes rail. This section will guide you through each step, from cutting and drilling to assembling the rail.
Cutting and Drilling
Cutting and drilling are crucial steps for creating the perfect hanging clothes rail. You need to ensure the cuts are accurate and the holes are drilled correctly for a stable and strong structure.
- Cutting the Pipes:Using a pipe cutter, measure and mark the desired length of your pipes. Cut the pipes to the required size, ensuring clean, straight cuts for a seamless look.
- Drilling the Holes:For the flanges, you’ll need to drill holes to attach them to the wall. Using a drill bit slightly smaller than the screws you’ll be using, drill holes into the flanges at the marked positions. This will ensure the screws fit snugly and prevent the flanges from cracking during installation.
Assembling the Rail
Once you’ve cut and drilled your materials, you can start assembling the hanging clothes rail. This process involves connecting the pipes to the flanges and ensuring the rail is level and stable.
- Attaching the Flanges:Use the screws you’ve chosen to attach the flanges to the wall. Ensure the flanges are securely fastened to the wall for a sturdy and reliable hanging rail.
- Connecting the Pipes:Slide the pipes into the flanges. The flanges should be designed to hold the pipes securely. If you are using threaded pipes, ensure you use thread sealant to prevent leaks and corrosion.
- Leveling the Rail:Use a level to ensure your hanging rail is straight and level. This step is essential for a visually appealing and functional rail.
Ensuring Stability and Strength
For a durable and reliable hanging clothes rail, it’s crucial to ensure stability and strength. Here are some tips to achieve this:
- Choose Sturdy Materials:Select strong and durable materials like metal pipes and flanges. This will ensure the rail can withstand the weight of your clothes.
- Secure Mounting:Ensure the flanges are securely mounted to the wall using appropriate screws and anchors, especially if you are attaching the rail to drywall.
- Proper Installation:Follow the instructions carefully during the installation process. This will ensure all parts are correctly assembled for optimal stability and strength.
Finishing Touches
Now that your clothes rail is constructed, it’s time to give it that final touch of personality. The finishing touches are where you can truly make your DIY project shine, adding a unique flair that reflects your style.Whether you prefer a sleek and modern look or a rustic and vintage aesthetic, there are numerous ways to personalize your clothes rail and create a storage solution that complements your space.
Adding Color and Style
The color and finish you choose can drastically alter the appearance of your clothes rail. You can opt for a classic, timeless look with a simple coat of paint, or embrace a more textured finish with a stain or varnish.
- Paint:Paint is a versatile option for adding color and personality to your clothes rail. Choose a color that complements your existing decor or creates a statement piece. You can go for a bold and vibrant hue, a subtle and calming shade, or even a metallic finish for a touch of glamour.
Consider using a primer before painting to ensure a smooth and even finish.
- Stain:Stain offers a more natural look, enhancing the wood’s grain and adding warmth to the clothes rail. It comes in a wide variety of shades, from light and airy to dark and rich. Choose a stain that complements the wood type and your desired aesthetic.
- Varnish:Varnish provides a protective layer over the wood, sealing in the stain or paint and adding a glossy or matte finish. It helps to prevent scratches and moisture damage, making your clothes rail more durable.
Decorative Elements
Beyond color and finish, you can add decorative elements to further personalize your clothes rail. These elements can range from simple to elaborate, depending on your desired look and creativity.
- Hardware:The hardware you use for the clothes rail, such as hooks, brackets, and end caps, can add a touch of style. Consider using decorative hardware that complements the overall design. For example, you could use antique-style hooks or modern, minimalist brackets.
- Stencils:Stencils allow you to create intricate patterns or designs on your clothes rail. You can find pre-made stencils or create your own using a stencil-making kit. This is a great way to add a unique touch and personalize your project.
Building a DIY hanging clothes rail is a fun weekend project, and you can personalize it to fit your style. If you’re going for a coastal vibe, you might want to check out the new Copper Coast Collection at Waterford shop the new copper coast collection at waterford , which has some beautiful pieces that would complement a rustic-chic rail.
Once you’ve got your rail up, you can add some stylish hooks and baskets to keep your clothes organized and looking great.
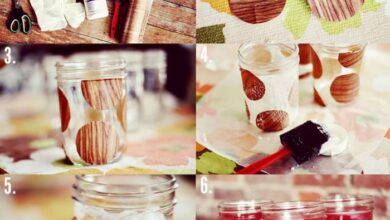
- Decoupage:Decoupage involves applying decorative paper, such as maps, fabric scraps, or patterned paper, to a surface. This can be a fun and creative way to add texture and interest to your clothes rail.
Secure Installation
Proper installation is crucial for ensuring your clothes rail is secure and can support the weight of your clothes.
For wall-mounted rails:Use heavy-duty anchors and screws designed for the weight of your clothes rail.
Building a DIY hanging clothes rail is a great way to add extra storage to any room, and it’s surprisingly easy! While I was researching materials for my project, I stumbled upon an article about boehringer ingelheim expanding cancer research at its vienna site.
It’s amazing to see how much progress is being made in the fight against cancer, and it definitely gave me a renewed sense of hope for the future. Anyway, back to my clothes rail, I’m excited to get started and finally have a place for all my clothes!
For ceiling-mounted rails:Ensure you are attaching to a structural beam in the ceiling. If you are unsure, consult a professional.
Safety Considerations

Building your own hanging clothes rail is a fun and rewarding project, but it’s crucial to prioritize safety throughout the process. This section will highlight essential safety precautions to take during each stage of the project, ensuring a safe and enjoyable DIY experience.
Using Proper Tools and Equipment
Choosing the right tools and equipment is fundamental for a safe and successful DIY project. Using tools that are in good working order and appropriate for the task at hand is essential. For example, a drill with a worn-out chuck could slip, causing injury, while using a screwdriver instead of a drill for larger holes could result in frustration and potentially damage the materials.
- Inspect tools for damage:Before starting any task, always inspect your tools for damage, such as cracked handles, loose parts, or frayed cords. If you notice any damage, replace or repair the tool immediately.
- Use the right tool for the job:Using the correct tool for each task is crucial for safety and efficiency. For example, using a hammer to drive screws can damage the screw head and potentially injure you.
- Maintain tools properly:Regularly clean and lubricate your tools to ensure they are functioning correctly and safely. Proper maintenance extends the life of your tools and reduces the risk of accidents.
Safe Work Environment
Creating a safe work environment is crucial for preventing injuries and ensuring a smooth DIY process. Here are some tips for setting up a safe work area:
- Clear the workspace:Before starting any work, clear the area of any obstacles, clutter, or tripping hazards. This includes tools, materials, and anything else that could obstruct your movement.
- Provide adequate lighting:Ensure sufficient lighting in your workspace to see clearly what you’re doing. Poor lighting can lead to eye strain and accidents.
- Wear appropriate safety gear:Depending on the tasks involved, you may need to wear safety glasses, gloves, or a dust mask to protect yourself from potential hazards.
- Use a stable work surface:Always work on a stable and sturdy surface to prevent tools or materials from falling and causing injury.
Avoiding Injuries
Here are some specific tips for avoiding injuries during the construction of your hanging clothes rail:
- Use caution when handling power tools:Always unplug power tools when not in use and be aware of their cords to avoid tripping. When operating power tools, wear safety glasses and use a firm grip to maintain control.
- Be mindful of sharp edges:Wood and metal can have sharp edges that can cause cuts or scrapes. Always handle materials carefully and wear gloves if necessary.
- Take breaks:It’s essential to take breaks during long DIY projects to prevent fatigue. Fatigue can lead to mistakes and increase the risk of injury.
Working with Electricity
If your hanging clothes rail project involves electrical components, it’s crucial to follow these safety precautions:
- Disconnect power:Always disconnect the power supply before working on any electrical wiring. This prevents accidental electrocution.
- Use insulated tools:When working with electricity, use tools with insulated handles to protect yourself from electrical shocks.
- Know your limits:If you’re unsure about any electrical work, it’s best to consult a qualified electrician.
Handling Materials Safely
Here are some tips for handling materials safely:
- Lift properly:When lifting heavy materials, use your legs, not your back, to avoid injury. Ask for help if you need it.
- Use appropriate storage:Store materials safely to prevent them from falling or causing injury. For example, store wood planks vertically to prevent them from tipping over.
- Dispose of materials properly:Dispose of any leftover materials responsibly, following local regulations for recycling or waste disposal.
Troubleshooting and Maintenance
Even the sturdiest DIY hanging clothes rail can encounter issues over time. Understanding common problems and implementing preventative maintenance practices will ensure your creation remains functional and aesthetically pleasing.
Common Issues and Solutions, Diy hanging clothes rail
Troubleshooting problems with your DIY hanging clothes rail involves identifying the source of the issue and implementing appropriate solutions.
- Sagging Rail:If the rail sags under the weight of your clothes, it could be due to inadequate support or insufficiently strong materials.
- Solution:Reinforce the rail with additional brackets or supports, or consider using a thicker or stronger material for the rail itself.
- Loose or Wobbly Connections:Loose screws or bolts can lead to instability and movement in the rail.
- Solution:Tighten all screws and bolts securely. If the problem persists, consider using stronger fasteners or applying a small amount of wood glue to the joints.
- Uneven Hanging:If the rail is uneven, it can cause clothes to hang unevenly, potentially leading to wrinkles or damage.
- Solution:Check the level of the rail and adjust it accordingly. Ensure that all brackets are securely attached and at the same height.
- Rust or Corrosion:Exposure to moisture can cause metal components to rust or corrode.
- Solution:Apply a protective coating of paint or sealant to metal components to prevent rust. If rust has already formed, use a wire brush to remove it and apply a rust-resistant primer before painting.
Maintenance and Repair
Regular maintenance is crucial for keeping your DIY hanging clothes rail in top condition.
- Regular Cleaning:Dust and debris can accumulate on the rail and brackets, affecting its appearance and potentially leading to wear and tear.
- Solution:Wipe down the rail and brackets regularly with a damp cloth. For more stubborn dirt, use a mild detergent and water solution.
- Inspecting for Damage:Regularly check the rail and brackets for signs of wear and tear, such as cracks, loose screws, or rust.
- Solution:Address any damage promptly by tightening screws, replacing damaged components, or applying protective coatings.
- Lubrication:Moving parts, such as sliding brackets or hooks, may benefit from lubrication to prevent squeaking and ensure smooth operation.
- Solution:Apply a small amount of silicone spray or lubricant to the moving parts.
Importance of Regular Cleaning and Inspection
Regular cleaning and inspection are essential for maintaining the longevity and functionality of your DIY hanging clothes rail.
- Preventative Measures:By addressing potential issues early on, you can prevent them from escalating into more serious problems.
- Solution:Regular cleaning and inspection can identify minor problems before they become major repairs, saving you time and money in the long run.
- Aesthetics and Safety:A clean and well-maintained clothes rail enhances the overall aesthetics of your space and ensures its safe use.
- Solution:Regular maintenance prevents the rail from becoming a safety hazard due to loose components or structural issues.
Inspiration and Examples
Ready to start designing your DIY hanging clothes rail? Let’s explore some inspirational ideas to spark your creativity and help you envision the perfect solution for your space.
Examples of DIY Hanging Clothes Rail Designs
There are endless possibilities when it comes to DIY hanging clothes rails. Here are some examples to inspire you, showcasing different designs, materials, and construction techniques: