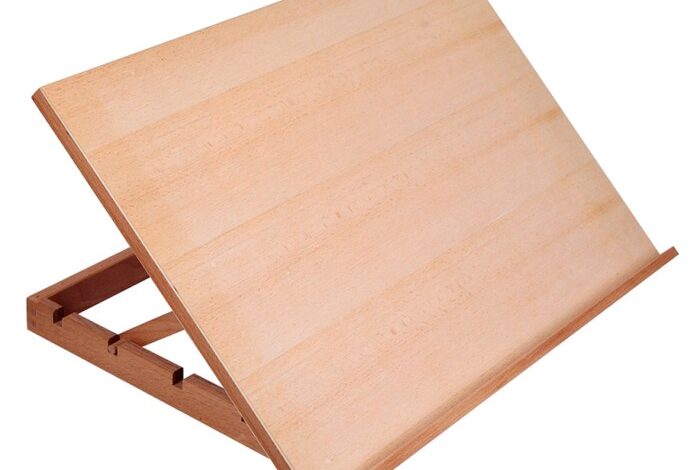
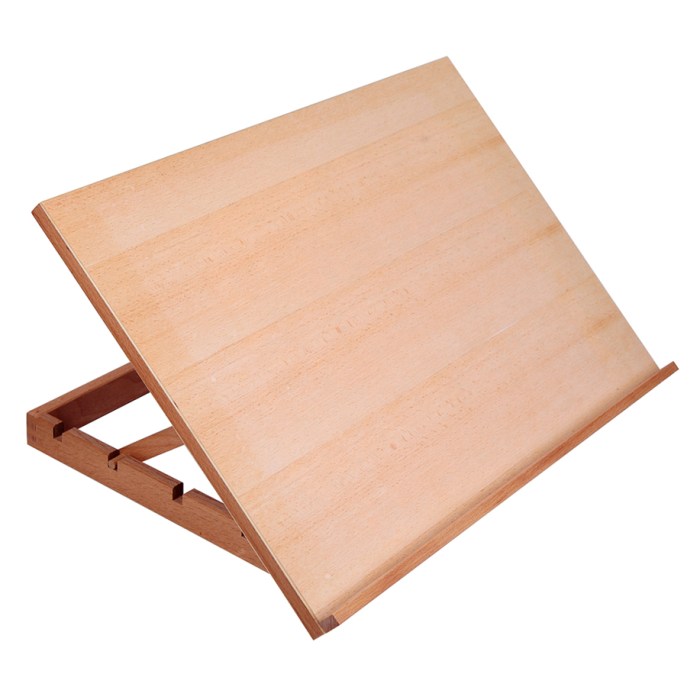
DIY mini art easel ornaments are a delightful way to unleash your creativity and add a touch of charm to any space. These miniature easels offer a versatile canvas for showcasing artwork, photos, or even simple messages. You can craft them from a variety of materials, such as wood, cardboard, or even recycled items, making them a budget-friendly and eco-conscious project.
Whether you’re looking for unique gift tags, festive tree decorations, or charming desk accessories, these little easels are sure to impress. They’re also a fantastic activity for kids, encouraging them to express their artistic side while developing fine motor skills.
DIY Mini Art Easel Ornaments

Mini art easels are charming and versatile decorations that add a touch of whimsy and personality to any space. They’re perfect for showcasing small works of art, photos, or even inspirational quotes. The best part is that creating these miniature masterpieces is a fun and rewarding DIY project.These miniature easels are not only adorable but also incredibly versatile.
They can be used to display a variety of items, making them perfect for personalizing any space.
Materials for Creating DIY Mini Art Easel Ornaments
The beauty of DIY mini art easels lies in their adaptability. You can use a variety of materials to craft them, allowing for unique and personalized creations. Here are some common options:
- Popsicle Sticks:These readily available and inexpensive craft supplies are perfect for creating simple yet sturdy easel frames.
- Toothpicks:Similar to popsicle sticks, toothpicks provide a slimmer and more delicate option for crafting miniature easels.
- Cardboard:Cardboard offers a more substantial base for larger or heavier ornaments. It can be easily cut and shaped into various easel designs.
- Wooden Dowels:Wooden dowels provide a polished and elegant look for your miniature easels. They can be easily cut to size and assembled using glue or small nails.
- Craft Foam:Craft foam is a versatile material that can be easily cut and shaped into different easel designs. It’s also lightweight and easy to decorate.
Materials and Tools: Diy Mini Art Easel Ornaments
Creating mini art easels as ornaments requires a selection of materials and tools. The choice of materials will influence the overall look, durability, and ease of construction.
DIY mini art easel ornaments are a fun and creative way to add a touch of whimsy to your home décor. They’re also a great project for kids, who can personalize them with their own artwork. If you’re looking for a way to add a touch of sparkle to your ornaments, try using a DIY foil strip manicure technique.
Simply apply a thin layer of glue to the surface of the easel and then press on a strip of foil. The result is a stunning metallic finish that will add a touch of glamour to your ornaments.
Materials
The materials you choose will largely determine the final appearance and durability of your mini easels. Here are some common options:
- Wood:Balsa wood, craft sticks, or dowels are popular choices for their lightweight nature and ease of carving. They can be stained or painted to match your decor.
- Cardboard:Sturdy cardboard is a budget-friendly option that can be cut and shaped easily. You can decorate it with paint, paper, or fabric.
- Metal:Wire or thin metal sheets can be used to create modern and minimalist easels. These can be bent and shaped to create unique designs.
- Plastic:Plastic craft sticks or even disposable spoons can be used for quick and easy projects. They can be painted or decorated to your liking.
- Other Materials:You can also explore materials like clay, polymer clay, or even recycled materials like bottle caps or cardboard tubes for creative and unique easels.
Tools
The tools you’ll need will depend on the materials you choose and the complexity of your design. Here are some essential tools:
- Scissors:For cutting cardboard, paper, or fabric.
- Craft Knife:For precise cutting of wood or cardboard.
- Glue:Hot glue gun or craft glue for attaching pieces.
- Ruler and Pencil:For measuring and marking.
- Paintbrushes and Paint:For decorating and adding color.
- Optional Tools:Depending on your design, you may also need pliers, wire cutters, a drill, or sandpaper.
Benefits and Drawbacks of Material Options
- Wood:
- Benefits:Durable, natural look, easy to stain or paint.
- Drawbacks:Can be more expensive, requires careful handling to avoid breakage.
- Cardboard:
- Benefits:Budget-friendly, easy to cut and shape, versatile for decoration.
- Drawbacks:Not as durable as wood, can be prone to bending or warping.
- Metal:
- Benefits:Modern and minimalist look, durable, can be bent and shaped easily.
- Drawbacks:Can be more challenging to work with, may require specialized tools.
- Plastic:
- Benefits:Lightweight, easy to work with, inexpensive.
- Drawbacks:May not be as durable as other materials, limited design options.
Design Ideas and Inspiration
Mini art easel ornaments offer a delightful way to showcase your artistic talents and add a personal touch to your home decor. With a bit of creativity, you can transform these tiny easels into miniature masterpieces that reflect your unique style and interests.
Themes and Styles
The beauty of mini art easel ornaments lies in their versatility. You can explore a wide range of themes and styles, allowing you to express your creativity in countless ways.
- Nature-Inspired Designs: Embrace the beauty of the natural world by creating miniature landscapes, floral arrangements, or whimsical woodland scenes. Use vibrant acrylic paints to capture the colors of blooming flowers, the lush green of leaves, or the majestic hues of a sunset.
You can even incorporate natural elements like dried flowers, twigs, or moss for added texture and authenticity.
- Abstract Art: For a modern and minimalist aesthetic, explore the world of abstract art. Experiment with bold colors, geometric patterns, and expressive brushstrokes. You can create abstract paintings that evoke emotions, tell stories, or simply delight the eye.
- Personalized Ornaments: Make your mini art easel ornaments truly special by personalizing them with meaningful designs. Create portraits of loved ones, paint a favorite quote, or depict a cherished memory. These ornaments become treasured keepsakes that hold sentimental value.
Inspiration from Existing Art Easel Designs
Many existing art easel designs offer inspiration for your mini ornaments.
- Traditional Easels: Look to classic easel designs for inspiration. You can recreate the iconic triangular shape with a miniature scale, adding details like a canvas holder and a small adjustable leg. You can even incorporate decorative elements like carvings or paint finishes to enhance the visual appeal.
- Modern Easels: Contemporary art easels often feature sleek and minimalist designs. You can create a modern mini easel by using clean lines, simple shapes, and a muted color palette. You can even incorporate materials like metal or acrylic for a contemporary feel.
I’ve been having so much fun making DIY mini art easel ornaments lately! It’s a great way to use up leftover craft supplies and personalize gifts. I even made some for my niece, who loves to draw, and she was so excited to use them with her art supplies.
Speaking of fun, I’m also in the mood for some movie night snacks, so I’m firing up my trusty my great northern popcorn machine – it makes the best popcorn! Maybe I’ll even make some popcorn-themed ornaments for my next craft project!
- Portable Easels: Portable easels are designed for ease of transport and use. You can create a mini portable easel with a folding design, allowing it to be easily stored or carried around. Consider adding a small handle or strap for added convenience.
Inspiration from Other Crafts
You can also find inspiration from other crafts, such as scrapbooking, paper crafting, and jewelry making.
- Scrapbooking Techniques: Scrapbooking techniques, such as layering, distressing, and embellishing, can be applied to mini art easel ornaments. You can create textured backgrounds, add dimensional elements, and use decorative paper or fabric to enhance the visual appeal.
- Paper Crafting Ideas: Paper crafting provides a wealth of ideas for creating mini art easel ornaments. You can use patterned paper, cardstock, and other paper-based materials to create intricate designs, cut-outs, and embellishments. You can even use paper quilling techniques to create delicate and intricate designs.
DIY mini art easel ornaments are a fun and creative project that can be enjoyed by people of all ages. After spending a morning crafting, I needed a little retail therapy, so I headed over to Brown Thomas to find the perfect outfit for my next workout brown thomas find perfect outfit workout.
Now that I’m feeling motivated and stylish, I can’t wait to get back to my easel and finish painting those adorable mini ornaments!
- Jewelry Making Inspiration: Jewelry making techniques can also be incorporated into your mini art easel ornaments. You can use beads, charms, and other jewelry findings to add decorative accents, create unique textures, and enhance the overall visual appeal.
Step-by-Step Instructions
Creating a DIY mini art easel ornament is a fun and rewarding project that allows you to express your creativity and add a unique touch to your home decor. This step-by-step guide will walk you through the process, providing clear instructions and visual aids to help you along the way.
Preparing the Materials
Before you begin, gather all the necessary materials and tools to ensure a smooth and enjoyable crafting experience.
- Wooden craft sticks: These will form the base of the easel. Choose sticks that are sturdy and of a size that suits your desired ornament size. You can use different lengths for the front and back supports.
- Wooden dowel rod: This will serve as the easel’s support bar, connecting the front and back supports. The diameter of the dowel rod should be slightly smaller than the width of the craft sticks.
- Small piece of cardboard: This will be used as the canvas for your artwork. Choose a thickness that provides adequate support for your chosen medium.
- Glue: Use a strong adhesive that bonds well to wood and cardboard. Wood glue or a hot glue gun are suitable options.
- Paint or markers: Choose colors and materials that complement your artistic vision and desired aesthetic.
- Decorative embellishments (optional): These can include ribbons, glitter, beads, or any other elements that enhance the visual appeal of your ornament.
- Scissors: For cutting the cardboard and any decorative elements.
- Pencil: For marking and sketching on the cardboard.
- Ruler: For measuring and ensuring precise dimensions.
Assembling the Easel
Now that you have gathered all the materials, let’s assemble the easel structure.
- Cut the craft sticks: Measure and cut two craft sticks to the desired length for the front and back supports of the easel. Ensure they are slightly longer than the width of the cardboard canvas. The front support will be slightly shorter than the back support to create an angle.
- Glue the craft sticks: Place the two craft sticks parallel to each other, with the shorter one in front. Apply glue to the ends of the sticks and join them to the dowel rod, ensuring they are perpendicular to the rod.
- Secure the structure: Allow the glue to dry completely before proceeding. Once dry, you can reinforce the structure by adding a small amount of glue to the joints for extra stability.
Preparing the Canvas, Diy mini art easel ornaments
Once the easel structure is complete, it’s time to prepare the canvas for your artwork.
- Cut the cardboard: Using scissors, cut a piece of cardboard to the desired size for your canvas. The width should match the distance between the two craft sticks, and the height should be slightly shorter than the length of the craft sticks.
- Decorate the cardboard: This step is optional, but you can add a decorative border or background to your canvas using paint, markers, or other embellishments. Let the paint dry completely before proceeding.
Creating Your Artwork
With the easel structure and canvas ready, it’s time to unleash your creativity and create your masterpiece.
- Sketch your design: Using a pencil, lightly sketch your design onto the cardboard canvas. This will serve as a guide for your painting or drawing.
- Paint or draw: Choose your preferred medium, whether it be paint, markers, or other artistic tools, and bring your design to life. Be sure to let the paint or ink dry completely before moving on.
Finishing Touches
To complete your mini art easel ornament, add some finishing touches to enhance its visual appeal.
- Attach the canvas: Carefully apply glue to the back of the cardboard canvas and attach it to the easel structure. Ensure the canvas is centered and aligned with the supports. Let the glue dry completely before proceeding.
- Decorate the easel: Add decorative embellishments to the easel, such as ribbons, glitter, or beads, to enhance its visual appeal. Be creative and let your imagination run wild.
Decoration and Customization
Now that you have your mini art easels crafted, it’s time to unleash your creativity and transform them into unique and personalized ornaments. Decorating and customizing your mini easels is a fun and rewarding part of the process, allowing you to add your own personal touch and make each ornament truly special.
Painting and Staining
Painting and staining are versatile techniques that can dramatically alter the look of your mini easels. You can use acrylic paints, craft paints, or even spray paint to create a wide range of colors and finishes.
- Consider painting the entire easel in a solid color for a simple and elegant look.
- Experiment with different paint techniques, such as sponging, stippling, or layering, to create unique textures and effects.
- If you prefer a more natural look, stain your easels with wood stain in various shades to highlight the wood grain.
Embellishment Techniques
Beyond painting, there are numerous ways to embellish your mini art easels and make them stand out.
- Adding texture:Use textured paints, fabric scraps, or even sand to create interesting textures on the surface of the easel.
- Using stencils:Apply stencils to create intricate designs or patterns on the easel, allowing you to add details without needing advanced painting skills.
- Incorporating mixed media:Combine various materials, such as beads, buttons, ribbons, or dried flowers, to create unique and eye-catching embellishments.
Adding Unique Touches
Here are some ideas for adding unique touches to your mini art easels, making each one truly special:
- Personalized messages:Use paint pens or small stencils to write personalized messages, names, or dates on the easel.
- Seasonal themes:Decorate your easels with seasonal motifs, such as snowflakes for winter, flowers for spring, or pumpkins for fall.
- Miniature art:Paint miniature scenes or landscapes on the easel’s canvas, creating a tiny gallery of your own.
Display and Presentation
Your DIY mini art easel ornaments are ready to shine! Now, let’s explore some creative ways to display them and make them a delightful part of your home decor or special occasions. The possibilities are endless, ranging from charming gift tags to festive tree decorations.
You can also use them as unique desk accessories to add a touch of personality to your workspace.
Displaying Mini Art Easel Ornaments
Displaying your mini art easel ornaments effectively is key to showcasing their charm. There are many creative ways to do this, each with its own unique appeal.
- Gift Tags:These ornaments make delightful gift tags, adding a personal touch to any present. Attach them to gifts with a ribbon or twine, or use them as place cards at a dinner party.
- Tree Decorations:Hang them on your Christmas tree, a holiday wreath, or even a spring flower arrangement. Their miniature size and easel design make them perfect for adding a whimsical touch.
- Desk Accessories:Place them on your desk, bookshelf, or windowsill to add a touch of personality and creativity to your space. They can also serve as memo holders or photo displays.
- Gallery Walls:Create a miniature gallery wall by arranging your ornaments on a wall or shelf. Use different sizes and colors to create a visually appealing display.
- Gift Baskets:Include them in gift baskets for birthdays, holidays, or other special occasions. They add a personal and artistic touch to the gift.
Creating a Cohesive Display
To create a cohesive and visually appealing display, consider these tips:
- Choose a Theme:Decide on a theme for your display, such as a color scheme, a holiday, or a specific art style. This will help you choose ornaments that complement each other.
- Mix and Match:Don’t be afraid to mix and match different sizes, shapes, and colors of ornaments. This will create a more dynamic and interesting display.
- Add Visual Interest:Incorporate other decorative elements, such as ribbons, beads, or small plants, to add visual interest to your display.
- Consider Lighting:Good lighting is essential for showcasing your ornaments. Place them in a well-lit area or use a spotlight to highlight their details.
- Experiment:Don’t be afraid to experiment with different arrangements until you find a display that you love.
Variations and Extensions
The basic mini art easel design offers a fantastic starting point for creativity. Let’s explore ways to add twists and turns to your miniature masterpieces. You can experiment with different shapes, sizes, and functionalities to create unique variations.
Shape Variations
The traditional easel shape is not the only option. Here are some alternative forms you can explore:
- Heart-shaped easels: These can add a romantic touch to your art displays. Imagine a heart-shaped easel showcasing a delicate watercolor painting of a blooming rose.
- Circular easels: Circular easels can provide a unique perspective, especially for showcasing circular artwork. You can imagine a circular easel displaying a miniature painting of a full moon.
- Geometric shapes: Experiment with triangles, squares, or even pentagons to create visually striking easels. Imagine a triangular easel holding a vibrant abstract painting.
Size Variations
The size of your mini easel can be adapted to suit the scale of your artwork. Here are some ideas:
- Tiny easels: Perfect for showcasing miniature paintings, these can be used as charms or decorations for small crafts. Imagine a tiny easel holding a miniature portrait of a beloved pet.
- Large-scale easels: Create larger versions for displaying larger artwork or even as decorative elements in your home. Imagine a large-scale easel holding a stunning landscape painting.
Functional Variations
Think beyond the basic easel design and incorporate additional features:
- Easel with a built-in shelf: This allows you to display other small objects or accessories alongside your artwork. Imagine a miniature easel with a small shelf for displaying a tiny vase with a single flower.
- Easel with a light: Add a small LED light to illuminate your artwork, especially for nighttime displays. Imagine a mini easel with a warm-toned LED light showcasing a miniature painting of a starry night sky.
- Easel with a magnetic base: This allows you to attach the easel to metal surfaces like refrigerators or magnetic boards. Imagine a mini easel with a magnetic base holding a miniature painting of a cat, adorning a refrigerator.