DIY Nail Polish Shelving: Organize Your Collection, Unleash Your Creativity
Organizing a growing nail polish collection can quickly become a visual and spatial challenge. As shades multiply and bottles accumulate, maintaining order and accessibility becomes paramount for any enthusiast. Beyond mere tidiness, a well-designed nail polish shelving system can transform a chaotic hoard into a curated display, inspiring creativity and simplifying your at-home manicure routine. This comprehensive guide delves into the practicalities and creative possibilities of crafting your own nail polish shelves, empowering you to build functional and aesthetically pleasing solutions tailored to your space and collection size. From repurposing common household items to undertaking more involved woodworking projects, the DIY approach offers unparalleled customization, cost-effectiveness, and the satisfaction of a handmade touch. Understanding the core principles of effective storage – visibility, accessibility, and protection – will guide your design decisions, ensuring your handmade shelves not only house your polish but also enhance its visual appeal and longevity.
The foundational element of any successful nail polish shelving project lies in understanding the scale and scope of your collection. Before picking up a tool, take stock of your current inventory. Categorize your polishes by brand, color family, finish (shimmer, matte, glitter), or even frequency of use. This inventory process provides crucial data for determining the required dimensions, the number of shelves, and the ideal spacing. A small collection might be adequately housed in a repurposed spice rack or a few strategically placed shadow boxes, while a substantial stash will necessitate more robust and expansive shelving solutions. Consider the physical dimensions of your nail polish bottles. Standard bottles vary in height and width, and accommodating a mix of shapes and sizes is essential for efficient utilization of shelf space. Many brands, like OPI or Essie, have relatively uniform bottle shapes, but be mindful of bulkier designer bottles or unique limited editions. Measuring the height of your tallest bottle and the width of your widest bottle will inform your shelf depth and height. For instance, if your tallest bottle stands at 3.5 inches, your shelf interior height needs to be at least 4 inches to allow for easy removal without scraping the top. Similarly, a shelf depth of 3 inches will comfortably accommodate most standard bottles, leaving a small buffer for ease of access.
Material selection is a critical juncture in DIY nail polish shelving, directly impacting durability, aesthetics, and the complexity of the build. Wood is a perennial favorite due to its versatility and ease of manipulation. Plywood, MDF (medium-density fiberboard), and solid wood planks (pine, oak, maple) are all viable options. Plywood offers excellent strength and stability, especially for larger constructions, and is generally more affordable than solid wood. MDF is a smooth, paintable surface ideal for a seamless, modern look, but it can be heavier and less resistant to moisture than plywood. Solid wood provides a classic, premium feel and exceptional durability but comes with a higher cost and requires more careful finishing. Beyond wood, consider repurposing existing items. Old drawers, shadow boxes, picture frames, and even repurposed spice racks can be transformed into functional polish holders with minimal effort. For a more industrial or modern aesthetic, consider using acrylic sheets, metal wire shelving, or even repurposed pallet wood. The choice of material will also influence the tools and techniques required. Working with thin plywood might involve a handsaw and wood glue, while constructing a more substantial unit from solid wood could necessitate a miter saw, drill, and screws.
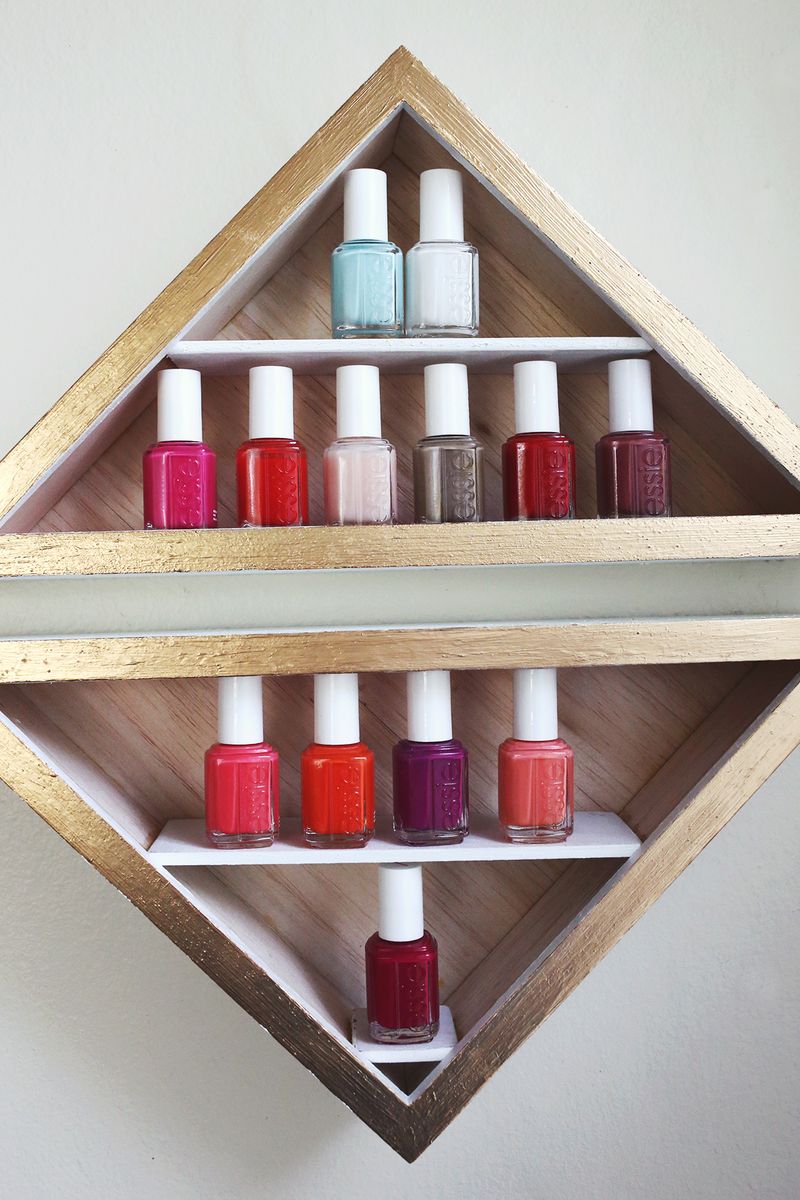
For those seeking simpler, quicker solutions, repurposing existing items offers an immediate path to organized nail polish storage. A shallow drawer organizer, typically used for cutlery or small tools, can be lined with felt or craft foam to prevent bottles from sliding and scratching. The individual compartments provide natural separation, making it easy to group polishes by color or brand. Vintage spice racks, especially those with multiple tiers, can be surprisingly effective. Ensure the individual spice jars or compartments are large enough to accommodate your polish bottles, or consider removing the internal dividers to create open shelving. Shadow boxes, often used for displaying collectibles, can be mounted on walls, turning your polish collection into a decorative element. For added functionality, consider adding small shelves or dividers within the shadow box. Picture frames, particularly larger ones, can be adapted. By attaching a thin backing of wood or sturdy cardboard and adding horizontal dividers, you can create a compact wall-mounted display. Consider adding small lip edges to prevent bottles from sliding off. Old CD racks, with their horizontal slots, can also be repurposed, though you might need to reinforce them to handle the weight of multiple nail polish bottles. The key with repurposing is to assess the existing structure, consider its weight-bearing capacity, and adapt it to the specific needs of your nail polish collection.
Embarking on a more involved woodworking project allows for complete customization and the creation of truly unique shelving solutions. A basic wall-mounted shelf unit is an excellent starting point. Begin by cutting your chosen wood material (plywood or MDF are good choices for beginners) into the desired lengths for the shelf sides, top, bottom, and any internal dividers. Use wood glue and screws to assemble the basic box structure. For added rigidity, consider adding a backing panel. Once the main structure is assembled, you can add horizontal dividers to create individual compartments for each polish bottle. Measure the height of your tallest bottle and add a small buffer (around 0.5 inches) to determine the appropriate spacing between shelves. Use small wooden dowels or shelf pins to support the dividers, allowing for adjustability if your collection grows or bottle sizes change. For a more polished look, sand all surfaces smooth and apply a sealant, stain, or paint. Consider the weight of your collection when deciding on mounting hardware. Heavy-duty brackets and wall anchors are essential for ensuring the shelves remain securely attached to the wall.
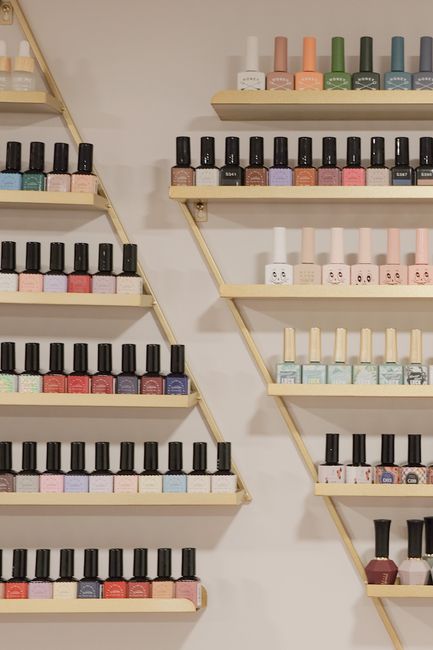
For a more elaborate and visually appealing option, consider building tiered or rotating nail polish shelves. Tiered shelves, often designed as stepped risers, offer excellent visibility, allowing you to see every bottle at a glance. These can be constructed from wood by creating multiple levels with varying depths and heights. Think of building a small staircase with individual platforms for each row of polish. Rotating shelves, also known as lazy Susans, are ideal for corner spaces or for maximizing access within a cabinet. These can be built by attaching a turntable mechanism to the base of your shelving unit, allowing the entire unit to spin. This not only provides easy access but also adds a dynamic element to your storage. For a more compact and integrated solution, consider building shelves directly into existing furniture, such as a shallow cupboard or a hutch. This approach can seamlessly blend your nail polish storage with your existing decor.
The design of your nail polish shelves should prioritize functionality and ease of access. Consider the angle at which you want your polishes displayed. A slight incline can improve visibility, especially in tiered units. Some DIYers opt for creating individual slots or channels within the shelves to keep bottles upright and prevent them from tipping. This can be achieved by cutting grooves into the shelf material or by attaching small wooden strips to create dividers. The depth of your shelves is also crucial. Too deep, and bottles can get lost in the back; too shallow, and they might tumble off. A depth of 2.5 to 3 inches is generally sufficient for most standard nail polish bottles. The height between shelves should accommodate your tallest bottles with ease. Think about incorporating a small lip or edge along the front of each shelf to prevent bottles from sliding forward, especially if your shelves are not perfectly level or if you live in an earthquake-prone area.
Paint, stain, and finishes are where your DIY nail polish shelves can truly come alive and complement your personal style. The raw wood can be transformed with a splash of color. Vibrant hues can create a playful and energetic display, while muted tones can offer a sophisticated and calming aesthetic. Consider the overall decor of the room where your shelves will be located. A bold, lacquered finish can make a statement, while a natural wood stain can enhance the warmth and texture of the material. For a clean, modern look, consider painting the shelves a crisp white or a sleek black. If you’re working with MDF, a smooth primer and multiple thin coats of paint will yield the best results. For a more rustic or vintage feel, consider distressing the paint or using a wax finish. Remember that nail polish bottles are often glass, and direct sunlight can degrade the polish over time. If your shelves will be located near a window, consider using a UV-protective sealant or choosing a paint or stain that offers some degree of light protection.
Beyond basic shelving, consider incorporating elements that enhance the user experience and visual appeal. Small LED strip lights can be integrated beneath each shelf to illuminate your collection, making it easier to select shades and adding a touch of glamour. Consider adding labels to your shelves or individual compartments, especially if you have a large and diverse collection. This will not only help with organization but also with quickly locating specific colors. If you’re creating wall-mounted shelves, think about the overall aesthetic. You can frame the shelves with decorative molding or incorporate them into a larger wall art installation. For a truly personalized touch, consider adding small decorative elements to the shelves themselves, such as miniature ceramic figurines, polished stones, or even small mirrors that reflect the light and highlight your polish colors.
Safety and stability are paramount considerations when building and installing any DIY shelving unit, particularly one designed to hold potentially heavy glass bottles. Always ensure your chosen materials are sturdy enough for the intended load. When assembling wooden shelves, use ample wood glue and appropriate screws. For wall-mounted units, the quality of your brackets and wall anchors is non-negotiable. Stud finders are invaluable tools for locating wall studs, which provide the strongest mounting points. If mounting into drywall, always use anchors rated for significantly more weight than you anticipate your collection to be. Regularly inspect your shelves for any signs of wear, loosening screws, or sagging. If you have young children or pets, consider adding a latch or safety mechanism to prevent the shelves from being pulled down. The weight of a large nail polish collection can be substantial, so err on the side of caution when it comes to structural integrity and mounting.
The process of making your own nail polish shelves extends beyond mere construction; it’s an opportunity to engage with your hobby on a deeper, more creative level. By designing and building your own storage, you are not just organizing; you are curating and personalizing your passion. This DIY approach allows for a dynamic evolution of your storage as your collection grows, enabling you to adapt and expand your shelving solutions as needed. The satisfaction derived from a well-organized and beautifully displayed collection, born from your own hands, is a testament to the power of personalized organization and the enduring appeal of the DIY ethos.
