
DIY Foil Strip Manicure: A Comprehensive Guide to Stunning, Salon-Quality Nails at Home
The allure of the foil strip manicure lies in its ability to deliver intricate, eye-catching designs with a surprising level of ease and affordability. Gone are the days of needing professional tools and extensive artistic talent to achieve a statement nail. With the advent of specialized foil transfer strips, transforming your fingertips into miniature works of art is now entirely within reach for the at-home enthusiast. This comprehensive guide will delve into every aspect of the DIY foil strip manicure, from understanding the essential materials and techniques to troubleshooting common issues and exploring creative design possibilities. By the end of this article, you’ll possess the knowledge and confidence to execute flawless foil strip manicures, elevating your nail game without ever leaving your house.
Understanding the Core Components: What You Need for a Foil Strip Manicure
Before embarking on your foil strip manicure journey, it’s crucial to gather the necessary supplies. The cornerstone of this technique is, of course, the foil transfer strip. These are thin, flexible sheets imprinted with metallic, holographic, iridescent, or patterned designs. They come in a vast array of colors, finishes, and patterns, offering endless possibilities for personalization. You’ll also need a specialized foil glue or adhesive. While some individuals attempt to use regular nail polish as an adhesive, the results are often inconsistent and short-lived. Dedicated foil glue is formulated to create the ideal tacky surface that allows the foil design to adhere effectively. For application, tweezers or an orange stick are indispensable for precise placement and handling of the delicate foil strips. Finally, a top coat is essential for sealing the design and ensuring its longevity. A good quality, chip-resistant top coat will lock in the foil, prevent peeling, and add a glossy finish. While not strictly mandatory for the application itself, having a nail file and buffer on hand will help prepare your nails for a smooth canvas and refine the edges after application.
The Essential Prep Work: Laying the Foundation for a Flawless Foil Manicure
Like any successful nail enhancement, proper preparation is paramount. Begin by ensuring your nails are clean and free of any old polish or debris. Gently buff your nails to create a smooth surface, removing any ridges or imperfections. If you desire a specific base color, apply a thin, even layer of your chosen nail polish and allow it to dry completely. This base color will act as a background for your foil design and can significantly impact the overall aesthetic. For optimal foil adhesion, it’s often recommended to apply a thin layer of your chosen base color, but do not apply a top coat at this stage. The foil glue needs to adhere directly to the nail polish or the bare nail if you’re opting for a clear foil design. Ensure your cuticles are pushed back and any excess skin is trimmed. This not only provides a cleaner look but also prevents the foil from lifting or peeling prematurely around the cuticle area.
The Art of Application: Mastering the Foil Transfer Technique
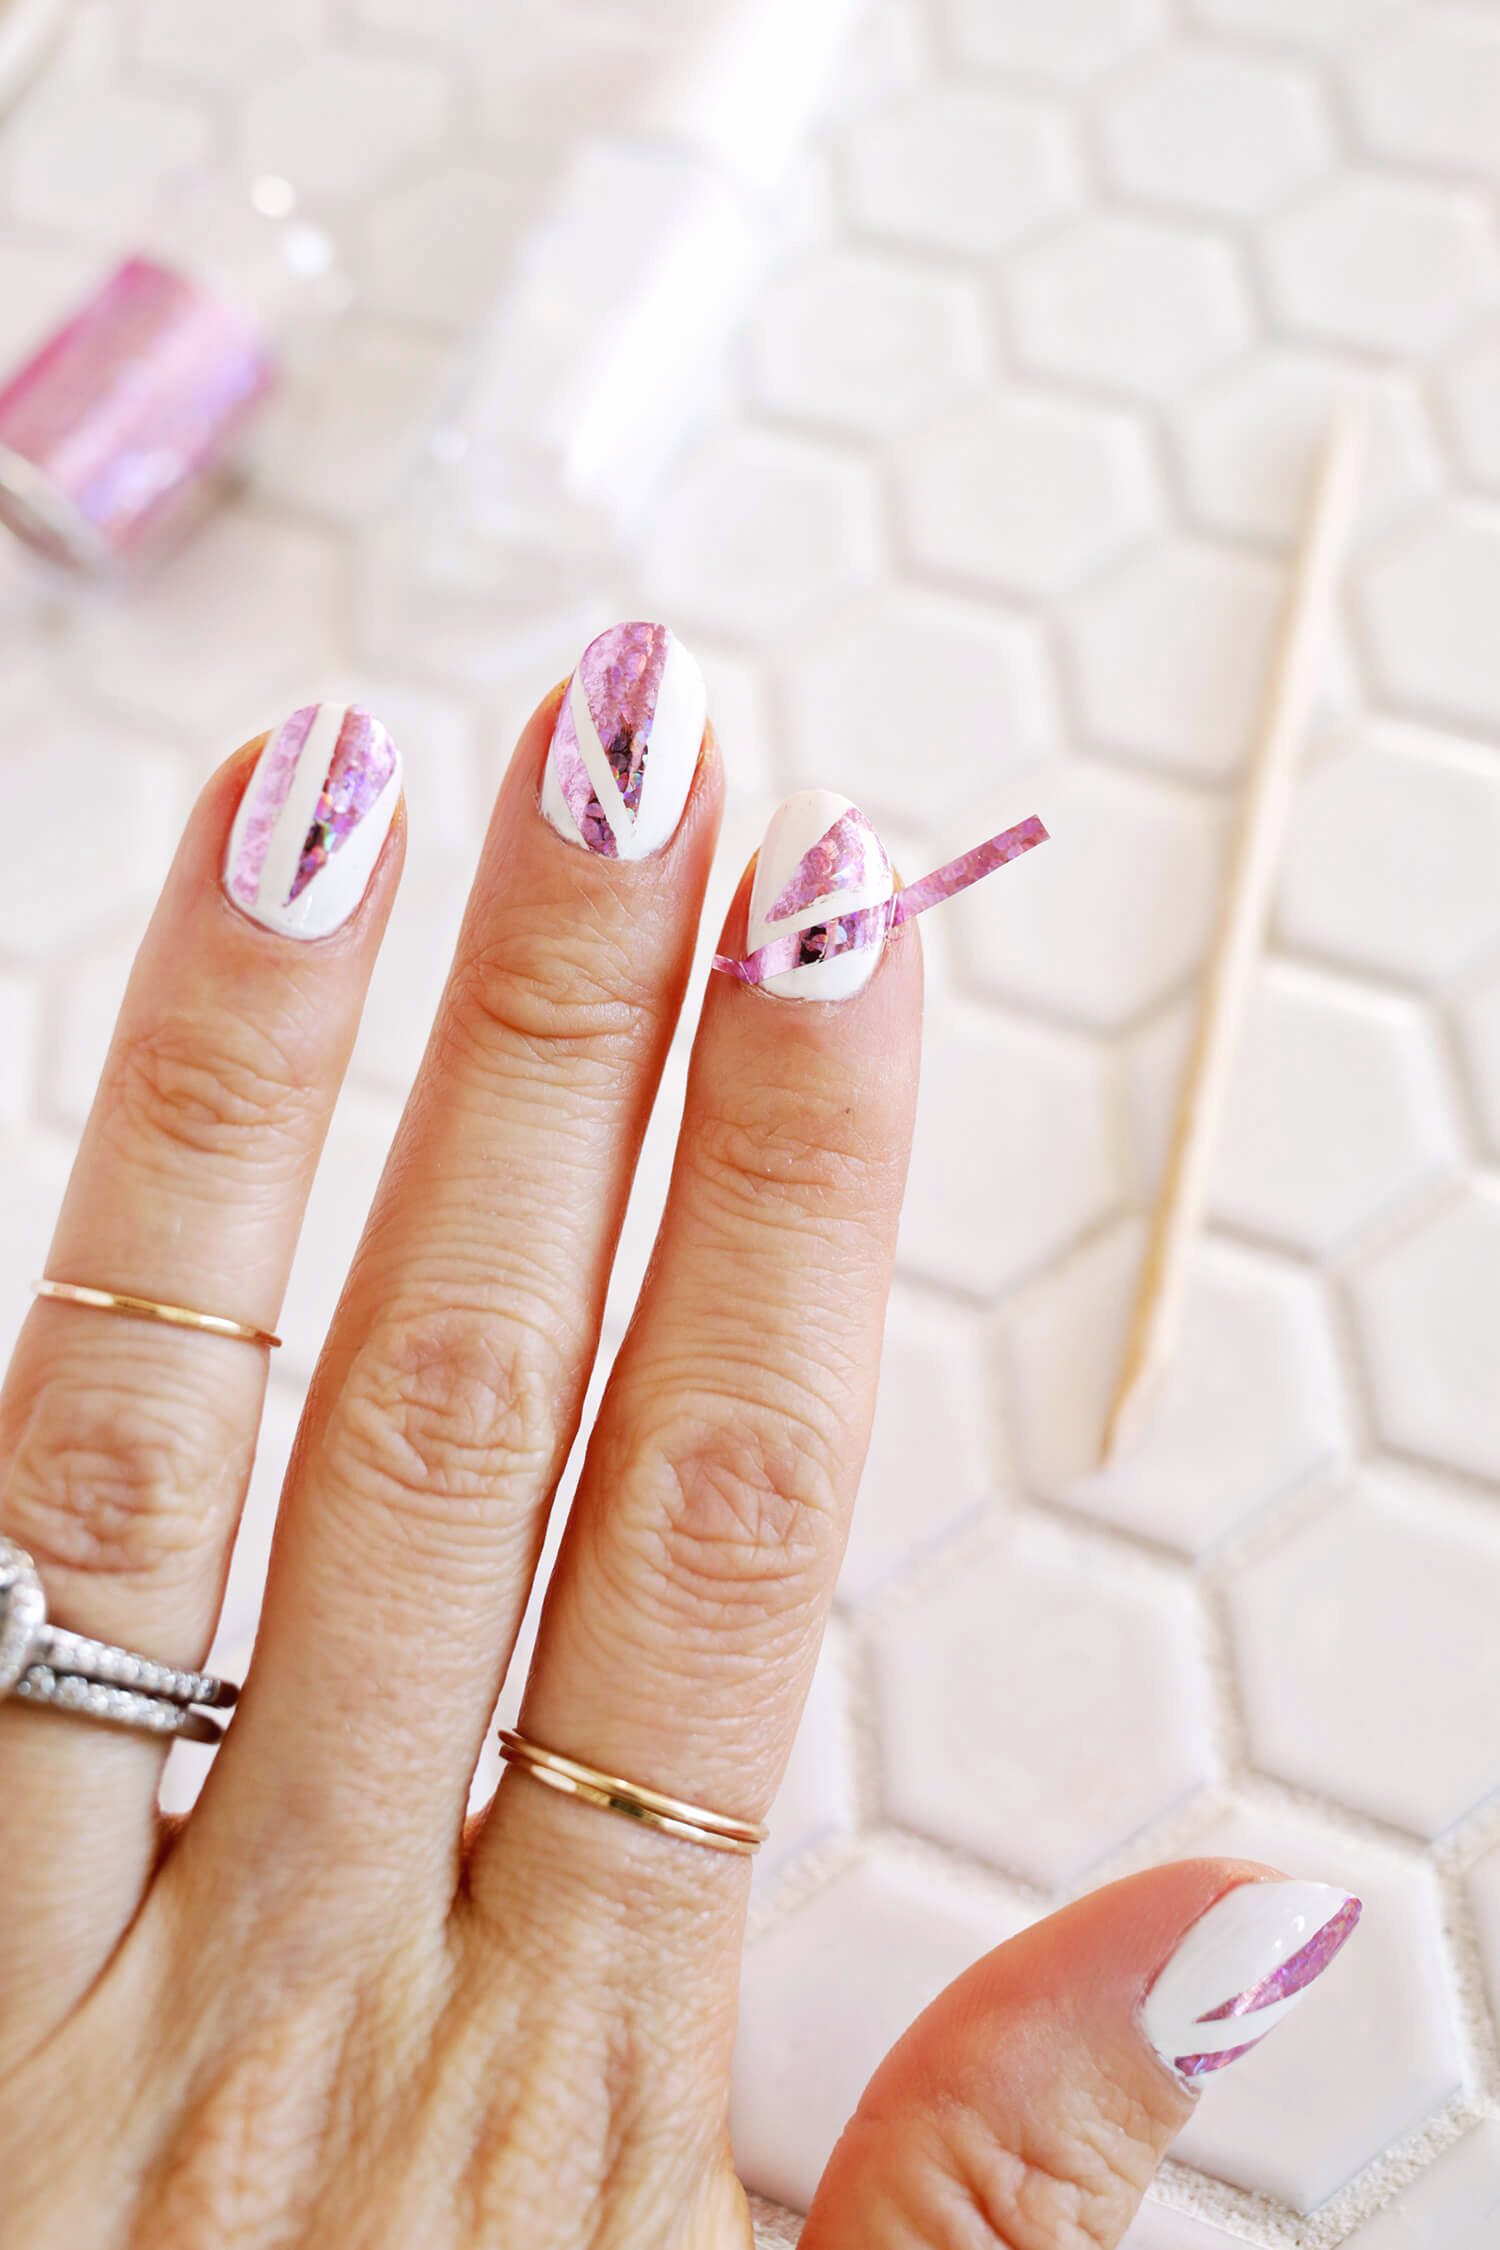
The application of the foil strip is the most critical step in achieving a successful manicure. Start by selecting your desired foil strip and cutting it to a size slightly larger than the nail you intend to cover. This allows for some wiggle room during application. Next, apply a thin, even layer of your specialized foil glue to the nail. It’s vital to ensure complete coverage, reaching all edges and corners. Allow the foil glue to dry until it becomes tacky and slightly translucent. This can take anywhere from 30 seconds to a couple of minutes, depending on the brand and ambient humidity. You’ll know it’s ready when you can gently touch the surface with your finger without it feeling wet, but it still has a discernible stickiness.
Once the glue is tacky, carefully take your pre-cut foil strip and place it design-side down onto the glued surface of your nail. Gently press down with your finger or the flat side of your orange stick, ensuring the foil makes full contact with the tacky glue. Work from the center of the nail outwards, smoothing out any air bubbles or wrinkles as you go. The goal is to transfer the design uniformly onto the nail.
The moment of truth arrives with the removal of the foil. With a swift, decisive motion, peel the foil away from the nail, starting from one edge and pulling it back at a slight angle. You should see the metallic or patterned design beautifully transferred onto your nail. If there are any bare spots or incomplete transfers, don’t despair. You can carefully reapply a tiny amount of foil glue to those areas, allow it to become tacky again, and re-press a small section of the foil onto the specific spot. Patience and precision are key here.
Sealing the Deal: Top Coating for Durability and Shine
The final, indispensable step in your DIY foil strip manicure is the application of a high-quality top coat. This is what locks in your stunning design, protects it from chipping and peeling, and adds a professional, glossy finish. Apply a generous, even layer of top coat over the entire nail, ensuring it covers the foil completely and seals the edges. Be careful not to apply the top coat too thickly, as this can sometimes cause the foil to wrinkle or lose some of its shine. Allow the top coat to dry completely, which may take longer than a standard nail polish due to the added layers. Resist the urge to touch your nails before they are fully dry to avoid smudging your hard work. A quick-drying top coat can be a lifesaver here, significantly reducing the waiting time.
Troubleshooting Common Foil Strip Manicure Issues
Even with the best intentions and careful application, you might encounter a few hiccups along the way. One common problem is incomplete foil transfer, where parts of the design don’t adhere to the nail. This is usually due to insufficient tackiness of the foil glue. Ensure you’re allowing adequate drying time for the glue. If it’s too wet, the foil will smudge; if it’s too dry, it won’t stick. Another issue is wrinkling or bubbling in the foil. This can occur if you press too hard, apply the foil unevenly, or if the foil glue is not perfectly dry. Gentle, even pressure and patience are your allies. Peeling foil, particularly around the cuticle or free edge, is often a sign of inadequate sealing with the top coat or if the foil glue didn’t adhere properly to the base. Ensure your top coat reaches all the way to the edge of the nail and seals it securely. If you notice any lifting, gently buff the edge and reapply a tiny amount of top coat. Streaking in holographic foils can sometimes happen if the top coat is applied unevenly or if the foil itself has inherent imperfections. Experimenting with different top coat brands and application techniques can help mitigate this. Remember, practice makes perfect, and each manicure will bring you closer to mastering the technique.
Creative Design Possibilities: Beyond Simple Coverage
The beauty of the foil strip manicure lies in its versatility. While covering an entire nail is a popular and impactful approach, you can also use foil strips for more intricate designs. Consider using partial application to create accents on specific areas of the nail, such as the tips, the cuticle line, or as a geometric overlay. You can also layer different foil patterns on top of each other for a truly unique, multidimensional effect. For example, a holographic foil layered over a metallic chrome can create stunning depth. Combining foil with nail art pens or stamping opens up a world of possibilities. You can stamp a design and then apply a foil accent to highlight certain elements. Cutting small shapes or strips from your foil sheets allows for delicate patterns, tiny dots, or even freehand designs. Don’t be afraid to experiment with different color combinations and textures. The world of foil transfer is vast and ever-evolving, with new patterns and finishes emerging regularly. Explore different finishes like matte, iridescent, and mirrored effects to add further dimension to your creations.
Maintaining Your Foil Strip Manicure: Tips for Longevity
To ensure your stunning foil strip manicure lasts as long as possible, a few maintenance tips are crucial. Avoid excessive contact with water, especially hot water, as this can soften the adhesive and lead to peeling. When washing dishes, wear gloves. Similarly, protect your nails from harsh chemicals found in cleaning products. Be mindful of your nails’ interactions with everyday objects – avoid using them as tools to open cans or scrape surfaces, as this can easily damage the foil. Reapply a thin layer of top coat every few days, especially to the free edge of the nail, to reinforce the seal and prevent chipping. If you notice any minor lifting or imperfections, address them promptly with a tiny touch-up of top coat. Proper hydration of your cuticles with cuticle oil can also contribute to overall nail health and may help prevent the foil from lifting.
SEO Optimization for Your DIY Foil Strip Manicure Guide
To ensure this guide reaches a wide audience searching for DIY nail solutions, incorporating relevant keywords is essential. Throughout the article, we’ve naturally included terms like "DIY foil strip manicure," "foil nails," "transfer foil nails," "how to do foil nails," "at-home manicure," "nail art tutorial," "metallic nails," "holographic nails," and "nail art at home." Using these terms in headings, subheadings, and the body content will improve search engine ranking. Additionally, structuring the content with clear headings and bullet points enhances readability and SEO. Including descriptive phrases that answer common user queries, such as "easy nail art ideas" or "long-lasting nail designs," further strengthens the article’s discoverability. The detailed, step-by-step approach and troubleshooting advice cater to users seeking comprehensive information, making the article a valuable resource.
Conclusion: Empowering Your Inner Nail Artist
The DIY foil strip manicure offers a captivating blend of glamour, creativity, and accessibility. By understanding the materials, mastering the application techniques, and implementing simple troubleshooting and maintenance strategies, you can consistently achieve professional-looking results from the comfort of your own home. This guide has provided you with the foundational knowledge to embark on this exciting nail art journey. Embrace the endless possibilities, experiment with different designs and finishes, and let your creativity flow. With a little practice, your fingertips will soon be adorned with stunning, salon-worthy foil strip manicures that are sure to turn heads. Unleash your inner nail artist and transform your nails into a canvas of dazzling metallic and intricate patterns.
