Master Your Domain: Expert Tips for an Organized Craft Space
Effective craft space organization transcends mere tidiness; it’s about creating a functional, inspiring environment that fuels creativity and streamlines your workflow. A well-organized space minimizes wasted time searching for supplies, prevents project abandonment due to frustration, and allows you to focus on the joy of making. This comprehensive guide offers actionable strategies, from fundamental decluttering to advanced storage solutions, designed to transform your craft area into a haven of productivity and inspiration.
Declutter Ruthlessly: The Foundation of Order
Before any organizational system can be implemented, a thorough decluttering process is paramount. Approach this with a critical eye. Gather all your craft supplies from every corner of your home – drawers, boxes, shelves, even forgotten nooks. Create distinct zones for sorting: Keep, Donate/Sell, Trash, and Relocate (items that belong elsewhere in your home). Be honest about what you truly use and love. Ask yourself: "Have I used this in the last year?" "Do I have multiple of this item?" "Does this item contribute to my current creative endeavors?" Broken or unusable items should be discarded without sentiment. Fabric scraps can be surprisingly useful, but if you have an overwhelming accumulation of tiny, unusable pieces, it might be time to let some go. Similarly, consider destashing duplicate tools or supplies you no longer need. Donating to schools, community centers, or other crafters can give your pre-loved items a new lease on life. This initial purge is crucial; attempting to organize clutter is a futile exercise.
Categorize and Conquer: Grouping Like with Like
Once decluttered, the next vital step is categorization. Group similar items together. This might involve grouping all your yarn by type and weight, all your paints by medium (acrylics, watercolors, oils), all your beads by color and size, or all your sewing notions together. Within these broad categories, you can further subdivide. For example, your yarn might be sorted into sock yarn, worsted weight, bulky weight, and specialty yarns. Your paper crafting supplies could be divided into cardstock, patterned paper, embellishments, stamps, and dies. This granular approach allows for more efficient retrieval and ensures you can easily find what you need for a specific project. Think about the natural flow of your creative process. If you frequently combine beads with jewelry findings, store them in close proximity. This categorization is the bedrock of any efficient storage system.
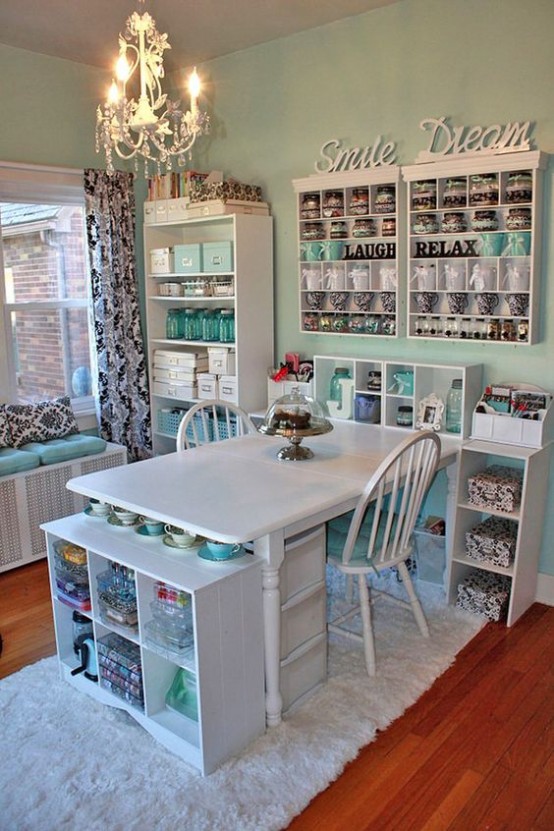
Maximize Vertical Space: The Unsung Hero of Storage
In many craft spaces, especially smaller ones, horizontal space is a luxury. Vertical space, however, is often underutilized. Invest in shelving units, wall-mounted racks, and tiered organizers. Pegboards are incredibly versatile for hanging tools, scissors, rulers, and even small baskets for craft supplies. Consider wall-mounted bins or containers that can be easily accessed. For yarn, tall shelving units with adjustable shelves allow you to store a large quantity efficiently. Stacking bins are also excellent for maximizing vertical real estate, but ensure they are clearly labeled so you don’t have to open every single one to find what you’re looking for. Even small items like buttons can be stored in tiered drawer units or small cubbies that stack vertically. Don’t underestimate the power of the wall; it’s your largest untapped storage potential.
Invest in Smart Storage Solutions: Tools of the Trade
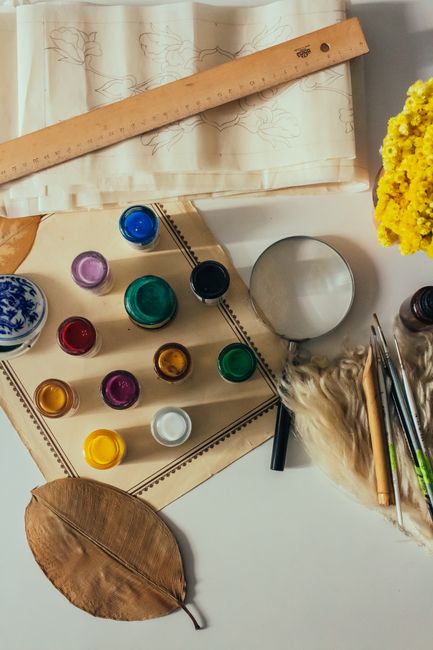
The right storage solutions can make a significant difference. For smaller items like beads, buttons, and hardware, clear, compartmentalized containers are ideal. These allow you to see the contents at a glance and prevent mixing. Thread spools can be neatly organized on thread racks or in specialized thread organizers. For larger items like fabric, consider fabric storage shelves, rolling carts, or even large drawers. Paper crafting supplies benefit from dedicated paper holders, magazine files, and binders. If you have a lot of paints, consider a paint organizer rack or a rolling cart designed for art supplies. Jars, both glass and plastic, are excellent for storing a wide array of items, from pens and pencils to glitter and sequins. The key is to choose containers that fit the items you’re storing and that integrate well with your overall space.
Label Everything: The Ultimate Time Saver
This is arguably the most critical tip for long-term organization. Once everything is categorized and in its place, label it. Use clear, concise labels. This applies to bins, drawers, shelves, and even individual containers. Labels eliminate guesswork and save precious time. Instead of rummaging through a bin labeled "Misc. Craft Stuff," a clearly labeled bin for "Embroidery Floss" or "Felt Sheets" makes finding what you need instantaneous. Consider different labeling methods: simple printed labels, handwritten labels with a good marker, or even custom-designed labels for a more polished look. For fabric, you might label by fiber content, width, or even color family. For paints, label by brand, color name, and medium. Consistency in your labeling system is key for maintainability.
Optimize Your Workspace Layout: Flow and Functionality
Your craft space layout should support your creative process. Identify the areas where you perform specific tasks. Your cutting station should be well-lit and have ample space for your cutting mat and tools. Your sewing machine should be positioned for comfortable use, with easy access to threads, needles, and bobbins. Your painting or drawing area should have good lighting and organized access to your paints, brushes, and paper. Consider the distance between frequently used items. If you constantly reach for your scissors when cutting paper, ensure they are within easy reach of your cutting surface. Think about natural light and artificial lighting. Good lighting is essential for detailed work and can reduce eye strain. Mobile storage solutions, like rolling carts, can be invaluable for bringing supplies to your workspace as needed, then tucking them away when not in use.
Storage for Specific Craft Types:
- Sewing: Fabric bolts and folded fabrics on shelves, drawers for notions (thread, needles, pins, scissors), wall-mounted racks for rulers and rotary cutters, a dedicated sewing machine table with integrated storage.
- Knitting/Crocheting: Yarn bins or baskets organized by weight and fiber, shelves for pattern books, a small bag for on-the-go projects (yarn, needles, pattern).
- Paper Crafts: Cardstock and patterned paper holders, drawers or bins for stamps and dies, shelves for embellishments (stickers, rhinestones, ribbon), dedicated containers for pens, markers, and adhesives.
- Painting/Drawing: Easel with brush holders, paint racks or rolling carts for tubes and bottles of paint, drawers for charcoal, pencils, and pastels, designated shelves for canvases and paper pads.
- Jewelry Making: Small compartment organizers for beads and findings, specialized pliers and tools on a pegboard or in a tool roll, storage for wire, clasps, and charms.
Embrace a "One-In, One-Out" Policy: Sustainable Organization
To prevent your craft space from becoming overwhelmed again, adopt a "one-in, one-out" policy. For every new craft supply you bring into your space, aim to remove a similar item. Bought a new skein of yarn? Consider donating or selling an old one you no longer use. Acquired a new set of paintbrushes? Destash an older, worn-out set. This practice helps maintain a healthy balance of supplies and prevents clutter from accumulating. It requires mindful purchasing and a commitment to regular purges.
Regular Maintenance: The Key to Lasting Order
Organization isn’t a one-time event; it’s an ongoing process. Schedule regular maintenance sessions. This could be a quick 15-minute tidy-up at the end of each crafting session, a weekly "put away" hour, or a monthly deeper dive into organization. Put items back in their designated homes immediately after use. Don’t let piles accumulate. This consistent effort will prevent the chaos from creeping back in and ensure your craft space remains a functional and inspiring environment.
Personalize Your Space: Make it Yours
While functionality is paramount, don’t forget to personalize your craft space. Add elements that inspire you: artwork, plants, comfortable seating, or even a motivational quote. A space that feels inviting and reflects your personality will make you more inclined to spend time there and, consequently, more likely to keep it organized. Ultimately, your craft space should be a reflection of your creative spirit.
Invest in Good Lighting: Crucial for detail work, reducing eye strain, and accurate color representation, good lighting can be the difference between frustration and enjoyable crafting. Consider a combination of ambient overhead lighting and task lighting (desk lamps, clip-on lights).
Utilize Drawer Dividers and Inserts: For drawers, dividers are essential for preventing items from becoming a jumbled mess. These can be store-bought or even DIY solutions made from cardboard.
Think About Accessibility: Place frequently used items within easy reach. Less frequently used items can be stored higher up or further away.
Consider a Dedicated "Works in Progress" Area: Having a designated spot for current projects prevents them from cluttering your main workspace. This could be a specific shelf, a portable bin, or a designated corner.
Don’t Overlook "Dead Space": Areas like the sides of cabinets, the back of doors, or even the space above windows can often be utilized with clever storage solutions like wall-mounted racks or small shelves.
Create a "Inspiration Zone": This could be a bulletin board, a shelf with inspiring books and samples, or a visual display of your favorite color palettes. Keeping inspiration readily available can spark new ideas.
Keep Cleaning Supplies Handy: Having cleaning supplies (dust cloths, wipes, vacuum cleaner) easily accessible makes it easier to maintain a clean and hygienic workspace, which in turn contributes to better organization.
Don’t Be Afraid to Rearrange: As your crafting habits evolve or your collection grows, your organizational needs will change. Periodically re-evaluate your space and be willing to rearrange and adapt your storage solutions to best suit your current workflow.
Utilize Clear Bins for Visibility: For items where seeing the contents is beneficial (e.g., craft supplies in general, fabric scraps), clear bins are invaluable. This eliminates the need to open every container to identify its contents.
Invest in a Good Quality Tool Chest or Rolling Cart: For crafters who use a variety of tools, a sturdy tool chest or a well-designed rolling cart can provide excellent organization and mobility.
Think About Your Hobby’s Specific Needs: The best organizational strategies are tailored to the specific requirements of your chosen craft. Research and explore solutions that are common and effective within your particular craft community.
