DIY Patch Laptop Case – Ever wished your laptop had a personality as unique as you? With a little creativity and some basic materials, you can transform a plain laptop case into a stylish and functional piece of art.
This project is perfect for those who love to personalize their belongings and express their individual style.
Imagine a laptop case that not only protects your precious device but also reflects your passions, hobbies, and personality. This is where the magic of DIY comes in. We’ll explore different design ideas, materials, and techniques to help you create a truly unique and personalized laptop case.
Introduction to DIY Laptop Cases

In the digital age, laptops are an indispensable part of our lives, accompanying us on our journeys and safeguarding our valuable data. Protecting this precious device from the wear and tear of everyday use is paramount. While commercially available laptop cases offer convenience, a DIY approach presents an opportunity to create a custom-tailored solution that meets your specific needs and reflects your personal style.
This blog post will guide you through the process of crafting your own unique laptop case, exploring the benefits, materials, and considerations involved.
Materials for Laptop Cases
The choice of materials is crucial for the durability and aesthetics of your laptop case. A diverse range of materials cater to different preferences and requirements. Let’s delve into some commonly used options:
- Fabric:Fabrics like canvas, denim, or cotton offer a blend of durability and affordability. They are lightweight and can be easily customized with patterns, embroidery, or embellishments.
- Leather:Leather exudes elegance and longevity, providing excellent protection against scratches and minor impacts. Its natural texture and patina develop over time, adding character to your case.
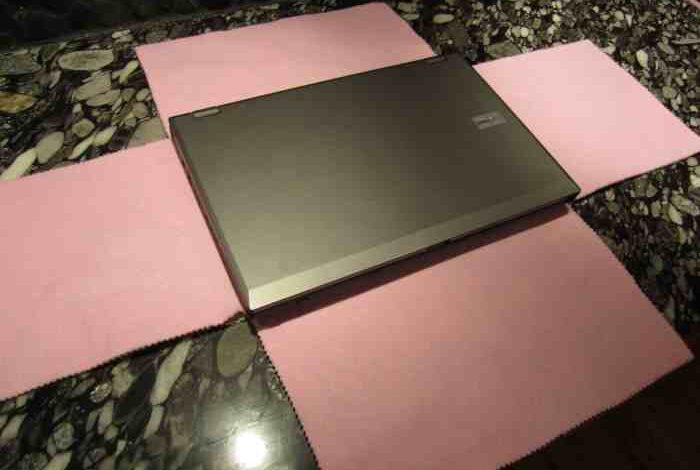
- Felt:Felt is a soft and flexible material that provides cushioning and scratch protection. It is ideal for lining the interior of your case, ensuring your laptop remains free from abrasions.
- Neoprene:Neoprene is a water-resistant material often used for wetsuit fabrication. Its flexibility and shock-absorbing properties make it suitable for protecting laptops from minor bumps and spills.
- Hard Plastic:Hard plastic cases offer robust protection against impacts and drops. They are often used for laptops that require extra security, particularly for travel or outdoor activities.
Choosing the Right Size and Fit
The most important factor in creating a DIY laptop case is ensuring a perfect fit. A case that is too small will restrict access and potentially damage your laptop, while a case that is too large can make it bulky and inconvenient to carry.
Measure your laptop’s dimensions carefully, including its width, depth, and height. Leave a little extra space around the laptop for padding and ease of access. If you plan to include additional compartments for accessories, factor in their dimensions as well.
Design Considerations
The design of your laptop case is where you can truly express your creativity and make it uniquely yours. You can choose from a variety of materials, textures, colors, and patterns to create a case that reflects your personal style.
Choosing Materials
The choice of material is crucial, as it impacts the look, feel, and durability of your laptop case. Here are some popular options:
- Fabric: Fabric is a versatile material that offers a wide range of textures, patterns, and colors. Popular choices include cotton, canvas, felt, and fleece.
- Leather: Leather is a durable and stylish material that adds a touch of sophistication to your case. It can be sourced from various animals, such as cow, sheep, and goat.
- Wood: Wood is a natural material that adds warmth and character to your case. It can be stained, painted, or left in its natural state.
- Plastic: Plastic is a lightweight and durable material that is easy to clean and maintain. It is available in a wide range of colors and textures.
- Metal: Metal is a strong and durable material that can add a modern and industrial look to your case. Aluminum and steel are popular choices.
Incorporating Textures
Texture can add depth and visual interest to your laptop case. You can achieve different textures by using a variety of materials, such as:
- Embossed fabric: Embossed fabric has a raised design that creates a tactile experience. It can be used to add intricate patterns or simple geometric shapes.
- Woven fabric: Woven fabric has a unique texture that is created by interlacing threads. It can be used to create patterns or to add a rustic look to your case.
- Flocked fabric: Flocked fabric has a velvety texture that is created by applying tiny fibers to a base fabric. It can be used to add a soft and luxurious feel to your case.
- Leather with a distressed finish: Leather with a distressed finish has a vintage and worn look that adds character to your case.
Playing with Colors and Patterns
Color and pattern are powerful tools for expressing your personality and making your laptop case stand out. You can:
- Use contrasting colorsto create a bold and eye-catching design. For example, you could use a bright red fabric for the exterior of your case and a black fabric for the lining.
- Use complementary colorsto create a harmonious and sophisticated design. For example, you could use a blue fabric for the exterior of your case and a yellow fabric for the lining.
- Use a single colorto create a minimalist and sleek design.
- Incorporate patternssuch as stripes, polka dots, florals, or geometric designs to add visual interest to your case.
Adding Personal Touches
Personal touches can make your laptop case truly unique and reflect your interests and hobbies. Here are some ideas:
- Embroidered details: Embroidery can be used to add initials, names, or small designs to your case.
- Patches and badges: Patches and badges can be sewn or glued onto your case to add a personal touch. You can find patches that represent your favorite bands, movies, or hobbies.
- Iron-on transfers: Iron-on transfers can be used to add images, text, or patterns to your case.
- Painted details: You can paint your case with acrylic paints to create custom designs or to add a splash of color.
Materials and Tools
Building a DIY laptop case requires careful selection of materials and tools to ensure a sturdy and functional product. The right materials will not only protect your laptop but also enhance its lifespan. Choosing the right tools will make the process efficient and enjoyable.
My latest DIY project is a totally rad laptop case covered in patches. I’m channeling my inner punk rock vibes, and it’s totally inspiring me to check out the awesome hair dyes from we love good dye young.
Maybe I’ll add some vibrant streaks to my hair to match the color scheme of my patch-covered laptop case!
Materials
The materials you choose will significantly impact the durability, aesthetics, and overall quality of your laptop case.
- Hardboard or plywood:These materials provide a rigid base for your laptop case, ensuring its structural integrity and protection against impacts.
- Foam padding:Foam padding provides cushioning and shock absorption, safeguarding your laptop from bumps and scratches.
- Fabric:Fabric covers the case, enhancing its aesthetics and providing a soft, comfortable touch. Choose a fabric that is durable, water-resistant, and easy to clean.
- Adhesive:A strong adhesive is essential for securely attaching the foam padding and fabric to the hardboard or plywood base.
- Velcro or magnetic closures:These closures ensure a secure and easy-to-open and close laptop case.
- Hardware:This includes screws, hinges, and other necessary components for assembling the case.
Tools
The right tools are essential for accurate and efficient construction of your DIY laptop case.
- Measuring tape:Accurate measurements are crucial for ensuring a perfect fit for your laptop.
- Pencil or marker:These tools help you transfer measurements and mark cutting lines on the materials.
- Utility knife or jigsaw:These tools are used for precisely cutting the hardboard or plywood to the desired size and shape.
- Scissors:These tools are essential for cutting the foam padding and fabric to the appropriate dimensions.
- Screwdriver:This tool is necessary for securing hardware components, such as screws and hinges.
- Hot glue gun:This tool is useful for adhering the foam padding and fabric to the base.
Construction Techniques: Diy Patch Laptop Case
The construction phase is where your design comes to life. It involves carefully assembling the pieces you’ve prepared, ensuring a secure and protective fit for your laptop. The techniques you choose will depend on the materials and design of your case.
Sewing Techniques, Diy patch laptop case
Sewing is a versatile option for fabric cases, offering durability and flexibility.
- Straight Stitch:This basic stitch is ideal for seams that require strength, such as the main body of the case. Use a strong thread and a stitch length appropriate for the fabric.
- Zigzag Stitch:This stitch is used for finishing edges and preventing fraying. It creates a more secure seam and can be used for decorative purposes.
- Topstitch:This stitch is used to create a decorative and secure seam on the outer layer of the case. It can also be used to attach additional layers or embellishments.
Gluing Techniques
Gluing is a quick and effective method for assembling cases made of rigid materials like cardboard, wood, or plastic.
- Hot Glue:This adhesive sets quickly and is suitable for bonding various materials. However, it can be messy and may not be as strong as other glues.
- Epoxy Resin:This strong adhesive is ideal for creating durable bonds, especially with wood and metal. It requires a longer drying time than hot glue.
- Contact Cement:This adhesive is ideal for bonding large surfaces and creating a strong bond. It requires a quick and precise application, as it dries rapidly.
Creating a Secure Fit
A well-fitting case is essential for protecting your laptop. Here are some tips:
- Measure Twice, Cut Once:Accuracy is key when cutting your materials. Measure your laptop carefully and double-check your measurements before cutting.
- Use Padding:Add padding to the interior of the case to protect your laptop from bumps and scratches. Foam, felt, or even old clothing can be used.
- Secure Closure:Use a secure closure system to keep your laptop safe inside the case. Velcro, buckles, or zippers are all good options.
Example: Cardboard Laptop Case
To illustrate the construction process, let’s consider a simple cardboard laptop case. You’ll need cardboard, a ruler, a pencil, scissors, and hot glue.
- Measure and Cut:Measure the dimensions of your laptop and cut two pieces of cardboard to match. Add an extra inch or two to each side for padding and seam allowance.
- Create the Base:Glue the two pieces of cardboard together, ensuring the edges are flush. This will form the base of your case.
- Add Padding:Cut pieces of foam or felt to fit inside the case. Glue these pieces to the inside of the cardboard, creating a protective layer for your laptop.
- Create a Lid:Cut another piece of cardboard to match the dimensions of the base. This will be the lid of your case.
- Attach the Lid:Glue the lid to the base, leaving a gap for the laptop to slide in. Ensure the lid is securely attached.
- Add a Closure:Attach a secure closure system to the lid, such as a velcro strap or a buckle.
Adding Functionality
A plain laptop case might offer basic protection, but adding functionality can transform it into a practical and versatile companion for your daily adventures. This section explores how to incorporate features like pockets, straps, and handles, while also discussing the importance of padding and lining for added protection and creating custom compartments for your accessories.
Pockets and Straps
Pockets provide convenient storage for smaller items, such as chargers, pens, or a notebook. Straps, on the other hand, offer a secure and comfortable way to carry your laptop.
- External Pockets:These are readily accessible and can be added to the front, sides, or back of the case. Consider using zippered pockets for security, flap pockets for quick access, or mesh pockets for ventilation.
- Internal Pockets:Internal pockets are great for keeping your accessories organized and protected. You can create dedicated pockets for your mouse, power bank, or even a separate compartment for your tablet. Consider using a combination of zippered and open pockets to accommodate different items.
My latest DIY project is a patchwork laptop case, using leftover fabric scraps from other projects. I’m trying to make it as secure as possible, and while I’m not worried about physical theft, I am concerned about online security.
I recently read about a new phishing technique targeting Microsoft’s passwordless authentication , so I’m making sure my laptop is protected with strong passwords and up-to-date security software. I’m hoping my new case will help keep my laptop safe from scratches and bumps, too!
- Straps:Straps can be made from various materials like webbing, leather, or even old belts. A shoulder strap is ideal for carrying your laptop for extended periods, while a shorter handle is useful for carrying it by hand. You can also add a carrying handle to the top of the case for easy lifting.
Padding and Lining
Padding and lining offer additional protection for your laptop, absorbing impacts and preventing scratches.
My latest DIY project is a laptop case covered in patches, a perfect way to personalize my tech. It’s a bit like the upside down braided top knot , a hairstyle that’s both practical and unique. Both projects are about adding a personal touch, whether it’s a stylish braid or a quirky patch collection.
I can’t wait to show off my new laptop case, it’s definitely going to be a conversation starter!
- Padding:Foam, felt, or even old clothing can be used for padding. Place padding around the laptop compartment to cushion it from bumps and drops. The thickness of the padding should be proportionate to the desired level of protection.
- Lining:Lining provides a smooth surface for your laptop and can also enhance the aesthetics of the case. You can use fabric, fleece, or even a soft, textured paper for lining. Choose a material that is durable and easy to clean.
Custom Compartments
Custom compartments allow you to organize your accessories efficiently and keep them separate from your laptop.
- Dividers:Use fabric or cardboard to create dividers within the laptop compartment. This can separate your laptop from other items, or create dedicated spaces for accessories like a mouse or power bank.
- Elastic Straps:Elastic straps are great for securing accessories like chargers or cables. They can be attached to the inside of the case or to the dividers. The elasticity allows for flexibility in accommodating different sized items.
- Velcro:Velcro can be used to create adjustable compartments or secure items within the case. Use Velcro straps to hold a mouse or a tablet, or attach Velcro patches to create a pocket for a phone or other small accessories.
Finishing Touches
The final stage of crafting your DIY laptop case is all about adding those finishing touches that make it truly your own. Whether you want a sleek and minimalist look or something more vibrant and expressive, there are endless ways to personalize your case.
Adding Decorative Elements
Decorative elements can elevate your laptop case from functional to fashionable. Here are some popular options:
- Stitching:Stitching along the edges or adding decorative patterns can add a touch of elegance and durability to your case. Consider using contrasting thread colors to create a visual impact.
- Embroidery:For a more personalized touch, consider embroidering your initials, a favorite quote, or a design onto the case. This can be done by hand or using a sewing machine.
- Hardware:Metal rivets, buckles, or even decorative buttons can add a touch of industrial chic or vintage charm to your case. Choose hardware that complements the overall design of your case.
Personalizing with Custom Designs
Custom designs allow you to express your unique style and make your laptop case truly stand out. Here are some ideas:
- Painting:Use acrylic paints to create intricate patterns, abstract designs, or even a full-blown mural on your case. Remember to seal the paint with a clear coat for protection.
- Decoupage:Decoupage involves applying paper cutouts, fabric scraps, or other materials to the surface of your case using glue and a sealant. This technique allows for endless creative possibilities.
- Iron-on Transfers:Iron-on transfers offer a quick and easy way to add images, text, or designs to your case. They come in a variety of styles and can be easily applied with an iron.
Adding Monograms
Monograms are a classic way to personalize any item, and your laptop case is no exception. They add a touch of sophistication and make your case easily identifiable.
- Embroidered Monograms:Embroidered monograms are a timeless and elegant option. They can be done by hand or with a sewing machine.
- Leather Patches:Leather patches with your initials or a monogram can be attached to your case using glue or stitching. This option offers a classic and rugged look.
- Vinyl Stickers:Vinyl stickers are a simple and affordable way to add a monogram to your case. They come in various colors and fonts and can be easily applied and removed.
Maintenance and Care

A well-maintained DIY laptop case will last longer and protect your laptop more effectively. Proper cleaning and storage are essential for preserving its functionality and appearance.
Cleaning and Maintaining the Case
Cleaning your DIY laptop case regularly will help prevent dirt, dust, and grime from accumulating, potentially damaging the case or your laptop.
- Use a soft, damp cloth to wipe down the exterior of the case, removing any visible dirt or debris.
- For stubborn stains, you can use a mild soap solution, but avoid using harsh chemicals or abrasive cleaners that could damage the material.
- If the case has fabric lining, vacuum it regularly to remove dust and particles.
- Inspect the case for any loose seams or tears and repair them promptly to prevent further damage.
Proper Storage
Storing your DIY laptop case properly is crucial for protecting it from damage.
- Store the case in a dry, cool place, away from direct sunlight and excessive heat, which can warp or damage the material.
- Avoid storing the case in humid environments, as moisture can cause mold or mildew growth.
- When not in use, keep the case closed to prevent dust and dirt from accumulating inside.
Extending the Lifespan
Following these tips can help extend the lifespan of your DIY laptop case:
- Handle the case with care, avoiding dropping or mishandling it.
- Avoid placing heavy objects on top of the case, which could deform or damage it.
- If the case has a zipper, ensure it is properly closed to prevent the laptop from falling out.
- Consider adding a protective layer, such as a fabric cover or a waterproof coating, to further protect the case from wear and tear.