Pom pom bracelet DIY is a fantastic way to create unique and stylish accessories while expressing your personal style. These adorable bracelets are perfect for adding a pop of color and texture to any outfit, and they’re surprisingly easy to make.
Whether you’re a seasoned crafter or just starting out, you’ll find that creating pom pom bracelets is a fun and rewarding experience.
From choosing the perfect yarn to assembling the pom poms into a beautiful bracelet, we’ll guide you through every step of the process. Get ready to unleash your creativity and explore a world of colorful possibilities with pom pom bracelets!
Introduction to Pom Pom Bracelets: Pom Pom Bracelet Diy
Pom pom bracelets are a fun and trendy accessory that has gained immense popularity in recent years. These colorful and playful bracelets are made by attaching pom poms to a string or elastic band, creating a charming and eye-catching piece of jewelry.
Their popularity stems from their versatility, affordability, and the endless creative possibilities they offer.
Versatility and Appeal of Pom Pom Bracelets
Pom pom bracelets are incredibly versatile and can be worn by people of all ages and styles. They can be dressed up or down, making them suitable for various occasions. Their vibrant colors and playful designs add a touch of whimsy and personality to any outfit.
The soft and fluffy texture of the pom poms provides a comfortable and enjoyable wearing experience.
Different Styles and Materials Used for Pom Pom Bracelets
Pom pom bracelets come in a wide range of styles and materials, catering to diverse tastes and preferences.
- Basic Pom Pom Bracelets:These bracelets feature a simple design with pom poms attached to a string or elastic band. They are typically made with yarn or felt pom poms and can be customized with different colors and sizes.
- Layered Pom Pom Bracelets:These bracelets feature multiple layers of pom poms, creating a more elaborate and eye-catching look. They can be made with different colors and textures of pom poms, adding depth and dimension to the design.
- Charm Pom Pom Bracelets:These bracelets incorporate charms or beads along with the pom poms, adding a touch of personalization and style. Charms can range from small pendants to miniature figurines, reflecting the wearer’s interests and personality.
- Beaded Pom Pom Bracelets:These bracelets combine pom poms with beads, creating a unique and stylish design. The beads can be made from various materials, such as wood, glass, or metal, and can be arranged in different patterns.
- Friendship Pom Pom Bracelets:These bracelets are often handmade and exchanged as gifts between friends, symbolizing their bond and connection. They can be personalized with special colors, charms, or messages.
Materials and Tools
Creating a pom pom bracelet is a fun and easy craft project. You can personalize your bracelet by using various colors and textures of yarn. To begin, you will need a few basic materials and tools.
Yarn
Yarn is the primary material for making pom poms. You can choose from a wide range of yarns based on your preference for color, texture, and thickness. Here are some popular types of yarn suitable for pom pom making:
- Acrylic yarn:This is a versatile and affordable option that comes in a wide variety of colors and textures. It’s easy to work with and creates fluffy pom poms.
- Wool yarn:Wool yarn is known for its warmth and softness. It’s a good choice for making pom poms that have a slightly more rustic look.
- Cotton yarn:Cotton yarn is a natural fiber that’s breathable and durable. It’s a good choice for making pom poms that are lightweight and have a smooth texture.
Tools
You’ll need a few tools to create your pom poms and assemble your bracelet.
- Scissors:You’ll need a pair of sharp scissors for cutting yarn and trimming pom poms.
- Fork:A fork can be used as a simple and effective tool for wrapping yarn to create pom poms.
- Pom pom maker:Pom pom makers are available in different sizes and shapes. They are designed to make consistent and even pom poms.
- Elastic cord:You will need an elastic cord to string your pom poms together.
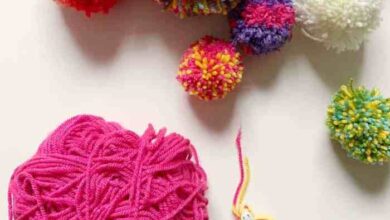
Pom Pom Making Techniques
Creating pom poms is a fun and easy craft that can be used for a variety of projects, including pom pom bracelets. There are several different methods for making pom poms, each with its own advantages and disadvantages. Let’s explore the most popular techniques.
Making pom pom bracelets is such a fun and easy craft project, especially when you have some free time. I always love using bright, colorful yarn and experimenting with different patterns. But sometimes, I need a break from the crafting and check out the latest tech gadgets.
Recently, I was really interested in the samsung galaxy note8 final specs and how its powerful features could be used to capture and share my DIY projects. Once I’m done with my pom pom bracelets, I’ll be sure to take some amazing photos with my new phone!
Using a Fork
This technique is a simple and accessible method for making small pom poms.
- Wrap yarn around the tines of a fork, creating a dense bundle of yarn.
- Tie a piece of yarn tightly around the middle of the bundle, securing the yarn in place.
- Carefully slide the pom pom off the fork and trim the ends of the yarn to create a fluffy pom pom.
This method is ideal for beginners and requires minimal materials. However, it is limited to making small pom poms and may not be suitable for larger or more intricate designs.
Using Cardboard
This technique is versatile and allows you to create pom poms of various sizes.
- Cut two identical circles out of cardboard, with a hole in the center of each circle.
- Wrap yarn around the cardboard circles, crossing the yarn between the holes to create a dense bundle.
- Tie a piece of yarn tightly around the middle of the bundle, securing the yarn in place.
- Carefully cut the yarn along the outer edge of the cardboard circles, creating a fluffy pom pom.
- Remove the cardboard circles and trim the ends of the yarn to create a neat pom pom.
This method allows for greater control over the size and shape of the pom pom. However, it requires more time and effort compared to using a fork.
Using a Pom Pom Maker
Pom pom makers are specialized tools designed to create pom poms with consistent size and shape.
- Wrap yarn around the pom pom maker, following the manufacturer’s instructions.
- Tie a piece of yarn tightly around the middle of the bundle, securing the yarn in place.
- Carefully cut the yarn along the outer edge of the pom pom maker, creating a fluffy pom pom.
- Remove the pom pom from the maker and trim the ends of the yarn to create a neat pom pom.
Pom pom makers offer the most consistent results and can be used to create a variety of sizes and shapes. However, they are a more expensive option than other methods.
Assembling the Bracelet

Now that you have your pom poms ready, it’s time to put together your bracelet! There are several ways to assemble your bracelet, each offering a unique look and feel. We’ll explore different methods for creating the base and attaching the pom poms.
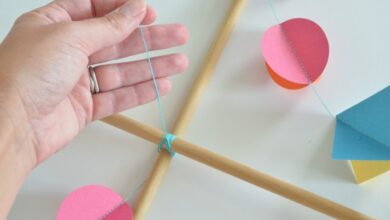
Creating the Bracelet Base
The base of your bracelet provides the structure for holding the pom poms. Here are some common methods for creating the base:
- String:This is a classic and versatile method. You can use embroidery floss, yarn, or even thin ribbon to create a simple string base. To make a string base, tie a knot at one end of the string and thread it through the center of your first pom pom.
Continue threading the string through the center of each pom pom, creating a chain of pom poms. Once you reach the desired length, tie a knot at the end of the string to secure the last pom pom.
- Elastic:Using elastic cord or thread is a great option for creating a stretchy bracelet. Simply tie a knot at one end of the elastic and thread it through the center of your first pom pom. Continue threading the elastic through the center of each pom pom, creating a chain of pom poms.
Making pom pom bracelets is a fun and easy craft project, perfect for a rainy afternoon. I’m always looking for inspiration for new color combinations, and recently, I found myself drawn to the vibrant colors of the waves in Nazaré, Portugal.
If you’re looking for a visual treat, check out the magicseaweed last two days at dramatic nazare report – the photos are breathtaking! The energy of the waves is something I try to capture in my pom pom bracelet designs, using bold colors and playful patterns.
Once you reach the desired length, tie a knot at the end of the elastic to secure the last pom pom.
- Chain:For a more durable and polished look, you can use a chain as the base of your bracelet. Thread your pom poms onto the chain, either by using a needle to pass the chain through the center of each pom pom or by using a special chain link that opens and closes to accommodate the pom poms.
Securing the Pom Poms
Once you have your base, you need to secure the pom poms to prevent them from slipping off. Here are some techniques for securing the pom poms:
- Knotting:This is a simple and effective method. After threading a pom pom onto your base, tie a knot on either side of the pom pom to secure it in place. You can use the same string or elastic that you used for the base, or you can use a different color for a decorative touch.
- Glue:For a more permanent hold, you can use fabric glue or hot glue to secure the pom poms to the base. Apply a small amount of glue to the base where the pom pom sits, then press the pom pom firmly onto the glue.
Making pom pom bracelets is a fun and easy craft project, perfect for adding a pop of color to your wrist. While I was working on my latest batch, I got thinking about the intricate details of William Blake’s art, especially his work on display at the Tate, like the Guardian of the Gates painting.
The way he uses color and texture in his art reminds me of the vibrant possibilities of pom poms, and I think I’ll try to incorporate some of his artistic ideas into my next bracelet design!
Allow the glue to dry completely before moving on.
- Beads:You can add beads between your pom poms to add a touch of sparkle and to help secure the pom poms. Simply thread a bead onto the string or elastic before adding each pom pom. The beads will help to keep the pom poms from slipping off and will add a unique visual element to your bracelet.
Finishing Touches
Once all of your pom poms are secured, you can add some finishing touches to your bracelet. You can add a clasp to the ends of your string or elastic base to make it easier to put on and take off.
You can also add a decorative charm or pendant to your bracelet. Finally, you can tie a bow at the end of your string base for a more whimsical look.
Design Ideas and Inspiration
The beauty of pom pom bracelets lies in their endless possibilities for customization. You can create unique and expressive pieces that reflect your personal style. Explore different color combinations, patterns, and embellishments to craft bracelets that truly stand out.
Color Combinations, Pom pom bracelet diy
Experimenting with different color combinations is a fantastic way to create visually appealing pom pom bracelets. You can create a cohesive look by using shades from the same color family or opt for a vibrant and eclectic design by incorporating contrasting colors.
For a classic and elegant look, try pairing neutral colors like white, gray, or black with pops of bright hues like red, yellow, or blue. For a playful and whimsical design, consider using a rainbow of colors.
Patterns
You can create intricate patterns on your pom pom bracelets by arranging the pom poms in a specific order. Some popular patterns include stripes, zigzags, and chevrons. You can also use different sizes and textures of pom poms to add depth and dimension to your designs.
For example, a striped bracelet could feature alternating rows of large and small pom poms.
Embellishments
Adding embellishments to your pom pom bracelets can elevate their visual appeal and personalize your creations. Consider incorporating beads, charms, or other decorative elements. You can attach these embellishments to the pom poms themselves or create a separate strand to weave through the bracelet.
For a rustic touch, you can use natural elements like dried flowers or feathers.
Materials and Textures
Beyond the traditional yarn pom poms, you can experiment with different materials to create unique and textured bracelets. Explore options like faux fur, felt, or even fabric scraps. You can also use pom pom makers to create pom poms in various shapes and sizes, adding another layer of creativity to your designs.
Tips and Tricks
Pom pom bracelet making is a fun and creative activity, but there are a few tips and tricks that can help you create beautiful and professional-looking bracelets. Here, we’ll explore some techniques to ensure your pom poms are fluffy and even, guide you in choosing the right yarn and tools for your designs, and offer solutions to common problems you might encounter.
Choosing the Right Yarn and Tools
Selecting the right yarn and tools is crucial for creating beautiful and durable pom pom bracelets. Here’s a guide to help you choose the right materials for your project:
- Yarn Type:The type of yarn you choose will significantly impact the look and feel of your pom poms. For fluffy and bouncy pom poms, consider using a soft and plush yarn like chenille or fuzzy yarn. If you prefer a more structured look, opt for a worsted weight yarn.
Experiment with different textures and weights to find what suits your style best.
- Yarn Weight:The weight of the yarn determines the thickness of your pom poms. Thicker yarns create larger and fuller pom poms, while thinner yarns result in smaller and more delicate pom poms.
- Tools:You’ll need a few basic tools to make pom poms. A fork or a cardboard pom pom maker are the most common options. For a more precise and uniform shape, consider using a pom pom maker with adjustable sizes.