
Transform Your Home’s Curb Appeal: A Comprehensive Guide to Painting Your Front Door
Painting your front door is a high-impact, relatively low-cost DIY project that can dramatically enhance your home’s curb appeal and express your personal style. The front door is the focal point of your home’s exterior, the first impression visitors and passersby receive. A fresh coat of paint can rejuvenate a tired facade, signal a welcoming atmosphere, and even add value to your property. This comprehensive guide will walk you through every step of the process, from selecting the right paint and tools to achieving a professional-quality finish that will last for years.
1. Choosing the Right Paint for Your Front Door
The material of your front door is the primary factor in determining the type of paint you should use. Most exterior doors are made of wood, metal (steel or aluminum), or fiberglass. Each material has unique properties that require specific paint formulations for optimal adhesion, durability, and finish.
Wood Doors: Wood is a classic choice, but it’s also susceptible to moisture and expansion/contraction. For wood doors, you’ll want to use a high-quality exterior oil-based or latex-based paint.
- Oil-Based Paints: Historically, oil-based paints were preferred for wood due to their superior adhesion and durability. They create a hard, protective finish that is resistant to wear and tear. However, they can be more difficult to clean up, have stronger fumes, and take longer to dry. Look for alkyd enamels designed for exterior use.
- Latex-Based Paints (Acrylic Latex): Modern high-quality acrylic latex paints offer excellent durability, flexibility, and UV resistance, often rivaling oil-based paints. They are easier to clean up with soap and water, dry faster, and have lower VOCs (Volatile Organic Compounds), making them a more environmentally friendly option. For exterior doors, choose a premium acrylic latex enamel.
- Primer: Regardless of whether you choose oil or latex, priming is crucial for wood doors. A good exterior primer will seal the wood, prevent tannin bleed-through (especially on certain wood species like mahogany or cedar), and provide a smooth surface for the topcoat to adhere to. Use an oil-based primer for oil-based topcoats or a stain-blocking primer for latex topcoats.
Metal Doors (Steel/Aluminum): Metal doors require specific preparation and paint types to prevent rust and ensure proper adhesion.
- Primer: A rust-inhibiting metal primer is absolutely essential for steel doors to prevent corrosion. For aluminum doors, a bonding primer is recommended to ensure the paint adheres well.
- Paint: Exterior-grade acrylic latex or oil-based enamel paints are suitable for metal doors. The key is proper priming and a durable topcoat. Consider paints formulated for metal surfaces.
Fiberglass Doors: Fiberglass is a durable and low-maintenance material.
- Primer: While some fiberglass doors may come with a factory finish that doesn’t require priming, others benefit from a light scuff-sand and a coat of high-quality exterior latex primer for optimal adhesion, especially if you’re opting for a darker color or a significant color change.
- Paint: Exterior-grade acrylic latex paints are generally the best choice for fiberglass doors. They offer good flexibility and fade resistance. Avoid oil-based paints as they can sometimes create a brittle finish on fiberglass.
Sheen Selection: The sheen of your paint affects both the appearance and durability.
- Satin/Eggshell: These are excellent choices for front doors. They offer a soft sheen that hides minor imperfections well and are relatively easy to clean.
- Semi-Gloss/Gloss: These finishes are highly durable, easy to wipe clean, and provide a more reflective, sophisticated look. However, they highlight surface imperfections more prominently, so meticulous preparation is key.
- Flat/Matte: Generally not recommended for front doors as they are less durable and harder to clean.
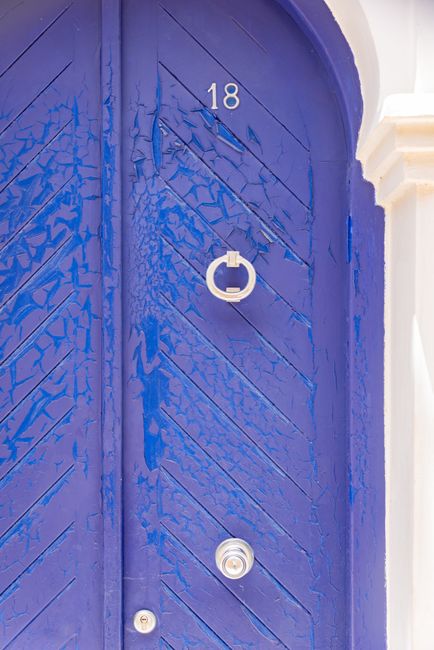
Color Selection: The color of your front door can significantly impact your home’s aesthetic.
- Complementary Colors: Consider the colors of your home’s siding, trim, and roof. The door color can either complement or contrast with these elements.
- Psychology of Color: Different colors evoke different feelings. Red is bold and welcoming, blue is calming and serene, green is natural and harmonious, yellow is cheerful and inviting, and black is sophisticated and classic.
- Neighborhood Context: While personal expression is important, consider the overall style and color palette of your neighborhood.
- Testing: Always purchase sample pots and paint swatches on a piece of cardboard or directly on your door (in an inconspicuous area) to see how the color looks in different lighting conditions throughout the day.
2. Gathering Your Supplies
Having the right tools and materials will make the painting process smoother and ensure a better outcome.
- Paint: Exterior-grade paint (primer and topcoat) in your chosen color and sheen.
- Brushes:
- Angled Sash Brush (2-2.5 inches): Essential for cutting in edges, corners, and detailed areas. A good quality synthetic or natural bristle brush will provide a smooth finish.
- Roller: A high-density foam roller or a short-nap mohair roller is ideal for applying paint to larger, flat surfaces of the door.
- Paint Tray and Liners: For holding and dispensing paint.
- Drop Cloths: Canvas or plastic drop cloths to protect surrounding areas from paint drips and spills.
- Sanding Tools:
- Medium-Grit Sandpaper (100-150 grit): For removing old paint, smoothing imperfections, and scuff-sanding for better adhesion.
- Fine-Grit Sandpaper (180-220 grit): For final smoothing after filling or before priming.
- Sanding Sponge: Useful for reaching into corners and curved areas.
- Scraper: A putty knife or paint scraper for removing loose paint.
- Caulk: Exterior-grade paintable caulk for filling gaps and cracks.
- Paint Stirrers: To thoroughly mix your paint.
- Cleaning Supplies:
- Mild Dish Soap and Water: For cleaning the door before painting.
- TSP (Trisodium Phosphate) or a Degreaser: For removing stubborn dirt and grime.
- Rags or Microfiber Cloths: For wiping down the door and cleaning up spills.
- Mineral Spirits or Paint Thinner: For cleaning oil-based brushes and spills.
- Screwdriver/Drill: To remove hardware.
- Painter’s Tape: High-quality painter’s tape for masking off areas you don’t want to paint.
- Dust Mask and Safety Glasses: For protection during sanding and painting.
- Ladder (if necessary): For reaching higher areas of the door.
- Wood Filler/Epoxy Filler (if needed): For repairing dents and gouges in wood doors.
3. Preparing Your Front Door for Painting
Proper preparation is the most critical step in achieving a professional and long-lasting finish. Skipping this stage will lead to peeling, chipping, and an uneven appearance.
- Remove Hardware: This is non-negotiable for a clean, professional look. Carefully remove the doorknob, lockset, hinges, kick plate, mail slot, and any other decorative hardware. Store all screws and small parts in a labeled bag to avoid losing them.
- Clean the Door Thoroughly: Wash the door with a mild detergent and water to remove dirt, dust, cobwebs, and any remnants of pollen or mildew. For stubborn grime or greasy buildup, use a TSP solution or an exterior degreaser, following the manufacturer’s instructions. Rinse thoroughly with clean water and allow the door to dry completely.
- Inspect and Repair:
- Wood Doors: Examine for any rot, soft spots, or damaged areas. Use a wood filler or epoxy filler to repair dents, gouges, and cracks. Allow the filler to dry completely according to the product instructions, then sand it smooth.
- Metal Doors: Check for rust. Use a wire brush or sandpaper to remove all traces of rust. If the rust is extensive, you may need to use a rust converter.
- All Doors: Inspect for peeling or bubbling paint. Scrape away any loose paint with a putty knife or scraper until you reach a solid surface.
- Sand the Surface:
- For previously painted doors: Lightly sand the entire surface with medium-grit sandpaper (100-150 grit) to create a profile for the new paint to adhere to. This is especially important if the old paint is glossy.
- For new wood or metal doors: Sand the surface according to the manufacturer’s recommendations.
- After repairs: Sand any patched areas smooth.
- Final Sanding: After sanding, use a fine-grit sandpaper (180-220 grit) for a final smooth finish.
- Wipe Away Dust: After sanding, thoroughly wipe down the entire door with a tack cloth or a damp (not wet) rag to remove all sanding dust. Dust left on the surface will embed in the paint and create a rough finish.
- Caulk Gaps and Cracks: Inspect the seams where the door meets the frame and around any trim. Use a high-quality exterior-grade paintable caulk to fill any gaps or cracks. Smooth the caulk with a damp finger or a caulking tool for a neat finish. Allow the caulk to cure completely before painting, as per the manufacturer’s instructions.
- Masking: If you are not removing the door from its hinges, carefully mask off the surrounding walls, thresholds, and any areas you don’t want to paint using high-quality painter’s tape. Press down firmly on the edges of the tape to prevent paint bleed.
4. Priming Your Front Door
Primer is the foundation for a successful paint job. It enhances adhesion, blocks stains, and provides a uniform surface for the topcoat.
- Choosing the Right Primer:
- Wood Doors: Use an oil-based or a stain-blocking latex primer. Oil-based primers are excellent for sealing wood and preventing tannin bleed, especially with exotic woods or if you’re painting a light color over a dark wood. Stain-blocking primers are essential if you’re concerned about knots or sap bleeding through.
- Metal Doors: Use a rust-inhibiting metal primer for steel doors. For aluminum, a bonding primer is recommended.
- Fiberglass Doors: Use a high-quality exterior latex primer if needed, especially if you’re making a significant color change.
- Application:
- Stir the primer thoroughly.
- Apply a thin, even coat of primer using a brush or roller. Work in the direction of the wood grain if it’s a wood door.
- Ensure complete coverage, paying attention to edges and recessed areas.
- Avoid applying the primer too thickly, as this can lead to drips and an uneven surface.
- Drying Time: Allow the primer to dry completely according to the manufacturer’s instructions. This is crucial for optimal adhesion and performance of the topcoat.
- Light Sanding (Optional but Recommended): Once the primer is dry, lightly sand the entire surface with fine-grit sandpaper (220 grit) to further smooth out any imperfections and create an even better surface for the paint. Wipe away dust with a tack cloth.
5. Painting Your Front Door: The Topcoat
This is where your door truly comes to life. Take your time and work systematically.
- Prepare Your Paint: Stir your topcoat paint thoroughly before you begin. If you’re using multiple cans of the same color, it’s a good idea to mix them all together in a larger container to ensure color consistency.
- Start with the Details: Using your angled sash brush, paint the edges and any detailed areas of the door, such as panels, moldings, and the areas around hardware if you didn’t remove them. Cut in carefully, ensuring a clean line.
- Paint Flat Surfaces:
- Using a Roller: For larger, flat areas, use your roller. Load the roller with paint, avoiding overloading it. Apply the paint in even, overlapping strokes. Work in sections, maintaining a wet edge to avoid lap marks.
- Using a Brush: If you prefer to use a brush for the entire door, work in sections. Apply the paint with smooth, even strokes, working in the direction of the wood grain. Avoid applying too much pressure, which can create brush marks.
- Apply Multiple Coats: Most doors will require at least two coats of topcoat for full coverage and durability.
- First Coat: Apply the first coat of paint, ensuring even coverage.
- Drying Time Between Coats: Allow the first coat to dry thoroughly according to the paint manufacturer’s recommendations. This is critical for proper adhesion of subsequent coats. Trying to apply a second coat too soon can result in peeling or an uneven finish.
- Light Sanding (Optional but Recommended): After the first coat is dry, you can lightly scuff-sand the entire surface with very fine-grit sandpaper (320 grit) or a sanding sponge to knock down any minor imperfections or dust nibs. Wipe away dust with a tack cloth.
- Second Coat: Apply the second coat of paint, again focusing on even coverage and avoiding lap marks.
- Third Coat (If Necessary): For very dark colors, bright colors, or if you’re experiencing any issues with coverage, a third coat might be necessary.
- Paint Edges and Sides: Don’t forget to paint the top and bottom edges of the door, as well as the side edges that meet the frame. This seals the wood and prevents moisture absorption.
6. Reassembling and Finishing Touches
Once the paint is dry and cured, it’s time to put everything back together.
- Allow for Full Curing: While the paint may feel dry to the touch within hours, it can take several days or even weeks for the paint to fully cure and reach its maximum hardness and durability. Be gentle with the door during this period.
- Reinstall Hardware: Carefully reattach all the hardware you removed earlier. Ensure all screws are tightened appropriately. If your hardware looks worn or outdated, this is a great opportunity to replace it for a completely refreshed look.
- Clean Up: Remove all painter’s tape. Clean your brushes and rollers thoroughly according to the paint type. Dispose of any used rags and drop cloths properly.
- Inspect Your Work: Step back and admire your newly painted front door. Check for any missed spots or areas that need touch-ups.
SEO Keywords: paint front door, exterior door paint, DIY front door painting, front door curb appeal, painting wood doors, painting steel doors, fiberglass door paint, front door color ideas, how to paint a front door, best exterior door paint, primer for exterior doors, door preparation for painting, satin finish paint, semi-gloss paint, DIY home improvement, entryway makeover, painting tips and tricks, long-lasting door paint, durable exterior paint.
