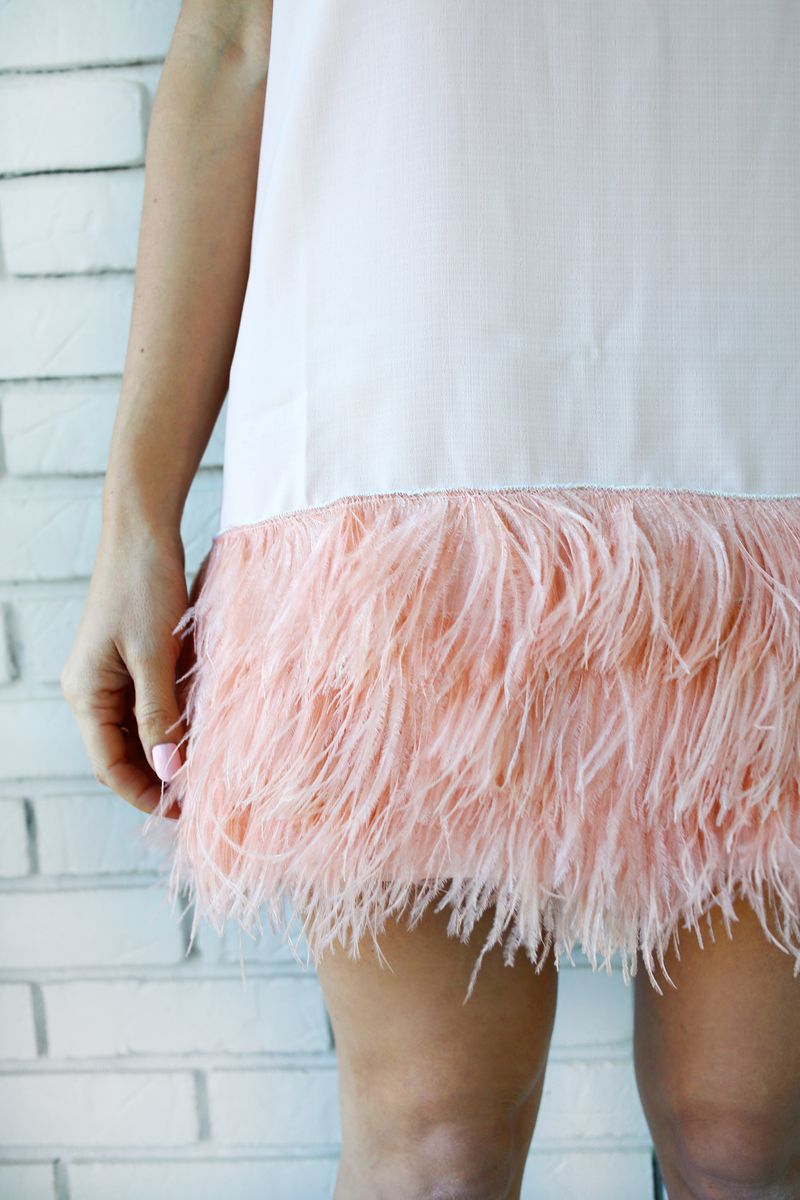

Feather Blocked Dress DIY: A Comprehensive Guide to Creating a Unique and Stylish Garment
The feather blocked dress DIY is a transformative project for fashion enthusiasts and crafters alike. This technique, while appearing complex, can be mastered with careful planning and execution, allowing for the creation of a truly unique and statement-making garment. At its core, feather blocking involves strategically placing and permanently affixing feathers to a pre-existing dress or fabric base, creating a textured, sculptural, and visually striking effect. This guide will delve into every aspect of this exciting DIY, from choosing materials to advanced techniques, ensuring you can embark on your feather-blocked dress journey with confidence.
The fundamental principle behind a feather blocked dress DIY lies in the application of heat and adhesive to permanently fuse feathers to fabric. This isn’t about simply gluing feathers on; it’s about creating a bond that withstands wear and washing, transforming the dress into a cohesive piece of art. The "blocking" aspect refers to the deliberate arrangement and layering of feathers to create defined shapes, patterns, or a sense of volume. Think of it as painting with feathers, where each feather is a brushstroke, contributing to a larger design.
Selecting the right dress or fabric base is paramount for a successful feather blocked dress DIY. Opt for fabrics that can withstand heat and pressure. Natural fibers like cotton, linen, and some silks are generally good choices. Synthetic fabrics, particularly those with high polyester content, can be more challenging as excessive heat can melt or damage them. Consider the existing silhouette of the dress. A simpler, less structured dress will often serve as a better canvas for elaborate feather blocking, allowing the feathers to be the primary design element. If you’re starting with fabric, consider the intended use of the final garment. A heavier weight fabric will better support the added weight and texture of the feathers. For a truly bespoke piece, consider a simple A-line dress, a shift dress, or even a basic skirt and top combination. The goal is to have a foundation that allows the feather work to shine.
Feather selection is another critical decision in your feather blocked dress DIY. The type, size, and color of feathers will dramatically influence the final aesthetic. Ostrich feathers are popular for their voluminous plumes and are excellent for creating a dramatic, flowing effect. Peacock feathers, with their iconic eyespots, add a touch of exoticism and intricate detail. Rooster feathers offer a stiffer, more upright texture, ideal for creating architectural elements or defined lines. Marabou feathers provide a soft, ethereal fluffiness. Consider the density and length of the feathers in relation to the desired look. For a densely feathered effect, you’ll need a large quantity of feathers. For a more subtle accent, a few carefully placed feathers will suffice. Ethical sourcing is also an important consideration. Look for reputable suppliers who ethically source feathers, often from molting birds or as byproducts of other industries. Natural colors are beautiful, but dyed feathers offer an even wider palette for your creative expression.
The adhesive system for your feather blocked dress DIY is where the permanence is achieved. While fabric glue can offer a temporary solution, for a truly blocked effect, heat-activated adhesive is the gold standard. Specialty feather fusing sheets or tapes are available, designed to bond feathers to fabric under heat. These typically consist of a thin, flexible film with adhesive on both sides. When heated, the adhesive melts and fuses the feather to the fabric and can also be used to secure layers of feathers to each other. Alternatively, some crafters have success with specialized fabric fusion adhesives that are then activated with heat. It’s crucial to test your chosen adhesive on scrap fabric and feathers before committing to your dress to understand its bonding properties and heat requirements.
Tools and supplies are essential for a successful feather blocked dress DIY. Beyond the dress and feathers, you’ll need a heat-resistant surface or ironing mat, a household iron or a heat press (for larger projects or more consistent results), sharp fabric scissors, tweezers for precise placement, a rotary cutter (optional, for cutting fabric backing if needed), and a lint roller to remove any stray fibers. If using heat-activated adhesive sheets, you’ll also need parchment paper or silicone release sheets to protect your iron and adhesive from direct contact. A seam ripper might be useful for deconstructing parts of a garment if you plan on altering the base.
The process of feather blocking your dress begins with meticulous preparation. Wash and dry your chosen dress or fabric to remove any sizing or residues that might interfere with adhesion. Iron the base fabric until it is smooth and wrinkle-free. Plan your design. Sketching your feather placement, considering the direction, layering, and density, will save you time and frustration during the application process. Consider the natural flow of the feathers and how they will drape and move with the garment. It’s often helpful to lay out the feathers on the dress without adhesive first to finalize your design.
Applying the feathers to your dress involves a systematic approach. If using heat-activated adhesive sheets, cut a piece of the sheet slightly larger than the area you intend to cover with feathers. Place the adhesive sheet on your heat-resistant surface. Arrange the feathers on top of the adhesive sheet in your desired pattern. Once the feathers are positioned, carefully place your dress fabric over them. Using your iron set to the appropriate temperature (refer to the adhesive manufacturer’s instructions), press firmly and evenly over the entire feathered area. Move the iron slowly and deliberately, ensuring all parts of the feathers are exposed to heat. Avoid sliding the iron, as this can shift the feathers.
For a layered effect, you will likely need to repeat this process. Once the first layer of feathers is securely bonded, you can apply subsequent layers of feathers on top of the initial layer. You might need to trim the edges of the adhesive sheet or use smaller pieces to achieve clean lines and avoid excess adhesive. Working in sections is crucial for larger projects. Allow each section to cool completely before moving on to the next to prevent the feathers from shifting.
When dealing with specific feather types, adjustments may be necessary. For delicate feathers like marabou, lower heat settings and shorter pressing times might be required to avoid scorching or melting. Stiffer feathers like rooster feathers might require more pressure to ensure a strong bond. For very large or intricate designs, a heat press can provide more consistent heat and pressure, leading to superior results compared to a household iron.
The "blocking" aspect of the feather blocked dress DIY comes into play when creating intentional shapes or patterns. This can involve meticulously aligning feathers to form geometric designs, outlining specific areas of the dress, or creating a gradient effect. For example, to create a solid block of color, you would lay feathers overlapping each other, ensuring no fabric is visible beneath. To create a more textured, three-dimensional effect, you can layer feathers of varying lengths and densities, building up volume.
Finishing touches are essential for a polished feather blocked dress DIY. Once all the feathers are securely attached, carefully inspect the garment for any loose feathers or areas that may require additional heat or adhesive. Trim any stray feather barbs or quill ends that are protruding awkwardly. You can also use tweezers to gently tease and fluff the feathers, enhancing their natural texture and volume. For areas where the adhesive might be visible, a small touch of fabric glue can sometimes be used sparingly, but this should be a last resort and tested for compatibility.
Cleaning and care for your feather blocked dress DIY requires special attention. Due to the heat-activated adhesive and delicate nature of feathers, dry cleaning is almost always the recommended method. If the dress is made from a washable fabric and the feather blocking is robust, a very gentle hand wash in cool water with a mild detergent might be possible, but always test a small, inconspicuous area first. Avoid machine washing and harsh detergents, as these can compromise the adhesive bond and damage the feathers. When storing your feather-blocked dress, hang it carefully to avoid crushing the feathers.
Troubleshooting common issues in a feather blocked dress DIY is part of the learning process. If feathers are not adhering, it could be due to insufficient heat, improper heat distribution, or incompatible adhesive. Ensure your iron is hot enough and you are applying adequate pressure. Test the adhesive again on scrap materials. If feathers are shifting during application, you might be moving the iron too quickly or not allowing enough cooling time between sections. If the adhesive is bleeding through the feathers, you might be using too much or the heat is too high. If the fabric is wrinkling or puckering, try using a lower heat setting or a press cloth.
Advanced techniques can elevate your feather blocked dress DIY to new levels. Consider incorporating different types and colors of feathers within a single design to create intricate patterns or ombré effects. You can also use feather trimming techniques to create sharp, defined edges or unique feather textures. Some crafters experiment with backing certain areas of the dress with a complementary fabric before applying feathers for added structure and opacity. Embellishing with beads, sequins, or embroidery alongside the feathers can further enhance the visual complexity of your garment.
The creative possibilities for a feather blocked dress DIY are virtually limitless. From creating a dramatic evening gown with cascading ostrich feathers to a whimsical festival outfit adorned with vibrant peacock plumes, the technique allows for immense personalization. You can target specific areas like the neckline, sleeves, or hemline, or cover the entire garment for a truly show-stopping effect. Think about the occasion for which you’re creating the dress. A formal event might call for elegant, refined feather work, while a more casual setting allows for bolder, more experimental designs.
Ultimately, the feather blocked dress DIY is a journey of creativity, patience, and precision. By understanding the principles of feather adhesion, carefully selecting your materials, and meticulously executing the application process, you can transform a simple dress into a wearable work of art. This guide provides a comprehensive framework, but don’t be afraid to experiment and discover your own unique approach to feather blocking. The satisfaction of creating such a distinctive and personal garment is immense, and the resulting piece is sure to turn heads and spark conversation wherever it is worn.
