
How to Pipe Frosting Ruffles: A Comprehensive Guide
Piping frosting ruffles is a fundamental cake decorating technique that adds elegance, texture, and visual interest to any baked creation. Mastering this skill unlocks a world of decorative possibilities, from delicate floral embellishments to dramatic, cascading borders. This in-depth guide will cover everything you need to know to achieve flawless frosting ruffles, including essential tools, frosting consistency, piping techniques, troubleshooting, and creative applications.
Essential Tools for Piping Frosting Ruffles
Before you begin piping ruffles, gathering the right tools is crucial. These items will ensure smooth execution and professional-looking results.
- Piping Bags: Reusable silicone piping bags are an excellent investment. They are durable, easy to clean, and provide a firm grip. Disposable piping bags are also a convenient option, especially for smaller projects or when working with multiple colors. Aim for bags of medium to large size to hold a sufficient amount of frosting.
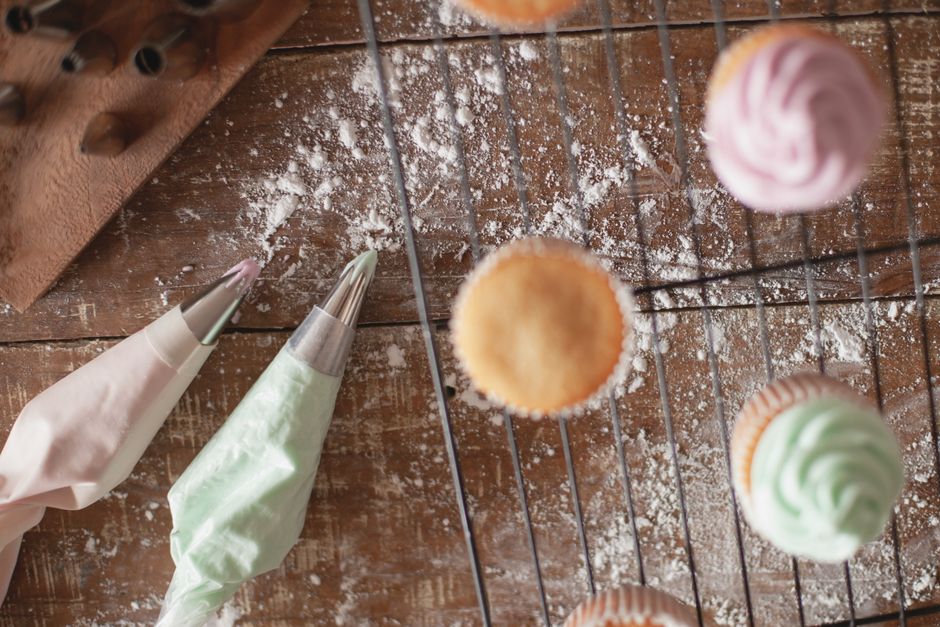
- Piping Tips: The star of ruffle piping is the specialized tip. The most common and versatile tip for ruffles is the petal tip, often labeled as a "petal tip," "leaf tip," or a specific number like Wilton 104, 125, or 127. These tips have a flattened, elongated opening with a slightly curved or pointed edge, designed to create the characteristic folded petal shape of a ruffle. Other tips that can achieve a ruffle-like effect, though with a slightly different texture, include star tips (open or closed) and even some round tips if used with a specific motion. However, for true, elegant ruffles, the petal tip is indispensable.
- Couplers: A coupler allows you to change piping tips without emptying and refilling your piping bag. This is particularly useful if you decide to experiment with different tip sizes or if you’re working on a project that requires multiple decorative elements.
- Offset Spatula: An offset spatula is essential for filling your piping bag with frosting cleanly and evenly. It also helps in smoothing the frosting within the bag, ensuring a consistent flow.
- Turntable (Cake Decorator’s Wheel): While not strictly essential, a turntable significantly simplifies the process of piping consistent ruffles around the circumference of a cake. It allows you to rotate the cake smoothly as you pipe, maintaining an even distance and pressure.
- Bench Scraper: A bench scraper is useful for cleaning excess frosting from your work surface and for neatly dividing larger batches of frosting.
- Frosting Bowls and Spatulas: You’ll need bowls to hold your frosting and spatulas for mixing and transferring it to the piping bag.
Achieving the Perfect Frosting Consistency
The consistency of your frosting is paramount to successful ruffle piping. Too soft, and your ruffles will be droopy and undefined. Too stiff, and they will be difficult to pipe, resulting in jagged edges and a less fluid appearance.
- Ideal Consistency: For piping ruffles, you want a medium-stiff consistency. This means the frosting should hold its shape reasonably well when scooped with a spatula but should still be smooth and pliable enough to flow through the piping tip without excessive pressure. It should resemble the consistency of thick buttercream or a firm ganache.
- Achieving the Right Consistency:
- Too Soft? If your frosting is too soft, gradually add more powdered sugar (confectioners’ sugar) a tablespoon at a time, mixing thoroughly after each addition, until the desired consistency is reached. Be cautious not to over-add powdered sugar, as this can make the frosting too stiff.
- Too Stiff? If your frosting is too stiff, add small amounts of liquid – milk, cream, or even water – a teaspoon at a time, mixing well. Be extremely careful with adding liquid; a little goes a long way, and too much will result in a runny frosting that cannot hold its shape.
- Buttercream Variations: For American buttercream, the balance of butter, powdered sugar, and liquid is key. For Swiss or Italian meringue buttercreams, the meringue base provides inherent stability, and you’ll primarily adjust consistency with butter.
- Ganache: For ganache ruffles, the ratio of chocolate to cream will determine the consistency. A common ratio for piping ganache is 2:1 (chocolate to cream) or 1.5:1, which will firm up considerably as it cools.
- Temperature Matters: The temperature of your frosting can also affect its consistency. If it’s too warm, it will be softer. If it’s too cold, it will be firmer. Allow your frosting to sit at room temperature for a short period to reach the optimal working temperature. If it becomes too soft while piping, place it in the refrigerator for 5-10 minutes, stirring well before continuing.
Mastering the Petal Tip Technique for Ruffles
The petal tip is specifically designed to create the layered, flowing motion of ruffles. Understanding how to hold the tip and move your hand is crucial.
- Holding the Petal Tip:
- Orientation: The key to piping ruffles with a petal tip is its orientation. The wider, open side of the tip should be angled slightly outwards, away from the surface you are piping on, and the narrower, thinner edge should be in contact with the surface. Imagine the tip as a flattened teardrop; the rounded part should be slightly elevated, and the straightest, thinnest edge should be touching the cake.
- Angle: Hold the piping bag at a consistent 45-degree angle to the cake surface. This angle allows the frosting to flow out smoothly and create the desired petal shape.
- The Piping Motion:
- Starting: Begin by holding the tip in place at your starting point, applying gentle, steady pressure to the piping bag to begin extruding frosting.
- The "S" or "U" Stroke: This is the core of ruffle piping. You will create a series of overlapping, wavy strokes. There are a few common methods:
- The "S" Curve: Begin by pressing the bag and moving the tip slightly to one side, creating a small outward curve. Then, reverse your motion, moving the tip back towards the center and then outwards to the other side, forming an "S" shape. As you pull away, release the pressure on the bag.
- The "U" Shape: Similar to the "S" curve, but focusing on a more pronounced U-like motion. Start with a slight outward movement, then bring the tip back towards the center, and then outwards again, creating a distinct loop.
- The Continuous Wave: For a flowing, cascading ruffle effect, you’ll want to connect these "S" or "U" strokes smoothly. As you finish one stroke and release pressure, immediately start the next stroke, overlapping the previous one slightly. The goal is to create a continuous, undulating line of frosting that mimics fabric ruffles.
- Pressure Control: Consistent pressure is vital. Too much pressure will result in thick, bulky ruffles, while too little pressure will lead to thin, wispy ones. Practice to find the sweet spot.
- Movement Speed: Move the piping bag at a steady pace. If you move too quickly, the frosting won’t have time to form a proper ruffle. If you move too slowly, the frosting may build up too much and create a messy appearance.
- Overlapping: Each new ruffle stroke should overlap the previous one slightly. This overlap is what creates the full, layered look of ruffles and prevents gaps.
Piping Different Types of Frosting Ruffles
The petal tip can be used to create a variety of ruffle styles:
- Single Layer Ruffles: These are the most basic and can be piped around the base of a cake, along the top edge, or as a decorative band.
- Cascading Ruffles: To achieve a cascading effect, pipe rows of ruffles one above the other, allowing each subsequent row to slightly overlap the row below it. You can pipe these in a downward motion, creating a waterfall-like appearance.
- Full Ruffle Flowers: By piping multiple concentric circles of ruffles, you can create stunning ruffle flowers. Start with a small circle of ruffles in the center and gradually increase the diameter of your circles, overlapping each row.
- Textured Ruffles: Experiment with slightly varying the angle of the tip or the pressure to create ruffles with subtle textural differences.
Piping Techniques for Specific Applications
- Piping Around the Base of a Cake:
- Load your piping bag with frosting.
- Insert the petal tip, ensuring the correct orientation.
- Hold the bag at a 45-degree angle.
- Start at your desired starting point. Apply gentle pressure and begin your "S" or "U" motion.
- As you pipe, slowly rotate the cake using your turntable (if available).
- Continue piping, overlapping each stroke, until you have a complete border.
- When you reach your starting point, ease off the pressure and carefully lift the piping bag.
- Piping Ruffles on the Side of a Cake:
- This often requires a downward motion.
- Hold the piping bag at a 45-degree angle relative to the side of the cake.
- Begin your "S" or "U" stroke, allowing the frosting to naturally fall downwards.
- Continue piping in rows, overlapping each row slightly, to create a cascading effect.
- Piping Ruffles on a Flat Surface (e.g., a Cookie or Cake Board):
- The technique is similar to piping around the base, but you have more control over the surface.
- Ensure your frosting consistency is firm enough to hold its shape without sliding.
- Practice your "S" or "U" strokes to achieve uniform ruffles.
Troubleshooting Common Ruffle Piping Problems
Even experienced decorators encounter challenges. Here’s how to address common issues:
- Droopy or Collapsed Ruffles:
- Cause: Frosting is too soft.
- Solution: Chill the frosting for a short period (5-10 minutes), stir well, and try again. Gradually add more powdered sugar if needed.
- Jagged or Unbroken Ruffles:
- Cause: Frosting is too stiff, or piping pressure is inconsistent.
- Solution: Add a tiny amount of liquid (milk or cream) to soften the frosting. Ensure steady, consistent pressure on the piping bag.
- Gaps Between Ruffles:
- Cause: Insufficient overlap between strokes.
- Solution: Ensure each new ruffle stroke overlaps the previous one by at least a third to half of its width.
- Uneven Ruffle Size:
- Cause: Inconsistent pressure, inconsistent tip angle, or uneven cake surface.
- Solution: Focus on maintaining a steady hand and consistent pressure. Ensure the cake surface is level. Use a turntable for easier rotation and consistency.
- Frosting Squeezing Out Unevenly:
- Cause: Air bubbles trapped in the piping bag, or the tip is not properly secured.
- Solution: Squeeze out any air bubbles before piping by holding the bag vertically and gently squeezing until frosting appears. Ensure the tip is securely attached to the bag.
- Ruffles Sticking to the Piping Bag:
- Cause: Frosting is too warm and sticky.
- Solution: Briefly chill the frosting and stir. Ensure your piping bag is clean and dry.
Creative Applications and Variations
Once you’ve mastered the basic ruffle technique, explore these creative ideas:
- Full Ruffle Cakes: Cover an entire cake in layers of ruffles for a dramatic and opulent effect.
- Ruffle Borders: Use ruffles to create elegant borders around the top or bottom of your cakes, cupcakes, or cookies.
- Ruffle Flowers: Combine ruffles to create beautiful and realistic-looking flowers, such as roses, peonies, or hydrangeas.
- Textured Backdrops: Pipe ruffles onto a fondant or buttercream-covered cake to add a unique texture.
- Color Combinations: Experiment with ombre effects by blending multiple colors of frosting or use contrasting colors for a bold statement.
- Edible Glitter and Sprinkles: Add a touch of sparkle or whimsy by dusting your finished ruffles with edible glitter or strategically placing sprinkles.
Cleaning and Storing Your Tools
Proper cleaning and storage of your piping tools will ensure their longevity and hygiene.
- Piping Bags: Wash reusable silicone piping bags thoroughly with warm, soapy water immediately after use. Rinse well and allow them to air dry completely. Disposable bags can be discarded.
- Piping Tips: Soak metal piping tips in warm, soapy water. Use a small brush (like a bottle brush or an old toothbrush) to clean out any residual frosting from inside the tip. Rinse thoroughly and dry completely. Store tips in a clean, dry place, such as a dedicated tip organizer or a small container.
Mastering frosting ruffles is a rewarding skill that elevates your cake decorating abilities. With the right tools, practice, and attention to detail, you can create stunning, professional-quality ruffles that will impress your guests and add a touch of artistry to every dessert.
