
DIY Rope Light Signs: Craft Your Own Illuminating Masterpiece for Unmatched Visibility and Customization
Creating a custom rope light sign is a rewarding and surprisingly accessible DIY project that offers a unique blend of creative expression and functional illumination. Whether you’re a business owner aiming to attract customers with a vibrant storefront display, a homeowner looking to add a personalized touch to your patio or entertainment space, or an event organizer seeking to make a statement, a homemade rope light sign provides unparalleled flexibility in design, size, and messaging. This article will serve as your comprehensive guide, detailing every step from initial concept and material selection to construction, installation, and maintenance, all while optimizing for search engines to ensure your dazzling creation gets the visibility it deserves.
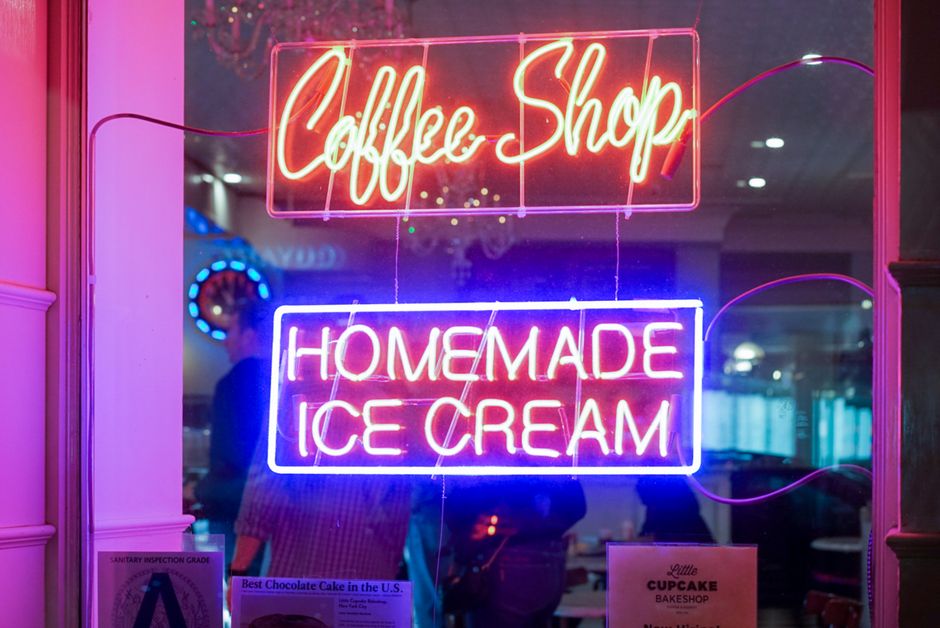
The foundational step in any successful DIY project is meticulous planning. Before you even purchase a single strand of rope light, dedicate ample time to conceptualizing your sign. What is the core message or image you wish to convey? Consider your target audience and the intended location. A bold, impactful word like "OPEN" or "SALE" for a retail business will differ significantly from an intricate silhouette for a home bar or a playful logo for a party. Sketch out your design repeatedly, exploring different fonts, shapes, and sizes. This iterative process is crucial for refining your vision and identifying potential challenges. Think about the overall aesthetic you want to achieve. Do you envision a sleek, modern look, a rustic, vintage feel, or something whimsical and fun? Your chosen aesthetic will influence your material choices, particularly the backing or mounting material for your rope lights. For businesses, consider incorporating your brand colors and logo for instant recognition. For home décor, think about how the sign will complement your existing interior design. Furthermore, consider the scale of your project. A small, decorative sign might be suitable for a tabletop, while a larger, illuminated message requires more substantial backing and potentially a more robust mounting system. Don’t underestimate the power of a well-executed sketch; it’s your blueprint for success and will save you time and resources down the line.
Material selection is paramount to both the longevity and aesthetic appeal of your DIY rope light sign. The primary component, of course, is the rope light itself. These come in various diameters, colors, and LED configurations. For brighter, more even illumination, opt for LED rope lights, which are also significantly more energy-efficient and longer-lasting than traditional incandescent versions. Consider the color palette that best suits your design. White is versatile, but vibrant reds, blues, greens, and yellows can create stunning visual impact. Some rope lights even come with multi-color options or remote-controlled color-changing capabilities, offering an extra layer of dynamism. When purchasing rope lights, ensure they are rated for outdoor use if the sign will be exposed to the elements, as this indicates superior weather resistance. Pay close attention to the length of the rope light and the cutting increments. Most rope lights can only be cut at designated points, so your design must accommodate these limitations. You’ll also need a backing material to mount your rope lights onto. Common choices include plywood, MDF (medium-density fiberboard), corrugated plastic (Coroplast), or even sturdy cardboard for indoor, temporary applications. Plywood and MDF offer durability and a substantial feel, making them ideal for more permanent or outdoor installations. Coroplast is lightweight, weather-resistant, and easy to cut, making it a popular choice for temporary signage or projects where weight is a concern. For intricate designs, consider using thin but rigid acrylic sheets. The thickness of your backing material should be sufficient to support the weight of the rope lights and any associated wiring. Additionally, you’ll need mounting hardware such as screws, brackets, zip ties, or heavy-duty adhesive, depending on your chosen backing and desired mounting method.
The process of transferring your design onto the backing material is a critical step that requires precision. Once your design is finalized and you have your chosen backing material, it’s time to translate your sketches into a tangible form. For simple designs, you can often freehand the layout. However, for more complex lettering or graphics, using a stencil or a projector is highly recommended. Print your design to the exact size of your intended sign and carefully trace it onto the backing material. If using a projector, darken the room, position the projector to cast your design onto the backing, and trace the outline. For rope lights, it’s helpful to mark not only the outline of your design but also the path the rope light will follow. This often involves creating a series of dots or small Xs along the line where the rope light will be secured. If you’re using a thicker rope light, consider scoring a shallow groove into the backing material to help seat the light more securely. When working with wood-based materials like plywood or MDF, it’s advisable to seal the surface with a primer or sealant, especially if the sign will be exposed to moisture. This will prevent warping and protect the material from damage. If you’re cutting out intricate shapes in your backing, a jigsaw or a Dremel tool will be your best friends. Remember to wear appropriate safety gear, including eye protection and gloves, when operating power tools.
Cutting and shaping the backing material is where your design truly begins to take physical form. The method you use will depend on the material chosen and the complexity of your design. For straight lines and simple shapes, a hand saw or circular saw is effective for plywood and MDF. For curves and more intricate cuts, a jigsaw is indispensable. If you’re working with Coroplast, a utility knife or a sharp craft knife will suffice for most cuts. When cutting out letters or negative space, ensure you maintain the structural integrity of your sign. In some cases, it might be easier to cut the backing material first and then trace your design onto the remaining piece, effectively creating a frame. Always measure twice and cut once to avoid costly mistakes. For a cleaner finish, consider sanding the edges of your cut material. This not only improves the appearance but also removes any sharp edges that could snag the rope lights or pose a safety hazard. If you plan to paint your backing, now is the time to do it. Use exterior-grade paint if the sign will be outdoors, and consider multiple coats for even coverage and durability. Allow the paint to dry completely before proceeding to the next step.
Securing the rope light to your shaped backing is a meticulous process that demands patience and attention to detail. Once your backing is prepared and your design is clearly marked, you’re ready to attach the rope lights. The most common method is to use zip ties, small screws with washers, or heavy-duty adhesive. For a clean look, especially with intricate designs, consider drilling small pilot holes along your marked path at regular intervals. These holes will be used to thread zip ties or to insert small screws that will hold the rope light in place. Ensure the holes are not too close together, as this could compromise the integrity of the backing material. If you’re using zip ties, thread them through the holes and loosely secure them around the rope light. Once the entire design is laid out, you can go back and tighten the zip ties evenly. For a more permanent and visually seamless attachment, especially on solid backing materials, small screws with washers can be used. Drill pilot holes that are slightly smaller than the screw threads and screw them in, ensuring the washers provide enough surface area to grip the rope light without crushing it. Heavy-duty, waterproof adhesive can also be used, particularly for very smooth surfaces or for a more "floating" appearance. Apply the adhesive in a continuous bead along the marked path, then carefully press the rope light into the adhesive. Allow ample drying time as per the adhesive manufacturer’s instructions. If your design involves sharp angles or tight curves, you may need to make small strategic cuts in the rope light tubing itself (following the manufacturer’s guidelines) or use specialized corner connectors to achieve a clean transition. Remember to test the flexibility of the rope light before committing to a permanent attachment method.
Wiring and power management are crucial for a functional and safe rope light sign. Most rope lights come with power cords and connectors. If you’re creating a larger sign, you may need to connect multiple sections of rope light together. Ensure you use the connectors provided by the manufacturer and follow their instructions carefully. Waterproofing these connections is essential, especially for outdoor installations. Use silicone sealant or heat-shrink tubing specifically designed for outdoor electrical connections. If your design is particularly complex or requires more power than a single outlet can safely provide, you may need to consider using a transformer or multiple power supplies. Always err on the side of caution and consult an electrician if you are unsure about the electrical requirements of your project. It’s also a good idea to integrate a switch into your wiring, allowing you to easily turn the sign on and off without unplugging it. Consider where you will conceal the power cord and any transformers to maintain the aesthetic integrity of your sign. For outdoor signs, ensure all wiring is properly protected from the elements. Using outdoor-rated electrical boxes and conduit can provide an extra layer of safety and durability.
Installation and mounting require careful consideration to ensure your sign is both securely displayed and visually appealing. The method of mounting will depend heavily on where your sign will be placed. For indoor use, Command strips, heavy-duty Velcro, or small brackets can be used for lighter signs. For heavier signs or outdoor installations, you’ll likely need a more robust solution. Consider using mounting brackets that can be screwed into walls, posts, or fences. If your sign is intended to be freestanding, you’ll need to design a stable base, perhaps incorporating weighted elements or a frame that can be staked into the ground. For business storefronts, consider attaching the sign to a wall, window, or even a custom-built frame that complements your building’s architecture. If mounting outdoors, ensure all fasteners are rust-resistant. For very large signs, you might need to consider structural support and professional installation to ensure safety and compliance with local building codes. When determining the final placement, consider the viewing angles. Will the sign be easily visible from the street, from across a room, or from a distance? Adjust the mounting height and angle accordingly.
Troubleshooting and maintenance are an inevitable part of owning any illuminated sign, even a DIY one. Periodically inspect your rope light sign for any signs of wear and tear. Check for loose connections, damaged wiring, or sections of the rope light that are not illuminating. If a section of LED rope light fails, it’s often possible to replace just that section, provided you can locate compatible replacements. For outdoor signs, regularly clean off any dirt, debris, or insect nests that may accumulate on the surface. A soft brush and a mild soap and water solution are usually sufficient for cleaning. If you encounter flickering lights, it could indicate a loose connection or a faulty power supply. Carefully inspect all connections and consider replacing the power adapter if necessary. If your sign is exposed to extreme weather, such as heavy rain or snow, ensure all protective measures are still in place and functioning correctly. For signs made with wood, touch up any paint that may have chipped or faded over time. Regular, preventative maintenance will significantly extend the lifespan of your DIY rope light sign and ensure it continues to shine brightly for years to come.
The SEO benefits of a custom rope light sign, especially for businesses, are substantial. A well-designed and brightly lit sign acts as a beacon, drawing attention from a distance. This increased visibility can lead to more foot traffic and impulse visits. For online visibility, consider incorporating keywords related to your business or message into the sign’s design. For example, a bakery could have a sign that clearly reads "Freshly Baked" or "Sweet Treats." This visual reinforcement of your offerings can translate into better search engine rankings when potential customers search for related terms. Furthermore, unique and eye-catching signage can generate organic social media buzz. Customers might post photos of your sign online, tagging your business and increasing your brand awareness organically. Think of your sign as a powerful, three-dimensional advertisement that works 24/7. For businesses, a custom rope light sign is not just decorative; it’s a strategic marketing investment. The initial investment in materials and time can yield significant returns in terms of customer acquisition and brand recognition. The ability to customize your sign also allows you to adapt it to seasonal promotions or special events, further enhancing its marketing potential. For example, during the holiday season, you could change the color of the rope lights or add festive embellishments to your sign, creating a unique and inviting atmosphere. This dynamic adaptability makes a DIY rope light sign a versatile tool for any business looking to stand out.
