
How to swap to natural cleaning products? It’s a question many are asking as they seek healthier and more sustainable ways to keep their homes sparkling clean. The allure of natural cleaning lies in its promise of a healthier environment for you and your family, free from harsh chemicals and synthetic fragrances.
But making the switch can seem daunting. Where do you start? What products should you choose? Fear not, this guide will equip you with the knowledge and tools to confidently embrace natural cleaning.
This journey into natural cleaning will unveil the benefits of using natural products, empower you with practical tips for making the transition, and guide you through creating your own DIY cleaning solutions. We’ll address common concerns, explore sustainable cleaning practices, and showcase real-life examples of people who have successfully switched to a healthier way of cleaning.
Understanding Natural Cleaning Products: How To Swap To Natural Cleaning Products

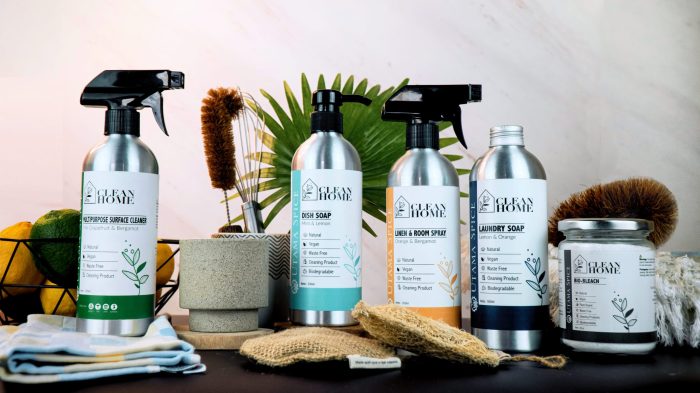
Making the switch to natural cleaning products is a fantastic way to create a healthier and more sustainable home. These products are gentler on your family, pets, and the environment, offering a cleaner and greener approach to everyday cleaning.
Benefits of Natural Cleaning Products
Natural cleaning products are formulated with plant-based ingredients and essential oils, minimizing the use of harsh chemicals and synthetic fragrances found in conventional cleaners. This shift brings several benefits, including:
- Improved Indoor Air Quality:Natural cleaning products release fewer volatile organic compounds (VOCs) into the air, reducing the risk of respiratory problems, headaches, and allergies.
- Reduced Skin Irritations:Natural cleaners are less likely to cause skin irritation, making them safer for sensitive skin and families with young children.
- Environmentally Friendly:Natural cleaning products are biodegradable and less likely to pollute waterways, contributing to a healthier planet.
Common Ingredients in Natural Cleaning Products, How to swap to natural cleaning products
Natural cleaning products leverage the power of nature to effectively clean your home. Some common ingredients include:
- Baking Soda (Sodium Bicarbonate):A versatile cleaning agent, baking soda is effective for scrubbing surfaces, deodorizing, and removing stains.
- Vinegar (Acetic Acid):A natural disinfectant and deodorizer, vinegar is effective for cleaning windows, countertops, and floors.
- Lemon Juice (Citric Acid):A natural disinfectant and stain remover, lemon juice also adds a fresh scent to your cleaning routine.
- Essential Oils:These concentrated plant extracts offer natural fragrances and antimicrobial properties, enhancing the cleaning experience.
Comparing Natural and Conventional Cleaning Products
While natural cleaning products offer numerous benefits, some may question their effectiveness compared to conventional cleaners.
- Efficacy:Natural cleaning products are equally effective in cleaning, although they may require a different approach or longer contact time. For instance, vinegar might need to sit on a surface for a few minutes before wiping it clean.
- Safety:Natural cleaning products are generally safer for humans and pets, as they contain fewer harsh chemicals. They are less likely to cause skin irritation, respiratory problems, or other health issues.
“Natural cleaning products are a safe and effective alternative to conventional cleaners, offering a healthier and more sustainable approach to home cleaning.”
Switching to natural cleaning products can be a rewarding journey for your home and the environment. It’s all about finding the right ingredients and tools, just like when choosing the perfect gift for a gardening enthusiast. Check out this fantastic resource for gifting ideas for gardening enthusiasts farrar and tanner , and you’ll find inspiration for natural cleaning solutions as well.
After all, both involve nurturing and fostering growth, whether it’s a lush garden or a sparkling clean home.
Switching to natural cleaning products can be a rewarding journey, both for your health and the environment. It’s amazing how much you can accomplish with simple ingredients like vinegar and baking soda! And if you’re looking for a fun way to spend a weekend, check out 9 things to do in Brooklyn this autumn.
After all, a clean home and a happy mind go hand-in-hand, and Brooklyn offers plenty of opportunities to enjoy both.
Switching to natural cleaning products is a great way to reduce your environmental impact and create a healthier home. It can be a little overwhelming at first, but there are plenty of resources available to help you make the transition.
For example, you can check out the latest news on the mining industry, like the recent discovery of nickel deposits in Newfoundland, which could lead to more sustainable battery production, first atlantic nickel mobilizes drill rig after new discoveries at atlantic nickel project and acquires atlantis nickel project in newfoundland.
These kinds of advancements are crucial for creating a cleaner future and can help us move towards a more sustainable approach to cleaning products.