Chalkboard mug DIY project sets the stage for this enthralling narrative, offering readers a glimpse into a story that is rich in detail with personal blog style and brimming with originality from the outset.
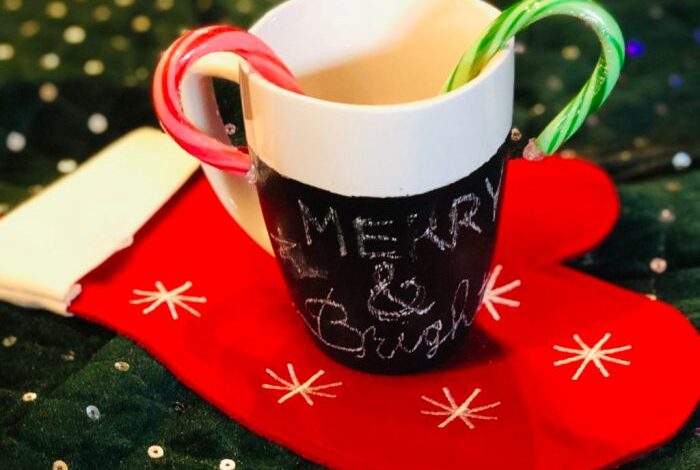
Ever wished you could personalize your morning coffee mug? Well, now you can with a chalkboard mug DIY project! This simple yet creative craft allows you to transform a plain mug into a fun and functional piece of art. Imagine waking up to a personalized message, a funny doodle, or a motivational quote every morning – the possibilities are endless!
Chalkboard Mugs: A Fun and Functional Trend
Chalkboard mugs are a fun and functional trend that has gained popularity in recent years. They combine the practicality of a regular mug with the creative freedom of a chalkboard, allowing users to personalize their drinking experience.
Benefits and Appeal of Chalkboard Mugs
Chalkboard mugs offer several benefits that contribute to their appeal:
- Personalization:The ability to write messages, draw designs, or create unique artwork directly on the mug makes it a personal expression of the user’s individuality.
- Interactive Fun:Chalkboard mugs are a fun way to engage with others, especially in social settings. Sharing a mug with a friend or family member can lead to creative collaborations or lighthearted messages.
- Practicality:Chalkboard mugs are functional as regular mugs, holding beverages like coffee, tea, or hot chocolate. The chalkboard surface can be easily wiped clean, allowing for repeated use and personalization.
- Uniqueness:Unlike standard mugs, chalkboard mugs stand out with their unique design and the opportunity for endless customization.
Creative Possibilities of Chalkboard Mugs
The possibilities for creativity with chalkboard mugs are endless:
- Personalized Messages:Write a special message for a loved one, a funny quote, or a motivational reminder.
- Artistic Expressions:Draw elaborate designs, doodle, or create abstract art directly on the mug.
- Decorative Elements:Use the chalkboard surface to add decorative touches to your kitchen or dining area.
- Interactive Games:Engage in a game of tic-tac-toe or hangman with friends and family.
- Event Reminders:Write down important dates, appointments, or reminders on the mug.
Materials Needed
Before embarking on your chalkboard mug DIY journey, ensure you have all the necessary materials. These materials are crucial for achieving a smooth and successful project.
Chalkboard mugs are a fun DIY project, especially when you want to personalize gifts or add a touch of whimsy to your kitchen. While you’re working on your mugs, why not think about how you’ll display them? A scrapbook is a great way to showcase your creativity and memories, even if the photos aren’t perfect.
Check out this article on how to scrapbook your memories with not so good photos for some inspiring ideas! After all, your chalkboard mug creations will make a great addition to your scrapbook page.
Essential Materials
The following materials are essential for creating your chalkboard mug:
- Ceramic Mug:Choose a mug made of ceramic, as this material is suitable for applying chalkboard paint.
- Chalkboard Paint:This paint provides the chalkboard surface on your mug. Ensure you use a paint specifically designed for ceramics.
- Paintbrush:A small paintbrush is ideal for applying chalkboard paint evenly and neatly onto the mug.
- Masking Tape:Use masking tape to protect areas of the mug you don’t want to paint, ensuring a clean and defined chalkboard surface.
- Chalk:This is for writing and drawing on your chalkboard mug. Choose chalk in various colors for a vibrant and creative experience.
- Clear Coat (Optional):Applying a clear coat after the chalkboard paint dries can protect the surface and enhance its durability.
Alternative Materials
You can explore alternative materials for a unique touch or if you lack certain items.
- Glass Mug:If you prefer a glass mug, you can use special chalkboard paint designed for glass surfaces.
- Spray Paint:Spray paint can be a convenient alternative to a paintbrush for applying chalkboard paint. However, ensure proper ventilation and protection during application.
- Chalk Markers:These markers offer a smooth and vibrant alternative to traditional chalk. They are available in various colors and are ideal for detailed drawings.
- Permanent Markers:For a more permanent design, you can use permanent markers on your chalkboard mug. However, note that these designs are difficult to erase.
Preparation and Cleaning
Before you begin transforming your plain mug into a chalkboard masterpiece, it’s essential to prepare the surface properly. This ensures the chalkboard paint adheres well and creates a smooth, even finish.
Cleaning the mug thoroughly is crucial. Any residue or grease can interfere with the paint’s adhesion, resulting in an uneven and patchy finish. A clean mug also allows for a more vibrant and long-lasting chalkboard surface.
Cleaning and Drying the Mug
Start by washing your mug with warm, soapy water. Use a gentle dish soap and a soft sponge or cloth to scrub the entire surface, paying attention to the rim and any intricate designs. Rinse the mug thoroughly to remove any soap residue.
Chalkboard mugs are so much fun to personalize! I love writing little messages on them for my friends and family. And speaking of fun crafts, I recently learned how to make eucalyptus hair wreaths which are perfect for adding a touch of greenery to your hair.
But back to the chalkboard mugs, they’re a great way to add a little bit of personality to your morning coffee routine.
- Avoid using abrasive cleaners or scrubbers, as these can damage the mug’s surface and affect the paint’s adhesion.
- Dry the mug completelybefore proceeding to the next step. Any moisture left on the surface can hinder the paint’s drying process and lead to uneven coverage.
Ensuring a Smooth Surface
Once the mug is clean and dry, it’s essential to ensure a smooth surface for optimal paint adhesion. This is particularly important if the mug has a textured or uneven surface.
- Sanding the surfacewith fine-grit sandpaper can create a smoother finish. This is especially helpful for mugs with raised designs or uneven glazes.
- Using a primercan also help create a smoother surface and improve the paint’s adhesion. Choose a primer specifically designed for ceramic surfaces for best results.
“The key to a successful chalkboard mug is a well-prepared surface. Take your time with the cleaning and preparation steps, and you’ll be rewarded with a smooth, even chalkboard finish.”
Applying the Chalkboard Paint

Now that your mug is prepped and ready, it’s time to apply the chalkboard paint! This is the exciting part where your mug transforms into a personalized canvas. Remember, a little patience goes a long way, and following these steps will help you achieve a smooth, professional finish.Applying chalkboard paint to a mug requires a steady hand and a few simple techniques.
The goal is to create an even coat of paint that will allow for smooth and clear writing. Here’s a step-by-step guide:
Applying the Chalkboard Paint
Start by shaking the chalkboard paint can vigorously for about a minute. This ensures the paint is well-mixed and ready for application. Hold the mug firmly and apply a thin, even coat of paint to the entire surface you want to be chalkboard.
I’m loving my new chalkboard mug DIY project – it’s so fun to personalize my morning coffee! But I’m also trying to get my home organized, and I recently tackled my hall closet – you wouldn’t believe the transformation! I found some great tips on how I organized my hall closet in one afternoon and I’m so happy with the results.
Now that I have a more organized closet, I can actually find my things, and I have more space for all my DIY projects, like this chalkboard mug!
A thin coat is crucial for a smooth finish, and it allows the paint to dry quickly and evenly. You can use a brush, sponge, or even a roller for applying the paint, depending on your preference and the size of the mug.For a truly professional finish, follow these tips:
- Allow each coat to dry completely before applying the next. This prevents the paint from becoming thick and clumpy.
- If you notice any drips or uneven spots, gently smooth them out with a clean brush or sponge.
- Apply two or three thin coats of paint for optimal coverage and durability.
Drying and Curing
Patience is key when it comes to chalkboard paint. Allowing the paint to dry and cure properly ensures a smooth, durable chalkboard surface that’s ready for your creative scribbles.
Chalkboard paint typically takes around 24 hours to dry completely. However, curing is a different process altogether. Curing refers to the hardening of the paint film, which takes a few days to a week. This process is crucial for achieving the desired durability and resistance to scratching and chipping.
Curing Process and Significance
The curing process involves a chemical reaction that strengthens the paint film. During this time, the paint becomes less susceptible to damage and more resistant to moisture. Proper curing is essential for a durable chalkboard surface that can withstand regular use and cleaning.
Handling the Mug After Painting
While the paint is drying, it’s important to handle the mug with care to avoid smudging or damaging the fresh paint. Here are some tips:
- Avoid touching the painted surface until it’s completely dry. If you need to move the mug, use gloves or a clean cloth to handle it gently.
- Store the mugs in a dust-free environment to prevent particles from settling on the wet paint.
- Keep the mugs away from direct sunlight or heat sources while they’re drying. These conditions can affect the curing process and potentially damage the paint.
- Once the paint is dry, it’s best to wait a full week before using the mug for the first time. This allows the paint to fully cure and reach its maximum durability.
Decorating and Personalizing: Chalkboard Mug Diy Project
Now that your chalkboard mug is ready, it’s time to unleash your creativity and personalize it! This is where the fun truly begins. You can turn your mug into a unique expression of your personality, a thoughtful gift, or a fun way to add a personal touch to your daily routine.
The possibilities are endless when it comes to decorating your chalkboard mug. You can use different colored chalks and markers to create various designs, messages, or even doodles.
Using Different Colored Chalks and Markers
Chalkboard mugs offer a fantastic opportunity to experiment with colors and create vibrant designs. Different colored chalks and markers can add depth and dimension to your creations.
- Chalk:Traditional chalk is a classic choice for chalkboard mugs. It comes in a wide range of colors and provides a matte finish.
- Liquid Chalk Markers:Liquid chalk markers offer a bolder, more vibrant look with a glossy finish. They come in various colors, including metallics, neon, and pastels.
- Whiteboard Markers:While not technically chalk, whiteboard markers can also be used on chalkboard mugs. They offer a smooth, vibrant finish and are easily erasable.
Examples of Creative Designs and Messages
Here are some ideas to inspire your chalkboard mug decorating:
- Quotes:Write your favorite quote or a motivational message to inspire you throughout the day.
- Designs:Create geometric patterns, abstract art, or whimsical doodles.
- Personalization:Add your name, initials, or a special date to make it truly yours.
- Calendar:Use your mug as a mini-calendar to keep track of important dates and appointments.
- Funny Sayings:Add a humorous saying or a witty remark to bring a smile to your face.
- Inspirational Messages:Write encouraging words or affirmations to motivate you.
- Lists:Create a to-do list, a grocery list, or a list of things you’re grateful for.
- Drawings:Sketch a simple design, a favorite animal, or a portrait.
Usage and Care
Now that you’ve created your very own chalkboard mug, it’s time to learn how to use and care for it properly. This will help you get the most out of your creative outlet and ensure your mug stays looking its best for years to come.
Writing and Drawing
Using your chalkboard mug is as simple as using a regular chalkboard. You can use chalk, liquid chalk markers, or even dry-erase markers to write or draw on the surface. The key is to use a light touch and avoid pressing too hard, which can damage the chalkboard paint.
Cleaning the Mug
Cleaning your chalkboard mug is also straightforward. To erase your drawings, simply use a damp cloth or a chalkboard eraser. For stubborn marks, you can use a mild soap and water solution. Avoid using abrasive cleaners or sponges, as these can scratch the surface.
Preserving the Chalkboard Surface
To ensure your chalkboard mug lasts, there are a few things you can do to preserve the surface.
- Avoid using water directly on the chalkboard surface.Water can damage the paint and make it difficult to write on.
- Store your mug in a cool, dry place.This will help prevent the chalkboard paint from cracking or peeling.
- Apply a thin coat of sealant to the chalkboard surface every few months.This will help protect the paint from scratches and wear.
By following these simple tips, you can enjoy your chalkboard mug for years to come!
Variations and Adaptations
Chalkboard mugs offer a blank canvas for creativity, and the possibilities for customization extend beyond simple designs. You can experiment with different styles, materials, and techniques to personalize your mug and create unique pieces that reflect your personality.
Alternative Designs and Styles, Chalkboard mug diy project
The classic chalkboard mug is a simple, functional piece that can be customized with chalk. However, you can explore various design styles to create unique and eye-catching mugs.
- Geometric Patterns: Incorporate geometric shapes, lines, and patterns into the design. This can create a modern and minimalist look. For example, you can use a stencil to create a repeating pattern of triangles, squares, or circles.
- Floral Motifs: Floral designs can add a touch of elegance and whimsy to your mug. You can use a stencil to create delicate floral patterns or freehand a simple flower design.
- Abstract Art: Explore abstract art concepts, such as color blocking, gradients, and textures, to create unique and visually appealing designs. You can use different colors of chalkboard paint to create layers and depth.
- Inspirational Quotes: Add inspirational quotes or messages to your mug to create a personalized and motivational piece. You can use a stencil to create a neat and professional-looking quote or freehand a more casual message.