
15 Easy DIY Halloween Decorations to Haunt Your Home This Spooky Season
Transform your abode into a chilling spectacle with these 15 accessible and budget-friendly DIY Halloween decorations. From eerie outdoor displays to frightfully fun indoor accents, these projects require minimal crafting experience and readily available materials, ensuring a memorable and spooktacular celebration without breaking the bank or your sanity. Get ready to unleash your inner ghoulish decorator and impress your trick-or-treaters and party guests with handmade horrors that exude personality and charm.
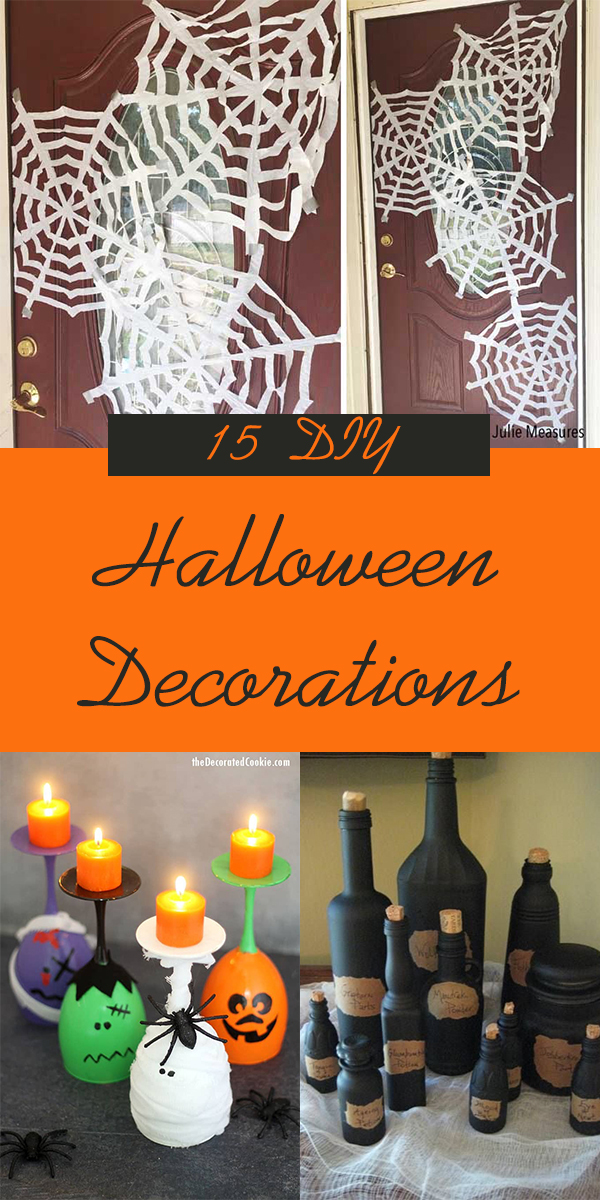
1. Spooky Mason Jar Luminaries:
Mason jar luminaries are a classic for a reason: they’re incredibly versatile and emit a beautifully eerie glow. To create these, gather an assortment of mason jars in various sizes. You’ll need black or orange spray paint, tissue paper in spooky colors (black, white, orange, purple), mod podge, and a craft knife or permanent markers. For the painted versions, thoroughly clean and dry your mason jars. Spray paint them with a thin, even coat of your chosen Halloween color. Once dry, you can either draw spooky faces like ghosts, pumpkins, or bats directly onto the painted surface with a permanent marker, or cut out shapes from spooky-colored tissue paper. Apply a thin layer of mod podge to the outside of the jar and carefully adhere your cut-out shapes, smoothing out any wrinkles. Alternatively, for a stained-glass effect, tear pieces of tissue paper and adhere them randomly all over the jar, overlapping them for a layered look. Once the mod podge is completely dry, you can add a coat of sealant for durability, though it’s not strictly necessary for indoor use. For the final touch, place a battery-operated tealight or a string of fairy lights inside each jar. These luminaries are perfect for lining pathways, adorning mantels, or creating a mystical ambiance on tabletops. Their flickering light casts captivating shadows, instantly adding to the Halloween atmosphere. Consider variations like wrapping the jars with gauze to create mummy luminaries or gluing on googly eyes for a more playful monster effect.
2. Ghostly Garlands from Fabric Scraps:
Repurpose old white t-shirts, sheets, or any light-colored fabric scraps into adorable and spooky ghost garlands. This project is environmentally friendly and remarkably simple. You’ll need your fabric, scissors, twine or ribbon, and a black permanent marker or small black felt circles for eyes. Cut your fabric into various sized squares or rectangles. The larger the piece, the larger your ghost will be. For each ghost, gather the center of the fabric piece and tie it securely with a piece of twine, leaving a long tail for hanging. This gathered center will form the ghost’s head. You can then fringe the bottom edges of the fabric for a wispy, ethereal look. Once you have a collection of fabric ghosts, use your black permanent marker to draw simple, spooky eyes on each one. Alternatively, cut out small circles from black felt and glue them on for a more uniform look. Thread the twine tails of your fabric ghosts onto a longer piece of twine or ribbon, spacing them evenly to create a flowing garland. Hang these ghostly strands across doorways, windows, or along your porch railing. Their gentle sway in the breeze adds a touch of whimsical fright. You can also experiment with different fabric textures and colors for a more varied garland.
3. Paper Plate Spiderwebs:
Create intricate and eye-catching spiderweb decorations using simple paper plates. This activity is fantastic for a rainy afternoon or as a craft for younger Halloween enthusiasts. You will need white paper plates, scissors, and black string or yarn. For each spiderweb, fold a paper plate in half, then in half again, and then in half a third time, so you have eight even wedges. Using sharp scissors, cut out a series of triangles or curved shapes from the folded edges of the plate, being careful not to cut all the way to the center point. The more cuts you make, the more intricate your web will appear. Once you unfold the plate, you will have a delicate spiderweb pattern. For a more realistic touch, you can gently bend and shape the “strands” of the web. To hang these, punch a small hole in the top of each web and thread a piece of black string through it. You can hang them individually in windows, from ceilings, or group them together for a dramatic wall display. Consider adding small plastic spiders to some of the webs for an extra creepy touch. This method also works with black paper plates for a bolder statement.
4. Silhouette Window Clings:
Add an element of mystery and shadow to your home’s exterior with DIY silhouette window clings. These are surprisingly easy to make and create a striking visual impact. You will need black construction paper or cardstock, scissors or a craft knife, and a spray adhesive or double-sided tape. Decide on your desired silhouette designs: bats, cats, witches, haunted houses, or creepy figures. Draw or print out your chosen shapes onto the black paper. Carefully cut them out using sharp scissors or a craft knife for intricate details. For a clean and reusable application, lightly spray the back of the silhouette with a temporary spray adhesive or apply small strips of double-sided tape around the edges. Press the silhouette firmly onto the inside of your windows. As night falls and your interior lights are on, these dark shapes will appear to loom ominously from the outside, creating an unforgettable Halloween spectacle. The beauty of these is their simplicity and the dramatic contrast they provide against a lit window.
5. Monster-fy Your Mailbox:
Give your ordinary mailbox a terrifying makeover and delight your trick-or-treaters from the street. This is a fun and impactful outdoor decoration. You’ll need large cardboard boxes (preferably weatherproof or coated), black paint, green or purple paint, googly eyes, scissors, and strong tape or adhesive. First, paint your mailbox in a base color like black or dark green. Once dry, use a different color to paint monster features: large, jagged teeth around the opening, or a single, giant eye. Cut out large circles from cardboard for eyes, paint them, and attach them with strong adhesive or screws. You can also add construction paper cutouts for nostrils, ears, or even a Frankenstein-style bolt. Consider adding yarn for fuzzy hair or felt for a tongue. The key is to be creative and embrace the silliness of monster design. Ensure any cardboard elements are securely attached and can withstand the elements if possible. This simple transformation turns a mundane object into a festive and welcoming (or terrifying!) Halloween icon.
6. Toilet Paper Roll Spiders:
Transform humble toilet paper rolls into creepy crawly spiders that can adorn your walls, hang from ceilings, or populate your spooky vignettes. This is an excellent craft for using up those leftover cardboard tubes. You will need toilet paper rolls, black paint, pipe cleaners, googly eyes, and scissors. Paint the toilet paper rolls black and let them dry completely. Once dry, cut the rolls in half or thirds to create the spider’s body segments. For the legs, cut four pipe cleaners in half. Take each half pipe cleaner and twist the ends together to create eight spider legs. Carefully insert these legs into the sides of the toilet paper roll segments, bending them into spider-like poses. Glue on googly eyes to the front segment to give your spiders a distinct personality. You can create a swarm of these spiders to hang from the ceiling with fishing line for a truly unsettling effect, or place them strategically on shelves and tabletops. Their lightweight nature makes them incredibly versatile for various hanging and placement options.
7. Bleached Burlap Ghost Garland:
For a more rustic and subtly spooky aesthetic, create a ghost garland using bleached burlap. This offers a more sophisticated, yet still DIY, Halloween vibe. You will need burlap fabric, bleach, scissors, twine, and a black permanent marker. Cut your burlap into irregular strips or ghost shapes. Place the burlap pieces in a plastic tub or bucket and carefully pour in bleach, ensuring the fabric is submerged. Allow it to bleach for varying amounts of time to achieve different levels of lightness and interesting patterns. Be sure to do this in a well-ventilated area and wear protective gloves and eyewear. Once you’ve achieved your desired bleached look, rinse the burlap thoroughly with water and allow it to dry completely. Once dry, you can either draw simple ghost faces on them with a black permanent marker or leave them plain for a more minimalist spooky feel. Punch small holes at the top of each bleached burlap ghost and thread them onto a piece of twine to create your garland. These look fantastic draped over mantels, fences, or even as a backdrop for a Halloween photo booth.
8. Cereal Box Monster Crafts:
Give old cereal boxes a monstrous makeover and turn them into a parade of colorful and quirky Halloween creatures. This is a fantastic way to upcycle and engage children in a fun craft. You will need empty cereal boxes, paint (acrylic works best), construction paper, scissors, glue, and googly eyes. Clean out your cereal boxes. Paint the boxes in vibrant Halloween colors – greens, purples, oranges, and blacks. Once dry, use construction paper to cut out and attach features like monster mouths, sharp teeth, spiky hair, or even antennae. Glue on googly eyes to bring your monsters to life. You can create a variety of monsters, from Frankenstein-inspired creations to fuzzy, multi-eyed beasts. These cereal box monsters can be displayed on shelves, used as table centerpieces, or even be part of a Halloween-themed scavenger hunt. Their sturdy construction makes them durable and display-ready.
9. Themed Door Decorations:
Transform your front door into a focal point of your Halloween décor. This is one of the most impactful ways to greet trick-or-treaters and set the tone for your spooky celebrations. Ideas include creating a giant spiderweb using white yarn or streamers, with a large cardboard spider as the centerpiece. Alternatively, cover your entire door with black paper and cut out a spooky jack-o’-lantern face. Another option is to create a mummy door by wrapping it with white streamers and adding large googly eyes. You can also hang a witches’ hat and broomstick on the door. The key is to choose a theme and execute it creatively. Consider using weather-resistant materials if your door is exposed to the elements. A well-decorated door not only welcomes guests but also adds a sense of anticipation and excitement for what lies within your haunted dwelling.
10. Pumpkin Patch Silhouettes:
Create a whimsical and enchanting outdoor display with pumpkin patch silhouettes. This is a simple yet effective way to add a touch of Halloween magic to your yard. You will need cardboard or large poster board, scissors, and stakes or strong adhesive. Draw various pumpkin shapes and sizes onto your cardboard or poster board. You can also draw other fall-themed silhouettes like scarecrows or corn stalks. Cut out your silhouettes carefully. To make them stand upright, attach stakes to the back of each cutout using strong tape or glue, or create a simple easel-like support. Place these silhouettes in your yard, arranging them to resemble a natural pumpkin patch. For an extra eerie effect, illuminate them from behind with strategically placed spotlights or string lights after dark. This creates a captivating and slightly mysterious ambiance that is sure to delight both children and adults.
11. Glittery Spiderweb Lanterns:
Elevate your outdoor lighting with shimmering spiderweb lanterns. These add a touch of glamorous spookiness to your Halloween décor. You will need plain paper lanterns (white or orange work well), white craft glue, glitter (silver or iridescent is ideal), and a small brush. Open your paper lanterns carefully. Using a small brush, paint swirling lines and patterns of white craft glue onto the surface of the lantern, mimicking a spiderweb. Immediately sprinkle the glitter liberally over the wet glue. Gently tap off any excess glitter. Allow the glue to dry completely. Once dry, hang these glittering lanterns from trees, porches, or eaves. When lit from within by battery-operated LED lights, they will cast a mesmerizing and festive glow. The glitter catches the light, creating a magical and enchanting spiderweb effect that is both elegant and spooky.
12. Yarn-Wrapped Bottle Ghosts and Mummies:
Give discarded glass bottles a spooky makeover with simple yarn wrapping. This is an eco-friendly and visually appealing decoration. You will need clean glass bottles (wine bottles, beer bottles, or any other shape), white or grey yarn, glue, and black permanent markers or googly eyes. For ghosts, wrap the bottles tightly with white or grey yarn, securing the end with glue. Once covered, use a black permanent marker to draw simple ghost faces. For mummies, wrap the bottles with strips of gauze or thin white yarn, leaving small gaps to reveal the bottle underneath. Glue on googly eyes for the mummy’s eyes. These can be placed on mantels, bookshelves, or clustered together on a table for a charmingly eerie display. The texture of the yarn and the simple faces make them instantly recognizable as Halloween figures.
13. Twisted Paper Bat Garland:
Create a unique and dynamic bat garland by twisting strips of black paper. This adds a three-dimensional and slightly unsettling quality to your décor. You will need black cardstock or construction paper, scissors, and twine. Cut your black paper into long, thin strips, approximately 1-2 inches wide. Twist each strip tightly to create a spring-like texture. Once twisted, cut out bat shapes from the twisted paper, or simply fold the twisted paper to create bat wing shapes. You can also cut out separate bat wing shapes and attach them to the twisted paper bodies. Punch small holes in the bats and thread them onto a piece of twine, spacing them evenly. These twisted paper bats have a more skeletal and ethereal appearance than flat cutouts, making them perfect for a creepy, crawly garland. Hang them across doorways, windows, or along your ceiling for a dramatic effect.
14. Spooky String Art:
For a more sophisticated and artistic touch, try creating spooky string art. This technique involves hammering nails into a board in a specific pattern and then wrapping string around them. You will need a wooden board, small nails, a hammer, black or Halloween-colored string or yarn, and a printed outline of your desired spooky shape (e.g., a pumpkin, a bat, a ghost). Place your printed outline onto the wooden board and hammer nails along the outline, spacing them evenly. Remove the paper outline. Begin wrapping the string around the nails, creating the shape of your design. You can use a single color of string for a classic look or multiple colors for a more vibrant effect. This requires a bit more patience and precision but results in a stunning and unique Halloween decoration that can be displayed year after year.
15. Glow-in-the-Dark Ghostly Footprints:
Add a touch of playful mystery to your pathways or hallways with glow-in-the-dark ghostly footprints. This is a simple yet highly effective way to guide trick-or-treaters or create a sense of an unseen presence. You will need glow-in-the-dark paint (specifically designed for outdoor use or suitable for sidewalks), stencils of footprint shapes, and painter’s tape. Find or create stencils of child-sized footprints. Lay the stencils onto your desired surface – sidewalks, driveways, or indoor flooring. Secure the stencils with painter’s tape. Carefully fill the stencil openings with the glow-in-the-dark paint. Allow the paint to dry completely according to the manufacturer’s instructions. Once dry, remove the stencils. As dusk settles, these ghostly footprints will begin to glow, creating a magical and slightly eerie trail that leads to your haunted house. Ensure the paint is safe for the surface you are applying it to.
