Custom photo garland DIY is a fantastic way to add a personal touch to your home decor. It’s a project that’s both sentimental and stylish, allowing you to showcase cherished memories in a unique and eye-catching way. Imagine stringing together your favorite photos, creating a visual timeline of your life’s adventures, or highlighting special moments with loved ones.
Photo garlands are versatile, adaptable to any theme or occasion, and can be customized to reflect your personal style. They add a touch of warmth and personality to any space, making them perfect for bedrooms, living rooms, hallways, or even outdoor spaces.
From simple and minimalist designs to elaborate and whimsical creations, there’s a photo garland style for everyone. Whether you’re celebrating a birthday, anniversary, graduation, or simply want to create a cozy and inviting atmosphere, a DIY photo garland is a wonderful way to personalize your home and share your stories with the world.
Introduction to Custom Photo Garlands
In a world where personalization reigns supreme, custom photo garlands have emerged as a captivating trend in home decor. These charming adornments offer a unique way to infuse spaces with cherished memories and create a personalized touch that speaks volumes about individual style and taste.
Photo garlands transcend mere decoration; they embody sentimentality and act as visual reminders of special moments, loved ones, and cherished experiences. The act of crafting a photo garland becomes a personal journey, allowing individuals to curate a collection of images that resonate with their heart and soul.
A custom photo garland is a fun and personal way to decorate your home, especially for a special occasion. While you’re crafting, why not treat yourself to a bottle of something special? You can discover the latest best priced wines for your collection with bbx , and pair it with your DIY project for a truly enjoyable evening.
Once the garland is complete, it will be the perfect finishing touch to your space, reminding you of all the happy memories captured in your photos.
Applications of Photo Garlands
Photo garlands are versatile and adaptable, finding their place in a wide array of settings and occasions. Here are some examples of how these delightful decorations add a touch of personalization to different events:
- Weddings:Photo garlands can be incorporated into wedding decor, showcasing the couple’s love story through a timeline of their relationship or featuring images of their families and closest friends. These garlands can be hung around the reception area, adding a touch of warmth and intimacy to the celebration.
- Birthday Parties:For birthdays, photo garlands can be personalized to celebrate the birthday person, featuring pictures from their childhood, memorable moments, or recent adventures. These garlands add a unique and heartwarming touch to the party decor.
- Baby Showers:Photo garlands can be used to create a whimsical and charming atmosphere at baby showers. They can feature pictures of the expectant parents, ultrasound images, or adorable baby-themed designs. These garlands add a personal touch to the celebration and make it a truly memorable event.
- Graduation Parties:Photo garlands are a perfect way to commemorate a graduate’s journey, showcasing pictures from their school years, extracurricular activities, and achievements. These garlands add a nostalgic touch to the graduation party and serve as a lasting reminder of this important milestone.
- Home Decor:Photo garlands can be used to decorate various areas of the home, adding a personal touch to living rooms, bedrooms, dining areas, or hallways. They can be used to create a gallery wall, showcase family portraits, or simply add a touch of warmth and personality to the space.
Materials and Supplies

Creating a custom photo garland is a fun and creative way to personalize your space and showcase cherished memories. You can use various materials to achieve your desired look and feel. To create a photo garland, you will need a few essential supplies.
Custom photo garlands are a fun way to personalize your space, but if you’re looking for a more budget-friendly option, try a stamped star wall! It’s a great alternative to expensive wallpaper, and you can find a detailed tutorial on how to create this look here.
Once you’ve got your star wall up, you can add a custom photo garland to complete the look and bring your favorite memories to life.
Here is a list of materials you can use:
Essential Materials
- Photo paper or cardstock:Photo paper is ideal for printing high-quality photos, while cardstock provides a sturdier base for your garland.
- String, twine, or ribbon:This will be the backbone of your garland, holding your photos together.
- Scissors:For cutting your photo paper, string, or ribbon to size.
- Hole punch:To create holes in your photos for threading the string.
- Glue or adhesive:For attaching embellishments or securing your photos to the string if you prefer not to use holes.
Optional Materials
- Embellishments:These can add a personal touch to your garland. Some popular options include glitter, stickers, washi tape, or even small dried flowers.
Material Selection
| Material | Pros | Cons |
|---|---|---|
| Photo Paper | High-quality prints, vibrant colors, variety of finishes | Thinner, can be more delicate |
| Cardstock | Durable, sturdy, can be easily punched | Less vibrant colors than photo paper |
| String | Versatile, affordable, easy to work with | May not be as durable as twine or ribbon |
| Twine | Strong, rustic look, comes in various colors | Can be more difficult to work with than string |
| Ribbon | Elegant, comes in a wide range of colors and patterns, durable | Can be more expensive than string or twine |
Design Inspiration and Ideas
Creating a photo garland is a fun and personal way to showcase your favorite memories. But with so many possibilities, it can be overwhelming to know where to start. This section will explore various design inspiration and ideas, helping you visualize your unique photo garland.
Photo Sizes and Shapes
The size and shape of your photos significantly impact the overall look and feel of your garland. Explore these options:
- Classic Square or Rectangle:These are the most common photo shapes, offering a timeless and elegant aesthetic. They work well for various garland styles, from minimalist to elaborate.
- Polaroid-Style:Polaroid photos add a vintage charm and a playful touch. They are perfect for creating a nostalgic feel, especially when combined with vintage-inspired embellishments.
- Strips and Collage:Experiment with cutting photos into strips or creating collages to add visual interest and a unique touch. You can even use different photo sizes within the same garland for a more dynamic look.
- Circle or Heart:These shapes are perfect for adding a touch of whimsy and romance. They can be used as standalone elements or incorporated into a larger garland design.
Garland Length and Arrangement
The length and arrangement of your photo garland determine its impact and how it fits into your space. Consider these factors:
- Length:The length of your garland should be proportionate to the space you intend to decorate. A shorter garland might be ideal for a small space, while a longer one can create a dramatic statement.
- Arrangement:You can arrange your photos in a straight line, in a zig-zag pattern, or in a more organic, free-flowing design. Experiment with different arrangements to find what best suits your style and space.
- Spacing:The spacing between photos can impact the overall look of the garland. Closely spaced photos create a more dense and vibrant effect, while wider spacing allows for a more minimalist and airy feel.
Color Palettes and Themes
Color palettes and themes can add a cohesive and intentional touch to your photo garland. Explore these ideas:
- Monochromatic:Choose a single color or a range of shades within the same color family for a sleek and sophisticated look. This can be achieved using black and white photos, sepia-toned photos, or color photos with a limited color palette.
- Complementary Colors:Use colors that are opposite each other on the color wheel, such as red and green or blue and orange, for a bold and vibrant effect. This can be achieved by selecting photos with dominant colors that complement each other.
- Analogous Colors:Choose colors that are next to each other on the color wheel, such as blue, green, and yellow, for a harmonious and balanced look. This can be achieved by selecting photos with similar color schemes or by adding colored embellishments that complement the photo colors.
- Seasonal or Themed:Incorporate colors and images that reflect a specific season or theme. For example, a summer-themed garland might feature bright colors and photos of beach scenes, while a winter-themed garland might feature cool tones and photos of snow-covered landscapes.
Incorporation of Embellishments
Embellishments can add personality and visual interest to your photo garland. Explore these options:
- Ribbons and Twine:Use ribbons or twine to connect the photos and add a touch of color or texture.
- Paper Flowers and Leaves:Add paper flowers or leaves in colors that complement your photo theme for a whimsical and festive touch.
- Buttons and Beads:Use buttons or beads to add pops of color and texture, especially when working with a minimalist or vintage theme.
- Lace and Fabric Scraps:Incorporate lace or fabric scraps to add a touch of elegance and texture to your garland.
- Dried Flowers and Herbs:Add dried flowers or herbs for a natural and rustic touch. This works well for a nature-inspired theme or a garland that complements a bohemian aesthetic.
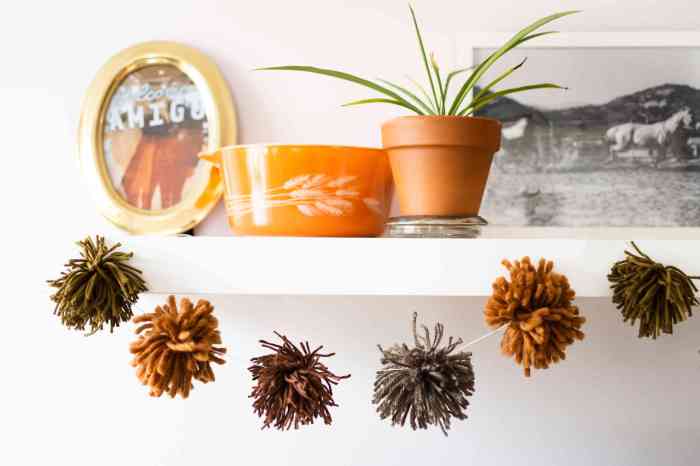
Visual Guide: Arranging Photos on a Garland
This is where you would include a visual guide with images demonstrating different ways to arrange photos on a garland. You could show examples of different photo sizes and shapes, garland lengths, and arrangement styles. You could also demonstrate how to incorporate embellishments to enhance the overall look.
Creative Variations and Customization
Now that you have the basics down, let’s explore the fun part: customizing your photo garland! This is where your creativity truly shines. By playing with photo styles, themes, and embellishments, you can create a unique and personal garland that reflects your style and the occasion you’re celebrating.
Photo Styles and Filters
The beauty of digital photos is that you can easily transform them with different styles and filters. This allows you to create a cohesive look for your garland, whether you’re going for a vintage vibe, a modern minimalist aesthetic, or a whimsical, colorful feel.
Creating a custom photo garland DIY is a fun way to personalize your space, and it’s a great way to showcase memories. It’s similar to how Xbox is building its gaming empire, strategically acquiring studios to expand its portfolio. Just like choosing the right photos for your garland, Xbox is carefully selecting studios that align with their vision, as explained in this article, xbox explains its acquisition strategy.
Once you’ve chosen your photos, you can string them together with twine or ribbon, adding a touch of personal flair to your home.
- Black and White:For a classic and timeless look, convert your photos to black and white. This can create a sense of nostalgia and elegance.
- Sepia Tone:A sepia tone filter adds a warm, vintage feel to your photos, perfect for capturing a nostalgic or romantic mood.
- Soft Focus:A soft focus filter can create a dreamy and romantic effect, ideal for photos of loved ones or special moments.
- Vintage Filters:Explore various vintage filters that mimic the look of old film, adding a unique and nostalgic touch to your photos.
- Artistic Filters:Experiment with artistic filters that add textures, brushstrokes, or other artistic effects to your photos, giving them a unique and personalized look.
Themes and Colors
The theme and color scheme of your photo garland should align with the occasion or the overall aesthetic you’re aiming for. This is where you can truly let your personality shine through.
- Birthday:Use bright colors, confetti, and fun photos to create a festive birthday garland.
- Wedding:Opt for soft pastel colors, romantic photos, and delicate embellishments for a beautiful wedding garland.
- Holiday:Incorporate festive colors, holiday-themed photos, and traditional decorations to create a cheerful holiday garland.
- Travel:Showcase your travel adventures with photos from different destinations, incorporating travel-themed decorations like maps, postcards, or souvenirs.
- Family:Create a heartwarming family garland with photos of loved ones, incorporating family heirlooms, quotes, or personalized touches.
Unique Embellishments and Decorations
Beyond photos, embellishments and decorations add a touch of personality and charm to your photo garland. Here are some creative ideas:
- Fabric Scraps:Add pops of color and texture with fabric scraps in coordinating colors or patterns.
- Paper Flowers:Create paper flowers in various sizes and colors to add a whimsical and delicate touch.
- Ribbons and Twine:Use ribbons and twine to tie together photos, add embellishments, or create a hanging loop.
- Dried Flowers:Incorporate dried flowers in natural colors or shades that complement your photos.
- Personalized Charms:Add charms with initials, dates, or meaningful symbols to personalize your garland.
Creative Photo Garland Projects with Unique Twists
Here are some examples of creative photo garland projects that showcase unique twists and ideas:
Photo Garland with a Map Background:A beautiful and personalized travel garland. Use a large map as the backdrop for your garland and arrange photos of your favorite travel destinations on top. You can also use pins, ribbons, or other embellishments to highlight specific locations.
Photo Garland with Polaroid Frames:A fun and nostalgic garland. Use printed photos in Polaroid frames to create a vintage feel. You can also add handwritten captions or notes to each photo for an extra personal touch.
Photo Garland with Watercolor Background:A whimsical and artistic garland. Use watercolor paper as the backdrop for your garland and paint a soft and dreamy background. Then, attach your photos to the watercolor paper with glue or tape.
Photo Garland with a Storyboard Theme:A creative and engaging garland. Arrange your photos in a storyboard format, telling a story through images. You can use different photo sizes, shapes, and colors to create a visually interesting and dynamic garland.
Tips and Tricks for Success: Custom Photo Garland Diy
Crafting a custom photo garland that truly shines requires a keen eye for detail and a few handy tips. Let’s dive into some practical advice that will elevate your garland from good to great.
Selecting High-Quality Photos
The foundation of a stunning photo garland lies in the quality of your images. Aim for sharp, vibrant photographs that capture the essence of your chosen theme. Consider these pointers:
- Resolution:Opt for high-resolution images, especially if you plan to print them larger. This ensures your photos remain clear and crisp even when enlarged.
- Color Balance:Ensure your photos have a balanced color palette. Overly saturated or faded colors can detract from the overall visual appeal.
- Subject Matter:Choose photos that complement your garland’s theme and resonate with your personal style. Consider using a variety of images, from portraits to landscapes, to create visual interest.
Ensuring Consistent Photo Sizes and Shapes
Uniformity in photo size and shape contributes significantly to a polished look. Here’s how to achieve consistency:
- Standard Size:If you’re printing photos, select a standard size like 4×6 or 5×7 inches for a cohesive appearance.
- Cropping:For a more unique look, experiment with cropping your photos into various shapes, such as circles, squares, or even irregular forms. However, maintain a consistent aspect ratio within each shape.
- Photo Editing:Utilize photo editing software to ensure all photos have a consistent size and shape before printing or attaching them to the string.
Choosing the Right String or Ribbon
The string or ribbon you choose plays a vital role in defining the overall aesthetic of your garland.
- Material:Consider the weight of your photos and the overall style of your garland when selecting a string or ribbon. For heavier photos, a sturdy twine or ribbon is ideal. For a more delicate look, a thin ribbon or thread might be suitable.
- Color:Choose a color that complements your photos and theme. A neutral color like white or beige allows the photos to take center stage, while a bolder color can add a touch of vibrancy.
- Texture:The texture of your string or ribbon can add another layer of visual interest. For example, a textured twine can add a rustic touch, while a satin ribbon can lend a touch of elegance.
Securing Photos Properly to Prevent Slipping
A well-secured photo garland ensures your photos remain in place and prevent unsightly slipping. Here’s how to ensure secure attachment:
- Adhesive:Use a strong, photo-safe adhesive to attach your photos to the string or ribbon. Avoid using adhesives that might damage the photos or leave behind residue.
- Clips:Consider using decorative clips or clothespins to secure your photos. These can add a touch of charm and allow for easy adjustments.
- Spacing:Space your photos evenly along the string or ribbon for a balanced and visually appealing garland.
Common Mistakes to Avoid
While creating a photo garland is a fun and creative process, there are a few common pitfalls to watch out for:
- Uneven Spacing:Inconsistent spacing between photos can make the garland look cluttered and disorganized.
- Using Low-Quality Photos:Using blurry or poorly lit photos can detract from the overall aesthetic.
- Overcrowding:Too many photos on the garland can make it look overwhelming and detract from the individual images.
- Using the Wrong Adhesive:Using an inappropriate adhesive can damage your photos or leave behind residue.
- Not Pre-Planning:Failing to plan out your garland’s design and layout can lead to a haphazard result.
Displaying and Styling
Once your photo garland is complete, it’s time to showcase it! The possibilities are endless, allowing you to integrate your creation into your home decor with style and personality.
Let’s explore some creative ways to display your photo garland and make it a standout feature in your space.
Hanging on Walls, Doors, or Windows, Custom photo garland diy
Hanging your photo garland is the most common and versatile display method. It offers a simple yet impactful way to add a personal touch to any room.
Here are some tips for hanging your photo garland:
- Use thumbtacks, pushpins, or small nails to secure the garland to walls, doors, or windows.
- Consider using a string or ribbon to hang the garland for a more elegant look.
- Experiment with different heights and angles to create a visually appealing arrangement.
For example, you could hang your photo garland above a fireplace, a sofa, or a bed to create a focal point. Alternatively, you can hang it across a window to add a touch of whimsy and personality.
Using as a Table Centerpiece or Backdrop
Your photo garland can also be used as a stunning centerpiece for your table or as a backdrop for a special event.
Here are some ideas for using your photo garland as a centerpiece or backdrop:
- Drape it across the center of your dining table for a unique and personalized centerpiece.
- Hang it behind a dessert table or a gift table at a party for a charming backdrop.
- Create a whimsical backdrop for a photo booth by hanging your photo garland in front of a plain wall.
Consider adding decorative elements like flowers, candles, or other small trinkets to enhance the visual appeal of your centerpiece or backdrop.
Incorporating into Other Home Decor Elements
You can also incorporate your photo garland into other home decor elements for a more cohesive and stylish look.
Here are some ideas for incorporating your photo garland into other home decor elements:
- Wrap it around a lampshade for a unique and personalized touch.
- Attach it to a mirror or a picture frame for a decorative border.
- Use it as a runner for a bookshelf or a mantelpiece.
These are just a few ideas to inspire you. With a little creativity, you can find countless ways to incorporate your photo garland into your home decor and make it a cherished part of your space.