
Serving Tray Makeover DIY: Revitalize Your Old Trays into Stunning Centerpieces
The humble serving tray, often relegated to utilitarian duty, possesses untapped potential to become a decorative focal point in any home. Forget the drab, chipped, or outdated designs you might currently own; a serving tray makeover DIY project is an accessible and rewarding way to inject personality, style, and functionality into your existing décor. This comprehensive guide delves into the transformative power of upcycling serving trays, covering everything from basic cleaning and preparation to advanced techniques and design inspiration. Whether you’re aiming for a rustic farmhouse aesthetic, a sleek modern look, or a vibrant bohemian statement, this article will equip you with the knowledge and confidence to breathe new life into old trays. We’ll explore various materials, tools, and creative approaches, ensuring you can tailor your makeover to your specific taste and skill level. From simple paint jobs to intricate decoupage and hardware embellishments, the possibilities are virtually limitless.
Before embarking on your serving tray transformation, a thorough assessment of your existing tray is crucial. Identify its material – is it wood, metal, laminate, or plastic? This will dictate the appropriate cleaning agents and finishing products. For wooden trays, check for any loose joints or splinters. Metal trays might exhibit rust or dullness, while laminate and plastic surfaces could be scratched or faded. Dust and grime are common culprits for a lackluster appearance, so a good cleaning is always the first step. For most materials, a mild soap and water solution is sufficient. For stubborn grime or greasy residues, a degreaser can be employed. If dealing with a painted or varnished wooden tray, a light sanding with fine-grit sandpaper (around 150-220 grit) will help remove any loose finishes and create a smooth surface for new paint or adhesive. For metal trays, especially those with rust, a wire brush or steel wool can effectively remove corrosion. Always wear appropriate safety gear, such as gloves and eye protection, particularly when sanding or using stronger cleaning agents. Thoroughly dry the tray after cleaning to prevent moisture damage or interference with subsequent steps. This preparatory phase, though seemingly mundane, is foundational to a successful and long-lasting makeover. Skipping these crucial steps can lead to peeling paint, uneven adhesion, and a less-than-professional finish. Take your time, be meticulous, and ensure your tray is pristine before moving on to the creative aspects of your DIY project.
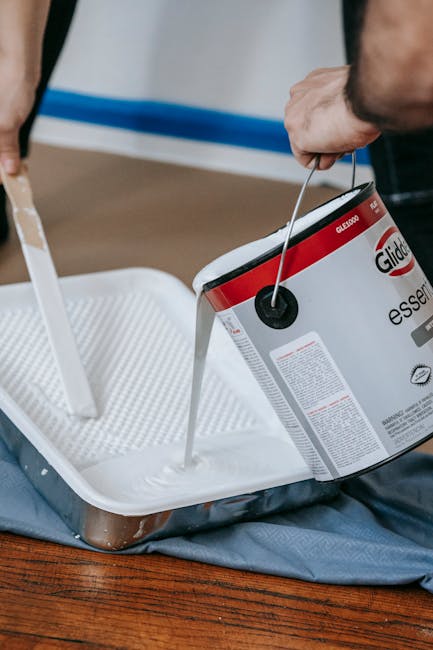
Painting is arguably the most straightforward yet impactful method for a serving tray makeover. The type of paint you choose will significantly influence the final aesthetic. For a classic and durable finish on wood or metal, acrylic paints are a versatile option. They dry quickly, come in a vast array of colors, and can be sealed with a clear coat for added protection. Chalk paint offers a popular vintage and matte finish that often requires minimal or no priming, making it ideal for a quick transformation. Its ability to be distressed easily adds to its rustic charm. For a more modern and sleek look, spray paint can provide a smooth, even coat, especially on metal or laminate surfaces. Ensure good ventilation when using spray paint and apply in thin, even layers. For high-traffic areas or surfaces that will come into frequent contact with food or beverages, consider using food-safe paints and sealants. Always read product labels carefully to ensure they are suitable for your intended use. Before applying any paint, consider a primer. A primer not only enhances paint adhesion but also helps to block stains and create a uniform base color, especially if you’re painting over a dark or vibrant existing finish. Apply primer in thin, even coats and allow it to dry completely between applications. Multiple thin coats of paint are always preferable to one thick, gloppy coat, as they offer a smoother finish and reduce the risk of drips and brush strokes. Once your base color is dry, you can explore various painting techniques to add depth and interest. Consider ombre effects, geometric patterns, or stenciled designs. A faux wood grain finish can also be achieved with a fine-toothed comb or a specialized wood grain tool. Remember that practice makes perfect, so don’t be afraid to experiment on scrap materials before applying your chosen technique to your tray.
Beyond solid colors, decorative finishes can elevate your serving tray from ordinary to extraordinary. Decoupage is a fantastic technique for adding intricate patterns and imagery. This involves adhering decorative paper, fabric, or even old maps to the tray’s surface and sealing it with a decoupage medium (like Mod Podge). The possibilities for paper choices are endless: scrapbooking paper, wallpaper samples, printed images from your computer, or even pages from old books. Ensure the paper is thin enough to conform to the tray’s contours without excessive wrinkling. Apply a thin layer of decoupage medium to the tray surface, carefully position the paper, and then brush another layer of medium over the top, smoothing out any air bubbles. Multiple thin coats of decoupage medium will provide durability and a smooth, lacquered finish. For fabric decoupage, a sturdier fabric like cotton or linen works best. If you’re aiming for a more textured and tactile experience, consider adding a coat of textured medium or even embedding small decorative elements like beads or glitter into the decoupage layers. For those who prefer a more natural or rustic aesthetic, consider wood staining. Stains penetrate the wood, highlighting its natural grain, and offer a rich, deep color. Various shades of stain are available, from light oak to deep walnut and even ebony. After staining, a clear sealant is essential to protect the wood and the stain from moisture and wear.
Hardware upgrades offer a subtle yet impactful way to personalize your serving tray and enhance its functionality. The existing handles might be outdated, uncomfortable, or simply not suit your new design. Replacing them with new ones can completely transform the tray’s look and feel. Options range from classic metal handles (brass, nickel, wrought iron) to more contemporary options like leather pulls, rope handles, or even repurposed found objects. When selecting new hardware, consider the scale and weight of your tray. Heavy trays will require sturdy handles. Measure the distance between existing screw holes to ensure compatibility with new hardware, or be prepared to drill new holes. If your tray doesn’t have handles, you can add them. Consider the placement and functionality – you want handles that are comfortable to grip and allow for easy carrying. Beyond handles, consider adding decorative embellishments. Metal corner protectors can add a touch of vintage charm and also offer protection. Small decorative feet can elevate the tray, giving it a more finished and substantial appearance. For trays with a flat surface, consider adding a mosaic or tile inlay for a truly unique and artistic statement. This involves cutting and adhering small tiles to the surface, then grouting the gaps. This technique requires patience and precision but results in a durable and visually stunning outcome.
For those seeking a more advanced and intricate makeover, consider techniques that combine multiple elements or create faux finishes. Faux finishes can mimic the look of expensive materials without the cost or complexity. For example, a faux marble finish can be achieved with various paint techniques, marbling mediums, and glazes, creating the illusion of natural stone. Similarly, a faux concrete or distressed metal finish can add industrial or rustic character to a tray. To achieve a distressed look, layers of contrasting paint colors can be applied, and then partially removed using sandpaper, steel wool, or even a sanding sponge to reveal the underlying colors. This creates an aged and weathered appearance. Another advanced technique involves resin pouring. Resin can be used to create a high-gloss, durable, and visually striking finish. It’s perfect for embedding objects, creating abstract art, or achieving a smooth, glass-like surface. Be sure to work in a well-ventilated area, wear protective gear, and follow the manufacturer’s instructions carefully when working with resin. Resin can also be tinted with various pigments to achieve a wide range of colors and effects. Consider adding metallic flakes or alcohol inks for even more dramatic visual interest. For trays with raised edges or compartments, consider lining them with felt, cork, or decorative paper for a more finished and luxurious interior. This not only adds a visual appeal but also protects the surface and reduces noise when items are placed inside.
When choosing a design aesthetic for your serving tray makeover, consider your existing home décor. If your home is filled with natural materials and muted tones, a rustic or farmhouse style might be appropriate. Think distressed wood finishes, natural stains, and simple metal hardware. For a more contemporary space, a sleek painted finish, geometric patterns, or metallic accents could be a good choice. Bohemian style allows for more freedom with bold colors, intricate patterns, and eclectic embellishments. Don’t be afraid to mix and match styles to create something truly unique. Pinterest and Instagram are invaluable resources for inspiration, offering countless examples of serving tray makeovers. Look for trends, color palettes, and techniques that resonate with your personal style. Consider the intended use of your tray. If it will primarily be used for entertaining, prioritize durability and ease of cleaning. If it’s more for decorative purposes, you can be more adventurous with your materials and finishes. The key is to create a piece that is both aesthetically pleasing and functional for your needs. Remember that a serving tray makeover DIY project is not just about transforming an old object; it’s about expressing your creativity and adding a personal touch to your home. The satisfaction of transforming something old and overlooked into a beautiful and functional piece is immense. By following these comprehensive guidelines and embracing your inner artist, you can elevate your serving trays into stunning centerpieces that will be admired by all who see them. The possibilities are truly endless, limited only by your imagination.
