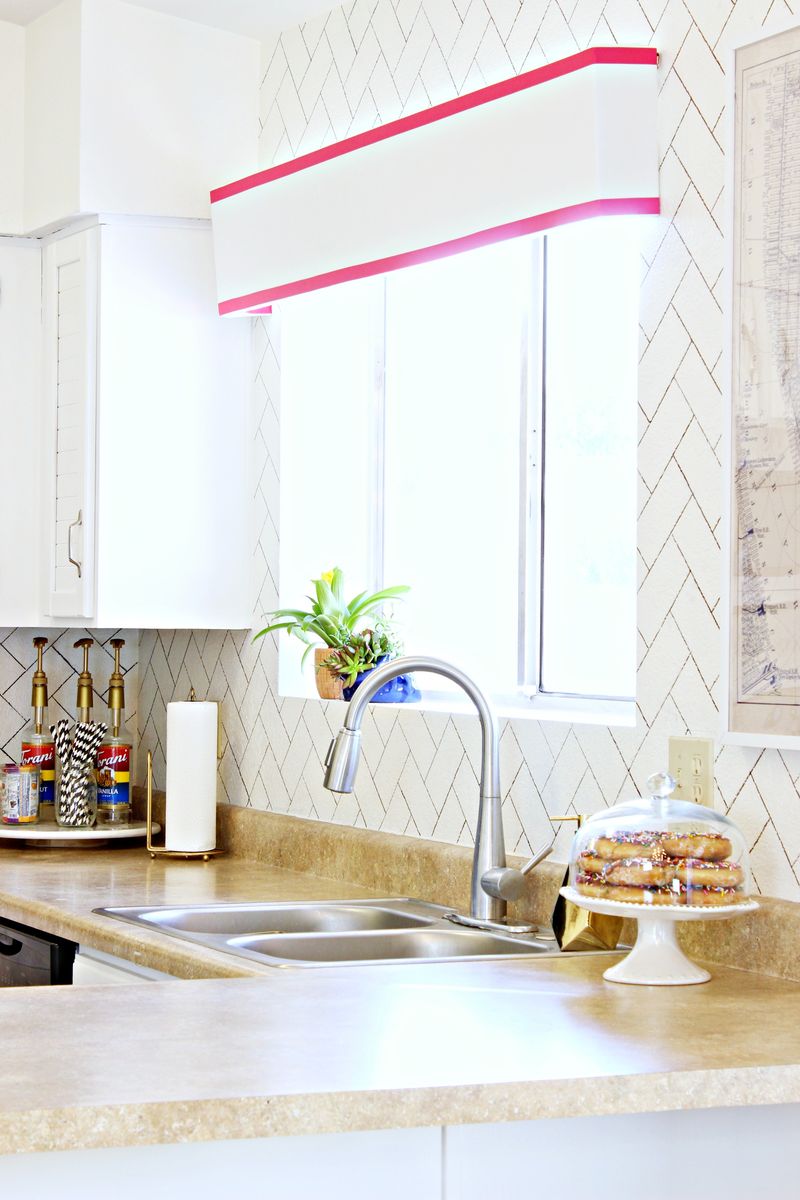

DIY Herringbone Faux Backsplash: A Stunning and Affordable Kitchen Upgrade
The allure of a herringbone backsplash is undeniable. Its classic V-shaped pattern adds a touch of sophistication and visual interest to any kitchen, transforming a utilitarian space into a stylish focal point. Traditionally achieved with expensive tile, the desire for this elegant look often comes with a significant price tag, placing it out of reach for many DIY enthusiasts. Fortunately, the world of home improvement offers creative and budget-friendly alternatives. This comprehensive guide will delve into the most popular and effective DIY herringbone faux backsplash techniques, empowering you to achieve a designer look without breaking the bank. We will explore materials, tools, step-by-step instructions, and essential tips for a professional-looking finish, ensuring your kitchen renovation is both beautiful and affordable.
Understanding the Herringbone Pattern and Faux Techniques
The herringbone pattern, characterized by its staggered, interlocking zig-zag arrangement, derives its name from the resemblance to the bones of a herring fish. Its inherent visual movement and dynamic quality make it a timeless design choice. When we refer to a "faux" backsplash, we are talking about replicating the aesthetic of a traditional tiled herringbone backsplash using more accessible and often less expensive materials. This can involve painting, using vinyl or peel-and-stick options, or even employing stencils. The goal is to capture the essence of the herringbone design’s visual appeal while minimizing labor and material costs. Each faux method offers a different level of commitment in terms of permanence and skill required, allowing for a solution that best suits your DIY comfort level and desired outcome.
The Paint and Stencil Method: Budget-Friendly Elegance
This is arguably the most cost-effective way to achieve a herringbone faux backsplash. It involves painting a base coat and then using a stencil to create the herringbone pattern.
Materials Needed:
- Paint: High-quality, durable kitchen and bath paint in your desired base color and accent color. Consider semi-gloss or satin finishes for ease of cleaning.
- Stencils: A large herringbone stencil designed for walls or backsplashes. Many craft stores and online retailers offer a wide variety. Ensure the stencil is large enough to cover a significant area efficiently.
- Paint Rollers and Brushes: Foam rollers are ideal for smooth coverage with stencils, while a stencil brush or a small artist’s brush may be needed for touch-ups.
- Painter’s Tape: High-quality painter’s tape is crucial for securing the stencil and preventing paint bleed.
- Drop Cloths or Plastic Sheeting: To protect countertops and floors from paint.
- Sanding Sponge: Fine-grit (220-grit) for smoothing the wall surface if needed.
- Cleaning Supplies: Mild soap and water, degreaser.
- Measuring Tape and Level: For accurate stencil placement.
- Caulking Gun and Caulk: For sealing edges and gaps.
- Clear Topcoat (Optional but Recommended): A water-based polyurethane or acrylic sealer for added durability and washability.
Step-by-Step Instructions:
- Preparation is Key: Thoroughly clean your backsplash area. Use a degreaser to remove any grease or grime. Allow the surface to dry completely. If the wall is uneven or has minor imperfections, lightly sand it with a fine-grit sanding sponge and wipe away dust.
- Apply the Base Coat: Paint the entire backsplash area with your chosen base color. Apply one or two coats, allowing each to dry completely according to the manufacturer’s instructions. A smooth, even base is essential for a flawless stencil application.
- Stencil Placement and Securing: Begin stenciling in a prominent corner or the center of the backsplash. Use a measuring tape and level to ensure the first stencil placement is perfectly straight. Secure the stencil firmly to the wall using painter’s tape, paying close attention to all edges to prevent paint seepage.
- Applying the Accent Color: For the herringbone pattern, you’ll be applying the accent color within the stencil. A common technique is to use a foam roller. Apply a small amount of accent paint to a paint tray. Lightly roll the stencil brush or roller over the paint, removing excess to prevent drips. Gently roll or dab the paint over the stencil openings, ensuring even coverage. Avoid overloading the roller.
- The Overlapping Technique: This is where the magic of the herringbone happens. Once you’ve stenciled a section, carefully lift the stencil, ensuring you don’t smudge the wet paint. Move the stencil to the next position, aligning it with the previously stenciled pattern to create the interlocking V-shapes. Most stencils have registration marks to guide this process. Continue this process, working your way across the entire backsplash.
- Touch-Ups: Once the stenciling is complete, carefully inspect the backsplash for any areas where paint has bled under the stencil or missed spots. Use a small artist’s brush dipped in the accent color to carefully touch up these areas.
- Drying and Sealing: Allow the accent paint to dry completely. Once dry, you can apply an optional clear topcoat. This will add a layer of protection and make the backsplash more durable and easier to clean. Apply one or two thin coats, allowing adequate drying time between each.
- Caulking: Once everything is fully dry, use caulk to seal the edges of the backsplash where it meets the countertop and cabinetry. This creates a clean, finished look and protects against moisture.
Tips for Success with the Paint and Stencil Method:
- Practice First: Before applying the stencil to your wall, practice on a piece of cardboard or scrap paper. This will help you get a feel for the stencil’s alignment and how much paint to use.
- Stencil Alignment is Crucial: Pay meticulous attention to the stencil’s registration marks. Even a slight misalignment can disrupt the herringbone pattern.
- Light Coats are Best: It’s better to apply multiple thin coats of paint than one thick, gloppy coat, especially with stencils.
- Clean the Stencil Regularly: If your stencil is large, you may need to clean it between applications to prevent dried paint from interfering with the pattern.
- Consider a Reusable Stencil: For larger projects, invest in a higher-quality, reusable stencil that can be cleaned and used multiple times.
The Peel-and-Stick Vinyl Tile Method: Instant Transformation
Peel-and-stick vinyl tiles offer a quick, easy, and often removable solution for a faux herringbone backsplash. These tiles come with an adhesive backing and can be applied directly over existing surfaces.
Materials Needed:
- Peel-and-Stick Vinyl Tiles: Choose tiles specifically designed for backsplashes. They are available in a vast array of styles, colors, and textures that mimic real tile. Look for ones that are heat and moisture resistant.
- Craft Knife or Utility Knife: For precise cutting of tiles.
- Straight Edge or Ruler: For guiding cuts.
- Measuring Tape and Level: For accurate placement.
- Cleaning Supplies: Mild soap and water, degreaser.
- Sanding Sponge (Optional): For minor surface imperfections.
- Adhesive Primer (Optional, but Recommended for Certain Surfaces): Check the manufacturer’s recommendations for your wall surface.
Step-by-Step Instructions:
- Surface Preparation: Clean the backsplash area thoroughly, removing any grease, grime, or dust. Ensure the surface is smooth and dry. If the wall has any significant imperfections, you may need to lightly sand and clean them.
- Layout Planning: Before you start peeling and sticking, plan your layout. Start in a central or visible corner and work your way out. This will help you determine how to cut tiles to fit edges and corners. Many peel-and-stick tiles are designed to be cut to fit.
- Applying the First Tile: Peel back a small section of the adhesive backing from the first tile. Align the tile carefully with your starting point, ensuring it is level. Once positioned, slowly peel off the remaining backing, pressing the tile firmly onto the wall as you go. Use a microfiber cloth to smooth out any air bubbles.
- Continuing the Pattern: For a herringbone pattern with peel-and-stick tiles, you’ll typically be using rectangular tiles that are then arranged in the V-shape. Apply each tile according to the manufacturer’s instructions, meticulously aligning them to create the staggered herringbone design. Pay close attention to the grout lines (if they are part of the tile design).
- Cutting Tiles: When you reach edges, outlets, or corners, use your craft knife and a straight edge to cut the tiles to size. Measure carefully and make clean, precise cuts.
- Finishing Touches: Once all tiles are applied, go back and press down firmly on all edges and surfaces to ensure a strong bond. Check for any lifted edges and press them down.
Tips for Success with Peel-and-Stick Vinyl Tiles:
- Read the Manufacturer’s Instructions: Each product is different. Follow the specific guidelines for application, cleaning, and any recommended primers.
- Work in Sections: Peel off only a small portion of the backing at a time to avoid the adhesive sticking to itself or to unwanted surfaces.
- Be Patient with Cuts: Precise cuts are essential for a professional look, especially around outlets and windows.
- Consider Air Bubbles: If you notice an air bubble, try to gently lift the tile and re-adhere it, smoothing out the bubble. A credit card or squeegee can be helpful.
- Durability: While convenient, peel-and-stick tiles may not be as durable as traditional tile. Consider their longevity for your specific needs.
Creating a Faux Herringbone with Wood or MDF: Rustic Charm
For a more textured and dimensional look, you can create a faux herringbone backsplash using thin wood planks or MDF. This method requires a bit more carpentry skill but can yield stunning results.
Materials Needed:
- Thin Wood Planks or MDF: Select materials that are thin enough to be easily cut and manageable. Pine, poplar, or even pre-primed MDF are good options.
- Wood Glue: A strong wood adhesive.
- Brad Nailer or Hammer and Small Nails: For securing the planks.
- Paint or Stain and Sealer: To finish the wood.
- Painter’s Tape: For holding planks in place while glue dries.
- Measuring Tape and Level: For accurate cuts and placement.
- Miter Saw or Hand Saw: For precise angled cuts.
- Sanding Paper: Various grits for smoothing.
- Cleaning Supplies:
- Caulk:
Step-by-Step Instructions:
- Prepare the Surface: Clean and ensure the backsplash wall is smooth and dry.
- Cut Your Planks: This is the most critical step for the herringbone pattern. You’ll be cutting your planks at 45-degree angles. For a standard herringbone, you’ll cut pairs of planks with opposing 45-degree angles. For example, one plank might be cut with the left side at 45 degrees and the right side at 90 degrees (a miter cut), and the next with the right side at 45 degrees and the left side at 90 degrees.
- Start Laying the Pattern: Begin in a central or prominent area. Apply wood glue to the back of your first plank and press it firmly against the wall. Use painter’s tape to hold it in place while the glue sets. Secure it further with a brad nailer or small nails, if desired.
- Build the Herringbone: Continue applying planks, carefully aligning each piece to create the V-shaped herringbone pattern. Ensure that the angled cuts meet precisely. Apply glue to the back of each plank and secure it to the wall.
- Cutting for Obstacles: Measure and cut planks precisely to fit around outlets, switches, and corners.
- Finishing: Once all planks are installed and the glue is fully dry, sand the entire surface to achieve a smooth finish. Remove any excess glue or nail heads. You can then paint or stain the wood to your desired color. Apply a few coats of a durable, water-resistant sealer to protect the wood.
- Caulking: Seal the edges where the wood meets the countertop and cabinetry with caulk for a professional finish.
Tips for Success with Wood Planks:
- Accurate Cuts are Paramount: The success of the herringbone pattern hinges on perfectly cut 45-degree angles. Invest in a good miter saw or practice your hand-sawing skills.
- Test Fit First: Lay out your cut planks on a flat surface to ensure they form the correct pattern before gluing them to the wall.
- Work in Small Sections: Apply glue and secure planks in manageable sections to prevent the glue from drying before you can attach them.
- Consider the Grain: If using natural wood, pay attention to the grain direction for a more aesthetically pleasing finish.
- Moisture Resistance: Ensure your chosen wood and finish are appropriate for a kitchen environment, which can be prone to moisture and grease.
Other Faux Herringbone Considerations:
- Grout Lines: When using paint and stencils or peel-and-stick tiles, you can choose to mimic grout lines. Some stencils have built-in grout lines, or you can lightly draw them in with a fine-tip marker after painting. With peel-and-stick tiles, the grout lines are usually integrated into the tile design.
- Cleaning and Maintenance: Regardless of the method you choose, regular cleaning is essential. For painted backsplashes, use mild soaps and non-abrasive cleaners. Vinyl tiles can usually be wiped down with a damp cloth. For wood, follow appropriate cleaning instructions for your finish.
- Durability: Consider the longevity you expect from your faux backsplash. While these DIY methods are more affordable, they may not be as durable as traditional tile and may require touch-ups or replacement over time.
- Budgeting: Thoroughly research the cost of materials for each method. The paint and stencil approach is generally the most budget-friendly, followed by peel-and-stick tiles, and then wood planking.
- Skill Level: Assess your DIY comfort level. The paint and stencil method is accessible to most, while wood planking requires more advanced carpentry skills.
The DIY herringbone faux backsplash is a fantastic way to elevate your kitchen’s style without the professional tile installation costs. By understanding the different methods available and applying careful planning and execution, you can achieve a beautiful and impactful focal point that reflects your personal style and budget. Whether you opt for the simplicity of paint and stencils, the speed of peel-and-stick tiles, or the rustic charm of wood planks, the herringbone pattern is a timeless choice that will undoubtedly enhance your kitchen’s aesthetic appeal for years to come. Remember to prioritize thorough preparation, accurate measurements, and patient application for the most successful and satisfying DIY backsplash project.
