
DIY Floral Wire Words: Crafting Beautiful, Personalized Letter Art
Creating stunning floral wire words is a rewarding DIY project that allows for immense personalization and can elevate any space with a touch of bohemian charm or modern elegance. This guide provides a comprehensive, step-by-step approach to crafting your own custom wire word art, focusing on techniques, material selection, and design considerations to ensure a professional and SEO-friendly outcome. We will cover everything from conceptualization and wire bending to floral embellishments and finishing touches, making this accessible for beginners while offering insights for more experienced crafters.
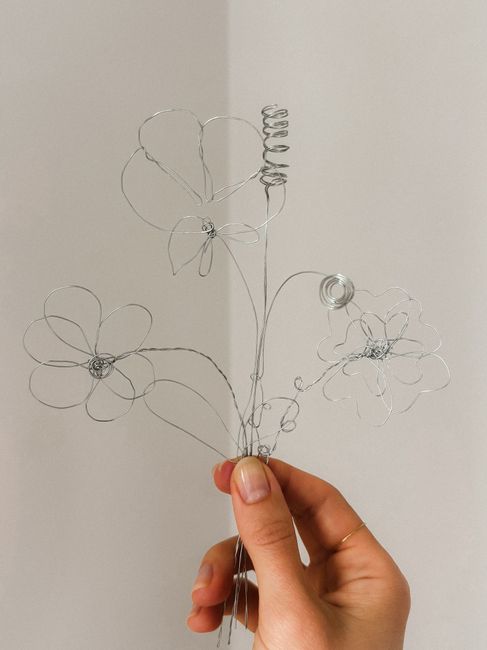
The foundational element of any floral wire word project is the wire itself. Choosing the right gauge and type of wire is paramount to achieving both structural integrity and ease of manipulation. For most wire word projects, a medium-gauge craft wire, typically between 16 and 20 gauge, is ideal. This range offers sufficient rigidity to hold its shape without being excessively difficult to bend by hand. Aluminum craft wire is a popular choice due to its malleability, resistance to rust, and availability in a wide array of colors. Copper wire offers a warm, metallic aesthetic and can be found in various patinas, from bright rose gold to aged bronze. Steel wire, while stronger, can be more challenging to bend and may require pliers for every curve. Consider the intended location of your floral wire word – a lighter aluminum wire is perfect for wall hanging, while a heavier gauge might be necessary for a free-standing piece. The color of the wire should also be a deliberate design choice, either to complement the chosen floral palette or to act as a contrasting element.
The design phase is where creativity truly takes flight. Before you even pick up a tool, sketch out your desired word or phrase. Consider the font style – will it be a whimsical script, a bold block letter, or a playful handwritten font? The complexity of the font will directly impact the difficulty of bending. Simple, rounded letters like ‘O’, ‘C’, and ‘S’ are generally easier than angular or intricate letters like ‘Z’, ‘X’, or those with serifs. Once you have a finalized sketch, you can begin translating it into wire. A common and effective technique is to create a template. Print your chosen word in the desired size and font on paper. This template will serve as your guide for bending, ensuring consistent curves and letterforms. You can even trace over the template directly with your wire. For more complex fonts or if you anticipate needing to replicate the design, consider creating a more durable template from cardboard or a thin piece of wood.
The actual bending process requires patience and the right tools. While some basic bending can be achieved with just your hands, a set of round-nose pliers and flat-nose pliers are essential for precision. Round-nose pliers are excellent for creating smooth, consistent curves and loops, while flat-nose pliers are useful for straightening wire, making sharp angles, and securing ends. Begin by laying your wire over your template. Gently guide the wire along the lines of the letters, using your fingers to create the initial curves. As you encounter tighter turns or need to create loops, employ your round-nose pliers. For sharper angles or to flatten sections of the wire, use your flat-nose pliers. Don’t be afraid to bend, unbend, and re-bend the wire to achieve the desired shape. The key is to work slowly and deliberately. If your wire starts to kink or buckle, it’s often a sign that you’re forcing it. Try to make smoother, more gradual bends. For connecting letters or creating the full word, you’ll need to strategically plan where to join lengths of wire. This can be done by twisting the ends together securely, using a small piece of complementary colored wire to bind them, or by strategically placing floral elements to hide the joins.
Once your wire word is bent into its desired form, the artistic embellishment with florals begins. This is where the "floral" aspect of "floral wire words" truly comes to life. The choice of floral elements is vast and depends entirely on your aesthetic preference, the occasion, and the desired longevity of your piece. For a natural, ephemeral look, fresh flowers are the obvious choice. Consider flowers with sturdy stems that can be easily interwoven with the wire. Roses, hydrangeas, baby’s breath, eucalyptus, and various types of foliage are excellent options. When attaching fresh flowers, it’s crucial to consider their lifespan and how they will be secured. You can use floral tape to bind stems to the wire, or smaller gauge wire to wrap around the stems and attach them. For longer-lasting arrangements, consider dried flowers or preserved botanicals. These offer a beautiful, textural element and will not wilt. Think dried lavender, statice, bunny tails, eucalyptus, and pressed flowers. They can be attached similarly to fresh flowers, often with hot glue or by weaving them through the wire structure.
For a permanent, maintenance-free option, artificial flowers are a fantastic choice. The quality of artificial flowers has improved dramatically, and you can find incredibly realistic and beautiful options in silk, foam, and plastic. When selecting artificial flowers, consider their size and color to ensure they complement the scale and style of your wire word. Delicate small blooms like artificial baby’s breath or tiny roses can add a whimsical touch, while larger, statement flowers like peonies or sunflowers can create a bold focal point. The attachment methods for artificial flowers are similar to their fresh and dried counterparts. You can use hot glue for a quick and secure bond, floral tape, or small gauge wire. Consider the weight of artificial flowers; heavier blooms might require a sturdier wire base or more secure attachment points.
When arranging your florals, think about balance and composition. Don’t overload the wire word; allow the wire itself to be a prominent design element. Consider where the flowers will add the most impact. You might cluster them at the curves of letters, trail them along the length of the word, or create a more asymmetrical, organic arrangement. Experiment with different textures and colors of flowers to create visual interest. For example, a mix of delicate baby’s breath with richer, colored blooms can create a beautiful contrast. Foliage, such as eucalyptus or ferns, can add volume and a natural, organic feel. Consider the directionality of your floral elements; you can have them flowing upwards, downwards, or cascading.
Securing your floral elements is a critical step in ensuring the longevity and appearance of your floral wire word. For fresh flowers, it’s essential to use a method that won’t damage the blooms. Floral tape is a pliable, self-adhering tape that can be used to wrap stems securely to the wire. If you’re using flowers with thicker stems, you might need to cut them to a manageable size before taping. Another effective method is using thin floral wire, often referred to as paddle wire. This wire is fine enough to be almost invisible and can be used to intricately wrap around stems and the main wire word, creating a very secure hold. For dried and artificial flowers, hot glue is a popular and effective adhesive. Apply a small amount of glue to the base of the stem or the flower itself and press it firmly onto the wire. Be cautious not to use too much glue, as it can seep through and create an unsightly mess. For a more robust attachment, especially with heavier artificial flowers, consider using a combination of hot glue and wire.
To ensure your floral wire word has a polished and professional finish, consider how you will hang or display it. For wall-mounted pieces, you’ll want to incorporate subtle hanging mechanisms. Many wire word artists create small loops at the top of letters like ‘A’ or ‘H’ that can be used to hang the word on a nail or hook. Alternatively, you can attach small D-rings or picture-hanging hardware to the back of the wire word. Ensure these are securely fastened to the wire, perhaps by wrapping them with additional wire. For free-standing words, the base of the letters needs to be designed to provide stability. This might involve creating wider, flatter bases for letters like ‘M’ or ‘W’, or even attaching small feet made from wire or wood. If your word is particularly large or heavy, consider incorporating a backing board made from thin plywood or sturdy cardboard that the wire word can be attached to for added support and stability.
SEO optimization for your DIY floral wire words project involves strategically using relevant keywords that potential crafters and buyers would search for. Incorporate terms like "DIY floral wire words," "wire letter art," "custom wire art," "floral wall decor," "handmade wire sculpture," "flower wall art," "crafting with wire," "easy wire art tutorial," and "personalized word art" throughout your content. Utilize these keywords naturally in headings, subheadings, and the body of your article. If you are selling your creations, ensure your product descriptions are rich with these keywords. Consider using long-tail keywords as well, such as "how to make floral wire words with fresh flowers" or "DIY dried flower wire art for nursery."
Beyond the basic construction and floral embellishment, consider advanced techniques and variations to elevate your floral wire word art. For a more intricate and dimensional look, you can use multiple strands of wire twisted together to create a thicker, more substantial wire. This is particularly effective for bolder font styles. Another technique involves incorporating beads into your design. Small beads can be threaded onto the wire as you bend it, adding subtle sparkle and texture. Larger, statement beads can be incorporated as focal points within the floral arrangements. For a vintage or rustic aesthetic, consider using twine or ribbon to wrap around sections of the wire, or to further secure floral elements. This also adds a textural contrast to the smooth wire.
The application of your floral wire words is as diverse as your imagination. They make stunning additions to home decor, gracing walls in living rooms, bedrooms, nurseries, or entryways. They are popular as wedding decor, spelling out couple’s initials or meaningful words like "Love" or "Mr & Mrs." They can be used for special occasions like birthdays, anniversaries, or baby showers. A personalized floral wire word makes a thoughtful and unique gift. For businesses, they can be used as eye-catching signage or decorative elements. The scalability of the project means you can create anything from a small, delicate initial to a large, impactful word or phrase.
In conclusion, the DIY floral wire words project offers a compelling blend of artistic expression and practical crafting. By understanding the nuances of wire selection, mastering bending techniques, thoughtfully choosing and applying floral embellishments, and considering professional finishing touches, you can create truly captivating pieces. The inherent SEO value of these keywords, combined with the inherent appeal of personalized, handmade decor, positions this project as a highly searchable and desirable craft for both creators and consumers alike. Experimentation and personal style are encouraged, leading to unique creations that are sure to impress.
