How to make cakesicles sets the stage for this enthralling narrative, offering readers a glimpse into a story that is rich in detail with personal blog style and brimming with originality from the outset.
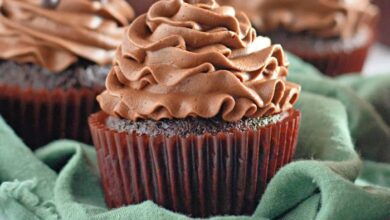
Cakesicles, the delectable hybrid of cake pops and popsicles, have taken the dessert world by storm. These bite-sized treats are a delightful fusion of moist cake, decadent chocolate, and endless creative possibilities. Whether you’re a seasoned baker or a novice in the kitchen, making cakesicles is an enjoyable and rewarding experience.
In this comprehensive guide, we’ll embark on a journey to unlock the secrets of crafting these irresistible treats, from mastering the cake batter to decorating them with artistic flair.
Cake Pops vs. Cakesicles
Both cake pops and cakesicles are delightful treats that offer a sweet and indulgent experience. However, they differ in their preparation, appearance, and taste, making them suitable for different occasions and preferences. This comparison will delve into the key differences between cake pops and cakesicles, exploring their advantages and disadvantages, and analyzing their taste, texture, and visual appeal.
Differences in Preparation
Cake pops and cakesicles share a common foundation: a cake base that is crumbled and mixed with frosting or another binding agent. However, their preparation diverges significantly from this point onward. Cake pops are formed into round balls, dipped in melted chocolate, and decorated with sprinkles, drizzles, or other embellishments.
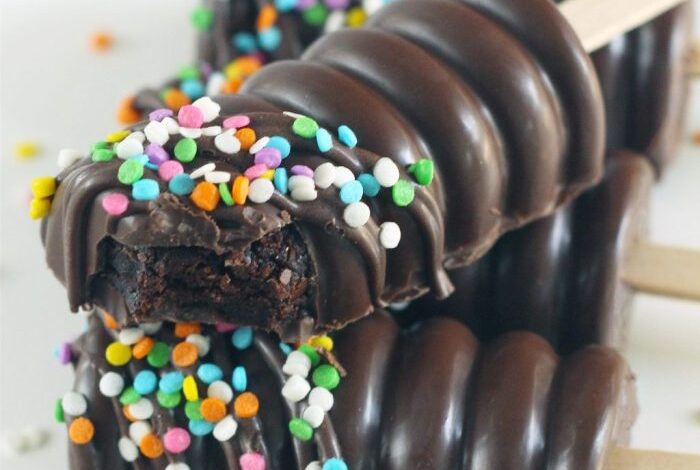
Conversely, cakesicles are rectangular or square-shaped, dipped in melted chocolate, and often adorned with decorative elements like cookies, candies, or fruit.
Advantages and Disadvantages
Cake Pops
- Advantages:
- Cake pops are easier to make than cakesicles, requiring less time and effort for shaping and decorating.
- They are highly portable, making them ideal for parties, events, and on-the-go snacking.
- The round shape allows for greater creativity in decorating, offering endless possibilities for embellishments.
- Disadvantages:
- Cake pops can be messy to eat, especially when the chocolate coating is thin or prone to cracking.
- The small size may not be satisfying for some individuals, requiring multiple cake pops to fulfill a craving.
- The round shape can limit the amount of filling or toppings that can be incorporated.
Cakesicles
- Advantages:
- Cakesicles offer a larger serving size, providing a more substantial and satisfying treat.
- The rectangular shape allows for a greater variety of fillings and toppings, creating more complex flavor profiles.
- The flat surface of cakesicles provides a larger canvas for decorative elements, enabling intricate designs and creative arrangements.
- Disadvantages:
- Cakesicles require more time and effort to prepare, especially when shaping and decorating the flat surface.
- They are less portable than cake pops, making them less suitable for on-the-go snacking.
- The larger size can make cakesicles more challenging to eat, potentially leading to messy hands or crumbs.
Taste and Texture
Cake pops and cakesicles share a similar cake base, resulting in a comparable taste. The primary difference lies in the texture, influenced by the shape and the coating. Cake pops have a denser texture due to the round shape and the chocolate coating, which creates a firm exterior.
Cakesicles, on the other hand, have a softer texture, with the rectangular shape allowing for a thinner chocolate coating and a more delicate bite.
Visual Appeal
Both cake pops and cakesicles offer a visually appealing presentation. Cake pops, with their round shape, provide a playful and whimsical appearance, while cakesicles, with their rectangular shape, offer a more sophisticated and elegant aesthetic. The choice between the two depends on the desired look and feel for the occasion or event.
Cake Batter Essentials
The cake batter is the heart of any cakesicle. It provides the foundational flavor and texture that will ultimately define your finished treat. Achieving the perfect consistency for dipping is key to creating beautiful, smooth cakesicles. Here’s a breakdown of the essential ingredients and techniques for crafting the ideal cake batter.
Basic Cake Batter Recipe, How to make cakesicles
This recipe yields a moist and slightly dense cake batter, perfect for cakesicles.
- cup (2 sticks) unsalted butter, softened
- 3/4 cups granulated sugar
- large eggs
- teaspoon vanilla extract
- cups all-purpose flour
- teaspoon baking powder
- /2 teaspoon salt
- cup milk
Instructions
- Preheat oven to 350°F (175°C). Grease and flour a 9×13 inch baking pan.
- In a large bowl, cream together the butter and sugar until light and fluffy.
- Beat in the eggs one at a time, then stir in the vanilla extract.
- In a separate bowl, whisk together the flour, baking powder, and salt.
- Gradually add the dry ingredients to the wet ingredients, alternating with the milk, beginning and ending with the dry ingredients. Mix until just combined.
- Pour the batter into the prepared pan and bake for 30-35 minutes, or until a toothpick inserted into the center comes out clean.
- Let the cake cool completely before crumbling it for cakesicles.
Achieving the Perfect Consistency
The ideal cakesicle batter should be moist and crumbly, allowing it to be easily formed into balls and dipped in chocolate.
Tips for Perfect Consistency
- Don’t overmix:Overmixing can result in a tough, chewy batter. Mix just until the ingredients are combined.
- Use room temperature ingredients:Room temperature ingredients will blend together more smoothly, resulting in a lighter and fluffier batter.
- Adjust the milk:If the batter seems too dry, add a tablespoon of milk at a time until it reaches the desired consistency. If it’s too wet, add a tablespoon of flour at a time.
- Chill the batter:Chilling the batter for at least 30 minutes allows it to firm up, making it easier to handle and shape.
The Role of Ingredients
Each ingredient in a cakesicle batter plays a crucial role in achieving the desired texture and flavor.
Flour
Flour provides structure to the cake, giving it its shape and firmness. All-purpose flour is the most common choice for cakesicles, but you can experiment with other types, such as cake flour or whole wheat flour, for variations in texture.
Sugar
Sugar adds sweetness and moisture to the cake. It also helps to create a tender crumb.
Butter
Butter adds richness and flavor to the cake. It also helps to create a moist and tender crumb.
Dipping and Coating Techniques
Dipping cake balls in melted chocolate is the crucial step in creating cakesicles. This process requires careful attention to temperature, chocolate type, and dipping technique to achieve a smooth and professional-looking finish.
Making cakesicles is a fun and rewarding process, especially when you get to experiment with different flavors and toppings. It’s all about layering and creating something beautiful, much like the way AI is changing the world. But before we get too carried away, it’s worth asking: can we afford AI ?
The costs associated with developing and implementing AI solutions are significant, so it’s important to consider the long-term implications. Ultimately, the answer lies in how we can use AI to create a better future, just like we use our culinary skills to create delicious treats like cakesicles.
Chocolate Types for Cakesicles
The type of chocolate you choose significantly impacts the final look and texture of your cakesicles. While you can use different types, some are better suited for this purpose.
- Candy Melts:These are specifically designed for dipping and molding, offering excellent melting and setting properties. They are available in various colors and flavors, making them ideal for creating vibrant and visually appealing cakesicles.
- Compound Chocolate:This type of chocolate contains vegetable fats, making it less prone to blooming (white discoloration) and easier to work with. It’s a good option for beginners, offering a smooth and consistent finish.
- Real Chocolate:Using real chocolate, such as dark, milk, or white chocolate, requires more experience as it can be temperamental. Tempering chocolate is essential to prevent blooming and achieve a shiny, professional finish. While it’s more challenging, real chocolate offers a superior taste and texture.
Tips for Smooth and Even Coatings
Creating smooth and even coatings on cakesicles is essential for a polished look. Here are some tips to help you achieve this:
- Melt Chocolate Properly:Melt your chosen chocolate gently using a double boiler or microwave, ensuring it doesn’t overheat. Overheating can lead to grainy chocolate and make it difficult to work with.
- Use the Right Temperature:The ideal temperature for dipping is between 90-95°F (32-35°C). This ensures the chocolate is fluid enough for dipping but not too hot to burn your fingers.
- Dip Quickly and Smoothly:Submerge the cake ball completely in the melted chocolate, ensuring a smooth and even coating. Avoid dipping too slowly, as this can cause uneven coverage.
- Remove Excess Chocolate:Gently tap the cake ball against the side of the bowl to remove any excess chocolate, preventing drips and creating a clean finish.
- Cool and Set:Place the dipped cake ball on a parchment-lined tray or cooling rack to set. Allow the chocolate to cool completely before handling, ensuring a firm and stable cakesicle.
Decorating Cakesicles
Once your cakesicles are set and ready, the fun part begins: decorating! There are endless possibilities to create beautiful and unique cakesicles, from simple to elaborate designs.
Making cakesicles is a fun and easy way to impress your friends and family with a delicious treat. You can find tons of creative recipes online, like this one I found in a blog about at home with micaela clouse in austin texas – it even has tips for decorating them! Once you’ve mastered the basics, you can experiment with different flavors and toppings to create your own signature cakesicles.
Drizzling Techniques
Drizzling melted chocolate or candy melts over cakesicles adds a touch of elegance and sophistication. You can create various patterns and textures using different tools, such as a fork, spoon, or piping bag.
- Zigzag Drizzle:Hold the piping bag at a slight angle and move it back and forth to create a zigzag pattern.
- Swirl Drizzle:Use a spoon to drizzle melted chocolate in a circular motion, creating a swirl pattern.
- Random Drizzle:Simply drizzle melted chocolate randomly over the cakesicles, creating a rustic and charming look.
Sprinkles and Edible Decorations
Sprinkles are a classic and fun way to decorate cakesicles. You can use a variety of sprinkles, from colorful jimmies to pearl sprinkles, to add texture and visual appeal.
- Sprinkle Coating:Dip the cakesicle completely in sprinkles, creating a full-coverage design.
- Sprinkle Border:Create a border around the top or bottom of the cakesicle by pressing sprinkles into melted chocolate.
- Sprinkle Pattern:Arrange sprinkles in a specific pattern, such as a heart, flower, or geometric design.
Edible Paint
Edible paint is a versatile decorating tool that allows you to create intricate designs and details. You can find edible paint in various colors and finishes, including metallic and pearlescent.
- Freehand Painting:Use a small brush to paint intricate designs or lettering directly onto the cakesicle.
- Stenciling:Use a stencil to create a precise pattern or design. Apply edible paint to the stencil and then remove it to reveal the design.
- Airbrushing:Airbrushing edible paint creates a smooth and even finish, perfect for creating gradients and subtle designs.
Seasonal and Holiday Themes
Cakesicles are a great way to celebrate different seasons and holidays.
Making cakesicles is a fun and festive way to celebrate the holidays. You can get creative with the shapes and designs, even incorporating a giant snowflake light up marquee like this one for a truly magical touch. Just remember to let the cakesicles cool completely before decorating, so they hold their shape and don’t melt under the warm glow of the snowflake.
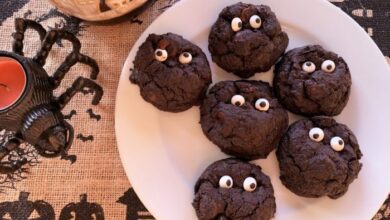
- Halloween:Decorate cakesicles with spooky themes, such as ghosts, pumpkins, and bats. Use orange, black, and purple colors and sprinkles.
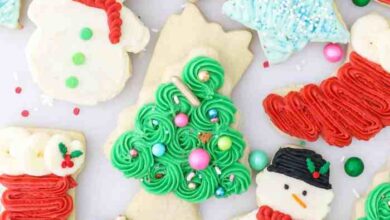
- Christmas:Decorate cakesicles with festive themes, such as snowflakes, Christmas trees, and reindeer. Use red, green, and white colors and sprinkles.
- Easter:Decorate cakesicles with pastel colors and sprinkles, incorporating Easter themes such as eggs, bunnies, and flowers.
Cakesicle Storage and Presentation: How To Make Cakesicles
You’ve painstakingly crafted your delectable cakesicles, and now it’s time to ensure their freshness and showcase their beauty. Proper storage and presentation are key to preserving their deliciousness and making a lasting impression.
Storage Methods for Maintaining Freshness
Storing cakesicles correctly is crucial to prevent them from becoming stale or soggy. Here are some effective methods:
- Airtight Containers:The most common and effective storage method involves using airtight containers. This prevents moisture loss and keeps cakesicles fresh for several days. Opt for containers with a tight-fitting lid to ensure a proper seal.
- Refrigeration:Cakesicles can be refrigerated for up to 5 days to maintain their optimal freshness. Place them in an airtight container or wrap them individually in plastic wrap to prevent them from absorbing other flavors in the refrigerator.
- Freezing:For longer storage, cakesicles can be frozen for up to 3 months. Wrap them individually in plastic wrap and then place them in a freezer-safe bag. When ready to serve, thaw them at room temperature for a few hours.
Presenting Cakesicles Attractively
The presentation of your cakesicles plays a vital role in creating a visually appealing and tempting display. Here are some tips for presenting them attractively:
- Tiered Stands:Tiered stands add elegance and create a visually appealing presentation. Use stands of varying heights and materials, such as glass, metal, or wood, to create a sophisticated look.
- Cake Pops Stands:Cake pop stands, with their various designs and sizes, offer a practical and attractive way to display cakesicles. Choose stands that complement the theme or color scheme of your cakesicles.
- Decorative Trays:Trays with unique shapes, colors, and textures provide a beautiful backdrop for your cakesicles. Consider trays made of wood, ceramic, or metal to add a touch of elegance.
- Acrylic Boxes:Clear acrylic boxes offer a modern and minimalist presentation. They showcase the vibrant colors and intricate details of your cakesicles while protecting them from dust and damage.
Packaging and Display Elements
Packaging and display elements enhance the overall presentation and create a memorable experience for your guests.
- Cake Boxes:Individual cake boxes provide a neat and elegant way to package cakesicles. Choose boxes in various sizes and colors to match your cakesicle designs.
- Gift Bags:Gift bags offer a convenient and festive option for presenting cakesicles. Select bags in various sizes and colors to suit the occasion.
- Ribbons and Bows:Add a touch of elegance and festivity by using ribbons and bows to decorate cakesicle boxes or gift bags. Choose colors that complement the cakesicles’ designs.
- Personalized Tags:Create personalized tags with messages, names, or special occasions to add a personal touch to your cakesicle presentation.
Troubleshooting Common Issues
Making cakesicles can be a fun and rewarding experience, but like any baking endeavor, there are potential pitfalls. Knowing how to troubleshoot common problems can save you time and frustration, ensuring that your cakesicles turn out perfectly.
Cracking
Cracking in cakesicles can occur during the cooling process or when the coating is applied. It’s often a result of the cake batter being too dry or the coating being applied too thickly.
- Use a moist cake batter:Ensure your cake batter is sufficiently moist. Overly dry batter can lead to cracking. Consider adding a little extra milk or even a tablespoon of melted butter to your batter for extra moisture.
- Cool cakesicles slowly:Avoid sudden temperature changes. Allow the cakesicles to cool gradually on a wire rack to prevent cracking.
- Apply coating in thin layers:Apply the coating in thin, even layers, allowing each layer to set before applying the next. This will help to prevent cracking and ensure a smooth finish.
Sticking
Cakesicles can stick to your work surface or the dipping tools if they are not properly prepared.
- Use parchment paper:Line your work surface with parchment paper to prevent sticking.
- Grease dipping tools:Lightly grease your dipping tools with cooking spray or butter to prevent the cakesicles from sticking.
- Don’t overcrowd the surface:Ensure there is enough space between cakesicles to allow for air circulation and prevent them from sticking together.
Uneven Coating
An uneven coating can result from improper dipping techniques or a coating that is too thick.
- Dip cakesicles fully:Submerge the entire cakesicle into the coating, ensuring complete coverage.
- Use a smooth motion:Dip and lift the cakesicles in a smooth, even motion to prevent air bubbles from forming.
- Tap off excess coating:Gently tap the cakesicles against the side of the bowl to remove any excess coating.
Cakesicle Variations

Cakesicles offer a blank canvas for creativity, allowing you to experiment with different flavors, fillings, and decorations. Beyond the basic vanilla cake and chocolate coating, there are countless ways to personalize your cakesicles and make them truly unique.
Flavor and Filling Combinations
Here’s a table showcasing various flavor and filling combinations that can inspire your next cakesicle creation:
| Cake Flavor | Filling | Coating |
|---|---|---|
| Vanilla | Chocolate ganache, raspberry jam, lemon curd | Milk chocolate, white chocolate |
| Chocolate | Peanut butter, caramel, Nutella | Dark chocolate, white chocolate |
| Red Velvet | Cream cheese frosting, white chocolate ganache, strawberry jam | White chocolate, red velvet candy melts |
| Carrot Cake | Cream cheese frosting, cinnamon cream cheese, caramel | White chocolate, orange candy melts |
| Lemon Cake | Lemon curd, raspberry jam, white chocolate ganache | White chocolate, lemon candy melts |
Unique Cake Batter Recipes and Toppings
Beyond the traditional cake batters, explore these unique recipes and toppings:* Funfetti Cake Batter:Incorporate colorful sprinkles into your cake batter for a fun and festive twist.
Brown Butter Cake Batter
The nutty flavor of brown butter adds depth and richness to your cakesicles.
Spice Cake Batter
Warm spices like cinnamon, nutmeg, and ginger create a cozy and comforting flavor profile.
Marble Cake Batter
Swirl together vanilla and chocolate cake batter for a visually appealing and delicious combination.
Alternative Coatings
While chocolate is a classic choice for cakesicle coatings, explore these alternatives:* White Chocolate:White chocolate provides a smooth and creamy coating with a slightly sweet flavor. It pairs well with various fillings, including fruits, nuts, and caramel.
Candy Melts
Candy melts are readily available in various colors and flavors, offering a fun and vibrant option for coating cakesicles. They melt smoothly and set quickly, making them easy to work with.
“When choosing an alternative coating, consider the flavor profile of your cake and filling to ensure a harmonious combination.”