DIY Maiden Twists Hairstyle: A Comprehensive Guide for Stunning Protective Styling
Maiden twists, a beloved protective hairstyle, offer a chic and versatile aesthetic while safeguarding natural hair. This comprehensive DIY guide will equip you with the knowledge and techniques to achieve beautiful, long-lasting maiden twists at home. We will delve into preparation, the twisting process itself, product selection, maintenance, and troubleshooting, ensuring a successful and satisfying experience.
Understanding Maiden Twists: The Foundation of Your DIY Journey
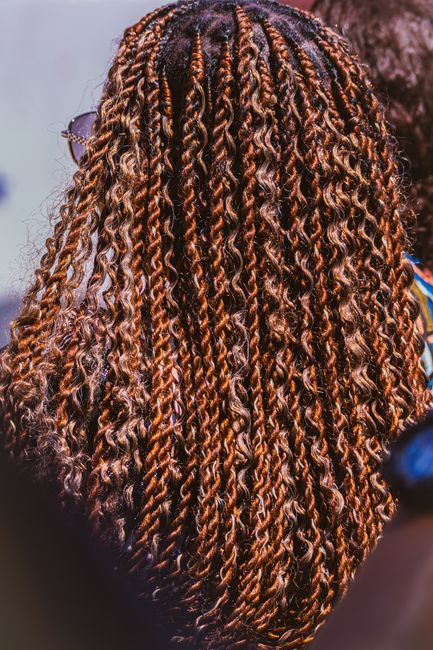
Maiden twists, often referred to as individual twists or two-strand twists, are created by dividing a section of hair into two strands and twisting them around each other in a consistent direction. Their appeal lies in their simplicity, adaptability, and hair-health benefits. Unlike braids that interlock three or more strands, twists are less prone to excessive tension, making them a gentler option for preserving the health of your scalp and hair strands. They are an excellent protective style, shielding your ends from friction, manipulation, and environmental damage, thus minimizing breakage and promoting length retention. The versatility of maiden twists is also a significant draw. They can be styled in numerous ways, from a simple all-over twist to intricate updos, bantu knots, and half-up, half-down configurations. This inherent adaptability allows you to switch up your look with minimal effort, making maiden twists a practical and stylish choice for various occasions and personal preferences.
Essential Preparation for Flawless Maiden Twists
Before embarking on your DIY maiden twists journey, thorough preparation is paramount. This foundational step significantly impacts the ease of twisting, the neatness of your finished style, and the overall health of your hair.
1. Thorough Hair Cleansing: The Starting Point
Begin with a clean canvas. Wash your hair with a sulfate-free shampoo to effectively remove product buildup, dirt, and excess oil without stripping your hair of its natural moisture. Follow up with a moisturizing conditioner. Focus on applying the conditioner from mid-lengths to the ends, as these areas are often drier and more prone to breakage. Detangling your hair thoroughly while the conditioner is in is crucial. Use a wide-tooth comb or your fingers to gently work through any knots and tangles. Rinse the conditioner thoroughly, ensuring no residue remains, which can hinder the grip and smoothness of your twists.
2. Deep Conditioning for Hydration and Manageability
A deep conditioning treatment is non-negotiable for maiden twists. This step replenishes lost moisture, enhances elasticity, and makes your hair more manageable for the twisting process. Opt for a deep conditioner rich in natural oils, butters, and humectants. Apply it generously, ensuring all strands are coated. For optimal penetration, cover your hair with a plastic cap and apply gentle heat (using a hooded dryer or a warm towel) for 20-30 minutes. Rinse the deep conditioner thoroughly with cool water to seal the cuticle, enhancing shine and smoothness.
3. Detangling and Sectioning: Precision is Key
After rinsing and before any further steps, gently detangle your hair once more. Ensure it is completely knot-free. Now comes the crucial step of sectioning. Sectioning your hair will make the twisting process significantly more manageable and will result in uniform, neat twists.
- Determine Your Section Size: The size of your sections will dictate the size of your twists. Smaller sections create smaller, more intricate twists, while larger sections result in thicker, more prominent twists. Consider the desired look and the thickness of your hair when making this decision. For beginners, starting with medium-sized sections is often recommended.
- Create Neat Parts: Use a rat-tail comb to create clean, defined parts. This is essential for achieving a polished and professional look. You can opt for square, rectangular, triangular, or even diagonal parts, depending on your preference. Ensure the parts are consistent throughout your entire head.
- Secure Each Section: Once a section is created, twist or clip it to keep it separate from the rest of your hair. This prevents tangles and makes it easier to focus on one section at a time.
4. Applying Styling Products: The Grip and Glide Factor
The right styling products are essential for achieving smooth, defined, and long-lasting maiden twists. You’ll need products that provide hold, moisture, and slip.
- Leave-In Conditioner: Apply a lightweight leave-in conditioner to each section. This adds an extra layer of moisture and helps to detangle further, making the hair more pliable.
- Twist Cream or Gel: This is your primary styling product. Choose a good quality twist cream or gel that offers sufficient hold without being overly stiff or flaky. Look for products that contain moisturizing ingredients like shea butter, coconut oil, or aloe vera. Apply a liberal amount to each section, ensuring even distribution. This product will provide the "grip" needed for the twists to hold their shape and the "glide" to help your fingers move smoothly through the hair.
- Styling Butter (Optional): For those with very dry or coarse hair, a styling butter can be incorporated before the twist cream for added moisture and softness. However, be mindful not to overdo it, as too much butter can weigh down finer hair.
The Art of Twisting: Step-by-Step Maiden Twist Creation
With your hair prepped and sections ready, it’s time to dive into the actual twisting process. Patience and consistency are key here.
1. Isolate a Small Portion of Hair
Take one of your pre-sectioned portions of hair. Within this larger section, isolate a smaller subsection of hair at the root. The size of this initial subsection will determine the thickness of your individual twist.
2. Divide into Two Strands
Divide this smaller subsection of hair into two equal strands. Ensure these strands are clean and free of tangles.
3. Begin the Twist: The Foundation of Definition
This is where the magic happens. You will be twisting these two strands around each other. The most common and effective technique is to twist them in the same direction throughout the entire process. For example, if you decide to twist the right strand over the left strand, consistently repeat this motion.
- The Overhand Twist: Hold one strand in your left hand and the other in your right. Take the strand in your right hand and twist it over the strand in your left hand. Then, take the strand that is now in your left hand and twist it over the strand that is now in your right. Continue this rhythmic motion, ensuring you are twisting both strands in the same general direction (e.g., both clockwise or both counter-clockwise).
4. Maintain Consistent Tension and Direction
This is the most critical aspect of creating neat and durable twists.
- Tension: Apply firm, but not excessive, tension as you twist. Too little tension will result in loose, unraveling twists, while too much tension can lead to scalp discomfort and breakage. Aim for a consistent, gentle pull that keeps the strands together.
- Direction: As mentioned, consistently twist in the same direction. If you find yourself switching directions, your twists will become messy and prone to unraveling. Develop a rhythm and stick to it.
5. Feeding in Hair (Optional for Length and Volume)
For longer, fuller twists, you can "feed in" small additional strands of hair as you twist. This technique involves incorporating a small amount of hair from the larger section into one of the two strands you are currently twisting. This is a more advanced technique, often used in braiding, but can be adapted for twists to add volume and length. Be sure to feed in hair smoothly and consistently to avoid bumps.
6. Twist to the Ends
Continue twisting all the way down to the ends of your hair. Ensure the ends are neatly tucked and secured within the twist. For very fine or wispy ends, you can apply a small amount of gel or twist cream directly to the ends to help them meld into the twist.
7. Secure the Ends (Optional)
While many maiden twists naturally stay put, some individuals prefer to secure the ends to prevent unraveling, especially for sleeping. You can:
- Knotting: Gently knot the very end of the twist.
- Hair Wax/Sealant: Apply a small amount of hair wax or sealant to the ends for extra hold.
- Small Elastic Band: For a very secure finish, you can use a tiny, snag-free elastic band at the very end of each twist.
8. Repeat for All Sections
Work systematically through each pre-sectioned portion of your hair, repeating the twisting process until your entire head is completed. Take breaks as needed, and don’t rush the process. Patience will yield a superior result.
Product Power: Choosing the Right Tools for Your DIY Maiden Twists
The effectiveness of your DIY maiden twists hinges on the quality and type of products you use. Investing in the right styling aids will make the process smoother and the results more impressive.
- Sulfate-Free Shampoo & Moisturizing Conditioner: As mentioned in preparation, these are crucial for a clean and hydrated base. Brands like SheaMoisture, Mielle Organics, and Camille Rose offer excellent options.
- Leave-In Conditioner: Look for lightweight, water-based formulas that provide moisture without weighing hair down. Brands like Kinky-Curly Knot Today and Cantu leave-in conditioners are popular choices.
- Twist Cream/Gel: This is your workhorse product. Seek out creams or gels that offer good hold, definition, and moisture. Ingredients like aloe vera, flaxseed gel, and natural oils are beneficial. Popular brands include LOC Method Twist & Lock Gel, Mielle Organics Rosemary Mint Twisting Cream, and Auntie Jackie’s Curl La La Defining Curl Custard. Experiment to find what works best for your hair type and texture.
- Styling Butter (Optional): For added moisture and softness, especially for coarser textures. Shea butter, mango butter, and cocoa butter are excellent bases.
- Rat-Tail Comb: Essential for creating clean, precise parts.
- Sectioning Clips: To keep your hair organized and manageable during the twisting process.
- Spray Bottle: For refreshing your hair with water or a diluted leave-in conditioner if it starts to dry out during styling.
Maintaining Your Maiden Twists: Longevity and Freshness
Proper maintenance is key to extending the life of your maiden twists and keeping them looking fresh and healthy.
1. Daily Moisture and Sealing
- Spritz and Seal: Lightly spritz your twists with water or a diluted leave-in conditioner daily. Follow up with a light application of a sealing oil or butter to lock in the moisture. This prevents dryness and keeps your twists pliable.
- Avoid Over-Moisturizing: Too much moisture can lead to mildew or an unpleasant odor. Aim for a balance.
2. Nighttime Protection: The Foundation of Longevity
- Satin or Silk Scarf/Bonnet: This is non-negotiable. Always cover your hair with a satin or silk scarf or bonnet before bed. This minimizes friction and prevents your twists from unraveling and frizzing.
- Pineapple Method: For added protection and to preserve the shape of your twists, gather them loosely at the top of your head in a "pineapple" before covering.
3. Refreshing Between Washes
- Scalp Massage: Gently massage your scalp with your fingertips to stimulate blood circulation and remove any loose flakes.
- Spot Cleaning: If you notice any product buildup or residue, you can spot clean with a diluted apple cider vinegar rinse applied to the affected areas.
- Re-twisting Flyaways: Use a small amount of twist cream or gel to tame any flyaways or frizz that may appear.
4. Washing Your Maiden Twists
Washing maiden twists requires a gentle approach to avoid disruption.
- Diluted Shampoo: Use a diluted sulfate-free shampoo. Gently massage the shampoo into your scalp and allow the suds to run down the twists. Avoid vigorous scrubbing.
- Rinse Thoroughly: Ensure all shampoo is rinsed out.
- Condition and Detangle: Apply a moisturizing conditioner, focusing on the mid-lengths and ends. Gently detangle your twists with your fingers or a wide-tooth comb while the conditioner is in.
- Air Dry or Low Heat: Gently squeeze out excess water. You can air dry your twists or use a hooded dryer on a low heat setting.
5. Re-twisting (Touch-Ups)
Depending on your hair’s texture and how well they hold, you may need to re-twist your maiden twists every 2-4 weeks. This involves re-applying product to a section and re-twisting it, especially around the roots, to maintain definition and prevent unraveling.
Troubleshooting Common DIY Maiden Twist Challenges
Even with careful preparation, you might encounter a few hiccups. Here’s how to address them:
- Uneven Twists: This often stems from inconsistent sectioning or uneven tension during twisting. For minor unevenness, you can try to gently adjust the twist or re-do the section. For significant differences, consider re-doing the entire section.
- Frizz: Frizz can be caused by dryness, inconsistent tension, or not sealing your twists properly. Ensure you’re applying enough moisture and sealing with oil or butter. Using a satin bonnet at night is crucial.
- Unraveling Twists: This usually indicates insufficient product application or loose tension. Make sure you’re using a good quality twist cream with hold and maintaining consistent, firm tension as you twist. Sealing the ends can also help.
- Scalp Soreness: This is a sign of too much tension. Loosen your grip, and avoid pulling too tightly, especially at the roots. If soreness persists, gently loosen the affected twists.
- Product Buildup: This can lead to dullness and a need for frequent washing. Ensure you’re using lightweight products and washing your hair regularly with a clarifying shampoo (occasionally, not too often to avoid stripping moisture).
Styling Your Maiden Twists: Versatility Unleashed
Once your maiden twists are in, the styling possibilities are endless.
- All-Over Twists: The classic and elegant look.
- Half-Up, Half-Down: Pull back the top half of your twists into a ponytail or bun.
- Bantu Knots: Twist sections of hair into knots and secure them.
- Twisted Updos: Create intricate buns and updos using your twists.
- Twisted Ponytail: Gather all your twists into a high or low ponytail.
- Faux Locs: With careful application and sealing, maiden twists can be a base for faux locs.
By following this comprehensive guide, you are well-equipped to embark on your DIY maiden twists journey. Embrace the process, be patient, and enjoy the beautiful, protective, and versatile results.

