DIY Serving Tray: A Simple and Stylish Addition to Your Home Decor
Crafting your own serving tray is a rewarding and accessible DIY project that can elevate your entertaining and home organization. This guide provides a comprehensive, SEO-friendly approach to creating a beautiful and functional serving tray with minimal fuss and readily available materials. Whether you’re a seasoned crafter or a complete beginner, this tutorial breaks down the process into easy-to-follow steps, focusing on techniques that ensure a professional and polished finish. The inherent charm of a handmade item, combined with its practical application, makes a DIY serving tray a valuable addition to any kitchen, dining room, or living space. Beyond its immediate use for serving drinks and appetizers, a custom tray can also act as a decorative centerpiece, a catch-all for keys and mail, or a stylish way to display small decorative items. The beauty of this project lies in its versatility; you can personalize it to match your existing decor, experiment with different finishes, and even incorporate unique embellishments. This article will delve into material selection, cutting techniques, assembly methods, and finishing touches, all while optimizing for search engines so that fellow DIY enthusiasts can easily discover this project. We will explore various wood types, hardware options, and sealant choices, empowering you to make informed decisions that suit your budget and aesthetic preferences. Furthermore, understanding the underlying principles of construction will foster confidence and encourage future DIY endeavors.
The foundational element of any DIY serving tray is the material from which it’s constructed. Wood is the most popular and forgiving medium for this project, offering a natural beauty and a sturdy base. Pine is an excellent choice for beginners due to its affordability, light weight, and ease of cutting and finishing. It readily accepts paint, stain, and varnish, allowing for a wide range of aesthetic possibilities. Plywood, particularly birch or maple plywood, offers a smoother surface and increased stability, making it ideal for those seeking a more refined look. For a more luxurious feel, consider hardwoods like oak, walnut, or cherry. These woods are more durable and boast richer grain patterns, but they also require more specialized tools and a bit more finesse to work with. When selecting your wood, look for pieces that are straight, free from knots or significant imperfections, and have a consistent thickness. The dimensions of your tray will depend on its intended use. A standard size might be around 12×18 inches, but you can adjust this to suit your needs, whether it’s a smaller tray for individual servings or a larger one for entertaining a crowd. Consider the depth of your tray as well; a depth of 2-3 inches is generally sufficient to prevent items from sliding off. When purchasing wood, it’s often beneficial to have it cut to your desired dimensions at the lumberyard to ensure straight, precise cuts, especially if you don’t have access to a table saw or miter saw. However, if you’re comfortable with hand tools or have access to power saws, cutting the wood yourself offers greater control over the project’s dimensions and allows for creative shaping.
The construction of the tray typically involves creating a base and attaching sides to form the perimeter. For a simple, rectangular tray, you’ll need one piece for the base and four pieces for the sides. The base dimensions will dictate the length and width of your tray. The side pieces will have a length that matches the corresponding edge of the base, and their height will determine the depth of the tray. For example, if your base is 12 inches wide and 18 inches long, you’ll need two side pieces that are 18 inches long and two side pieces that are 12 inches long (or slightly shorter to account for the thickness of the intersecting sides, depending on your joinery method). Precision in cutting these pieces is paramount. Even slight inaccuracies can lead to gaps and an uneven appearance. If you’re using a hand saw, employ a miter box for accurate 90-degree cuts. For power tools like a miter saw or table saw, ensure the blade is sharp and set to the correct angle. After cutting, it’s a good practice to lightly sand all the cut edges to remove any splinters and prepare them for assembly. This initial preparation step, though seemingly minor, contributes significantly to the overall quality of the finished product.
Assembly is where your DIY serving tray begins to take shape. There are several methods for joining the side pieces to the base and to each other, each offering different levels of strength and aesthetic appeal. For a beginner-friendly approach, wood glue and small finishing nails or brad nails are highly effective. Apply a generous amount of wood glue to the bottom edge of each side piece and position them around the perimeter of the base. Ensure the edges are flush and the corners are square. Then, carefully drive finishing nails through the sides into the base, spacing them evenly. Alternatively, you can attach the sides to each other first, creating a rectangular frame, and then attach this frame to the base. For a cleaner look with no visible nail heads, use a nail gun with brad nails, which can then be filled with wood putty before sanding and finishing. Another popular method for a more robust and visually appealing joint is pocket hole joinery. This technique uses specialized jigs to create angled holes in the ends of your pieces, allowing screws to be driven at an angle to secure them together. While pocket hole joinery requires a specific tool, it creates very strong and discreet joints, especially suitable for the side pieces connecting to each other. For connecting the sides to the base, you can still opt for glue and nails or screws from the underside of the base. Regardless of the method chosen, clamping the pieces together while the glue dries is crucial for ensuring a strong bond. Use bar clamps or pipe clamps to apply even pressure around the tray.
Once the basic structure of your tray is assembled and the glue has fully cured, the next critical step is sanding. This process smooths out any rough edges, removes excess glue, and prepares the wood for finishing. Start with a medium-grit sandpaper, typically around 100-120 grit, to address any imperfections and level out the surfaces. Work your way up through finer grits, such as 150, 220, and even 320 or 400 grit, for a progressively smoother finish. Sand in the direction of the wood grain to avoid creating visible scratches. Pay close attention to the corners and edges, ensuring they are smooth and rounded slightly for comfort and durability. After sanding with each grit, it’s beneficial to wipe down the tray with a tack cloth or a slightly damp cloth to remove all dust particles. A clean surface is essential for an even and flawless finish, whether you choose paint, stain, or a clear sealant. For a truly professional feel, consider using an orbital sander, which can significantly speed up the sanding process and provide a more uniform result, especially on larger surfaces.
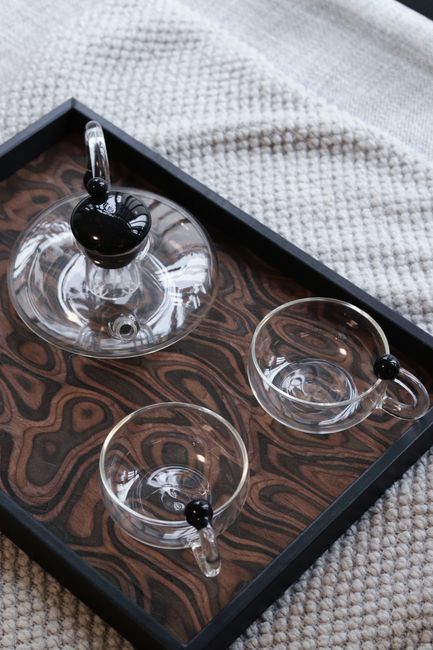
Finishing is where your DIY serving tray truly comes to life and takes on its unique personality. The options are vast, ranging from classic wood stains to bold paint colors and protective clear coats. If you’ve chosen a beautiful wood grain, a stain can enhance its natural beauty. Apply stain evenly with a brush or cloth, wiping away any excess after a few minutes, depending on the desired depth of color. For a more modern or whimsical look, consider painting your tray. Apply a primer first, especially if you’re using a light color on darker wood, to ensure good coverage and prevent bleed-through. Then, apply your chosen paint color in thin, even coats, allowing each coat to dry completely before applying the next. Once your stain or paint has dried, it’s essential to seal and protect the wood. A polyurethane or varnish offers excellent durability and resistance to spills and wear. Apply several thin coats, sanding lightly with a very fine grit sandpaper (400 or higher) between each coat for a super-smooth finish. For a more natural look, a wax finish can be applied, though it offers less protection. Consider experimenting with different finishes to achieve unique effects. For instance, a distressed finish can be created by applying a base coat, then a contrasting color, and then sanding through the top layer to reveal the base. Alternatively, a decoupage technique can be used to adhere decorative paper or fabric to the tray before sealing.
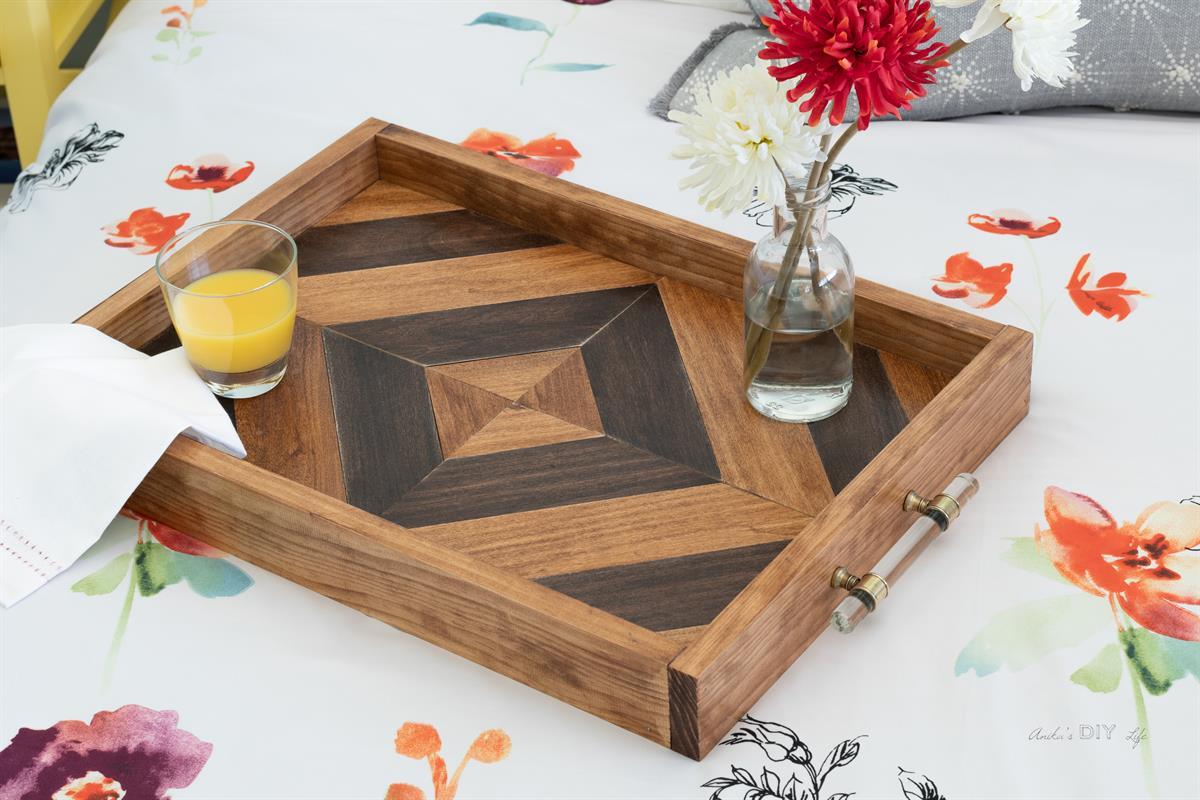
For added functionality and aesthetic appeal, consider incorporating handles. Handles not only make the tray easier to carry but also contribute to its overall style. There are numerous handle options available, from simple rope handles to ornate metal pulls. Measure and mark the placement of your handles carefully, ensuring they are evenly spaced and positioned for comfortable grip. Pre-drilling pilot holes before screwing in the handles is essential to prevent the wood from splitting, especially with smaller or more delicate handle types. For rope handles, you’ll typically drill holes through the sides of the tray and thread the rope through, securing it with knots on the inside. Metal handles can be attached with screws that go through the base or the sides of the tray. When selecting handles, consider the weight of the tray when fully loaded and choose handles that are sturdy enough to support it. The style of the handles should also complement the overall design of your tray and your home decor. For a rustic look, consider leather straps or cast iron handles. For a modern aesthetic, brushed nickel or minimalist metal bars work well.
A crucial element for any serving tray is its base, especially if you intend to place it on delicate surfaces like glass tables or polished wood. Adding felt pads or rubber feet to the underside of your tray will prevent scratches and provide a stable, non-slip surface. These are typically self-adhesive and can be easily attached to the corners of the tray. Alternatively, you can attach small wooden or plastic feet for a more substantial base. Ensure the feet are securely attached with screws or strong adhesive to prevent them from coming loose. This small but significant detail enhances the practicality and longevity of your DIY serving tray, protecting your furniture and ensuring it remains stable during use.
Cleaning and maintaining your DIY serving tray is straightforward, but proper care will ensure its longevity. For stained or clear-coated trays, a damp cloth is usually sufficient for everyday cleaning. Avoid harsh chemicals or abrasive scrubbers, which can damage the finish. For spills, wipe them up immediately to prevent staining. If your tray is painted, be a bit more cautious with cleaning, as some paints can be more susceptible to chipping or scratching. Periodically, you might want to reapply a coat of sealant, especially if the tray is used frequently or exposed to moisture. For wooden handles or parts, a light application of furniture polish can help maintain their sheen. Proper storage when not in use is also beneficial; avoid stacking heavy items on top of it or leaving it in direct sunlight for extended periods, as this can cause the wood to warp or the finish to degrade.
The versatility of a DIY serving tray extends far beyond its primary function. It can be a stylish organizer for your entryway, holding keys, mail, and sunglasses. In the bedroom, it can serve as a bedside caddy for books, glasses, and a glass of water. In the living room, it’s perfect for corralling remotes, coasters, and decorative items on a coffee table or ottoman. For those who enjoy crafting, a custom tray can be used to organize art supplies or display small finished projects. Its potential applications are limited only by your imagination. Furthermore, a handmade serving tray makes for a thoughtful and personalized gift. Imagine presenting a loved one with a tray that you’ve personally crafted, perhaps even incorporating their favorite colors or a design that reflects their interests. This personal touch elevates a simple gift into a cherished keepsake. The process of creating your own serving tray also offers a fantastic opportunity to learn new skills and gain confidence in your DIY abilities. It’s a project that can be adapted to various skill levels, with opportunities for complexity and customization as you become more comfortable with woodworking techniques. From selecting the wood to applying the final finish, each step provides a sense of accomplishment and tangible results.
In conclusion, creating a DIY serving tray is an accessible, rewarding, and highly customizable project. By carefully selecting materials, employing precise construction techniques, and applying thoughtful finishing touches, you can craft a beautiful and functional piece that will enhance your home and your entertaining. This comprehensive guide has provided the essential steps and considerations, ensuring that you have the knowledge to embark on this fulfilling DIY endeavor and enjoy the satisfaction of a handmade creation. The ability to tailor the size, shape, color, and embellishments to your specific tastes and needs makes a DIY serving tray an invaluable addition to any home, offering both practicality and a touch of personal style. The knowledge gained from completing this project can serve as a springboard for numerous other DIY endeavors, empowering you to personalize your living space and create items that are both beautiful and meaningful.
