
DIY Wooden Ring Crinkle Teether: A Comprehensive Guide for Safe and Sustainable Baby Essentials
Creating a DIY wooden ring crinkle teether offers parents a rewarding and practical way to craft a safe, natural, and stimulating toy for their little ones. This project combines the tactile appeal of wood with the auditory delight of crinkle material, providing sensory input that aids in infant development. Beyond the immediate benefits for the baby, a handmade teether can be a thoughtful, personalized gift for baby showers or new parents, demonstrating a commitment to natural materials and reducing reliance on mass-produced plastic toys. The process is relatively straightforward, requiring minimal specialized tools and readily available materials, making it an accessible DIY endeavor for crafters of all skill levels. Understanding the importance of material safety and proper construction is paramount to ensure the teether is not only engaging but also completely safe for a teething baby, who will inevitably explore it with their mouth. This guide will delve into every aspect of creating a superior wooden ring crinkle teether, from material selection and safety considerations to step-by-step construction and finishing techniques.
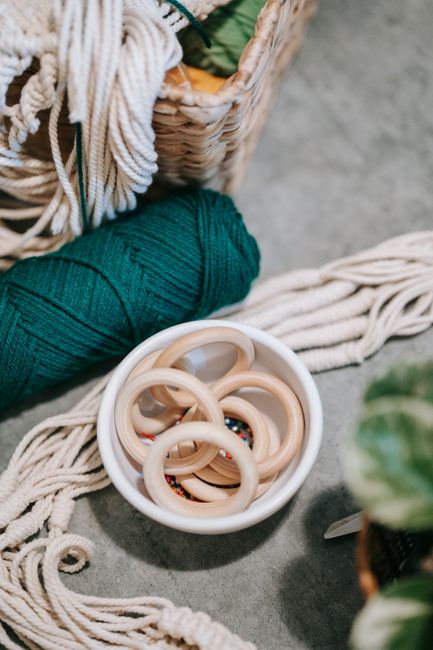
The foundation of a safe and durable wooden ring crinkle teether lies in the careful selection of materials. For the wooden ring, opt for untreated, unfinished hardwoods that are naturally resistant to bacteria and free from harmful chemicals. Popular choices include maple, beech, birch, and cherry wood. These woods are food-grade, non-toxic, and possess a smooth texture that is gentle on delicate gums. It is crucial to source rings specifically designed for baby teething products, as these are typically sanded to a smooth finish and are free from splinters. Avoid treated woods, plywood, or composite wood products, as they may contain glues, resins, or finishes that are unsafe for ingestion. The diameter of the wooden ring should be substantial enough to prevent it from being a choking hazard, typically ranging from 2.5 to 3.5 inches (6.5 to 9 cm). Inspect each ring thoroughly for any cracks, rough spots, or loose fibers. If a ring exhibits any imperfections, it is best to discard it and opt for a new one. The crinkle material should also be chosen with care. Food-grade, BPA-free crinkle paper is the safest option. This material is specifically designed for use in baby toys and is readily available from craft suppliers specializing in baby products. Ensure the crinkle paper is securely enclosed within a fabric layer to prevent the baby from accessing the crinkle material directly. Cotton, organic cotton, or bamboo fabrics are excellent choices for the fabric component due to their breathability, absorbency, and softness. Opt for tightly woven fabrics to provide a barrier against the crinkle material and to withstand repeated chewing and washing. OEKO-TEX certified fabrics offer an additional layer of assurance regarding their safety and absence of harmful substances.
Safety is the paramount consideration throughout the entire DIY process. Before beginning, ensure all tools and materials are clean and free from contaminants. When working with wood, sand all surfaces meticulously to eliminate any splinters or rough edges. A progression of sandpaper grits, starting with a coarser grit (e.g., 120) and moving to finer grits (e.g., 220 or higher), will achieve a silky-smooth finish. Pay particular attention to the inner and outer edges of the wooden ring. For the fabric components, it is essential to pre-wash all fabrics in a mild, fragrance-free detergent to remove any residual chemicals from manufacturing and to account for potential shrinkage. When sewing, use a strong, durable thread. Double-stitching key seams, especially those containing the crinkle material, will significantly enhance the teether’s longevity and prevent accidental tearing. Inspect all seams for any loose threads that could pose a choking hazard. The crinkle material should be completely enclosed and securely fastened within the fabric. Consider reinforcing the internal crinkle pouch with an additional layer of fabric or a serged seam for extra security. For the final assembly, ensure the wooden ring is firmly attached to the fabric component and that there are no gaps or loose parts that a baby could detach and swallow. Regularly inspect the finished teether for any signs of wear and tear, such as loose threads, fraying fabric, or damaged wood, and discontinue use if any are present.
The construction of a DIY wooden ring crinkle teether involves several key steps, each requiring attention to detail. Begin by preparing your fabric. Cut two pieces of fabric to your desired size and shape. Common shapes include simple rectangles, squares, or slightly curved pieces that can be folded around the wooden ring. The size will depend on how much of the wooden ring you want to cover and how much fabric you want to allow for grasping. A good starting point for a rectangular piece is approximately 4 inches by 8 inches, which can then be folded in half. Before assembling the fabric pieces, prepare the crinkle element. Cut a piece of crinkle paper to a size that will fit comfortably within the fabric enclosure. If you are using crinkle paper specifically designed for toys, it will often have a slightly textured surface. Some DIYers prefer to layer two pieces of crinkle paper for a more pronounced sound. Place the crinkle paper between the two fabric pieces, ensuring it is centered. If you are using a single piece of fabric folded in half, place the crinkle paper on the wrong side of the fabric, then fold the fabric in half. Now, align the edges of the fabric pieces and pin them securely. If you are using two separate pieces of fabric, ensure the right sides are facing each other before pinning.
Next, sew the fabric pieces together, leaving an opening for turning. This opening should be large enough to allow you to turn the fabric right side out. Use a sturdy stitch, such as a straight stitch or a zigzag stitch, with a quarter-inch seam allowance. If you are incorporating a loop for hanging the teether, now is the time to attach it. This loop can be made from fabric, ribbon, or a coordinating grosgrain ribbon, and should be securely stitched into the seam. After sewing the main seams, clip the corners to reduce bulk, which will help create sharper corners when turned right side out. Carefully turn the fabric right side out through the opening you left. Use a point turner or a dull pencil to push out the corners. Now, insert the crinkle paper inside the fabric enclosure if you haven’t already. Ensure the crinkle paper is evenly distributed and lies flat. For a more professional finish and to secure the crinkle material, you can then topstitch around the edges of the fabric, closing the opening as you go. This topstitching will also add a decorative element and reinforce the seams.
The final, critical step is attaching the fabric component to the wooden ring. There are several methods for achieving this. One common technique is to create a channel or sleeve in the fabric that the wooden ring can slide into. If you’ve constructed a simple pouch, you can carefully thread the wooden ring through the opening and then hand-stitch it closed, ensuring the fabric is snug around the ring. Another approach involves creating a fabric "flag" that wraps around a portion of the wooden ring. This flag can be sewn onto the main body of the fabric teether and then secured to the ring with strong stitching. Alternatively, you can create a fabric tab that encircles the ring, sewing it securely to itself and then to the main fabric piece. For maximum durability, use a strong upholstery thread and a needle that can easily penetrate the fabric and the wood if necessary (though most attachments rely on stitching through the fabric tightly around the ring). Consider sewing through the fabric multiple times to ensure a robust attachment. Ensure there are no loose ends of thread that could unravel. The goal is to have the fabric securely affixed to the wooden ring, preventing any possibility of the baby separating the two components.
Finishing touches are essential for both aesthetics and the longevity of your DIY wooden ring crinkle teether. Once the teether is fully assembled, inspect it one last time for any loose threads or imperfections. If you have used 100% cotton or bamboo fabric and untreated wood, the teether is generally considered safe to use without any additional finishes. However, some parents prefer to apply a natural, food-grade wood polish or oil to further enhance the wood’s durability and to provide a beautiful sheen. Options include organic coconut oil, beeswax, or a combination of beeswax and olive oil. To apply, rub a small amount of the polish or oil onto a clean cloth and then gently rub it into the wooden ring, ensuring complete coverage. Allow the wood to absorb the oil for at least 24 hours, then wipe away any excess with a clean cloth. Avoid using petroleum-based products or varnishes, as these are not safe for babies. If you choose to apply a finish, allow it to cure completely before giving the teether to your baby. For the fabric component, ensure all seams are secure. Any decorative stitching should be done with strong thread. The overall appearance should be neat and tidy, reflecting the care and attention to detail put into its creation. The smooth, natural feel of the wood combined with the subtle crinkle sound and soft fabric creates a multi-sensory experience that is highly beneficial for a baby’s developing senses.
Maintenance and cleaning of your DIY wooden ring crinkle teether are crucial for hygiene. Due to the natural materials used, it’s important to avoid harsh detergents or high-heat washing methods that could damage the wood or fabric. For regular cleaning, simply wipe the wooden ring with a damp cloth and mild, natural soap if necessary. Rinse thoroughly and allow the wood to air dry completely. The fabric component can be spot-cleaned with a damp cloth and mild soap. For a more thorough cleaning, you can gently hand-wash the entire teether in cool or lukewarm water with a small amount of mild, fragrance-free soap. Avoid soaking the wooden ring for extended periods, as this can cause the wood to swell or crack. After washing, gently squeeze out excess water from the fabric and allow both the wood and fabric to air dry completely. Do not put the teether in a washing machine or a dryer, as the heat and agitation can damage the materials. Inspect the teether regularly for any signs of wear, such as frayed fabric, loose threads, or cracks in the wood. If any damage is observed, it is best to discontinue use to ensure the baby’s safety. Proper care will ensure your handmade teether remains a safe and cherished item for your baby.
The educational and developmental benefits of a well-crafted wooden ring crinkle teether are significant. For infants, teething is a natural and often uncomfortable stage of development. The smooth, hard surface of the wooden ring provides gentle pressure relief for sore gums. The tactile variation between the wood and the fabric engages the baby’s sense of touch, encouraging exploration and fine motor skill development as they grasp and manipulate the teether. The auditory stimulation provided by the crinkle material plays a crucial role in sensory development. The sound captures the baby’s attention, promoting focus and encouraging them to interact with the toy. This auditory feedback helps babies understand cause and effect – their actions (squeezing or shaking the teether) result in a sound. As babies grow, they will continue to find value in the teether for its sensory qualities, even after the primary teething phase has passed. The natural materials used in a DIY teether also offer a subtle introduction to the beauty and sustainability of natural resources, a valuable lesson from an early age. Furthermore, the process of making a teether can be a mindful and enjoyable activity for parents, providing a sense of accomplishment and connection to the items they provide for their child. The personalized nature of a handmade item also imbues it with a special significance, making it a treasured keepsake.
Considerations for variations and personalization can elevate your DIY wooden ring crinkle teether from a simple toy to a unique creation. Beyond the basic design, explore different fabric patterns and colors to match a nursery theme or the baby’s wardrobe. You can also experiment with different fabric textures, such as soft minky or textured cotton, for added sensory appeal. For the crinkle material, some crafters like to incorporate small amounts of plastic beads or dried beans within a separate, securely stitched pouch inside the fabric to create a slight rattle sound in addition to the crinkle. However, ensure these are extremely well-secured to prevent any possibility of detachment. The shape of the fabric component can also be varied. Instead of a simple rectangle, consider a crescent moon, a star, or even a simple animal silhouette, provided the edges are smooth and safe. Another personalization option is to attach a small wooden bead or a natural wooden ring to a fabric loop on the teether, adding another tactile element. When making a teether as a gift, incorporating the baby’s initial or a small embroidered motif can add a deeply personal touch. Always prioritize safety and simplicity when introducing new elements. The primary function is still a safe and engaging teether, so ensure any embellishments do not compromise its integrity or pose a choking hazard.
In conclusion, the DIY wooden ring crinkle teether is a project that offers tangible benefits for both the baby and the crafter. By meticulously selecting safe, natural materials, prioritizing sound construction techniques, and paying close attention to finishing and maintenance, you can create a high-quality, stimulating, and safe teether. This handmade item not only provides developmental advantages through its multi-sensory appeal but also embodies a commitment to sustainable and non-toxic baby essentials. The process itself is a rewarding journey into crafting, offering a sense of accomplishment and the opportunity to create something truly special and personalized for a little one. The inherent educational value of natural materials and the tactile and auditory engagement provided by the teether contribute significantly to a baby’s early sensory exploration and cognitive development. Regular inspection and proper care ensure the longevity and continued safety of this lovingly crafted baby essential.
