
DIY Essential Oil Diffuser: Create Your Own Aromatic Sanctuary
Crafting your own essential oil diffuser offers a personalized and cost-effective way to enjoy the therapeutic benefits and delightful fragrances of essential oils. Beyond the immediate olfactory pleasure, aromatherapy has been linked to stress reduction, improved mood, enhanced sleep, and even boosted cognitive function. While commercial diffusers are readily available, a DIY approach allows for complete control over materials, design, and functionality, ensuring a diffuser that perfectly suits your aesthetic and needs. This article will guide you through various methods for creating your own essential oil diffusers, from simple reed diffusers to more elaborate ultrasonic and heat-based options, providing detailed instructions, material lists, and SEO-optimized tips to enhance your understanding and experience.
Understanding the Basics of Essential Oil Diffusion
Before diving into DIY projects, it’s crucial to understand how essential oil diffusers work and the different types available. Diffusion is the process of dispersing essential oil molecules into the air, allowing them to be inhaled and experienced aromatically and therapeutically. The method of dispersion determines the type of diffuser.
- Evaporative Diffusers: These are the simplest. They utilize a fan to blow air through a pad or filter saturated with essential oils. The scent is dispersed as the oil evaporates.
- Nebulizing Diffusers: These are more potent. They use a stream of air to atomize essential oils into a fine mist without the use of heat or water. This preserves the full therapeutic properties of the oils.
- Ultrasonic Diffusers: These are very popular. They use ultrasonic vibrations to break down essential oil and water into a fine mist, which is then released into the air. They also add humidity to the air.
- Heat Diffusers: These use a gentle heat source (like a candle or a low-wattage bulb) to warm the essential oils, causing them to evaporate and release their scent. While simple, heat can degrade some of the more delicate therapeutic compounds in certain oils.
- Passive Diffusers: These rely on natural evaporation or absorption. Reed diffusers and porous materials like clay or wood fall into this category.
Our DIY projects will primarily focus on passive, evaporative, and modifications that mimic ultrasonic or heat diffusion, offering a range of complexity and effectiveness.
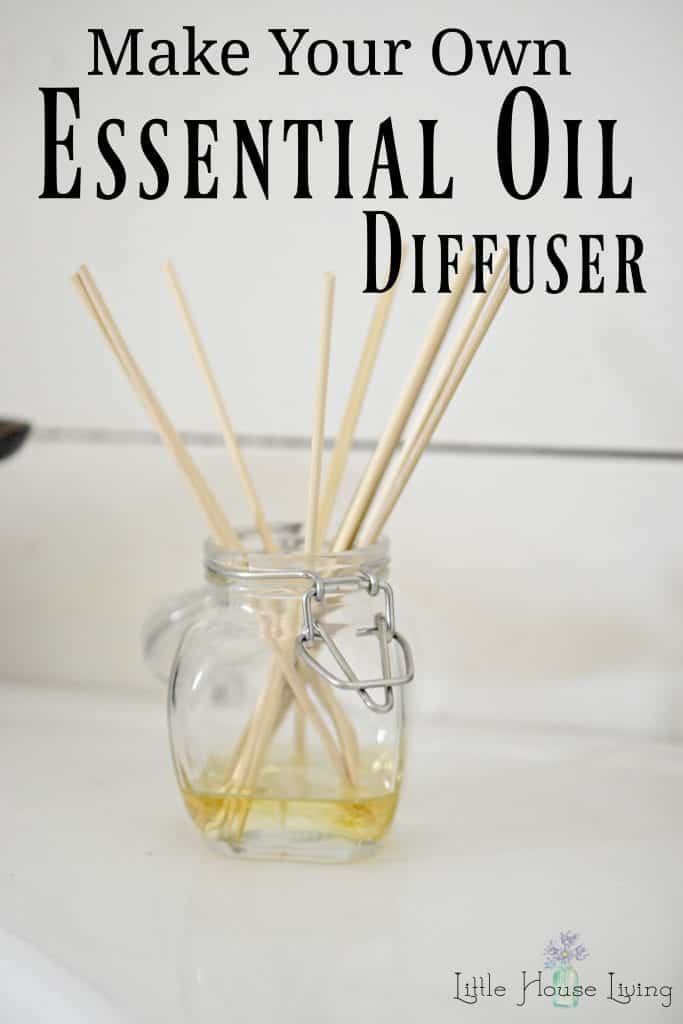
Project 1: The Simple & Stylish Reed Diffuser
The reed diffuser is perhaps the easiest and most elegant DIY essential oil diffuser. It requires minimal materials and no electricity, making it perfect for any space.
Materials:
- Glass Bottle or Jar: Choose one with a narrow opening to minimize evaporation. Recycled perfume bottles, small vases, or apothecary jars work well.
- Carrier Oil: A light, unscented oil is essential for diluting the essential oils and helping them travel up the reeds. Fractionated coconut oil, sweet almond oil, or safflower oil are excellent choices. Avoid heavier oils that can clog the reeds.
- Essential Oils: Your chosen therapeutic or aromatic oils.
- Reed Diffuser Sticks: These are specially designed to absorb and diffuse oil. Rattan reeds are the most common and effective. Bamboo skewers can be used in a pinch, but they are less porous.
- Optional: Small Funnel
Instructions:
- Clean Your Container: Thoroughly wash and dry your glass bottle or jar. Ensure there are no residual scents from previous contents.
- Determine Your Ratio: A good starting point is a 70-80% carrier oil to 20-30% essential oil ratio. For a 4-ounce bottle, this would be approximately 3-3.5 ounces of carrier oil and 0.5-1 ounce of essential oils. Experiment with this ratio to find your preferred scent strength.
- Add Carrier Oil: Using a funnel if necessary, pour the carrier oil into your clean glass container.
- Add Essential Oils: Carefully add your chosen essential oils to the carrier oil. You can use a single oil or create a custom blend. For example, lavender for relaxation, citrus oils for uplifting, or eucalyptus for respiratory support.
- Mix Gently: Swirl the bottle gently to combine the carrier oil and essential oils. Avoid vigorous shaking, which can introduce air bubbles.
- Insert Reeds: Place 5-10 reed diffuser sticks into the oil mixture. The number of reeds will affect the intensity of the scent. More reeds mean a stronger scent but faster evaporation.
- Allow Absorption: Let the reeds sit in the oil for at least an hour to begin absorbing the mixture.
- Flip the Reeds: After an hour, carefully flip the reeds so the saturated ends are exposed to the air. This kickstarts the diffusion process.
- Placement: Place your DIY reed diffuser in your desired location. Avoid direct sunlight or heat sources, which can accelerate evaporation.
SEO Tips for Reed Diffusers: Include keywords like "DIY reed diffuser," "homemade essential oil diffuser," "natural home fragrance," "aromatherapy diffuser," "no-electricity diffuser," "how to make essential oil reeds."
Project 2: The Terracotta Stone Diffuser
Porous materials like unglazed terracotta are excellent for passive diffusion. This project is incredibly simple and can be customized with paint or decorative elements.
Materials:
- Unglazed Terracotta Object: Small terracotta pots, decorative terracotta stones, or even terracotta coasters work well. Ensure they are unglazed.
- Essential Oils
- Optional: Non-toxic Craft Paint or Sealant (for decoration, ensure it’s fully cured before use with oils)
Instructions:
- Prepare the Terracotta: If you’re painting or decorating your terracotta, do so now. Allow any paint or sealant to dry and cure completely according to the manufacturer’s instructions. This is crucial to prevent any unwanted fumes from the craft materials.
- Apply Essential Oils: Place a few drops (5-10) of your chosen essential oils directly onto the unglazed terracotta surface.
- Allow Absorption: The porous nature of the terracotta will absorb the oil. The scent will gradually release into the air.
- Reapply as Needed: When the scent fades, simply reapply more essential oil.
SEO Tips for Terracotta Diffusers: Use terms like "DIY terracotta diffuser," "natural stone essential oil diffuser," "porous material diffuser," "simple aromatherapy," "crafty essential oil diffuser."
Project 3: The DIY Electric Diffuser (Heat Plate Method)
This project mimics the functionality of a basic electric heat diffuser using common household items. It’s a good option for those who want a bit more scent intensity than passive methods.
Materials:
- Small Ceramic Dish or Bowl: A ramekin or a small, heat-resistant decorative dish works well.
- Tea Light Candle: Unscented is best to avoid competing aromas.
- Small Heat-Resistant Plate or Metal Lid: This will sit on top of the ceramic dish to hold the oil and prevent direct flame contact. A metal lid from a jar or a small ceramic coaster can work.
- Water
- Essential Oils
Instructions:
- Assemble the Base: Place the ceramic dish on a stable, heat-resistant surface.
- Add Water: Fill the ceramic dish about halfway with water.
- Place the Plate/Lid: Position the heat-resistant plate or metal lid over the water-filled dish. Ensure it’s stable.
- Add Essential Oils: Place 5-10 drops of essential oils directly onto the plate/lid.
- Light the Candle: Carefully place and light the tea light candle beneath the ceramic dish. The heat from the candle will gently warm the water and the oil, causing the scent to diffuse.
- Monitor and Refill: Keep a close eye on the water level and the candle. Add more water and essential oils as needed. Never leave a burning candle unattended.
Safety Precautions: Always place this diffuser on a stable, non-flammable surface away from curtains, paper, or other flammable materials. Ensure children and pets cannot access it. Never leave the candle burning unsupervised.
SEO Tips for Electric Heat Diffusers: Incorporate keywords like "DIY electric diffuser," "homemade heat diffuser," "candle-powered essential oil diffuser," "simple aromatherapy warmer," "DIY scent diffuser."
Project 4: The Upcycled Jar & Cotton Ball/Felt Diffuser
This is a very accessible and eco-friendly option, perfect for smaller spaces or personal use.
Materials:
- Small Glass Jar with a Lid: A baby food jar, spice jar, or a small jam jar.
- Cotton Balls or Felt Pieces: Natural, undyed felt or organic cotton balls are ideal.
- Scissors
- Awl or Small Drill Bit
- Essential Oils
Instructions:
- Prepare the Lid: Using the awl or drill bit, carefully create several small holes in the lid of the glass jar. These holes will allow the scent to escape.
- Add Cotton/Felt: Place a few cotton balls or felt pieces inside the jar.
- Add Essential Oils: Drip 5-10 drops of your chosen essential oils onto the cotton balls or felt.
- Secure the Lid: Screw the lid tightly onto the jar.
- Placement: Place the jar in your desired location. The scent will gently diffuse through the holes in the lid.
- Refresh: When the scent fades, remove the lid, add more essential oil to the cotton/felt, and secure the lid again.
SEO Tips for Jar Diffusers: Use search terms like "DIY jar diffuser," "upcycled essential oil diffuser," "cotton ball diffuser," "felt essential oil diffuser," "small space aromatherapy," "DIY scent dispenser."
Maximizing Your DIY Essential Oil Diffuser Experience:
- Essential Oil Quality: Always use 100% pure, therapeutic-grade essential oils. Adulterated or synthetic oils will not provide the same benefits and can be harmful.
- Blending for Purpose: Research essential oil properties. Combine oils for specific effects:
- Relaxation: Lavender, Chamomile, Bergamot, Frankincense
- Energy/Focus: Peppermint, Lemon, Rosemary, Eucalyptus
- Mood Boosting: Sweet Orange, Grapefruit, Ylang Ylang, Jasmine
- Respiratory Support: Eucalyptus, Tea Tree, Peppermint, Pine
- Ventilation: While diffusing is beneficial, ensure adequate ventilation in your space, especially with continuous diffusion.
- Dilution is Key: For all DIY methods involving direct contact with oils (except for the reed diffuser carrier oil base), start with a conservative amount of essential oil and add more as needed. Overuse can be overwhelming.
- Cleaning and Maintenance: Regularly clean your DIY diffusers to prevent oil residue buildup and ensure optimal scent diffusion. For reed diffusers, replace reeds every 1-2 months or when they no longer effectively absorb and diffuse oil.
- Safety First: Always store essential oils and DIY diffuser components out of reach of children and pets. Be mindful of any sensitivities or allergies individuals in your household may have to specific oils.
Troubleshooting Common DIY Diffuser Issues:
- Weak Scent:
- Reed Diffusers: Add more reeds, flip reeds more frequently, ensure reeds are not clogged, increase essential oil ratio.
- Other Methods: Add more essential oil, ensure adequate airflow, check if the material is sufficiently porous.
- Too Strong Scent:
- Reed Diffusers: Remove a few reeds, use a narrower opening container.
- Other Methods: Reduce the amount of essential oil, ensure better ventilation.
- No Scent:
- Reed Diffusers: Reeds may be clogged or not absorbing oil; try new reeds. Oil mixture might be too diluted; adjust ratio.
- Other Methods: Ensure the material is indeed porous and not sealed. Essential oils may have degraded (less likely with pure oils).
Conclusion:
Creating your own essential oil diffusers is a rewarding endeavor that empowers you to curate a personalized aromatic environment. From the simplicity of reed diffusers to the ingenuity of upcycled jar methods, these DIY projects offer accessible and sustainable ways to enjoy the many benefits of aromatherapy. By understanding the principles of diffusion and employing these step-by-step guides, you can craft a unique and effective diffuser that enhances your home, promotes well-being, and brings the essence of nature indoors. Experiment with different designs, essential oil blends, and materials to discover your perfect aromatic sanctuary.
