
Crafting Your Signature: The Ultimate Guide to Creating Your Own Art Journal Banner
The art journal banner serves as a visual identifier, a personal emblem that anchors your creative space and introduces the theme or mood of its contents. Far from being mere decoration, a well-executed art journal banner is a powerful tool for organization, self-expression, and establishing a distinct artistic voice. This comprehensive guide will equip you with the knowledge and techniques to design and create unique banners that not only enhance your journal’s aesthetic but also streamline your creative process. We will delve into the foundational elements of banner design, explore diverse material options, and provide step-by-step instructions for various crafting methods, ensuring you can replicate and adapt these techniques to suit your personal style and journal’s purpose. Understanding the psychology of visual cues is paramount when designing your banner. Color palettes evoke emotions and set expectations. Bold, vibrant hues might signal energetic, experimental content, while muted, earthy tones could suggest reflective or nature-inspired themes. Typography plays a critical role; a handwritten script can convey intimacy and personal narrative, whereas a strong, blocky font might communicate authority or a more structured approach. The overall composition – the balance of elements, negative space, and focal points – guides the viewer’s eye and communicates the banner’s intent efficiently.
The first step in creating your art journal banner is conceptualization. Before reaching for any materials, dedicate time to brainstorming and planning. Consider the primary function of your art journal. Is it a repository for daily sketches, a place for extensive mixed-media experiments, a travelogue, or a space for personal growth and reflection? The answer will significantly influence your banner’s design. For a travel journal, you might incorporate imagery of maps, stamps, or iconic landmarks. A journal focused on botanical art could feature delicate floral motifs or botanical illustrations. If your journal is a space for emotional exploration, abstract shapes and symbolic imagery might be more appropriate. Think about the "brand" of your art journal. What feeling do you want it to evoke? What story does it tell? Sketch out several thumbnail ideas. Don’t censor yourself at this stage; let your imagination run wild. Explore different styles: minimalist, maximalist, vintage, modern, whimsical, serious. Consider what elements are essential for your banner to communicate. This might include your name, initials, a significant symbol, or a concise descriptor of the journal’s theme. For instance, if your journal is dedicated to exploring the concept of "transformation," your banner might feature a chrysalis, a sprouting seed, or a swirling vortex.
Material selection is crucial for both aesthetic appeal and durability. The beauty of art journaling is its embrace of diverse mediums, and your banner is the perfect place to showcase this eclecticism. Paper-based banners are versatile and accessible. Consider using heavier cardstock for a sturdy foundation, or explore decorative papers like patterned scrapbook paper, handmade papers with embedded fibers, or even repurposed book pages for a vintage feel. Fabric offers a tactile dimension. Felt, canvas, or even scraps of interesting textiles can lend texture and depth. These can be hand-stitched, glued, or even machine-sewn onto your journal’s cover or within its pages. If your journal is bound with a ring binder or disc system, you can easily create interchangeable banners. For a more robust and professional finish, consider using thin wood veneer or even a piece of thin, flexible plastic. These can be painted, etched, or even laser-cut for intricate designs. Think about how the material will interact with the rest of your journal. If your journal is highly textured, a smooth banner might create a pleasing contrast, and vice versa. The weight and thickness of your chosen material will also impact how it lies within the journal, so consider this for ease of use.
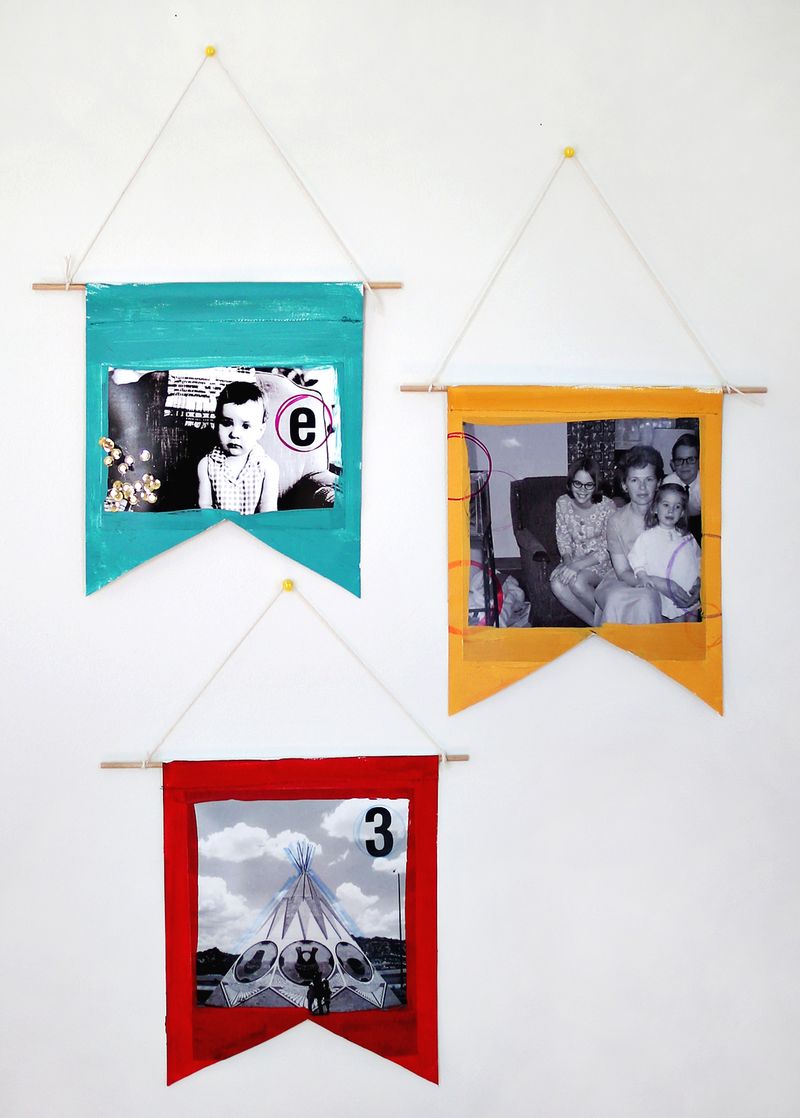
Now, let’s dive into the practicalities of crafting your art journal banner. One of the simplest yet most effective methods is the paper-based banner. Start by cutting your chosen paper to your desired size and shape. Rectangles are classic, but you can also experiment with pennant shapes, banners with scalloped edges, or even more abstract forms. Once you have your base, the creative possibilities are vast. Collage is an excellent technique for building layers of interest. Collect ephemera like old photographs, magazine clippings, ticket stubs, postage stamps, and handwritten notes. Arrange these elements compositionally, adhering them with a strong adhesive like PVA glue or a glue stick. Don’t be afraid to overlap elements and create depth. Consider incorporating text, whether it’s a powerful quote, a personal mantra, or simply your initials rendered in an interesting font. Stamping is another fantastic method. Explore a wide range of rubber or clear stamps – alphabets, decorative motifs, borders – and experiment with different ink pads. Distress inks can create a vintage, aged look, while vibrant pigment inks offer a bold statement.
Painting offers boundless opportunities for personalization. Acrylic paints are a popular choice due to their versatility, quick drying time, and opacity. Use them to create solid color backgrounds, intricate patterns, or even representational imagery. Watercolors can be used for softer, more blended effects. Consider using gouache for its rich, opaque color and ability to cover other mediums. For a textured finish, consider using modeling paste or texture gels before painting. These can be applied with palette knives or stencils to create raised patterns. When painting, think about color theory. Complementary colors create high contrast, while analogous colors create a more harmonious feel. Consider the emotional impact of your color choices.
Embellishments can elevate your banner from simple to spectacular. Washi tape, with its endless array of patterns and colors, is perfect for adding borders, accents, or even creating entire designs. Stickers can be used to add quick pops of color and imagery. Thread and embroidery floss can be used for stitching decorative elements, outlining shapes, or adding subtle textural details. Beads, sequins, and glitter can introduce sparkle and light reflection, adding a touch of glamour. For a more organic feel, consider incorporating natural elements like dried leaves, pressed flowers, or small shells. When using embellishments, ensure they are securely adhered to prevent them from falling off. A good quality craft glue or a double-sided adhesive tape is essential. Overdoing embellishments can make a banner look cluttered, so aim for balance and intentionality. Each embellishment should serve a purpose in the overall design.
For those who enjoy a more tactile experience, fabric banners offer a rich sensory dimension. Begin by cutting your fabric to the desired shape and size. For a frayed edge effect, simply cut the fabric and leave the edges raw. For a cleaner finish, you can hem the edges by folding them over and stitching them down, either by hand or with a sewing machine. Appliqué is a wonderful technique for fabric banners. Cut out shapes from contrasting fabrics and stitch them onto your base fabric. This could be lettering, symbolic shapes, or decorative motifs. Embroidery is another time-honored craft that lends itself beautifully to fabric banners. Use embroidery floss to stitch your designs, creating intricate patterns, lettering, or illustrations. Chain stitch, satin stitch, and French knots are just a few of the many stitches you can explore. Fabric markers or paints can be used to add color and detail. When working with fabric, consider the weave and texture of the material. A tightly woven cotton might be ideal for detailed stitching, while a looser weave like linen might lend itself to a more rustic, textured look.
For a more permanent and integrated banner, consider creating one that becomes part of the journal’s structure. If your journal has a lay-flat binding or exposed spine, you can create a banner that wraps around or is attached to the spine. This could involve painting directly onto the cover, creating a leather or fabric inlay, or even attaching a metal or wooden plaque. For ring-bound journals, you can create custom dividers with integrated banners. These can be made from cardstock, plastic sheets, or even thin chipboard. The key is to ensure the banner is securely attached and doesn’t impede the functionality of the journal. If you’re creating a banner for the cover of a notebook, consider sealing it with a protective layer. A Mod Podge or a clear acrylic sealant can protect your artwork from wear and tear, especially if you anticipate your journal being handled frequently.
Integrating your banner seamlessly into your art journal is essential. Consider its placement. Will it be on the cover, the inside front cover, or as the first page spread? The placement will influence its design and the message it conveys. A cover banner acts as an introduction, a promise of what lies within. An inside cover banner can be a more personal statement, a quiet declaration of artistic intent. When adhering your banner, use a strong, archival-quality adhesive that won’t yellow or damage the journal pages over time. PVA glue, photo corners, or double-sided adhesive sheets are good options. If your banner is intended to be a permanent fixture, ensure it lies flat and doesn’t create an awkward bulk that makes writing or drawing difficult. Experiment with different banner styles for different journals. You might have a bold, graphic banner for your experimental art journal and a delicate, handwritten banner for your daily sketchbook.
The SEO aspect of creating an art journal banner guide lies in using relevant keywords naturally throughout the text. Keywords like "art journal banner," "DIY banner," "create journal art," "personalized journal cover," "mixed media banner," "scrapbooking banner," "crafting journal art," "journal design ideas," and "art journal decoration" should be incorporated. The use of descriptive headings and subheadings also aids in search engine readability. By providing comprehensive, actionable information, this article aims to rank highly for users searching for ways to personalize and enhance their art journals. The detailed exploration of materials, techniques, and conceptualization ensures that readers will find valuable, long-form content. The inclusion of diverse methods caters to a broad audience with varying skill levels and preferences. Furthermore, the focus on practical application and the integration of keywords naturally within the narrative structure will contribute to its search engine visibility and user engagement. The goal is to become a go-to resource for anyone looking to elevate their art journaling experience through the creation of a unique and meaningful banner.
