From Tiny Seed to Bountiful Harvest: Your Definitive Guide to Starting Herbs and Vegetables Indoors
Starting your own herb and vegetable seeds indoors is a cost-effective and deeply rewarding way to cultivate a fresh, homegrown food supply. This practice offers unparalleled control over plant varieties, bypasses the often-limited selection at garden centers, and provides a significant head start on the growing season, especially in regions with shorter summers. The process, while requiring attention to detail, is remarkably accessible even for novice gardeners. Success hinges on understanding fundamental principles of germination, providing optimal environmental conditions, and employing a systematic approach to seedling care. This guide breaks down the essential steps, from selecting appropriate seeds and materials to nurturing delicate sprouts into robust plants ready for transplanting.
Essential Materials for Seed Starting
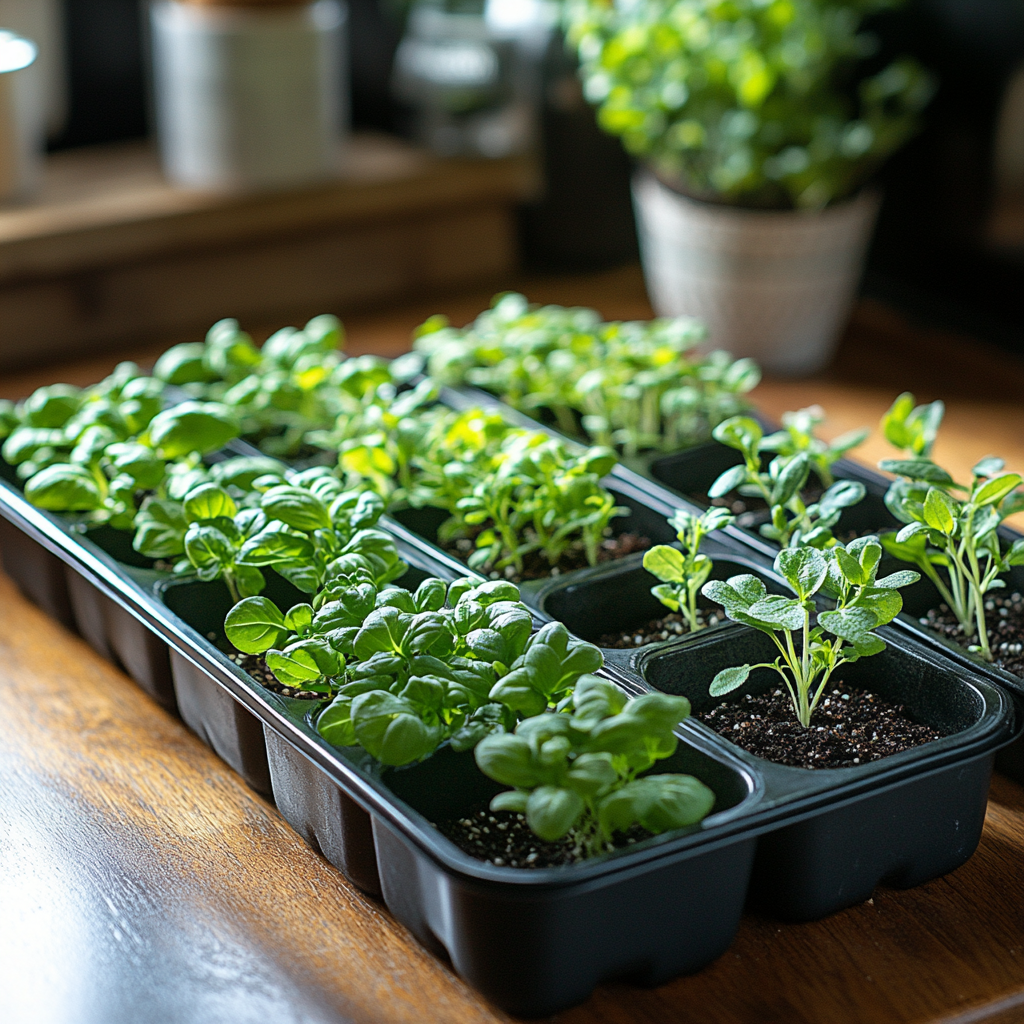
Acquiring the right materials is the foundational step for successful seed starting. Seed-starting trays or containers are crucial. Options range from inexpensive plastic cell packs with individual compartments to more durable, reusable trays. For larger seeds or plants that will remain in their starter pots for a longer period, peat pots, coconut coir pots, or even repurposed yogurt containers (with drainage holes punched) can be utilized. The key requirement for any container is adequate drainage to prevent waterlogging, which is a primary cause of root rot. Seed-starting mix is distinct from regular potting soil. It is sterile, fine-textured, and designed to retain moisture while providing good aeration. This sterile environment minimizes the risk of damping-off disease, a common fungal issue that affects young seedlings. Avoid using garden soil, which can compact easily, harbor pathogens, and may contain weed seeds. Watering cans with a fine rose or spray bottles are essential for gentle watering. The force of a regular watering can can dislodge tiny seeds or damage delicate seedlings. Labels and markers are non-negotiable for identifying the varieties of seeds sown. It’s easy to forget what’s growing where, especially when dealing with multiple types of herbs and vegetables. A warm, consistent environment is paramount for germination. This can be achieved through various methods, including placing trays on top of refrigerators, near heat vents, or, ideally, using a heating mat. These mats provide uniform bottom heat, accelerating germination rates. Finally, adequate light is the most critical factor once seedlings emerge. Grow lights are highly recommended, especially for starting seeds early in the season when natural daylight is insufficient. Fluorescent grow lights (T5 or T8) or LED grow lights designed for plant growth are effective and energy-efficient options.
Choosing the Right Seeds and Timing
The selection of seeds should be guided by your climate, available growing space, and personal preferences. For indoor starting, prioritize varieties known for their vigor and suitability for container growing or early transplanting. Herbs like basil, parsley, cilantro, dill, chives, thyme, oregano, and mint are excellent choices for beginners and thrive when started indoors. Many vegetables also benefit from an indoor head start. Common choices include tomatoes, peppers (both sweet and hot), eggplant, broccoli, cauliflower, cabbage, kale, lettuce, spinach, and onions. Consider the days to maturity for each plant and your region’s average last frost date. A general rule of thumb is to start warm-season crops like tomatoes and peppers 6-8 weeks before the last expected frost, while cool-season crops like broccoli and kale can be started 4-6 weeks prior. Consult your local extension office or reputable gardening resources for specific planting calendars tailored to your USDA Hardiness Zone. Seed packets provide vital information, including planting depth, germination time, spacing requirements, and optimal growing temperatures. Pay close attention to this information. Don’t overcrowd your seed-starting trays; while it might seem economical, it can lead to competition for resources and increased disease risk.
Sowing Your Seeds: A Step-by-Step Process
The physical act of sowing seeds is straightforward but requires precision. Begin by filling your chosen seed-starting containers with pre-moistened seed-starting mix. The mix should be damp but not soaking wet, resembling a wrung-out sponge. Gently press the mix down to eliminate large air pockets, but avoid compacting it too firmly. Refer to the seed packet for the recommended planting depth. A general guideline is to sow seeds at a depth equal to twice their diameter. For very fine seeds, like some herb seeds, they can often be sown on the surface and lightly pressed in, as they require light to germinate. Sow 2-3 seeds per cell to ensure at least one successful germination. This also accounts for potential non-viable seeds. Once seeds are sown, gently cover them with seed-starting mix to the recommended depth. For surface-sown seeds, a light dusting is sufficient. Water the newly sown seeds gently to ensure good seed-to-soil contact. A spray bottle is ideal for this initial watering. Label each container immediately with the plant variety and the date of sowing. This is critical for organization and tracking germination progress.
Germination and Early Seedling Care
The period following sowing is dedicated to creating an environment conducive to germination. Maintain consistent moisture in the seed-starting mix. Check the moisture levels daily by touching the surface of the soil. If it feels dry, water gently. Provide warmth. As mentioned, a heating mat placed under the trays significantly accelerates germination. The ideal temperature range for most vegetable and herb seeds is between 70-75°F (21-24°C). Covering the seed trays with a clear plastic dome or plastic wrap helps retain humidity, creating a mini-greenhouse effect. Once seedlings emerge, remove the plastic cover immediately to improve air circulation and prevent fungal diseases. This is also the point where light becomes critical. As soon as you see the first sprout breaking the surface, move the trays under your grow lights. Position the lights about 2-4 inches above the seedlings. Adjust the light height as the seedlings grow to maintain this distance. Provide 14-16 hours of light per day. This artificial light source is crucial for preventing leggy, weak seedlings. Without adequate light, seedlings will stretch towards any available light source, becoming tall, thin, and prone to breakage. Continue to monitor moisture levels and water as needed. Aim to keep the soil consistently moist but not waterlogged. Thin seedlings once they develop their first set of true leaves. True leaves are the leaves that appear after the initial cotyledons (seed leaves). Remove weaker seedlings by snipping them at the soil line with small scissors, leaving the strongest one or two per cell. This prevents competition and ensures the remaining seedlings have the best chance to thrive.
Hardening Off: Preparing Seedlings for the Outdoors
The process of hardening off is essential to acclimate your indoor-grown seedlings to the harsher conditions of the outdoors. Skipping this step can result in transplant shock, where seedlings wilt, fail to thrive, or even die. Begin hardening off about 7-10 days before your intended transplant date. Start by placing the seedlings in a sheltered outdoor location for a few hours each day, out of direct sunlight and protected from strong winds. A covered porch, patio, or a larger hoop house can be ideal. Gradually increase the amount of time spent outdoors and exposure to sunlight over the hardening-off period. On the first day, bring them in at night. As the week progresses, leave them out overnight if temperatures are consistently above freezing and expected to remain mild. Monitor seedlings closely for signs of stress, such as wilting or leaf scorch, and bring them indoors if necessary. Ensure they continue to receive adequate water during this transition. By the end of the hardening-off period, your seedlings should be robust enough to tolerate full sun, wind, and fluctuating temperatures, preparing them for their permanent home in the garden or larger containers.
Troubleshooting Common Seed Starting Issues
Several common problems can arise during seed starting. Damping-off is a fungal disease characterized by seedlings collapsing at the soil line. It is often caused by overwatering, poor air circulation, and non-sterile conditions. To prevent it, use sterile seed-starting mix, avoid overwatering, ensure good air circulation (using a fan on a low setting can help), and remove any diseased seedlings immediately. Leggy seedlings are a result of insufficient light. Increase light duration and intensity, and ensure the lights are positioned correctly. Failure to germinate can be due to several factors: old seeds (check the expiration date), incorrect planting depth, lack of moisture, or insufficient warmth. Some seeds also have specific germination requirements, such as stratification (cold treatment) or scarification (breaking the seed coat), though these are less common for typical herbs and vegetables. Yellowing leaves can indicate nutrient deficiencies (though seedlings rarely need fertilizer before transplanting) or, more commonly, overwatering. Ensure good drainage and allow the soil to dry slightly between waterings. Pests, such as fungus gnats, can also be a problem. These tiny flies are attracted to moist soil and their larvae can damage roots. Reduce watering frequency and consider using yellow sticky traps to monitor and capture adult gnats.
Transplanting Your Seedlings
Once your seedlings have been hardened off and the danger of frost has passed for your region, they are ready for transplanting. Gently remove seedlings from their starter trays, taking care to disturb the roots as little as possible. If using peat pots, they can often be planted directly into the ground, but it’s advisable to tear down the sides of the pot to prevent the peat from wicking moisture away from the roots. For plants like tomatoes, which develop adventitious roots, you can plant them deeper than they were in their starter cell, which encourages a stronger root system. Dig a hole in your garden bed or container that is slightly larger than the seedling’s root ball. Gently place the seedling in the hole and backfill with soil, firming it gently around the base of the plant. Water thoroughly immediately after transplanting to help settle the soil and reduce transplant shock. Consider using a diluted liquid fertilizer specifically formulated for transplanting to give your plants an extra boost.
Selecting Seeds for SEO Success
When selecting seeds for your indoor starting project, consider varieties that have strong search interest and are commonly sought by gardeners. Keywords like "organic basil seeds," "heirloom tomato seeds," "best pepper seeds for containers," and "easy herb seeds to grow" are frequently used. Choosing popular, reliable varieties that are known for good germination rates and transplant success will also contribute to a positive growing experience, encouraging repeat gardening endeavors and word-of-mouth recommendations. Focus on heirloom and open-pollinated varieties where possible, as these often have dedicated online communities and enthusiasts searching for them. The ability to save seeds from these plants also adds to their appeal and searchability. For instance, "non-GMO certified herb seeds" or "heirloom vegetable seed varieties" are specific search terms that indicate a discerning consumer. Understanding these search patterns can inform your seed choices, leading to more successful gardening outcomes and a higher likelihood of finding the specific plants you desire.
Optimizing SEO for Your Seed Starting Content
To ensure this guide reaches a broad audience interested in seed starting, incorporating relevant keywords naturally throughout the text is essential. Terms such as "how to start seeds indoors," "seed starting guide," "grow herbs from seed," "vegetable seed starting," "seedling care," "hardening off plants," and "transplanting seedlings" are fundamental. Utilizing long-tail keywords like "best grow lights for starting seeds" or "DIY seed starting trays" can attract highly targeted traffic. Including variations and synonyms, such as "germinating seeds," "young plants," and "transplant shock," further enhances search engine visibility. The structure of the article, with clear headings and subheadings (e.g., "Essential Materials for Seed Starting," "Sowing Your Seeds: A Step-by-Step Process"), improves readability for both users and search engines. Internal linking to other relevant gardening articles on your site, if applicable, and external linking to reputable horticultural resources can also boost SEO. Regularly updating content with current gardening trends and seasonal advice will keep it fresh and relevant in search engine results. The inclusion of practical, actionable advice provides intrinsic value, encouraging users to spend more time on the page and share the content. This engagement is a significant factor in SEO performance.
