
DIY Mini Liquor Bottle Earrings: A Comprehensive Guide to Crafting Unique Accessories
Creating your own DIY mini liquor bottle earrings is an engaging and rewarding craft project, offering a unique way to express personal style and upcycle miniature spirits into fashionable accessories. This detailed guide will walk you through every step, from selecting your miniature bottles to the final assembly, ensuring you can craft eye-catching earrings that are both conversation starters and personalized statements. The process involves careful preparation, precise execution, and a touch of creativity, making it accessible to crafters of all skill levels. Whether you’re looking for a fun weekend project, a unique gift idea, or a way to personalize your look, these DIY earrings are an excellent choice.
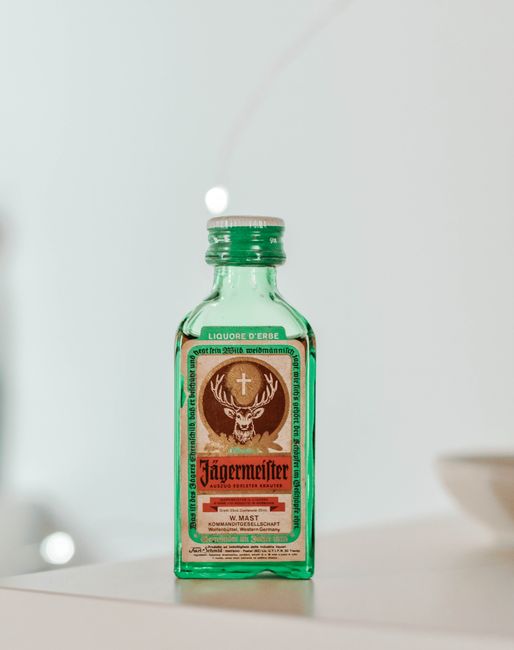
I. Selecting Your Miniature Liquor Bottles: The Foundation of Your Earrings
The foundation of your DIY mini liquor bottle earrings lies in the selection of the miniature bottles themselves. This choice dictates the overall aesthetic, color palette, and theme of your finished pieces. Consider the following factors to make an informed decision:
-
Bottle Size and Shape: Miniature liquor bottles come in a surprising variety of sizes and shapes. Common sizes range from 50ml to 100ml. Taller, slimmer bottles might lend themselves to a more elegant earring design, while shorter, wider bottles could offer a bolder statement. Look for bottles with interesting embossed details, unique cap shapes, or distinct glass colors. The internal liquid color also plays a significant role; vibrant liqueurs or darker spirits can create striking visual effects.
-
Bottle Contents (or Lack Thereof): You can choose to use bottles that still contain their original liquid, or opt for empty bottles and fill them with your own creative materials.
- Bottles with Original Liquid: This offers instant color and visual appeal. Ensure the liquid is sealed securely. If the bottle appears to have leaked, it’s best to empty and clean it thoroughly.
- Empty Bottles: This provides maximum creative freedom. You can fill them with colored water, glitter, tiny beads, sand, or even miniature printed labels. If opting for liquid, ensure it’s non-toxic and won’t evaporate quickly. For glitter or beads, a strong adhesive to seal the opening is crucial.
-
Bottle Material and Durability: Most miniature liquor bottles are made of glass. While visually appealing, glass can be fragile. Consider the weight of the bottle and how it will hang from your ear. If you’re concerned about breakage, look for plastic miniatures, though these are less common and may not offer the same aesthetic. Ensure the bottle’s integrity – no cracks or significant chips.
-
Theme and Personalization: Think about the occasion or the person for whom you are making the earrings. Are you aiming for a fun, quirky vibe? A sophisticated look? A specific color scheme? Matching the liquor type to a theme can be a creative touch (e.g., tropical-themed earrings with miniature rum bottles).
-
Acquisition of Miniatures: Miniature liquor bottles can be purchased at liquor stores, duty-free shops, and online retailers. Sometimes, they are available as gift sets or as individual purchases. For emptying and refilling, consider purchasing empties if available, or carefully draining existing miniatures.
II. Essential Tools and Materials for Crafting Mini Liquor Bottle Earrings
To successfully craft your DIY mini liquor bottle earrings, gathering the right tools and materials beforehand is paramount. This ensures a smooth and efficient crafting process.
- Miniature Liquor Bottles: As discussed in Section I.
- Jewelry Pliers: Essential for bending wire, opening and closing jump rings, and manipulating small jewelry components. You’ll likely need at least two pairs:
- Round-nose pliers: For creating loops and curves in wire.
- Chain-nose or flat-nose pliers: For gripping, bending, and securing components.
- Drill and Drill Bits: A small, precision drill is crucial for creating holes in the bottle caps for attaching earring hooks. Carbide or diamond-tipped drill bits are recommended for glass, though a steady hand with a standard bit can work for plastic caps. Start with a very small bit and gradually increase size if needed.
- Eye Screws or Head Pins: To create a secure point of attachment on the bottle cap. Small eye screws are ideal for screwing into the cap, while head pins can be secured with adhesive.
- Jump Rings: Small metal rings used to connect different jewelry components. You’ll need various sizes, typically 4mm, 6mm, and 8mm.
- Earring Hooks (or Posts): The part that goes through the earlobe. Fishhook earrings are common, but you can also use stud earring posts for a different look. Ensure they are made of hypoallergenic material like surgical stainless steel or sterling silver if you have sensitive ears.
- Strong Adhesive: For securing head pins or any decorative elements if not using eye screws. E6000, Gem-Tac, or a strong super glue formulated for glass and metal are good options.
- Clear Sealant (Optional): If filling bottles with liquid or glitter, a clear sealant for the cap can prevent leaks.
- Decorative Elements (Optional): Tiny charms, beads, rhinestones, or miniature printed labels can be added for extra flair.
- Protective Eyewear: Essential when drilling glass or working with small, potentially sharp components.
- Gloves (Optional): To protect your hands from glue and sharp edges.
- Sandpaper (Fine Grit): To smooth any rough edges after drilling.
- Rubbing Alcohol and Paper Towels: For cleaning bottles and surfaces.
- Protective Surface: A cutting mat or old newspaper to protect your work area from glue and potential spills.
III. Preparing the Miniature Liquor Bottles: The Crucial First Steps
Proper preparation of your miniature liquor bottles is key to ensuring durable, aesthetically pleasing, and safe earrings. This stage involves cleaning, draining (if necessary), and creating attachment points.
-
Cleaning the Bottles:
- Outer Surface: Gently wash the exterior of the bottles with warm, soapy water and a soft cloth. Rinse thoroughly and dry completely with a lint-free towel to prevent water spots. For stubborn residue, a bit of rubbing alcohol can be effective.
- Inner Surface (if empty or refilling): If the bottles are empty or you intend to refill them, carefully rinse the interior with warm water. For persistent odors or residue, a solution of rice and rubbing alcohol, or baking soda and water, can be swirled around inside to scrub the interior. Rinse multiple times until completely clean and allow to air dry upside down for at least 24 hours to ensure no moisture remains.
-
Draining and Sealing (if applicable):
- For bottles with original liquid: Ensure the cap is tightly sealed. If the seal seems loose, consider adding a small amount of strong, waterproof adhesive around the inside of the cap before screwing it on tightly. Allow the adhesive to cure completely according to the manufacturer’s instructions.
- For empty bottles to be refilled:
- Filling with Liquid: Carefully fill the bottle with your chosen liquid (colored water, etc.). Avoid overfilling.
- Filling with Solid Elements: Add glitter, beads, or other small decorative items.
- Sealing: Once filled, it’s crucial to seal the opening permanently. Apply a generous amount of strong, waterproof adhesive (like E6000) to the inside rim of the bottle opening before screwing on the cap tightly. Alternatively, if you’ve filled with solids, you can use a strong glue to seal the cap directly without screwing it on. For an extra layer of security, after the initial seal has cured, you can apply a bead of clear sealant around the outside edge of the cap.
-
Creating Attachment Points: This is where you’ll connect the bottle to the earring hardware. There are two primary methods:
-
Method 1: Drilling the Cap (Recommended for Metal Caps)
- Safety First: Wear protective eyewear.
- Positioning: Place the bottle cap on a stable, non-slip surface.
- Drilling: Using a very small drill bit (e.g., 1/16 inch), carefully drill a hole directly through the center of the cap. Start slowly and apply gentle pressure. If the cap is plastic, this will be easier. For metal caps, you might need a drill bit specifically designed for metal. If you are unsure about drilling metal, consider the head pin method.
- Smooth Edges: Once the hole is drilled, use a small piece of fine-grit sandpaper to gently smooth any rough edges around the hole, both inside and out, to prevent snagging or cuts.
-
Method 2: Using Head Pins and Adhesive (Good for All Cap Types, Especially Plastic or When Drilling is Difficult)
- Prepare the Head Pin: If using a standard head pin, you may need to bend a small loop at one end to help it adhere better.
- Adhesive Application: Apply a generous amount of strong adhesive (E6000 is ideal) to the top of the bottle cap where you want the attachment point.
- Inserting the Head Pin: Firmly press the head pin into the adhesive, ensuring the flat head or loop is embedded well. Position it so it extends upwards, ready for attaching jump rings.
- Curing: Allow the adhesive to cure completely according to the manufacturer’s instructions (often 24-72 hours for maximum strength). This is critical for durability.
-
-
Adding Eye Screws (Alternative to Drilling): If your bottle caps have a suitable material (e.g., cork or a softer plastic), you can directly screw in a small eye screw. Gently twist the eye screw into the cap until it’s firmly seated, ensuring it pierces through to create an attachment point. Be careful not to over-tighten and crack the cap.
IV. Assembling Your Mini Liquor Bottle Earrings: Bringing It All Together
With your miniature bottles prepared and attachment points created, the assembly stage is where your DIY earrings truly come to life. This involves connecting the bottle to the earring hook using jewelry findings.
-
Attaching the Eye Screw or Head Pin:
- If you drilled a hole: Insert the loop of a small eye screw through the drilled hole in the cap. If the hole is slightly too large, you can add a tiny dab of strong glue around the eye screw where it meets the cap for added security. Alternatively, if you used head pins and drilled, you can thread the head pin through the hole and secure it from the inside of the cap with glue or a tiny stopper.
- If you used adhesive and a head pin: Ensure the head pin is securely adhered and cured.
-
Adding the First Jump Ring: Open a medium-sized jump ring (around 6mm) using your chain-nose pliers. Hook it onto the loop of the eye screw or head pin that is attached to your bottle cap. Close the jump ring securely.
-
Connecting to the Earring Hook:
- Open a new jump ring: Use a slightly larger jump ring (around 8mm) if you plan to add any decorative elements or for more movement. For a simpler connection, a 6mm jump ring is sufficient.
- Hook onto the Earring Hook: Open the new jump ring and hook it onto the loop of your earring hook.
- Connect to the Bottle: With the earring hook jump ring open, attach it to the first jump ring that is already connected to your bottle cap.
- Close the Jump Ring: Carefully close both jump rings securely using your pliers. Ensure there are no gaps, as this can lead to the earring coming apart.
-
Adding Decorative Elements (Optional): This is where you can truly personalize your earrings.
- Charms: Attach small charms (e.g., tiny keys, alcohol-related symbols, initials) to the jump ring connecting the bottle to the earring hook, or even directly to the bottle’s eye screw/head pin loop before attaching the earring hook.
- Beads: String beads onto a head pin and attach it below the bottle, or incorporate them into the jump ring chain.
- Rhinestones: Glue small rhinestones around the bottle cap for a touch of sparkle.
- Miniature Labels: If you’ve used empty bottles, you can print tiny labels that mimic real liquor brands (ensure you respect copyright if selling) and adhere them to the bottle.
-
Final Inspection: Once assembled, gently hold the earrings by the hook and let them dangle. Check for any loose components, ensure the bottles hang correctly, and that the earring hooks are oriented properly for comfortable wear.
V. Tips for Success and Troubleshooting Common Issues
Even with careful planning, some challenges may arise during the DIY process. Here are some tips for ensuring a smooth crafting experience and troubleshooting common issues.
- Handling Glass: Always work on a protected surface and be mindful of the weight and fragility of glass bottles. If a bottle cracks or breaks, it’s best to discard it and start with a new one.
- Adhesive Strength: The strength of your adhesive is crucial for the longevity of your earrings. Always use a strong, waterproof adhesive specifically designed for glass and metal. Allow adequate curing time – this is non-negotiable for durable results. Rushing this step is the most common cause of earring failure.
- Drilling Small Holes: Patience is key when drilling. Start with a small bit, apply gentle, consistent pressure, and don’t force the drill. If the material is resistant, consider using a drill lubricant or a few drops of water to keep the bit cool and prevent breakage.
- Uneven Hanging: If your bottles hang unevenly, check that the attachment point on the cap is directly centered. Also, ensure that the jump rings are aligned and not twisted.
- Weight of Earrings: Miniature liquor bottles can be heavier than typical earrings. Be mindful of this when selecting bottles, especially if you have sensitive earlobes. Consider adding a clear earlobe support patch if you find them too heavy for extended wear.
- Color Fading: If using bottles with colored liquid that is exposed to direct sunlight for extended periods, the color may fade over time. Store your earrings away from direct sunlight.
- Leakage: If you’ve refilled bottles, ensure the seal is absolutely airtight. A secondary sealant around the cap after the initial seal has cured can provide extra protection.
- Hypoallergenic Options: For individuals with metal sensitivities, always opt for hypoallergenic earring hooks made from surgical stainless steel, sterling silver, or titanium.
- Customization Ideas:
- Themed Sets: Create sets based on specific types of liquor, colors, or even holidays.
- Personalized Gifts: Fill empty bottles with a tiny scroll of a personal message or a favorite scent.
- Glitter Bomb Effect: Fill bottles with fine glitter and a small amount of clear mineral oil for a mesmerizing, shimmering effect.
- "Empty" Look: For a more subtle look, you can use clear bottles with just a tiny amount of colored sand or beads inside.
VI. Styling Your DIY Mini Liquor Bottle Earrings: Making a Statement
Once your DIY mini liquor bottle earrings are complete, the fun truly begins: styling them. These unique accessories are designed to be conversation starters and add a distinctive flair to any outfit.
- Casual Chic: Pair your earrings with a simple t-shirt, jeans, and a denim jacket for an effortlessly cool, urban vibe. They add an unexpected pop of personality to an otherwise straightforward ensemble.
- Night Out Glam: Dress up your earrings by pairing them with a little black dress or a sophisticated top. The sparkle and unique shape can elevate a formal look, making you stand out from the crowd. Consider bolder, more ornate bottle choices for evening wear.
- Festival Fun: These earrings are perfect for music festivals, concerts, or themed parties. Their playful nature and eye-catching design complement vibrant, eclectic outfits.
- Themed Events: Attending a party with a specific theme? Your mini liquor bottle earrings can be the perfect thematic accessory. Think retro parties, costume events, or even themed bar crawls.
- Conversation Starters: Be prepared for compliments and questions! These earrings are a fantastic way to initiate conversations and share your creative endeavors. They often spark curiosity about the specific liquor represented or the crafting process.
- Accessorizing with Coordinated Pieces: While the earrings are the focal point, you can subtly coordinate with other accessories. Consider a bracelet with a similar metallic finish to your earring findings, or a scarf with colors that complement the liquid in your bottles.
- Hair and Makeup: Consider how your hairstyle and makeup can enhance the earrings. Updos can showcase them fully, while a bold lip color can complement a vibrant bottle.
VII. The SEO-Optimized Conclusion: Embrace Your Crafty Side
DIY mini liquor bottle earrings offer a unique avenue for personal expression and creative upcycling. This comprehensive guide has provided a detailed roadmap, from selecting your miniature bottles and gathering essential tools to meticulously preparing and assembling these distinctive accessories. By following these steps, you can confidently craft earrings that reflect your individual style and become cherished additions to your jewelry collection. The process is not only about creating beautiful objects but also about the satisfaction of a hands-on project, the joy of personalization, and the potential to transform everyday items into wearable art. Whether you are a seasoned crafter or a curious beginner, diving into the world of DIY jewelry with mini liquor bottles promises a rewarding and stylish experience. Explore different bottle types, experiment with decorative elements, and embrace the fun of wearing your creations with pride. For individuals searching for unique jewelry ideas, DIY projects, upcycling crafts, personalized accessories, or quirky fashion statements, "DIY Mini Liquor Bottle Earrings" provides a wealth of creative potential and a satisfying crafting journey.
Keywords: DIY mini liquor bottle earrings, craft jewelry, upcycling crafts, personalized earrings, unique accessories, miniature bottle jewelry, handmade earrings, liquor bottle crafts, creative jewelry, step-by-step guide, jewelry making, bottle cap earrings, head pin jewelry, eye screw jewelry, craft supplies, fashion accessories, statement earrings, quirky jewelry, gift ideas, beginner crafts, advanced crafts.
