
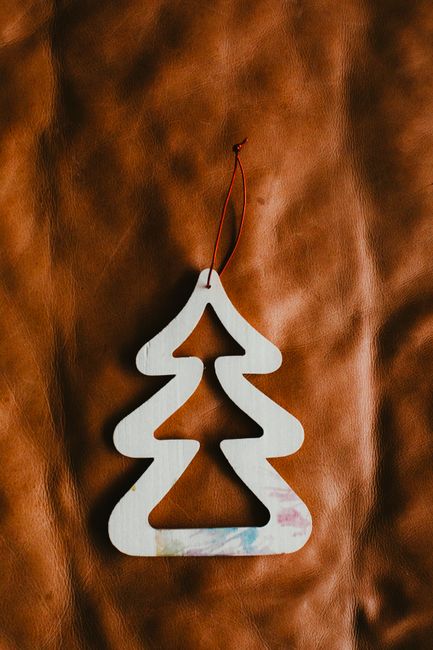
Easy Stitched Leather Ornaments: A Beginner’s Guide to Creative Crafting
Stitched leather ornaments offer a sophisticated yet accessible crafting avenue, transforming simple leather scraps into personalized decorative pieces. The inherent beauty of leather, combined with the tactile satisfaction of hand-stitching, creates ornaments that are both visually appealing and imbued with a sense of handmade charm. These projects are remarkably versatile, lending themselves to seasonal decorations, personalized gifts, and even embellishments for bags or keychains. The ease of execution, coupled with the readily available materials, makes stitched leather ornaments an ideal entry point for crafters of all skill levels. The process involves minimal specialized tools, and the learning curve is gentle, allowing for rapid progression from basic shapes to more intricate designs. The durability of leather ensures that these ornaments can be cherished and displayed for years to come, accumulating sentimental value with each passing season. This article will guide you through the fundamental techniques, material selection, and design considerations necessary to create beautiful and durable stitched leather ornaments, emphasizing SEO-friendly keywords for discoverability.
Understanding the Basics of Stitched Leather Ornaments
The core of creating stitched leather ornaments lies in the interplay of leather, needle, and thread. The process typically involves cutting out shapes from leather, preparing them for stitching, and then executing a chosen stitch pattern. For beginners, the simplest shapes like circles, squares, hearts, or stars are excellent starting points. These basic forms allow for a focus on mastering the stitching technique without the added complexity of intricate cutting. Leather, unlike fabric, does not fray, which simplifies the edge finishing. However, it requires a slightly different approach to punching holes for stitching. Awls or specialized leather punches are used to create pilot holes, guiding the needle and ensuring consistent stitch spacing.
The choice of thread is also crucial. Waxed linen thread is a popular choice for leather crafting due to its strength, durability, and ability to hold its shape. It also adds a subtle aesthetic appeal. Alternatively, embroidery floss can be used for a finer stitch, though it may not be as robust for heavier leather. The needle, typically a leather stitching needle, features a triangular or diamond-shaped tip designed to pierce leather easily.
Materials and Tools for Stitched Leather Ornaments
To embark on your journey into creating stitched leather ornaments, a foundational set of materials and tools is essential. These are generally affordable and readily available from craft stores, online suppliers, or even repurposed from existing leather goods.
- Leather: The primary material, leather, comes in various types and thicknesses. For ornaments, thinner to medium-weight leathers (1-3mm thick) are ideal. Vegetable-tanned leather is highly recommended for its ability to hold its shape and its suitability for tooling or stamping, should you wish to add further embellishment. Chrome-tanned leather is also an option, often more readily available in vibrant colors, but it can be more challenging to punch holes through without specialized tools. Scrap leather bundles are an excellent and economical way to experiment with different colors and textures. Look for smooth finishes or subtle textures that complement the stitching.
- Cutting Tools: A sharp craft knife or rotary cutter is indispensable for precise leather cutting. A metal ruler or quilting ruler will ensure straight lines, while a self-healing cutting mat protects your work surface. For curved shapes, a template or freehand drawing with a pencil (which can be easily wiped off) will be necessary.
- Hole Punching Tools: To create clean holes for stitching, you’ll need either a stitching awl or a rotary punch. An awl is a pointed tool that manually punches holes. A rotary punch offers interchangeable discs for different hole sizes, providing more consistent spacing. A hammer will be needed to strike the awl or punch.
- Stitching Supplies:
- Needles: Leather stitching needles, distinguished by their sharp, pointed tips (often triangular or diamond-shaped), are designed to pierce leather effectively.
- Thread: Waxed linen thread is the go-to for its strength, durability, and ease of handling. It’s available in a wide array of colors. Alternatively, strong embroidery floss or artificial sinew can be used.
- Stitching Pony or Clamp (Optional but Recommended): This tool holds the leather pieces together while you stitch, freeing up your hands and ensuring consistent tension. While not strictly necessary for very small ornaments, it significantly improves the stitching experience.
- Marking Tools: A chalk pencil or a silver gel pen can be used to mark stitch lines or patterns on the leather. These marks are generally easy to remove.
- Finishing Supplies (Optional):
- Edge Beveler: To round off the edges of the leather for a smoother, more professional finish.
- Burnisher: A wooden or bone tool used to smooth and polish the edges of vegetable-tanned leather.
- Leather Dye or Paint: For adding color or custom designs.
- Leather Sealer or Conditioner: To protect and enhance the leather’s appearance.
- Hanging Mechanism: Depending on the intended use, you’ll need a way to hang your ornament. This could be a ribbon, a leather thong, twine, or a small metal eyelet.
Basic Stitching Techniques for Leather Ornaments
Mastering a few fundamental stitching techniques will unlock a world of creative possibilities for your leather ornaments. The most common and beginner-friendly stitch for leather is the saddle stitch.
The Saddle Stitch: This is a very strong and durable stitch, traditionally used for leather goods. It involves using two needles threaded onto the same piece of thread, working from opposite directions through each punched hole.
- Prepare the Leather: Cut your leather shapes and punch your stitching holes evenly spaced along the edges. For two pieces of leather to be joined, align them precisely and punch through both layers simultaneously.
- Thread the Needles: Cut a length of waxed thread, ensuring it’s about 3-4 times the length of the seam you intend to stitch. Thread one needle onto each end of the thread.
- Start Stitching: Begin at one end of your seam. Pass one needle through the first hole. Then, pass the second needle through the same hole, from the opposite direction. Pull both needles evenly until the thread is taut, leaving a short tail (about an inch) on one side.
- Continue the Stitch: For the next hole, pass one needle through from one side. Then, pass the second needle through the same hole from the opposite side, crossing over the thread that is already there. Pull both needles taut, ensuring the stitches are snug but not so tight that they distort the leather.
- Maintain Even Tension: Consistent tension is key to a neat and professional-looking saddle stitch. Aim for stitches that are neither too loose nor too tight.
- Finishing the Stitch: When you reach the end of your seam, backstitch over the last 2-3 stitches by passing the needles through the previous holes in reverse. Trim the excess thread close to the leather. For added security, you can gently melt the thread ends with a lighter if using synthetic thread, or use a tiny dab of leather cement.
Other Useful Stitches:
- Running Stitch: A simpler stitch where a single needle is passed through the holes, creating a dashed line. While not as strong as the saddle stitch, it can be effective for decorative purposes on lighter leather or for joining two pieces where extreme durability isn’t paramount.
- Whipstitch: This stitch encircles the edge of the leather, wrapping the thread around the edge and through the holes. It’s a good option for single-layer ornaments where you want to reinforce and decorate the edge simultaneously.
Designing Your Stitched Leather Ornaments
The beauty of creating your own stitched leather ornaments lies in the limitless design potential. You are not confined by mass-produced aesthetics.
Shape and Form:
- Geometric Shapes: Circles, squares, hexagons, and diamonds are straightforward to cut and stitch, offering a clean, modern look. Layering different shapes or colors of leather can add depth and visual interest.
- Nature-Inspired Shapes: Leaves, flowers, stars, moons, and snowflakes are classic choices that lend themselves well to ornament design. Consider the intricate details you can achieve with precise cutting and stitching.
- Thematic Shapes: For holidays, think of Christmas trees, gingerbread men, pumpkins, Easter eggs, or hearts for Valentine’s Day.
- Monograms and Initials: Cut out individual letters or monograms for personalized ornaments. Stitching around the edges of each letter creates a striking effect.
- Layered Designs: Cut out multiple shapes and layer them on top of each other, stitching them together. This allows for complex patterns and color combinations. For instance, a larger leaf shape with a smaller, contrasting leaf stitched onto it.
- Appliqué: Stitch a smaller leather shape onto a larger leather background. This creates a raised design element.
Embellishment and Decoration:
- Contrast Stitching: Use a thread color that strongly contrasts with the leather color to make your stitching a prominent design feature.
- Perforation and Cutouts: Before stitching, you can create small cutouts or perforations within the leather shape to add delicate patterns. This is best done with a sharp craft knife or a specialized leather punch.
- Tooling and Stamping: Vegetable-tanned leather can be tooled or stamped with designs before assembly. This adds intricate patterns and textures.
- Painting and Dyeing: Apply leather dyes or paints to create custom colors and intricate designs. Allow them to dry thoroughly before stitching.
- Adding Charms or Beads: Integrate small metal charms, beads, or even small leather tassels into your stitching as you work.
- Layered Textures: Combine different leather textures – smooth, pebbled, or suede – within a single ornament for added visual depth.
Putting It All Together: Step-by-Step Ornament Creation
Let’s walk through the creation of a simple, yet elegant, stitched leather heart ornament. This process can be adapted for countless other shapes.
Project: Simple Stitched Leather Heart Ornament
Materials:
- Two pieces of contrasting or complementary leather (e.g., red and white)
- Heart-shaped template (can be hand-drawn or printed)
- Sharp craft knife or rotary cutter
- Cutting mat
- Leather stitching needles
- Waxed linen thread (contrasting color)
- Stitching awl or rotary punch
- Hammer
- Scissors
- Ribbon or leather thong for hanging
Instructions:
- Prepare Your Template: Print or draw a heart shape onto sturdy paper or cardstock. Ensure it’s a size suitable for an ornament (e.g., 3-4 inches wide).
- Trace and Cut the Leather: Place the heart template onto one piece of leather and trace around it with a silver gel pen or chalk pencil. Repeat with the second piece of leather, ensuring the grain direction matches if applicable. Carefully cut out both heart shapes using your craft knife and ruler for straight edges, or freehand for a softer line.
- Align and Mark Stitching Holes: Place the two leather heart shapes perfectly on top of each other. Decide on your stitching margin – typically 1/8 to 1/4 inch from the edge. Mark this margin line around the entire perimeter of the heart using your marking tool. Then, mark the locations for your stitching holes along this line, spacing them evenly (e.g., every 1/4 inch).
- Punch the Stitching Holes: Using your stitching awl and hammer, carefully punch holes through both layers of leather at each marked spot. Ensure the awl pierces straight through both pieces. If using a rotary punch, set the desired spacing and punch through both layers.
- Prepare for Stitching: Cut a length of waxed linen thread approximately 3-4 times the perimeter of your heart. Thread one needle onto each end of the thread.
- Begin the Saddle Stitch: Start at the top point of the heart or the bottom point, whichever feels most natural. Pass one needle through the first hole. Then, pass the second needle through the same hole from the opposite direction. Pull both needles taut until a short tail (about an inch) is left.
- Continue Stitching: Work your way around the heart, using the saddle stitch technique described earlier. Maintain even tension throughout. For the curves of the heart, you may need to slightly adjust your needle angle.
- Incorporate Hanging Loop: Before you reach the last few holes, decide where you want your hanging loop to be (often at the top point). Fold a short piece of ribbon or leather thong to create a loop. Insert the ends of the loop into the last few unstitched holes, ensuring they are securely positioned. Continue stitching, encasing the loop ends within your seam.
- Finish the Stitching: When you’ve completed the entire heart, backstitch over the last 2-3 stitches for security. Trim any excess thread close to the leather. If using synthetic thread, you can carefully melt the ends with a lighter.
- Finishing Touches (Optional): If desired, use an edge beveler to slightly round off the edges of the ornament. You can also use a burnisher on vegetable-tanned leather for a smoother edge.
Tips for Success and Advanced Techniques
- Practice on Scraps: Before working on your final ornament pieces, practice your stitching technique on scrap leather to get a feel for the tension and needle control.
- Thread Length: Always err on the side of having too much thread. Running out mid-stitch is frustrating.
- Consistent Spacing: Use a ruler and marking tool to ensure your stitch holes are evenly spaced. This significantly contributes to a polished look.
- Edge Finishing: For a professional look, consider using an edge beveler and burnisher on vegetable-tanned leather. This smooths and polishes the raw edge.
- Water and Leather: Be cautious with water around leather, especially chrome-tanned leather, as it can cause staining or discoloration.
- Layering for Depth: Don’t be afraid to layer multiple pieces of leather to create unique textures and designs.
- Embellish Before Stitching: If you plan to paint, stamp, or tool your leather, do so before you start stitching. It’s much easier to work on flat pieces.
- Create Templates: For repeatable designs, creating durable templates from cardstock or thin plastic will save you time and ensure accuracy.
- Invest in Quality Tools: While you can start with basic tools, investing in sharper knives and well-made punches will make the process more enjoyable and result in a higher quality finish.
SEO Considerations for Stitched Leather Ornaments
To ensure your content about stitched leather ornaments reaches a wider audience, incorporating relevant keywords is crucial. Think about what potential crafters would search for when looking for projects and inspiration.
Primary Keywords:
- Stitched leather ornaments
- Easy leather ornaments
- DIY leather ornaments
- Handmade leather ornaments
- Leather ornament patterns
- Leather crafting for beginners
- Simple leather crafts
Secondary Keywords:
- Leather stitching techniques
- How to stitch leather
- Leather craft supplies
- Christmas leather ornaments
- Holiday leather decorations
- Personalized leather gifts
- Leather tooling
- Leather stamping
- Vegetable-tanned leather projects
- Scrap leather crafts
- Home decor crafts
Long-Tail Keywords:
- How to make easy stitched leather heart ornaments
- Best beginner leather ornament craft ideas
- Simple leather ornaments for Christmas tree
- DIY personalized leather ornaments for gifts
- Learn saddle stitching for leather ornaments
Content Optimization Strategies:
- Keyword Integration: Naturally weave these keywords into headings, subheadings, and the body of your article. Avoid keyword stuffing, which can harm your SEO.
- Descriptive Titles and Meta Descriptions: Craft compelling titles and meta descriptions that include primary keywords and entice users to click.
- Image Alt Text: Use descriptive alt text for all images, incorporating relevant keywords where appropriate.
- Internal and External Linking: Link to other relevant articles on your site (e.g., a guide to leather types) and to reputable external resources.
- User Experience: Ensure your article is well-structured, easy to read, and provides valuable information. Mobile-friendliness is also a key SEO factor.
- Content Depth and Quality: Comprehensive articles like this one, offering detailed instructions and a wide range of ideas, tend to rank better in search results.
By focusing on these SEO strategies, you can significantly increase the visibility of your stitched leather ornament content, attracting crafters looking for inspiration and guidance. The enduring appeal of handmade items, combined with the inherent beauty of leather, ensures that stitched leather ornaments will remain a popular and rewarding craft for years to come.

