DIY Half Moon Tassel Earrings: A Comprehensive Guide for Craft Enthusiasts
Crafting your own jewelry offers a unique avenue for personal expression and can be a remarkably rewarding hobby. Among the vast array of DIY jewelry projects, half moon tassel earrings stand out for their chic aesthetic and relatively simple construction. These earrings combine the elegant curve of a half moon shape with the playful sway of tassels, creating a statement piece that can be customized to suit any style. This comprehensive guide will walk you through the entire process of creating your own half moon tassel earrings, covering materials, step-by-step instructions, design variations, and tips for achieving a professional finish. Whether you’re a seasoned crafter or a beginner looking for a new project, this guide will equip you with the knowledge and confidence to produce beautiful, handmade earrings.
The appeal of DIY half moon tassel earrings lies in their versatility and adaptability. The half moon component can be fashioned from various materials, from metal blanks to polymer clay or even laser-cut wood. The tassels themselves offer an even wider spectrum of customization, with options ranging from embroidery floss and yarn to leather strips and silk thread. This allows for an incredible degree of personalization, enabling you to match your earrings to specific outfits, occasions, or even your personal mood. Beyond aesthetics, creating your own jewelry can be an economical choice, allowing you to acquire stylish accessories at a fraction of the cost of retail prices. Furthermore, it’s an excellent way to upcycle materials and practice sustainable crafting.
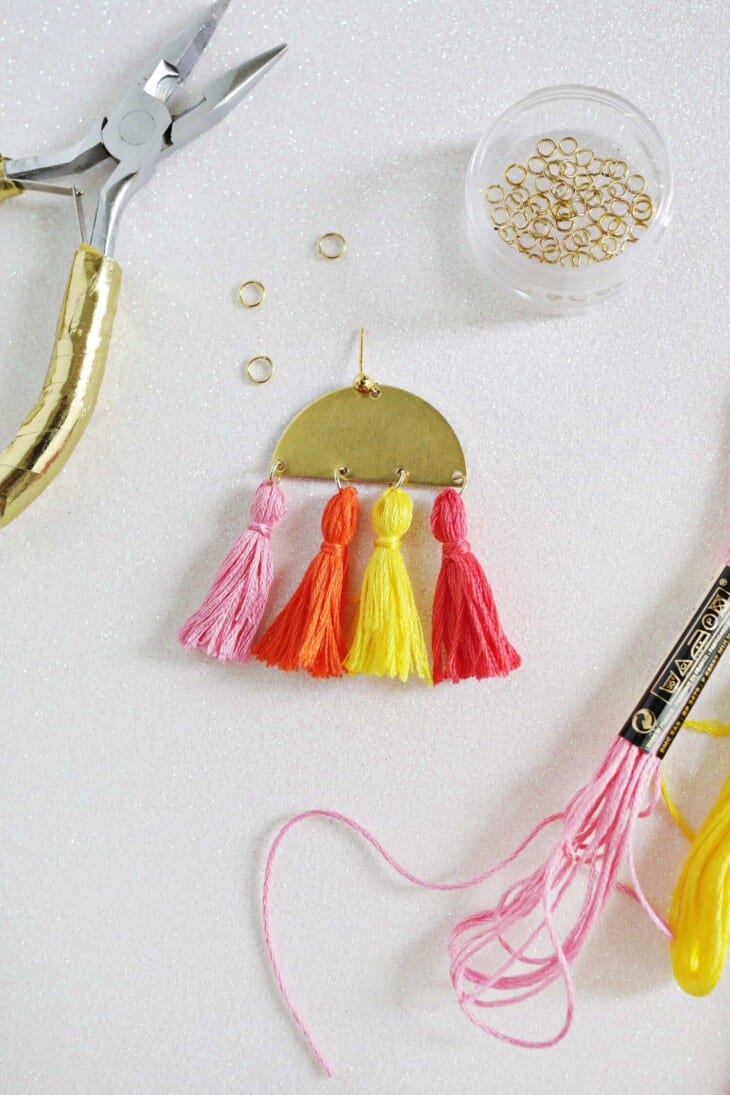
To embark on your DIY half moon tassel earring journey, a well-prepared set of materials is essential. The core components will include:
- Half Moon Components: These form the foundational shape of your earring. Options include:
- Metal Blanks: Available in various metals like brass, sterling silver, or plated alloys. Look for blanks with pre-drilled holes for easy attachment. You can find these at jewelry supply stores or online craft retailers.
- Polymer Clay: This versatile medium allows you to sculpt and bake your own half moon shapes. You’ll need polymer clay in your desired colors, a rolling pin or pasta machine for even thickness, and a sharp craft knife or cookie cutters for shaping.
- Laser-Cut Wood or Acrylic: These can be purchased online from crafters or specialized shops. They often come with pre-made holes.
- Beads: Larger, flat beads can also be used as a base for a half moon shape, especially if they have side-drilled holes.
- Tassel Material: This is where your creativity can truly shine.
- Embroidery Floss: A classic and readily available choice, offering a vast color palette.
- Craft Yarn: Provides a softer, chunkier texture.
- Silk Thread: Offers a luxurious sheen and drape.
- Leather or Faux Leather Strips: Creates a more bohemian or edgy look.
- Thin Fabric Strips: Can be cut from old clothing or scrap fabric.
- Earring Hooks or Posts: Choose between standard fishhook ear wires for dangling earrings or stud posts if you prefer a more secure fit. Ensure they are made from hypoallergenic materials like sterling silver or surgical stainless steel if you have sensitive ears.
- Jump Rings: Small metal rings used to connect different components. You’ll need various sizes, typically 4-6mm.
- Pliers: Crucial for manipulating jump rings and securing components. You’ll ideally need two pairs of flat-nose or round-nose pliers.
- Scissors: Sharp scissors are vital for clean tassel cuts.
- Optional Embellishments: Beads, charms, rhinestones, glitter, or fabric paint can be used to further personalize your earrings.
- Adhesive (if using polymer clay or certain embellishments): E6000 or a strong jewelry adhesive.
- Clear Sealer (for polymer clay): To protect your finished clay design.
- Crimping Beads or Tubes (optional): For a more secure tassel attachment if you are not using a loop method.
Let’s begin with the step-by-step instructions for creating your half moon tassel earrings. We’ll cover a general approach that can be adapted based on your chosen half moon material.
Step 1: Prepare Your Half Moon Components
- Metal Blanks: If your blanks don’t have pre-drilled holes, you’ll need a small drill bit and a drill press or hand drill to create them. Place the blank on a firm surface and carefully drill a hole near the top curve of the half moon. Ensure the hole is large enough for your jump ring.
- Polymer Clay:
- Condition your polymer clay until it’s pliable.
- Roll out the clay to your desired thickness (typically 2-3mm) using a rolling pin or pasta machine.
- Use a half moon cookie cutter or a sharp craft knife to cut out your shapes.
- Before baking, use a skewer or toothpick to create a hole at the top of each half moon, ensuring it’s large enough for a jump ring.
- Follow the manufacturer’s instructions for baking your polymer clay. Allow to cool completely.
- Once cooled, you can sand any rough edges with fine-grit sandpaper. Apply a clear sealer if desired for added protection and shine.
- Laser-Cut Materials: If your pre-made components have holes, you can proceed directly. If not, a drill may be necessary.
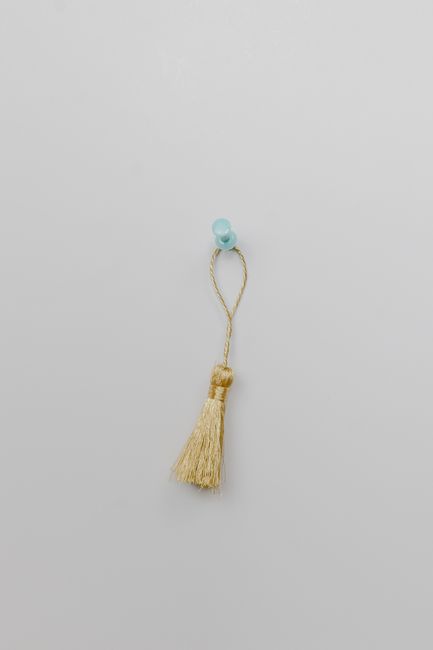
Step 2: Create Your Tassels
The method for creating tassels can vary slightly depending on your chosen material. Here’s a common approach using embroidery floss:
- Determine Tassel Length: Decide on the desired length of your tassels. This will influence how much material you need.
- Wrap Your Material: For embroidery floss, take a generous length of floss (around 6-8 inches). You can use a piece of cardboard, a book, or even your fingers to wrap the floss around. Wrap it repeatedly until you have a thick bundle. The more wraps, the fuller your tassel will be. For yarn or fabric strips, you’ll use similar wrapping techniques.
- Cut the Loops: Carefully slide a sharp pair of scissors through the loops at one end of your wrapped material. This will create your tassel strands.
- Secure the Top: Take a separate piece of floss or thread (about 6 inches long). Fold it in half to create a loop. Place this loop around the top of your tassel bundle, just below where you cut the loops. Wrap the ends of this securing thread tightly around the top of the tassel several times, creating a neat head. Tie a knot securely to hold everything in place. Trim any excess from the securing thread.
- Trim to Even Length: Once the top is secured, lay your tassel flat and trim all the strands to an even length. You can leave them as is or create a pointed or angled bottom for a different look.
Step 3: Assemble the Earring Components
This is where your pliers become indispensable.
- Attach Tassel to Half Moon:
- Option 1 (Loop Through Hole): If the top of your tassel has a loop (from the securing thread), thread a jump ring through this loop. Then, open the jump ring using your pliers and attach it to the pre-drilled hole on your half moon component. Close the jump ring securely.
- Option 2 (Direct Attachment): If you don’t have a dedicated loop on your tassel head, you can thread a jump ring through some of the strands at the very top of the tassel. Then, attach this jump ring to the half moon as described above.
- Option 3 (Crimping): For a very secure attachment, you can thread the top of your tassel through a small jump ring or directly through the hole in the half moon. Then, thread a crimp bead onto the tassel strands and crimp it securely with your pliers. This will hold the tassel in place. You can then use a jump ring to connect the half moon to the earring hook.
- Attach Earring Hook to Half Moon: Open a jump ring and thread it through the top hole of the half moon component. Then, attach this jump ring to the loop of your earring hook or post. Close the jump ring securely.
Step 4: Add Embellishments (Optional)
This is your chance to make your earrings truly unique.
- Beads: You can thread small beads onto the tassel strands before securing the top, or add them as dangles from the bottom of the half moon using additional jump rings.
- Charms: Attach small charms to the jump ring that connects the half moon to the earring hook for extra flair.
- Glitter or Paint: For polymer clay half moons, you can add glitter or paint designs before sealing them.
Design Variations and Tips for a Professional Finish
The beauty of DIY jewelry lies in its endless possibilities for customization. Here are some ideas to inspire your half moon tassel earring designs:
- Color Combinations: Play with contrasting or complementary colors for your half moons and tassels. A metallic half moon paired with brightly colored tassels creates a striking effect.
- Tassel Texture: Experiment with different materials to achieve varying textures. A chunky yarn tassel offers a cozy feel, while thin silk threads provide an elegant drape.
- Tassel Length and Density: Vary the length and fullness of your tassels. Shorter, more compact tassels can be sophisticated, while longer, fuller tassels make a bolder statement.
- Layering: Consider layering multiple smaller tassels onto a single half moon for a more intricate look.
- Geometric Play: Instead of a perfect half circle, try creating a more stylized half moon shape with sharper angles.
- Mixed Media: Combine different materials. For example, use a polymer clay half moon with leather tassels.
- Embellished Half Moons: Beyond paint and glitter, consider embedding small beads or even tiny pressed flowers into your polymer clay half moons before baking.
- Matching Sets: Create coordinating bracelets or necklaces to complement your earrings.
To achieve a professional finish, pay attention to these details:
- Clean Cuts: Ensure all your cuts, especially for the tassels, are clean and sharp. Ragged edges detract from the overall appearance.
- Secure Closures: Double-check that all your jump rings are fully closed. A slightly open jump ring can lead to lost components.
- Even Tassel Length: Take the time to trim your tassels evenly. This is a small detail that makes a big difference.
- Neat Tassel Heads: A well-wrapped and secured tassel head gives your earrings a polished look.
- Quality Materials: Investing in good quality earring hooks and jump rings will not only make your earrings last longer but also prevent potential allergic reactions.
- Smooth Surfaces: If working with polymer clay, sanding and sealing can significantly enhance the smoothness and professional look of your pieces.
- Consistent Design: If making a pair of earrings, ensure they are as identical as possible in terms of size, color, and tassel length.
Troubleshooting Common Issues
Even with the best intentions, you might encounter a few hiccups during your DIY earring creation. Here are some common issues and how to address them:
- Tassels Unraveling: If your tassel strands start to separate, you may need to re-secure the head more tightly with additional thread or a dab of jewelry adhesive. You can also carefully use a tiny amount of fabric glue or hairspray on the very top strands to hold them together.
- Jump Rings Not Closing Properly: Ensure you are using the correct pliers for the job. Flat-nose pliers are ideal for firmly closing jump rings. If a jump ring is bent out of shape, it’s often best to discard it and use a new one.
- Polymer Clay Cracking During Baking: This can happen if the clay is rolled too thin or if the temperature in your oven is too high. Ensure you follow the manufacturer’s recommended baking time and temperature precisely. Sometimes, slight cracks can be mended with a bit of liquid polymer clay or a strong adhesive after baking.
- Earring Hooks Causing Irritation: If you have sensitive ears, ensure you are using hypoallergenic materials like sterling silver or surgical stainless steel for your earring hooks.
SEO Considerations for This Article
To maximize the SEO friendliness of this article, keywords have been strategically incorporated. Primary keywords like "DIY half moon tassel earrings," "how to make tassel earrings," and "jewelry making tutorial" are present throughout the text. Secondary keywords and related terms such as "embroidery floss tassels," "polymer clay earrings," "earring components," "crafting supplies," "handmade jewelry," and "jewelry design ideas" are also woven in naturally. The comprehensive nature of the guide, covering materials, steps, and variations, contributes to its depth and authority, which search engines favor. The use of clear headings and a logical flow of information also aids in readability and search engine crawling. The article is structured to answer common user queries related to making half moon tassel earrings, further enhancing its SEO value.
The creation of DIY half moon tassel earrings is an accessible and enjoyable project for crafters of all skill levels. By understanding the materials, following the step-by-step instructions, and embracing the endless design possibilities, you can craft unique and stylish accessories that reflect your personal taste. This guide provides a solid foundation for your crafting endeavors, empowering you to create beautiful, handmade jewelry that you’ll be proud to wear or gift. Experiment with different colors, textures, and embellishments to truly make these half moon tassel earrings your own.
