How to fill in a pass through or interior window – Have you ever looked at a pass-through or interior window in your home and thought, “I wish I could just fill that in?” Whether you’re looking to create a more cohesive space, increase privacy, or simply change the aesthetic of your home, filling in a pass-through or interior window can be a great option.
It’s a project that might seem daunting, but with the right information and a bit of elbow grease, you can transform your space in no time.
In this blog post, we’ll walk you through the process of filling in a pass-through or interior window, from understanding the different types of windows to choosing the right materials and tools. We’ll cover everything you need to know to get started, including safety precautions and finishing touches.
Understanding Pass-Through and Interior Windows
Pass-through and interior windows are architectural features that enhance the flow and functionality of spaces within a home or building. While both serve the purpose of providing light and ventilation, they differ in their design, application, and overall impact on the surrounding environment.
Understanding the nuances of each type is crucial for making informed decisions when designing or renovating your space.
Pass-Through Windows
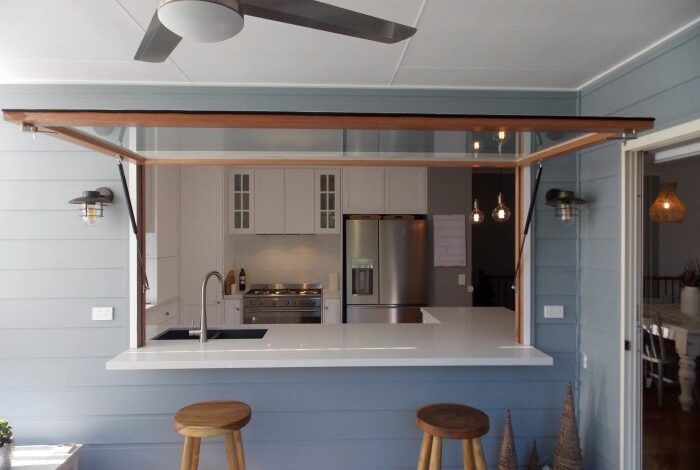
Pass-through windows are designed to connect two spaces within a building, often serving as a visual and physical link between a kitchen and dining area or a living room and a patio. These windows typically feature a large opening that allows for easy movement of people and objects, blurring the lines between the two spaces.Pass-through windows offer several advantages:
- Enhanced Flow and Connectivity:They create a sense of openness and continuity between spaces, making them feel larger and more connected.
- Increased Natural Light:Pass-through windows allow natural light to penetrate deeper into the interior, creating a brighter and more inviting atmosphere.
- Improved Ventilation:The large opening allows for efficient air circulation, promoting a comfortable and healthy indoor environment.
- Enhanced Functionality:Pass-through windows facilitate easy access to outdoor spaces, making it convenient to serve food or drinks, bring in groceries, or simply enjoy the outdoors.
Pass-through windows also come with some drawbacks:
- Privacy Concerns:Depending on the location and design, pass-through windows can compromise privacy, especially if they overlook a public area or a neighbor’s property.
- Security Risks:The large opening can create a security vulnerability, making it easier for intruders to gain access to the interior.
- Energy Efficiency:Pass-through windows can lead to heat loss or gain, depending on the climate, potentially impacting energy efficiency.
Examples of pass-through windows include:
- Kitchen Island Pass-Through:This type of pass-through window is often incorporated into kitchen islands, creating a seamless connection between the kitchen and dining area.
- Patio Door Pass-Through:A large sliding glass door that opens up to a patio or deck can also function as a pass-through window, providing easy access to the outdoors.
Interior Windows
Interior windows, also known as transom windows, are designed to separate and define spaces within a building while still allowing for light and ventilation. They are typically smaller than pass-through windows and are often placed above doorways or other openings.Interior windows offer several advantages:
- Space Division:They help to create distinct areas within a room without completely blocking off the flow of light or air.
- Enhanced Natural Light:Interior windows allow natural light to filter into otherwise enclosed spaces, creating a brighter and more welcoming environment.
- Improved Ventilation:Interior windows can help to circulate air between different areas of a room, promoting a comfortable and healthy indoor environment.
- Architectural Interest:Interior windows can add visual interest and architectural detail to a room, enhancing its aesthetic appeal.
Interior windows also come with some drawbacks:
- Limited Functionality:Interior windows are not designed for movement of people or objects, making them less functional than pass-through windows.
- Privacy Concerns:Depending on their placement, interior windows can compromise privacy, especially if they overlook areas that are intended to be private.
- Maintenance:Interior windows can be more difficult to clean and maintain than exterior windows.
Examples of interior windows include:
- Transom Windows:These are often placed above doorways, allowing for light and ventilation while maintaining privacy.
- French Doors with Transom Windows:French doors can be paired with transom windows to create a more elegant and functional entrance to a room.
Choosing the Right Window Type
Deciding between a pass-through or interior window requires careful consideration of your needs and the specific space you’re working with. While both offer unique benefits, understanding their differences will help you choose the most suitable option for your project.
Filling in a pass-through or interior window can be a great way to create more privacy or define a space. You can use various materials like drywall, plywood, or even decorative panels. If you’re feeling creative, why not try adding a personal touch with custom-made Instagram stickers?
Check out this great guide on making Instagram stickers at home to create unique designs for your project. Once you’ve chosen your material and added your personal flair, you can easily install it using screws, nails, or adhesive. And just like that, you’ve transformed your space with a stylish and functional solution.
Factors to Consider When Choosing Between a Pass-Through or Interior Window
Choosing between a pass-through and interior window depends on several factors, including the purpose of the window, the available space, and the desired level of privacy.
- Purpose:Pass-through windows are primarily designed for creating visual connections between spaces, allowing light and air to flow freely. Interior windows, on the other hand, are typically used to enhance privacy or create a specific ambiance within a room.
- Space:Pass-through windows require a larger opening and can significantly impact the layout of a room. Interior windows are more flexible and can be installed in smaller spaces, making them ideal for dividing areas without sacrificing too much floor space.
- Privacy:Pass-through windows offer limited privacy, as they provide a clear view into the adjacent space. Interior windows can be designed to offer varying levels of privacy, depending on the type of glass used and the placement of the window.
Selecting the Appropriate Window Size and Style
The size and style of the window you choose will impact its functionality and aesthetic appeal.
Filling in a pass-through or interior window can be a great way to create more usable space or add privacy. You might want to use a solid material like drywall, or get creative with a fun and functional solution like a chalkboard.
For a super easy and stylish option, try making a magnetic clipboard chalkboard – you can find a great tutorial on how to make one here. Once you’ve chosen your method, remember to seal the area properly to prevent moisture damage and ensure a smooth, finished look.
- Size:The size of the window should be proportionate to the space it occupies. A large window in a small room can feel overwhelming, while a small window in a large room might seem insignificant. Consider the amount of natural light you want to let in and the overall balance of the space.
- Style:The style of the window should complement the overall design aesthetic of the room. For a modern space, consider sleek, minimalist windows. For a traditional space, choose windows with ornate detailing. The style of the window should also consider the surrounding architecture and the existing windows in the house.
Considering the Overall Design Aesthetic and Functionality
The window you choose should seamlessly integrate with the existing design and functionality of the space.
- Design:The window should complement the existing design elements of the room, such as the furniture, flooring, and color scheme. Consider the overall style of the space and choose a window that enhances the existing design.
- Functionality:The window should serve a practical purpose, such as providing natural light, ventilation, or creating a visual connection between spaces. Ensure that the window is placed in a location that allows for optimal functionality and does not obstruct any existing features or pathways.
Preparing for Installation
Before you begin the installation process, it’s crucial to prepare meticulously. This includes accurate measurements, selecting the right tools and materials, and prioritizing safety throughout the project.
Measuring the Window Opening
Precise measurements are essential for ensuring the window fits perfectly and functions smoothly. Here’s a step-by-step guide to measuring your window opening:
- Measure the Width:Measure the width of the opening at multiple points, including the top, middle, and bottom. Note the narrowest measurement.
- Measure the Height:Similarly, measure the height at multiple points, including the left, center, and right sides. Record the shortest measurement.
- Measure the Depth:If your pass-through or interior window is not a standard rectangular shape, measure the depth of the opening at various points.
Once you have these measurements, you can determine the required window dimensions. For a standard rectangular window, subtract 1/2 inch from each measurement to allow for proper installation. For non-standard shapes, consult with a professional window installer or manufacturer for guidance.
Tools and Materials, How to fill in a pass through or interior window
The tools and materials required for installing a pass-through or interior window vary depending on the type of window and the complexity of the installation. However, here are some essential items:
- Measuring Tape:For accurate measurements of the window opening.
- Level:Ensures the window is installed straight and level.
- Stud Finder:Locates wall studs for secure window framing.
- Saw:For cutting framing materials to size.
- Drill:For drilling pilot holes and attaching the window frame.
- Screwdriver:For securing screws and other fasteners.
- Caulk Gun:For sealing gaps and cracks around the window frame.
- Safety Glasses:Protect your eyes from debris and dust.
- Work Gloves:Protect your hands from cuts and splinters.
- Framing Lumber:For building the window frame (if necessary).
- Shims:For leveling the window frame and ensuring a tight fit.
- Caulk:For sealing the window frame to the wall.
- Fasteners:Screws, nails, or other fasteners for securing the window frame.
Safety Precautions
Safety should always be your top priority when working on a home improvement project. Here are some essential precautions to take:
- Wear appropriate safety gear:Always wear safety glasses, work gloves, and sturdy footwear when handling tools and materials.
- Use tools correctly:Read the instructions for each tool carefully and use it only for its intended purpose. Never operate a tool if you are unsure how to use it properly.
- Be aware of your surroundings:Keep the work area clean and free of clutter. Avoid working in areas where there is a risk of falling or tripping.
- Use ladders safely:If you need to use a ladder, make sure it is placed on a stable surface and is secured properly. Never overextend yourself or reach too far.
- Get help if needed:If you are not comfortable doing any part of the installation, don’t hesitate to ask for help from a professional.
Installation Process

Installing a pass-through or interior window involves a series of steps that require precision and attention to detail. Whether you are replacing an existing window or installing a new one, the process ensures a secure and functional installation.
Filling in a pass through or interior window can be a fun DIY project, especially if you’re looking to create a more cohesive space. It’s a great way to add privacy or simply change the look of your home. For inspiration on creative home design projects, check out at work with amber vander vliet , where Amber shares her unique approach to interior design.
Once you’ve gathered your materials, you can start planning how to fill in that window, whether it’s with drywall, wood paneling, or even a decorative piece of furniture.
Steps Involved in Installation
The installation process typically involves the following steps:
- Preparation: This step includes gathering the necessary tools and materials, ensuring the area is clear of obstructions, and preparing the opening for the new window. Tools needed include a level, tape measure, saw, drill, screwdriver, and safety glasses. Materials required may include framing lumber, shims, caulk, screws, and weather stripping.
- Removing the Existing Window: This step involves carefully removing the existing window frame and sashes, ensuring no damage is done to the surrounding wall. If there is an existing window, use a pry bar to carefully remove the molding and trim around the window frame.
- Installing the New Window Frame: This step involves placing the new window frame in the opening, ensuring it is level and plumb. Use shims to adjust the frame’s position and secure it in place with screws or nails.
- Securing the Window Frame: This step involves attaching the window frame to the surrounding wall using screws or nails. Ensure the frame is securely fastened and there is no movement.
- Installing the Window Sashes: This step involves placing the window sashes in the frame and securing them with screws or nails. Ensure the sashes are properly aligned and operate smoothly.
- Caulking and Weather Stripping: This step involves sealing the gaps between the window frame and the wall with caulk and applying weather stripping to prevent drafts and water infiltration.
- Finishing Touches: This step involves installing the window trim and molding, ensuring a clean and finished look.
Visual Representation of the Installation Process
The following table provides a visual representation of the installation process, outlining each step and its corresponding action:
| Step | Action |
|---|---|
| 1. Preparation | Gather tools and materials, clear the area, and prepare the opening. |
| 2. Removing the Existing Window | Carefully remove the existing window frame and sashes. |
| 3. Installing the New Window Frame | Place the new window frame in the opening, ensuring it is level and plumb. Use shims to adjust the frame’s position and secure it in place. |
| 4. Securing the Window Frame | Attach the window frame to the surrounding wall using screws or nails. |
| 5. Installing the Window Sashes | Place the window sashes in the frame and secure them with screws or nails. |
| 6. Caulking and Weather Stripping | Seal the gaps between the window frame and the wall with caulk and apply weather stripping. |
| 7. Finishing Touches | Install the window trim and molding. |
Finishing Touches
After successfully installing your pass-through or interior window, the final step is to ensure a seamless and aesthetically pleasing finish. This involves sealing, weatherproofing, and adding decorative trim to complete the installation.
Sealing and Weatherproofing
Sealing and weatherproofing the window frame is crucial for preventing drafts, moisture intrusion, and energy loss. Proper sealing helps maintain a comfortable indoor environment and protects the window from damage.
- Caulking: Apply a bead of high-quality, paintable silicone caulk around the perimeter of the window frame, where it meets the wall or surrounding structure. This helps to seal any gaps and prevent air leaks.
- Weatherstripping: Install weatherstripping around the window sash, particularly on the sides and top, to create a tight seal when the window is closed. Choose weatherstripping that is compatible with your window type and the climate you live in.
- Flashing: For exterior windows, install flashing around the window frame to direct water away from the wall and prevent moisture from seeping in. Flashing is typically made of metal or rubber and is installed under the siding or other exterior cladding.
Installing Trim and Moldings
Installing trim and moldings enhances the aesthetics and functionality of the window. Trim provides a finished look, covers imperfections, and protects the window frame from damage.
- Window Casing: This is the trim that surrounds the window frame and extends to the wall. It creates a clean and finished look and helps to cover any gaps between the frame and the wall.
- Window Stool: This is the trim that is installed beneath the window sill. It provides a finished look and helps to protect the sill from damage.
- Window Apron: This is the trim that is installed beneath the window stool and extends to the floor. It provides a finished look and helps to protect the wall from splashes and spills.
- Window Head Casing: This is the trim that is installed above the window frame. It provides a finished look and helps to protect the top of the window frame from damage.
Maintenance and Care: How To Fill In A Pass Through Or Interior Window
Just like any other part of your home, your pass-through or interior windows require regular maintenance to ensure they stay in good working order and look their best. This includes cleaning, addressing potential problems, and using the right cleaning products and techniques for different window materials.
Cleaning and Maintenance Tips
Regular cleaning is crucial for keeping your pass-through or interior windows looking their best and functioning properly. Here are some essential tips:
- Clean Regularly:Aim to clean your windows at least every few weeks, or more often if they are exposed to dust, grease, or other contaminants.
- Use a Gentle Cleaning Solution:A mixture of warm water and mild dish soap is usually sufficient. Avoid harsh chemicals that can damage the window material or its finish.
- Remove Stubborn Stains:For tougher stains, you can use a specialized glass cleaner or a solution of vinegar and water. Always test the cleaning solution on an inconspicuous area first to ensure it does not damage the window surface.
- Dry Thoroughly:After cleaning, dry the windows with a soft cloth to prevent streaks or water spots. You can also use a squeegee for a streak-free finish.
- Clean the Tracks:If your windows have tracks, clean them regularly to prevent dust and debris from accumulating. Use a vacuum cleaner with a crevice attachment or a small brush to remove dirt and grime.
Common Problems and Solutions
While pass-through and interior windows are generally durable, they can encounter some common issues.
- Stuck Windows:If a window gets stuck, it’s often due to dirt or debris in the tracks. Clean the tracks thoroughly and lubricate them with silicone spray or a similar lubricant.
- Condensation:Condensation can occur on windows, especially in humid environments. This can be addressed by improving ventilation, using a dehumidifier, or ensuring adequate insulation around the windows.
- Cracks or Chips:If you notice cracks or chips in the window glass, it’s best to contact a professional to have them repaired or replaced. This can prevent further damage and ensure the window’s structural integrity.
Specialized Cleaning Products and Techniques
The cleaning products and techniques you use will depend on the material of your pass-through or interior windows.
- Glass Windows:For standard glass windows, a simple mixture of warm water and dish soap is often enough. You can also use a commercial glass cleaner for a streak-free finish.
- Vinyl Windows:Vinyl windows are relatively low-maintenance. Use a mild soap and water solution for cleaning. Avoid abrasive cleaners or harsh chemicals that can damage the vinyl surface.
- Wood Windows:Wood windows require more care. Use a wood cleaner specifically designed for windows. Apply a sealant or varnish to protect the wood from moisture and damage.
- Metal Windows:Metal windows are typically durable. Use a mild soap and water solution for cleaning. Avoid abrasive cleaners that can scratch the metal surface.