
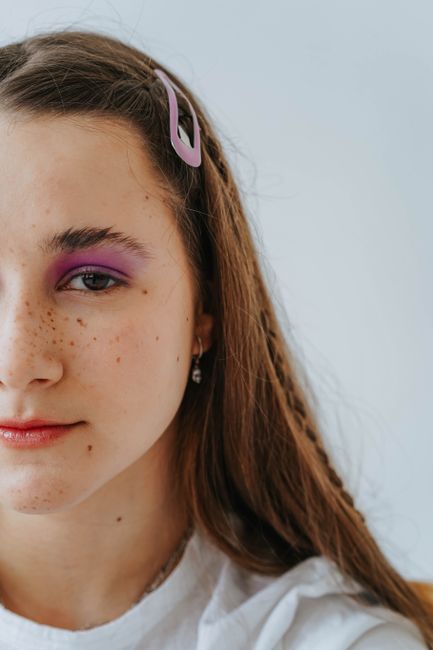
DIY Statement Hair Clips: Craft Your Own Unique Accessories
Creating statement hair clips at home offers a personalized and budget-friendly way to elevate any hairstyle. This comprehensive guide details various techniques, materials, and design considerations, enabling you to craft eye-catching accessories that reflect your individual style. From simple embellishments to intricate fabrications, the possibilities are virtually limitless. Understanding the fundamental components of a hair clip – the base and the embellishments – is crucial. The base typically consists of a metal or plastic clip mechanism, such as a bobby pin, alligator clip, barrette, or snap clip. The embellishments are the decorative elements that transform a plain clip into a statement piece. Common embellishment materials include beads, rhinestones, pearls, fabric scraps, ribbon, felt, polymer clay, charms, dried flowers, and even small painted figurines.
The process begins with selecting the right base clip. Bobby pins are versatile and easily adaptable for smaller, more delicate embellishments. Alligator clips offer a stronger grip and are ideal for heavier or larger designs. Barrettes, with their hinged clasps, are suitable for a variety of styles and can accommodate a range of sizes. Snap clips, known for their ease of use, are excellent for children’s accessories or for simple, quick embellishments. When choosing a base, consider the weight and size of your intended embellishments. A flimsy clip will not support heavy materials, and a tiny clip may not provide adequate surface area for an elaborate design. For most DIY projects, metal clips in silver, gold, or gunmetal finishes are preferred for their durability and aesthetic appeal.
Essential Tools and Materials for Statement Hair Clip Creation
To embark on your statement hair clip journey, a few essential tools and materials are indispensable. The cornerstone of any crafting endeavor is a reliable adhesive. For attaching beads, rhinestones, and small decorative elements, a strong craft glue or jewelry glue is paramount. E6000 and Gem-Tac are highly recommended for their permanent hold and clear drying properties. For fabric and felt applications, fabric glue or a hot glue gun with a low-temperature setting is effective. A hot glue gun offers quick adhesion but can leave visible strings or a bulkier finish if not used carefully. Precision applicators or fine-tip bottles for glues are beneficial for detailed work.
Scissors are a necessity for cutting fabric, ribbon, felt, and other pliable materials. Fabric scissors are ideal for clean cuts on textiles. Small, sharp craft scissors or embroidery scissors are useful for intricate cutting of smaller embellishments. Pliers, particularly needle-nose pliers, are invaluable for manipulating small components like jump rings, bending wire, and securely attaching charms. Tweezers are also essential for picking up and placing tiny beads and rhinestones precisely.
For projects involving wire wrapping or creating structural elements, wire cutters and round-nose pliers are beneficial. If you plan to incorporate polymer clay, a rolling pin or brayer, sculpting tools, and a pasta machine (for even thickness) are helpful. For painting embellishments or clip bases, acrylic paints, paintbrushes in various sizes (including fine-tip brushes for detail), and a sealant to protect the paint are recommended.
A cutting mat provides a protected surface for cutting and crafting, preventing damage to your work area. A ruler or measuring tape ensures accuracy in sizing your components. If your designs involve sewing, a needle and thread are obvious additions to your toolkit. Finally, a well-lit workspace is crucial for detail-oriented work, and a magnifier can be a lifesaver for intricate tasks.
Technique 1: Embellishing with Beads and Rhinestones
One of the most accessible and impactful ways to create statement hair clips is by embellishing plain bases with beads and rhinestones. This technique allows for immense customization in color, pattern, and sparkle. Begin by cleaning your clip base to ensure optimal adhesion. If using a metal clip, a quick wipe with rubbing alcohol can remove any oils or residue.
Plan your design before applying any adhesive. Arrange your beads and rhinestones on a flat surface in your desired pattern. Consider using a mix of sizes and shapes for visual interest. For example, a cluster of small rhinestones around a larger focal bead can create a striking effect.
When using strong craft glue, apply a thin, even layer to the clip base. Avoid applying too much glue, as it can seep out and create an unsightly mess. Use tweezers to carefully pick up and place each bead or rhinestone onto the glued surface. Work in small sections to prevent the glue from drying before you can place your embellishments.
For creating intricate patterns or clusters, it’s helpful to use a fine-tip applicator for precise glue placement. Press each embellishment gently to ensure it adheres securely. Allow the glue to dry completely, typically for at least 24 hours, before handling the clip extensively. This ensures a permanent bond.
Consider using different types of beads: glass beads for their luster, acrylic beads for their affordability and variety of colors, seed beads for delicate accents, and Swarovski crystals for maximum sparkle. Rhinestones come in various cuts and finishes, offering endless possibilities for shimmering designs. For added texture, incorporate small pearls or cabochons.
To create a more elaborate effect, consider layering embellishments. For instance, you could outline a shape with small seed beads and then fill the interior with larger rhinestones. Another approach is to create a gradient effect by transitioning from larger beads to smaller ones.
Technique 2: Fabric and Ribbon Embellishments
Fabric and ribbon offer a softer, more tactile aesthetic for statement hair clips. This technique is ideal for creating bows, rosettes, or adding textured accents. Begin by cutting your fabric or ribbon to the desired size and shape. For bows, traditional bow-making techniques apply. You can create simple loops, double bows, or even more complex multi-layered bows.
To create fabric rosettes, cut circular pieces of fabric and then create a spiral cut from the outside edge to the center. Starting from the outer edge, roll the fabric tightly, gathering it as you go. Secure the base of the rosette with glue or a few stitches.
When attaching fabric elements to your clip base, a hot glue gun is often the most efficient method for quick adhesion. Apply a generous amount of hot glue to the back of your fabric embellishment and press it firmly onto the clip base. For a cleaner finish, you can cover the clip base entirely with a piece of fabric before adding other embellishments.
Alternatively, you can use fabric glue for a more flexible and less bulky bond. For more structured fabric pieces, like a stiffened bow, you might consider sewing it directly onto the clip base if the clip has holes or a fabric covering.
Ribbon can be used to create bows, wrap the clip base for a polished look, or be layered to create texture. Satin ribbons offer a sleek, elegant sheen, while grosgrain ribbons provide a more textured, matte finish. Velvet ribbons add a luxurious feel.
Consider combining fabric and ribbon with other embellishments. For instance, a fabric bow can be adorned with a cluster of rhinestones in the center, or a ribbon-wrapped clip can have a small charm dangling from it. When working with delicate fabrics or ribbons, be mindful of heat from the hot glue gun, as some materials can melt or scorch. Using a low-temperature hot glue gun is recommended.
Technique 3: Polymer Clay Creations
Polymer clay is a highly versatile medium for crafting intricate and durable statement hair clip embellishments. It allows for the creation of miniature sculptures, detailed textures, and vibrant colors. Begin by conditioning your polymer clay by kneading it until it is soft and pliable.
For small embellishments like fruits, flowers, or geometric shapes, you can sculpt them by hand or use cutters. To create realistic textures, you can use stamps, embossing tools, or even imprint natural objects into the clay.
When attaching polymer clay embellishments to a clip, there are a few methods. You can bake a small loop or hole into the back of the clay piece and then use a jump ring to attach it to a clip with a pre-existing loop. Alternatively, you can directly glue a baked and cooled clay piece onto the clip base using a strong adhesive like E6000. For a more secure attachment, especially for heavier pieces, consider pressing the unbaked clay directly onto the clip base, ensuring it adheres well, and then baking the entire piece together. This requires careful consideration of the clip’s material and its ability to withstand baking temperatures.
Coloring polymer clay can be done using colored clay itself, or by painting baked pieces with acrylic paints. Once baked and cooled, you can seal the painted areas with a varnish or sealant to protect the design.
Consider creating miniature scenes or tiered designs with polymer clay. For example, a small bouquet of clay flowers can be attached to a clip base. Intricate beadwork can be incorporated into clay designs before baking. The possibilities are extensive, allowing for truly unique and personalized statement pieces.
Technique 4: Mixed Media and Found Object Embellishments
The realm of statement hair clips extends beyond traditional craft supplies. Mixed media and found objects offer opportunities for truly avant-garde and personalized creations. This involves combining various materials and even incorporating small, interesting objects that hold personal significance.
Consider using dried flowers and leaves. Carefully press and dry these natural elements to preserve their shape and color. You can then seal them with a clear resin or a strong craft glue and arrange them on your clip base. Be aware that dried botanicals can be fragile, so gentle handling is essential.
Small charms, pendants, or even pieces of jewelry can be repurposed as statement embellishments. Look for interesting buttons, beads from old necklaces or bracelets, or even small metallic figurines.
Fabric paint and stencils can be used to create custom patterns on clip bases or fabric embellishments. Even small painted miniatures or figurines can be glued onto a clip to create a whimsical or themed accessory.
When working with mixed media, consider the weight and balance of your design. Ensure that the adhesive you use is compatible with all the materials you are combining. For instance, some glues might react with certain plastics or metals. Always test your adhesive on a small, inconspicuous area first if you are unsure.
The key to successful mixed media statement hair clips is creativity and experimentation. Don’t be afraid to combine unexpected elements to create a truly unique and eye-catching accessory. Think about themes that resonate with you – vintage, celestial, nature-inspired, or abstract – and let that guide your material choices.
Finishing Touches and Presentation
Once your statement hair clip is fully assembled and the adhesive is completely dry, take a moment for finishing touches. Inspect your creation for any stray glue strings or imperfections and carefully trim or clean them. If you’ve used paint, ensure it’s fully dry and consider applying a sealant for added durability and a polished finish.
For added longevity and a professional look, you can consider backing your embellishments with a thin layer of felt or fabric, especially on the underside of the clip where it might come into contact with your hair or scalp. This can also add a layer of comfort and prevent any sharp edges from causing discomfort.
When storing your statement hair clips, treat them with care. Avoid storing them in a place where they can be crushed or have other heavy items placed on top of them. Individual pouches or a dedicated jewelry organizer can help protect your creations.
Consider the presentation of your DIY hair clips. If you are gifting them, a small gift box or organza bag can elevate the perceived value and make them even more special. Adding a handwritten tag explaining your creative process can be a thoughtful touch.
SEO Considerations for "DIY Statement Hair Clips" Article
To ensure this article is discoverable by individuals searching for DIY hair accessory tutorials, incorporating relevant keywords throughout the text is crucial. The primary keyword, "DIY statement hair clips," should appear naturally in the title, headings, and throughout the body of the article.
Secondary keywords and related phrases to weave in include: "make hair clips at home," "custom hair accessories," "beaded hair clips tutorial," "fabric hair clip ideas," "polymer clay hair accessories," "handmade hair bows," "embellished hair clips," "easy DIY hair clips," "unique hair clip designs," and "hair clip crafting."
Utilizing headings and subheadings (H2, H3 tags) not only breaks up the text for readability but also helps search engines understand the structure and content of the article. Each section’s heading should incorporate relevant keywords where appropriate.
Using descriptive alt text for any images that would accompany this article is also a key SEO practice. This alt text should accurately describe the image and include relevant keywords. For example, an image of a completed beaded hair clip could have alt text like: "Sparkling DIY statement hair clip embellished with rhinestones and beads."
Internal linking to other relevant DIY or craft-related articles on a website can also improve SEO. External linking to reputable crafting supply websites or inspirational design blogs can add credibility.
The overall depth and comprehensiveness of the article, providing detailed instructions and multiple techniques, also contribute to its SEO value by establishing it as a valuable resource. The word count exceeding 1200 words further signals to search engines that this is a thorough and authoritative piece of content on the topic of creating DIY statement hair clips.
