
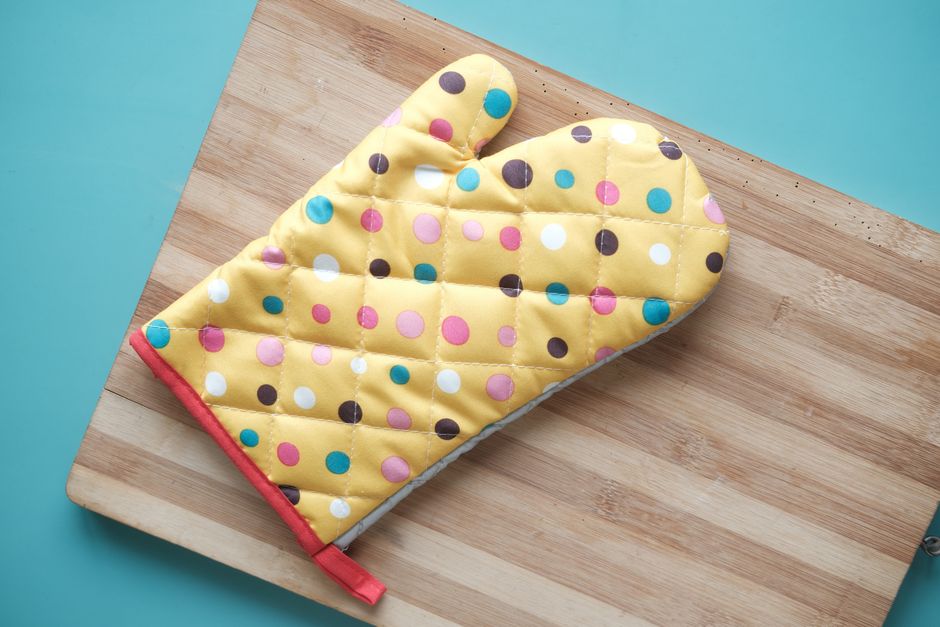
DIY Oven Mitts: Crafting Your Own Heat-Resistant Kitchen Essential
Creating your own DIY oven mitts offers a rewarding and practical approach to equipping your kitchen with essential heat protection. Beyond the satisfaction of crafting, custom oven mitts allow for personalized aesthetics, improved fit, and the use of materials specifically chosen for durability and safety. This comprehensive guide will walk you through the process, from selecting appropriate materials to final assembly, ensuring you create functional and stylish oven mitts that can withstand the heat of your culinary adventures. Understanding the core principles of heat resistance, insulation, and ease of use is paramount when embarking on this project.
The fundamental function of an oven mitt is to create a barrier between your hand and hot surfaces. This barrier is achieved through layers of insulating material. When choosing fabrics for your DIY oven mitts, prioritizing heat resistance and insulation is non-negotiable. Cotton is a popular choice due to its breathability and affordability, but it’s crucial to use dense weaves like quilting cotton or denim. Natural fibers are generally preferred over synthetics, as many synthetics can melt or warp at high temperatures, posing a significant burn risk. For the insulating core, batting is a primary consideration. Cotton batting is a good option, as is polyester batting, though some prefer the more natural feel of cotton. For superior heat resistance, consider using a layer of Insul-Bright, a needle-punched, polyester insulated material specifically designed for oven mitts and pot holders. Insul-Bright contains reflective fibers that reflect heat away from the hand, significantly enhancing the protective capabilities. Combining different layers can create a robust insulating package. For instance, a layer of cotton batting followed by Insul-Bright offers excellent thermal protection. The outer fabric should be durable and washable, able to withstand repeated use and laundering. Consider fabrics like canvas, denim, or even thicker quilting cottons for the exterior. The lining should be comfortable against the skin. A soft quilting cotton or a flannel can provide a pleasant feel. Avoid using stretchy or thin fabrics for the lining as they may not offer adequate protection. Remember, the goal is to create a thick, layered barrier that effectively dissipates heat.
Pattern selection is the next critical step in crafting your DIY oven mitts. While pre-made patterns are readily available online and in sewing stores, understanding the basic components of an oven mitt pattern is beneficial for customization. A standard oven mitt pattern typically consists of several pieces: the main mitt body (often cut on the fold for symmetry), a thumb piece, and a binding strip for finishing the edges. The mitt body is usually shaped to fit the hand comfortably, with a slightly elongated thumb to allow for natural dexterity. When choosing or drafting a pattern, consider the size of your hands and the desired coverage. A longer mitt will provide protection further up the forearm, which can be useful for reaching into deep ovens. You can find free patterns by searching online for "free oven mitt sewing pattern" or "DIY pot holder pattern." Many quilting and sewing blogs offer downloadable patterns that are specifically designed for this purpose. If you’re comfortable with pattern drafting, you can trace your own hand and add seam allowances and a thumb gusset. Ensure the pattern allows for the thickness of your chosen insulating layers. It’s often advisable to make a muslin or test version with scrap fabric and your chosen batting to check the fit and dexterity before cutting into your good fabric. Pay attention to the curves of the fingers and the articulation of the thumb; these elements greatly impact the comfort and usability of the finished mitt. The pattern should also accommodate a hanging loop, a small but essential feature for storing your oven mitts.
The cutting process requires precision and attention to detail to ensure your DIY oven mitts are symmetrical and well-constructed. Once you have your chosen pattern, lay it out on your fabric according to the grain lines indicated on the pattern pieces. If your pattern is designed to be cut on the fold, ensure the fold line of the fabric aligns perfectly with the fold line of the pattern piece. Use sharp fabric scissors or a rotary cutter and mat for clean, accurate cuts. You will typically need to cut multiple layers of each pattern piece: an outer fabric piece, a lining fabric piece, and usually one or two insulating layers depending on your material choice. For the insulating layer, if using Insul-Bright, cut it to the same dimensions as your fabric pieces. If using cotton or polyester batting, you might cut one or two layers for each mitt. Some patterns recommend cutting the insulating layer slightly smaller than the fabric pieces to avoid bulk in the seams. Pin the pattern pieces securely to the fabric before cutting to prevent shifting. If you’re using patterned fabric, pay attention to the direction of the pattern, especially for the thumb piece, to ensure it appears correctly on both mitts. Accuracy in cutting directly translates to a better-fitting and more professional-looking final product. Double-check that you have all the necessary pieces for both mitts (two main body pieces and two thumb pieces per mitt, or equivalent if cut on the fold).
Assembling your DIY oven mitts involves layering and stitching these cut pieces together. The order of assembly is crucial for achieving proper insulation and a smooth finish. Begin by layering your chosen materials for one mitt. The typical order is: outer fabric (right side up), followed by the insulating layer(s) (e.g., Insul-Bright, batting), and then the lining fabric (right side down). Pin these layers together securely around the edges to prevent shifting during sewing. Next, attach the thumb piece. This usually involves sewing the thumb pieces right sides together, leaving the raw edges open, and then turning it right side out. Carefully position the thumb piece onto the main mitt body, aligning raw edges, and baste it in place. Now, with your layered mitt body and attached thumb, you’ll sew the main seam. Place the outer fabric and lining right sides together, encasing the insulating layers within. Stitch around the perimeter of the mitt, leaving an opening for turning. Be sure to backstitch at the beginning and end of your seam for reinforcement. For the curved areas and the thumb, clipping the seam allowance will help the mitt lie flat and prevent puckering. Turn the mitt right side out through the opening you left. Gently push out the seams and corners to ensure a crisp shape. This is where you’ll see your mitt take form.
The final finishing touches for your DIY oven mitts are essential for both aesthetics and functionality. After turning the mitt right side out, it’s time to close the opening. You can hand-stitch it closed with a blind stitch for an invisible finish, or machine-stitch it close to the edge for a more casual look. The most critical finishing step is binding the raw edges. This involves applying a bias tape or fabric strip around the entire opening of the mitt. Bias tape is ideal because it’s designed to bend and conform to curves, ensuring a neat finish. You can purchase pre-made bias tape or make your own from a coordinating fabric. To apply it, fold the bias tape in half lengthwise, enclosing the raw edge of the mitt within. Stitch the bias tape to the mitt, catching both sides of the tape. Flip the mitt over and topstitch the bias tape down on the other side, ensuring you catch the raw edge of the tape on the back. For added durability and a professional touch, you can add a hanging loop at this stage. Create a small loop of fabric or ribbon, tuck its raw ends into the bias tape seam before topstitching, or attach it securely to the top edge of the mitt. This loop is invaluable for hanging your mitts near the stove or on a hook. Some crafters also like to add decorative topstitching around the edges of the mitt for extra visual appeal and reinforcement. Ensure all stitching is secure and reinforced, especially around the thumb area, as this is a high-stress point.
When considering SEO for your DIY oven mitts article, keywords should be strategically integrated throughout the text. Essential terms include "DIY oven mitts," "sewing oven mitts," "homemade oven mitts," "heat resistant mitts," "crafting kitchen essentials," "quilted oven mitts," "Insul-Bright oven mitts," "custom oven mitts," and "easy sewing projects." The title itself is a prime location for primary keywords. Within the body of the article, naturally incorporate these keywords into headings, subheadings, and descriptive sentences. For example, instead of simply saying "Choosing fabrics," use "Choosing Heat-Resistant Fabrics for Your DIY Oven Mitts." When discussing patterns, refer to "Finding and Using Oven Mitt Patterns for Homemade Protection." The conclusion or a dedicated section on benefits could incorporate terms like "Benefits of DIY Oven Mitts" or "Why Make Your Own Oven Mitts." Furthermore, consider long-tail keywords that users might search for, such as "how to sew insulated oven mitts," "best fabric for oven mitts," or "easy sewing projects for the kitchen." Utilizing these keywords in a natural and informative way will improve the article’s visibility in search engine results.
The benefits of crafting your own DIY oven mitts extend beyond mere practicality. Personalization is a significant advantage. You can choose fabrics that perfectly match your kitchen décor or reflect your personal style. This could involve bold prints, subtle textures, or even incorporating novelty fabrics. Beyond aesthetics, custom oven mitts offer an improved fit. Standard oven mitts can sometimes be too large or too small, hindering dexterity and safety. By making your own, you can tailor the size and shape to your hands, ensuring a secure and comfortable grip on hot cookware. This personalized fit can significantly reduce the risk of accidental burns. Furthermore, you have complete control over the materials used. If you have concerns about certain synthetic materials or desire a specific level of insulation, you can select fabrics and batting that meet your exact needs. This is particularly beneficial for individuals with sensitive skin or those who prioritize natural and eco-friendly materials. The satisfaction of creating a functional and beautiful item with your own hands is also a powerful motivator. It’s a tangible reminder of your skills and a contribution to the functionality and charm of your kitchen. The process itself can be a relaxing and rewarding hobby, offering a creative outlet and a sense of accomplishment.
When discussing material choices in more detail, it’s important to delve into specific fabric types and their properties for oven mitt construction. For the outer shell and lining, high-quality quilting cotton is a robust choice. Its tight weave provides durability, and it’s readily available in a vast array of colors and patterns. Denim is another excellent option for the outer shell, offering superior abrasion resistance and a rugged aesthetic. Canvas fabric, similar to denim in its durability, also makes for a strong outer layer. For a softer feel against the skin, consider a pre-washed flannel for the lining. It provides a cozy touch and good insulation, though it may not be as durable as quilting cotton over the long term. The insulating core is where heat resistance is truly built. As mentioned, Insul-Bright is a standout choice. It’s a non-woven polyester batting with a reflective metallic layer that deflects heat. It’s also needle-punched, meaning it’s durable and won’t shift or bunch up. For a more traditional approach, layers of 100% cotton batting can be used. Multiple layers are often recommended for adequate insulation, with at least two to three layers providing good protection. Polyester batting is also an option, offering good loft and insulation, but it may not have the same heat-reflective properties as Insul-Bright. A combination of Insul-Bright and a layer of cotton batting can provide exceptional protection. When layering batting, ensure that the layers are evenly distributed and secured through quilting or basting to prevent them from shifting during use. The thickness of your insulating layers will directly impact the heat resistance of your DIY oven mitts.
The sewing techniques employed in DIY oven mitt construction are relatively straightforward, making this project accessible to beginner sewers. Standard straight stitching is the primary stitch used for assembling the main seams of the mitt. A ¼-inch or ⅜-inch seam allowance is typical, depending on your pattern. When sewing the outer fabric and lining together, encasing the batting, it’s important to sew slowly and carefully, especially around curves and the thumb gusset, to maintain a smooth shape. Quilting the layers together is a crucial step for both structural integrity and preventing the insulating materials from shifting. You can quilt the layers in a simple grid pattern, diagonal lines, or more decorative free-motion quilting designs. This also adds a decorative element to the mitt. Basting stitches, either by hand or machine, are essential for holding all the layers together before you begin sewing the final seams. This temporary stitching prevents the fabric and batting from sliding apart. For the final edge finishing, applying bias tape requires careful alignment and stitching. Folding the bias tape in half, sandwiching the raw edge of the mitt, and then stitching it down securely creates a durable and professional-looking edge. Topstitching the bias tape on the other side provides an additional layer of reinforcement and a clean finish. The use of a walking foot on your sewing machine can be incredibly beneficial when sewing through multiple layers of fabric and batting, as it helps to feed the layers evenly and prevent stretching or bunching.
Maintaining your DIY oven mitts is essential for their longevity and continued effectiveness. As with most kitchen textiles, regular washing is necessary to keep them clean and hygienic. Most cotton-based oven mitts can be machine washed in warm water with mild detergent. It’s advisable to check the fabric manufacturer’s care instructions for any specific recommendations. Avoid using fabric softeners, as they can coat the fibers and reduce their insulating properties. Tumble dry on a low heat setting or air dry them completely to prevent shrinkage and damage. If your oven mitts become significantly stained or worn, it may be time to consider replacing them. Burn marks or significant thinning of the fabric indicate that the insulating layers are compromised and they no longer provide adequate protection. Inspect your mitts regularly for any signs of wear and tear, such as fraying seams or holes. Promptly repairing minor damage, such as restitching a loose seam, can extend the life of your mitts. Proper storage is also important. Hanging your oven mitts on hooks near the stove or in a pantry will allow them to air out and prevent them from becoming damp or developing mildew. Avoid storing them in damp or humid environments. By following these simple care and maintenance tips, your handcrafted oven mitts will remain a reliable and stylish kitchen companion for years to come.

