Starburst Ceiling Medallion DIY: Crafting a Celestial Focal Point
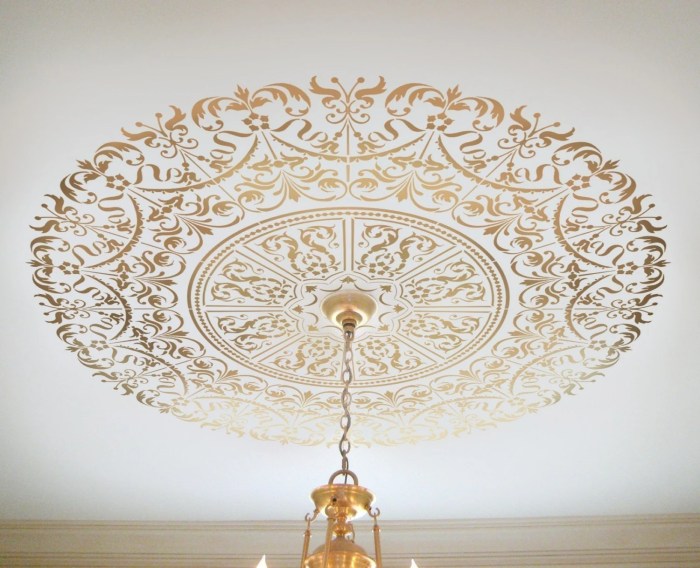
Transforming a plain ceiling into a captivating architectural feature is achievable with a DIY starburst ceiling medallion. This guide details the process of creating a custom starburst medallion, offering a cost-effective and personalized alternative to pre-made options. Beyond mere aesthetics, ceiling medallions enhance a room’s perceived height and grandeur, drawing the eye upwards and adding a touch of sophisticated drama. The starburst design, with its radiating lines and dynamic energy, evokes a sense of celestial wonder and can be adapted to complement a wide range of interior styles, from mid-century modern to traditional and eclectic. Understanding the fundamental principles of measurement, material selection, and construction will empower individuals to embark on this rewarding DIY project.
The first critical step in any DIY ceiling medallion project is accurate measurement. Begin by determining the desired size of your starburst medallion. This decision is influenced by several factors, including the scale of the room, the presence and size of a central light fixture, and personal preference. A common starting point is to consider the diameter of your existing light fixture. Generally, the medallion’s diameter should be at least twice the diameter of the light fixture it will frame. For rooms with standard 8-foot ceilings, a medallion between 18 and 30 inches in diameter is often appropriate. Larger rooms or those with higher ceilings can accommodate larger medallions, up to 40 inches or more, to maintain visual balance. Measure the ceiling area where the medallion will be installed, ensuring it will be centered and won’t interfere with any architectural features like beams or vents. If the medallion is intended to surround a central light fixture, measure the fixture’s dimensions precisely. Consider the overall visual weight of the medallion in relation to the room’s furnishings. A medallion that is too small can appear lost, while one that is excessively large can overwhelm the space. Use a tape measure to confirm your measurements and sketch a rough diagram of the ceiling space, noting the intended placement and dimensions. This planning phase is crucial for minimizing errors and ensuring a successful outcome.
Material selection significantly impacts the appearance, durability, and complexity of your DIY starburst ceiling medallion. For a lightweight yet paintable option, expanded polystyrene (EPS) foam is a popular choice for DIYers. It’s easy to cut and shape with basic tools and readily available at most craft or building supply stores. However, EPS foam is relatively fragile and requires a strong primer and paint application for durability and a smooth finish. Another viable material is medium-density fiberboard (MDF). MDF offers a more robust and durable option, providing a smoother surface for painting and a more substantial feel. Its density means it’s heavier than foam, so ensure your ceiling mounting is secure. For a truly high-end and professional finish, consider carving from wood. While this requires advanced woodworking skills and tools, the resulting medallion will possess unparalleled quality and longevity. However, for most DIY applications, EPS foam or MDF are the most accessible and manageable materials. When choosing EPS foam, opt for high-density varieties for better structural integrity. For MDF, select a thickness that balances stability with weight, typically between 1/4 and 1/2 inch. Consider the fire rating of your chosen material, especially if it will be near a light fixture.
The design of your starburst is where your creativity can truly shine. A classic starburst features evenly spaced rays emanating from a central point. However, you can customize this significantly. Consider the number of rays – anywhere from 8 to 24 is common. The width and length of each ray can also be varied. Some designs incorporate a layered effect, with shorter rays overlapping longer ones. You might also opt for a more abstract interpretation with irregular or curved rays. Sketching your design on paper is an excellent way to visualize different possibilities. Use a compass to draw a central circle, representing the space for your light fixture or the central hub of the starburst. Then, draft the rays emanating from this circle. Think about how the rays will connect to the central hub and extend to the outer edge of the medallion. For a truly unique design, experiment with different angles and proportions. Many online resources and design platforms offer inspiration for starburst patterns, which can be downloaded and adapted. If you’re working with EPS foam or MDF, you’ll likely need to transfer your design onto the material. You can do this by printing your design to scale and tracing it, or by using a projector to cast the design directly onto the material.
Cutting the starburst components requires precision and patience. For EPS foam, a hot wire cutter is the ideal tool, producing clean, melt-cut edges. Alternatively, a sharp utility knife or a craft knife can be used, though multiple passes may be necessary to achieve a clean cut, and this method is more prone to creating jagged edges. For MDF, a jigsaw or a scroll saw are the preferred tools for intricate cuts. A jigsaw is versatile for straight lines and gentle curves, while a scroll saw offers greater control for detailed and complex shapes. Always use a sharp blade appropriate for the material you are cutting to ensure smooth, accurate edges. When cutting EPS foam, wear a respirator to avoid inhaling fumes. For MDF, wear safety glasses to protect your eyes from dust. When cutting multiple identical rays, consider creating a template from cardboard or thin plywood. This template can then be traced onto your material, ensuring uniformity for all the rays. Accurately cutting each ray is vital for the overall symmetry and aesthetic appeal of the finished medallion. Take your time with each cut, and don’t hesitate to sand down any rough edges after cutting.
Assembling the starburst medallion typically involves adhering the individual rays to a central backing or to each other. The method of assembly depends on the material and the chosen design. For EPS foam, a strong spray adhesive specifically designed for foam or a construction adhesive like Liquid Nails (ensure it’s foam-safe) can be used. Apply the adhesive to the edges of the rays where they will connect. For MDF, wood glue is the primary adhesive. Apply a thin, even layer of glue to the joining surfaces and clamp the pieces firmly together while the glue dries. If you’re creating a layered starburst with concentric rings of rays, assemble each ring individually before attaching it to the next. For a central backing, you can cut a circular piece of thin plywood or MDF to serve as the base onto which the rays are attached. This adds structural support and makes installation easier. Ensure that the central backing is slightly smaller than the overall diameter of the starburst to allow the rays to extend beyond its edge. Pay close attention to the spacing and alignment of each ray as you attach it. Use a ruler and level to ensure symmetry and balance. Consider dry-fitting the pieces before applying adhesive to confirm the layout.
Sanding and priming are essential steps for achieving a smooth, paint-ready surface. For EPS foam, use a fine-grit sandpaper (220 grit or higher) or a sanding sponge. Avoid aggressive sanding, which can damage the foam. The goal is to smooth any rough edges from cutting and to create a slightly roughened surface for primer adhesion. For MDF, start with a medium-grit sandpaper (120-150 grit) to remove any saw marks or imperfections, then follow with a finer grit (220 grit) for a smooth finish. Always sand in the direction of the wood grain. After sanding, thoroughly wipe down the entire medallion with a tack cloth or a slightly damp cloth to remove all dust. For EPS foam, a high-quality primer specifically designed for foam or a shellac-based primer is crucial. These primers seal the porous surface of the foam, preventing it from absorbing excessive amounts of paint and creating an uneven finish. Apply at least two coats of primer, allowing each coat to dry completely. For MDF, a standard water-based primer or a shellac-based primer will work well. Apply one or two coats of primer, sanding lightly between coats for an ultra-smooth finish. Ensure all primer is completely dry before moving on to painting.
Painting the starburst medallion allows for personalization and can dramatically impact its overall look. Choose a paint color that complements your room’s decor. High-quality acrylic paints or latex paints are excellent choices for both EPS foam and MDF. For a sophisticated look, consider metallic finishes like gold, silver, or bronze, which can enhance the celestial theme. Matte, satin, or semi-gloss finishes are all viable options, depending on the desired aesthetic. For EPS foam, it’s advisable to use a paint that doesn’t contain harsh solvents, as some solvents can dissolve the foam. Test a small, inconspicuous area first. For MDF, you can use a wider range of paints. Apply multiple thin coats of paint rather than one thick coat to achieve an even, streak-free finish. Allow each coat to dry thoroughly before applying the next. You can also experiment with different painting techniques, such as dry brushing or antiquing, to add depth and character to your medallion. For a striking effect, consider painting the rays a different color than the central hub or the outer edge.
Installation of the starburst ceiling medallion requires careful planning and secure fastening. First, ensure the ceiling is clean and dry. Locate the ceiling joists in the area where the medallion will be installed. Using a stud finder is essential for this. The medallion should ideally be secured to at least one, preferably two, ceiling joists for maximum stability. Mark the center point of your intended medallion placement on the ceiling. If your medallion has a central opening for a light fixture, ensure it aligns with the existing electrical box. For lighter medallions (like EPS foam), construction adhesive can be used in conjunction with ceiling anchors or self-tapping screws that are long enough to penetrate the drywall and reach the joists. Apply a generous bead of construction adhesive to the back of the medallion. Carefully lift the medallion into place, pressing it firmly against the ceiling. If you are using screws, pre-drill pilot holes through the medallion and into the joists. For heavier medallions (like MDF), it is imperative to secure them directly to ceiling joists using screws. Use appropriate length screws that will penetrate the joist by at least 1 inch. For added security, consider using toggle bolts or Molly bolts if joist access is limited, though direct joist attachment is always preferred. Have a helper assist you during installation, especially for larger medallions, to ensure it is held securely while you fasten it. If you are installing around a light fixture, ensure the fixture is turned off at the breaker before you begin and that all electrical connections are made by a qualified electrician if necessary.
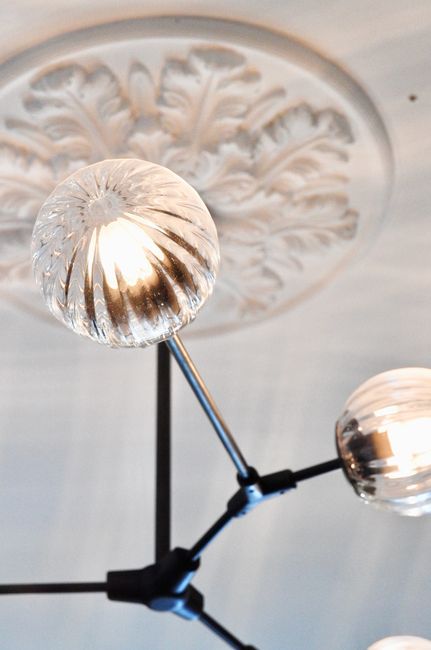
Finishing touches can elevate your DIY starburst ceiling medallion from a craft project to a statement piece. Once the medallion is securely installed and any adhesive or paint is fully cured, consider adding decorative elements. For a more opulent look, you can apply gold leaf or silver leaf to specific sections of the medallion. Rub ‘n Buff is another product that can add a metallic sheen and an antique patina. You can also paint intricate details or patterns onto the rays using fine brushes. Consider adding small decorative finials or rosettes to the tips of the rays for added flair. If your medallion is installed around a light fixture, choose a light fixture that complements the style of the medallion. A chandelier with crystal accents or a fixture with ornate metalwork can further enhance the celestial theme. For a subtle yet impactful touch, consider adding a subtle sheen to the entire medallion with a clear sealant, which will also protect the paintwork. Regularly dusting and cleaning your medallion will help maintain its pristine appearance. With careful planning, precise execution, and a touch of personal style, your DIY starburst ceiling medallion will become a captivating focal point in your home.
